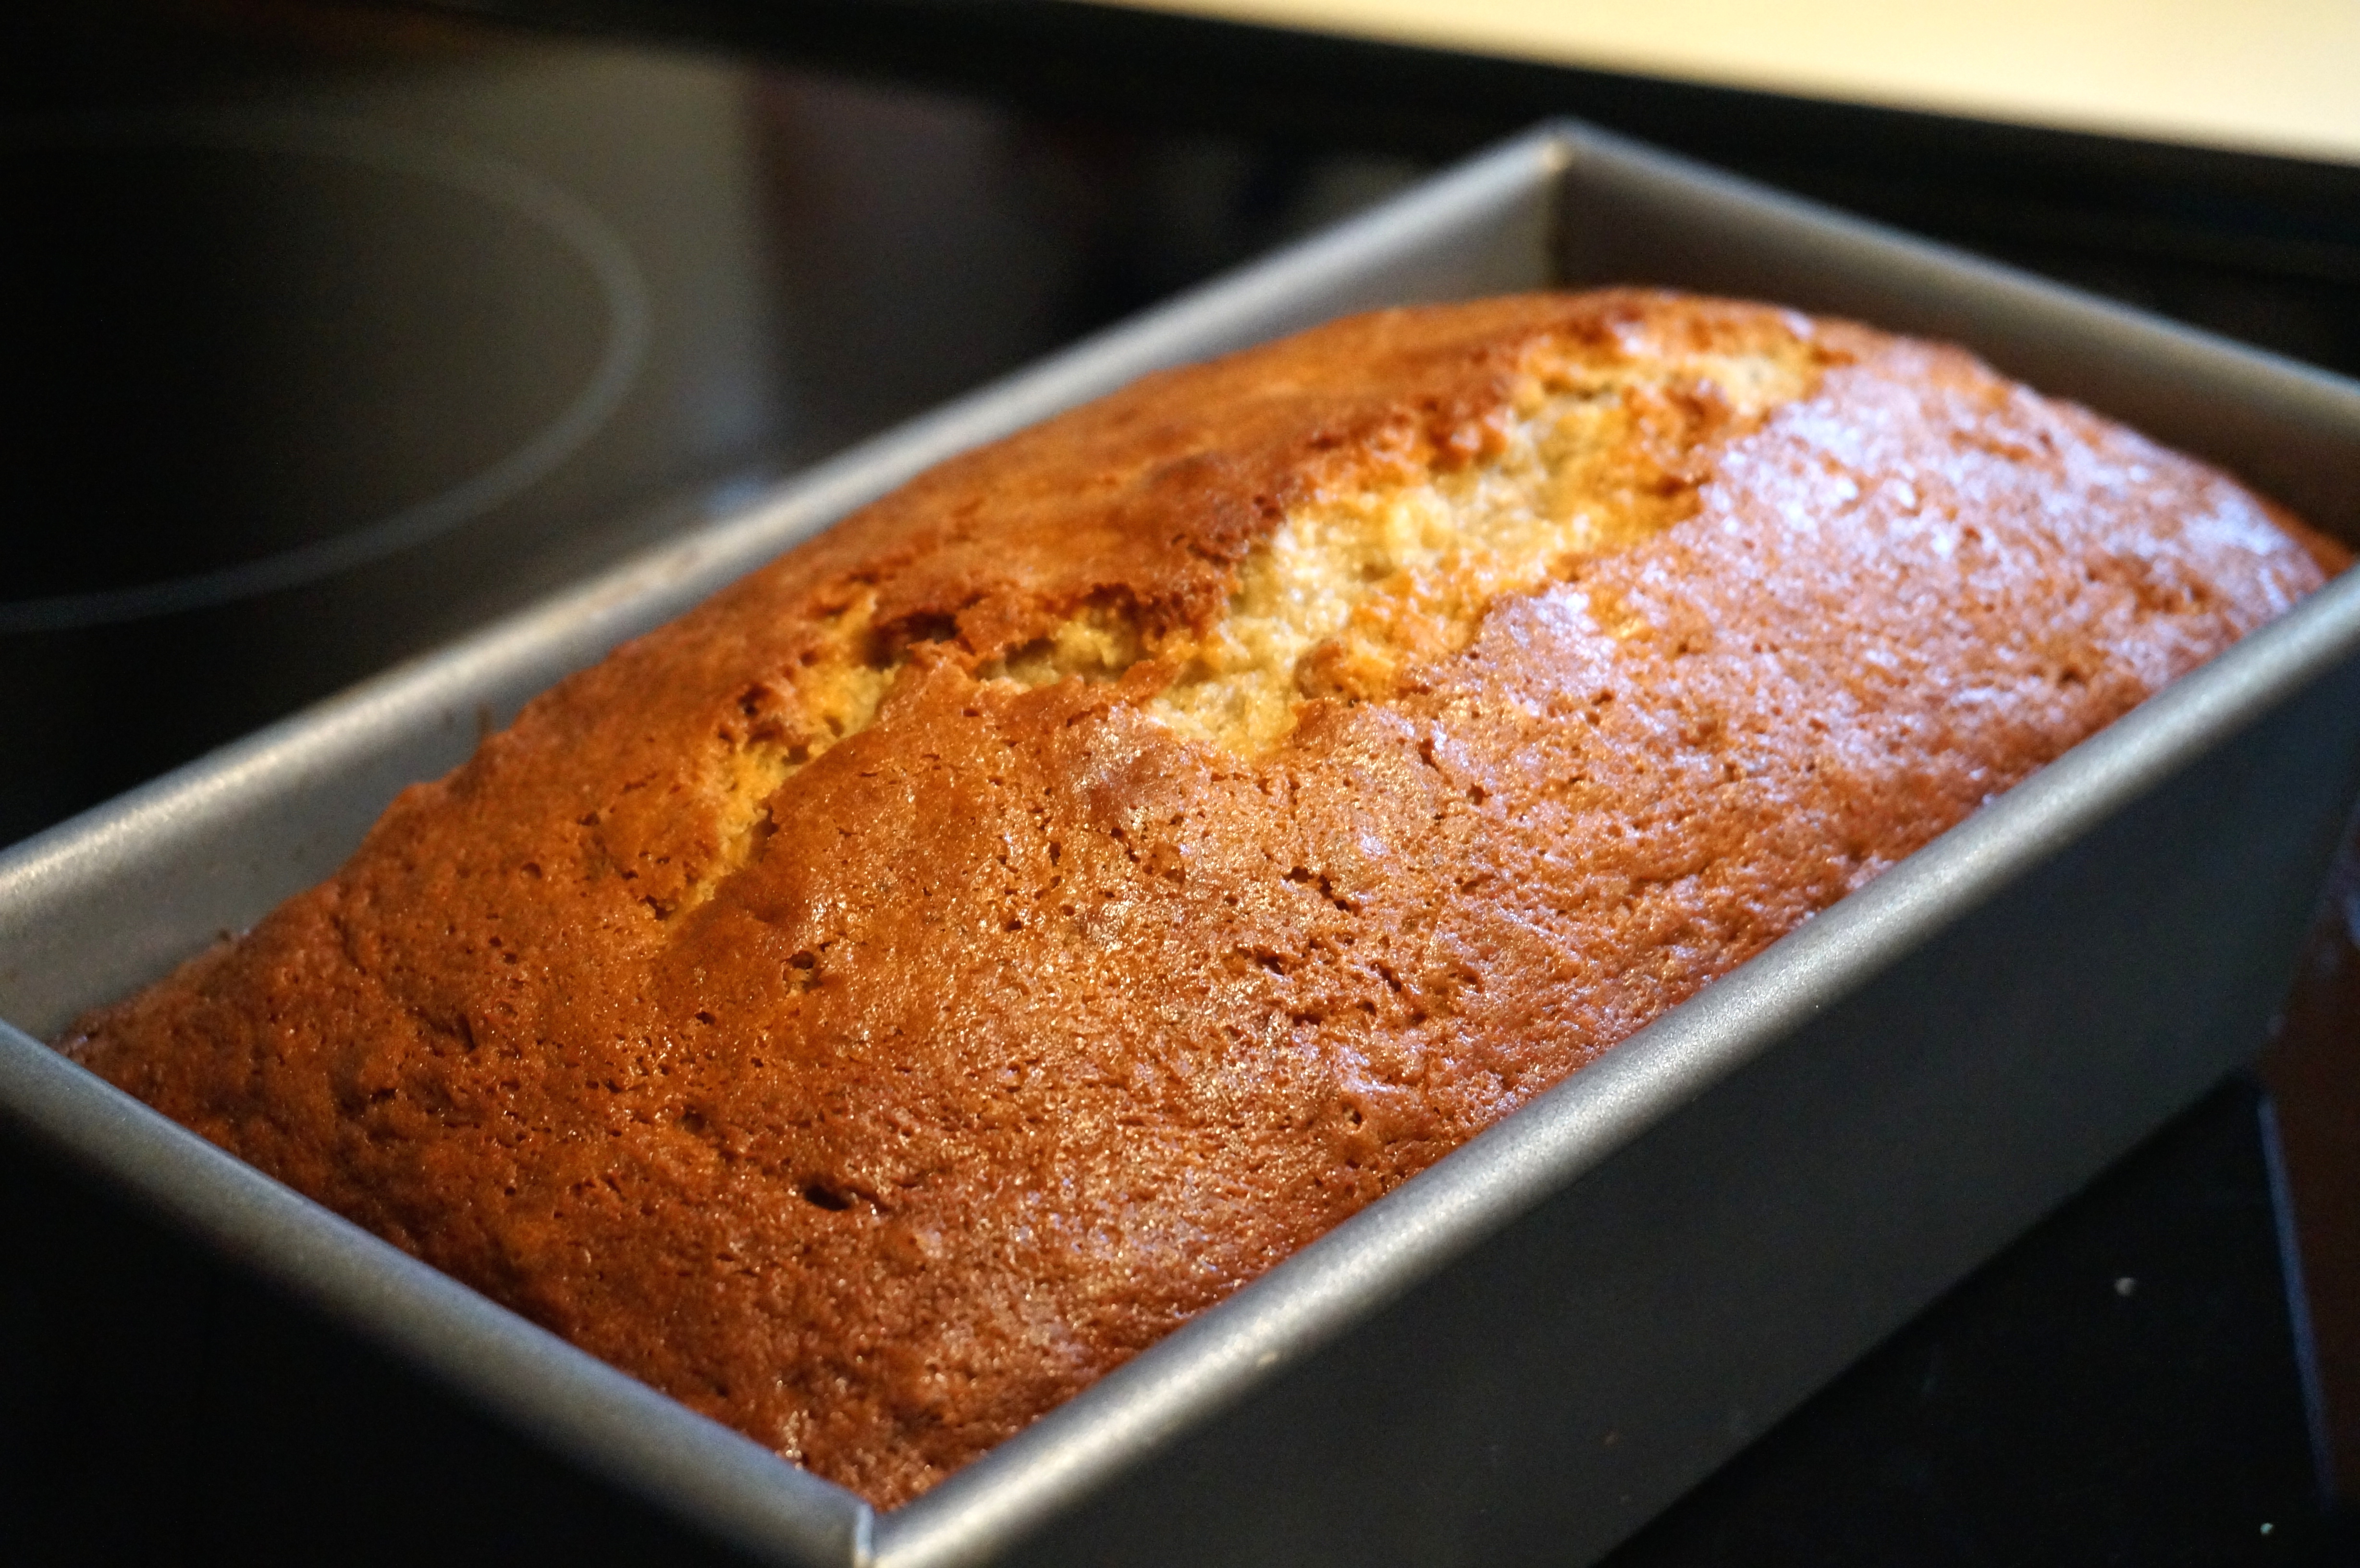
Banana Nut Bread

DSC00975

Banana Nut Bread
Recipe Type: Breakfast, Dessert
Cuisine: Breads, Baking
Author: Claire McCormick of “Claire Tastes”
Prep time:
Cook time:
Total time:
Serves: 12
A moist, nutty loaf perfect for a rainy Saturday morning or a grab n’ go breakfast!
Ingredients
  • 1 2/3 cups all-purpose flour
  • 1 teaspoon baking soda
  • 1/2 teaspoon ground cinnamon
  • 1/2 teaspoon salt
  • 1 cup plus 2 tablespoons sugar
  • 2 eggs
  • 1/2 cup vegetable oil (you could also substitute applesauce here!)
  • 3 1/2 bananas, very ripe, mashed
  • 3 tablespoons vanilla Greek yogurt (you could also use plain)
  • 1 teaspoon vanilla extract
  • 2/3 cup chopped walnuts or pecan pieces
Instructions
  1. Preheat oven to 350 degrees (375 for muffins). Grease the bottom and sides of a loaf pan or muffin tin with cooking spray.
  2. Sift together the flour, baking soda, cinnamon and salt. Beat sugar and eggs with a whisk until fluffy. Stir in the oil (or applesauce). Add mashed bananas, yogurt, and vanilla.
  3. Fold in dry ingredients and stir until just combined. Stir in nuts.
  4. Pour into prepared loaf pan or muffin tin and bake, 45 minutes to 1 hour (for bread) or 15-20 minutes (for muffins), or until a toothpick comes out cleanly and you get that lovely little crack on the top! 🙂

DSC00969

Truffle Baked Mac n’ Cheese- Lightened Up!

DSC00946

I love mac n’ cheese, ya’ll. But it’s one of those meals that you just can’t bring yourself to indulge in on a regular basis. Maybe that’s what makes it so good. It definitely brings me back to my elementary school days, when we’d have a snow day and stay at home and make our own play-dough and string cranberries and popcorn and eat Kraft mac n’ cheese (yes, the 100%  “synthetic and we don’t even pretend not to be” bright orange kind). Yet something about that mac n’ cheese was just. so. dang. good!

Since I’ve “grown up” a little bit, I’ve gotten away from that mac n’ cheese from the box (okay, okay, Annie’s makes a mean boxed white cheddar variety… but at least it’s got the organic part going for it!) and moved on to making my own. But really, how many ways can you experiment with mac n’ cheese besides changing the only two ingredients- pasta and cheese? Hmmmm… maybe I’ll REALLY change things up tonight and instead of elbows, I’ll use SHELLS! Probably not that exciting.

On the bright side, with only two main ingredients, it’s pretty hard to mess up macaroni and cheese. But when I first came across the idea of a “lightened-up” version using yogurt in place of cream for the cheese sauce, I have to admit that I was a little skeptical. But when I thought about it more, it seemed to make more sense- why wouldn’t plain Greek yogurt be a sensible alternative to heavy cream? Thick, creamy, and perfectly tart, plain Greek makes perfect sense. And it doesn’t mean you can’t add the other stuff like butter and flour; it just means you get to add a bit less of them to save some unnecessary calories! I promise you won’t even miss them.

I also added a little chili powder and nutmeg for an extra kick, and topped it off with Panko breadcrumbs and a drizzle of truffle oil (because that stuff makes ANYTHING feel more gourmet, so even if my mac n’ cheese stinks, maybe no one will even notice!).

I’m all for indulging occasionally when it comes to food. But with this dish, at least you can indulge in the healthiest way possible! 🙂

Happy weekend!

Truffle Baked Mac n’ Cheese- Lightened Up!
Recipe Type: Dinner, Side
Cuisine: American, Gourmet
Author: Claire McCormick of “Claire Tastes”
Prep time:
Cook time:
Total time:
Serves: 8-10
A lightened-up version of the American favorite, lightened up by using plain Greek yogurt for the cheese sauce! Indulge and savor every single forkful.
Ingredients
  • 8 ounces elbow macaroni
  • 1/2 stick butter
  • 1/3 cup flour
  • 1 small onion, chopped
  • 1 cup low fat milk
  • 8 oz low fat plain Greek yogurt (I used Fage 2%)
  • 8 ounces reduced fat, extra sharp cheddar, grated
  • 2 tablespoons Parmesan cheese
  • S&P
  • 1 tablespoon chili powder
  • 1/2 tsp garlic powder
  • 1/4 tsp nutmeg
  • 1/4 cup Panko bread crumbs
  • 1/2 tablespoon truffle oil, for finishing
Instructions
  1. Preheat oven to 350 degrees. Grease a baking dish with nonstick cooking spray.
  2. Cook macaroni according to package directions (about 9-11 minutes for al dente). Rinse and set aside.
  3. In a large pan, heat 1/2 tablespoon butter. Add onions and cook on medium high heat until translucent, about 3 – 4 minutes. Remove from pan and set aside. Reduce heat to medium.
  4. In the same pan, heat remaining butter. Stir in flour and cook 2 minutes.
  5. Slowly whisk in milk and yogurt until thick. Remove from heat and stir in cheddar and Parmesan cheeses, reserving a bit of the cheddar for topping later! Mix well.
  6. Add salt, pepper, chili powder and nutmeg. Mix onions, pasta and sauce together.
  7. Pour mixture into the prepared dish. Sprinkle with remaining cheddar and Panko bread crumbs. Drizzle with truffle oil.
  8. Bake 30 – 35 minutes, or until cheesy is melted and bread crumbs have browned.


Rainbow Kale Salad w/ Lemon Hummus Vinaigrette (Adapted from “Sea Salt”)

The delicious recipe was inspired by a similar one that my sister, Mary, made for me while I was visiting her in San Clemente, CA. She’s the one who introduced me to hummus dressing (and juicing)! Consider my mind blown. World changer. You can see her original post on her blog, Sea Salt.

DSC00696

Rainbow Kale Salad w/ Lemon Hummus Vinaigrette
Recipe Type: Salad
Cuisine: Vegetarian, Healthy
Author: Claire McCormick of “Claire Tastes”
Prep time:
Cook time:
Total time:
Serves: 6
Toss a few on-hand veggies into a big bowl and drizzle with my easy, homemade lemon-hummus vinaigrette! Serve topped with a chickpea burger, feta cheese, and a few sweet potato fries on the side.
Ingredients
  • 5 cups chopped kale
  • 2 whole carrots, shaved into curly strands
  • 1/4 cup lemon juice
  • 3 tsp olive oil, separated (by teaspoon)
  • 2 cups shaved brussels sprouts
  • 1 cup grape tomatoes, halved
  • 1/2 red onion, chopped
  • 2 tsp minced garlic
  • 5 small whole baby bella mushrooms, sliced thinly
  • 2 stalks celery, chopped
  • 2 cups broccoli florets
  • 2 cups cauliflower florets
  • 1 tsp garlic powder
  • 1/8 tsp red pepper flakes
  • salt and pepper, to taste
  • For the hummus dressing:
  • 3 tbsp hummus
  • 1/4 cup red wine vinegar
  • 2 tbsp lemon juice
  • salt and pepper, to taste
  • crumbled feta cheese, for topping
  • chopped almonds and figs, for topping
Instructions
  1. In a large bowl, combine kale, carrots, shaved brussels sprouts, and tomatoes.
  2. Add lemon juice and 1 tsp oil and massage with hands until kale is slightly wilted.
  3. In a medium saute pan, heat 1 tsp oil on medium-high. Add red onion, minced garlic, and mushrooms. Cook until soft, about 4 minutes. Remove from pan and add to kale mixture.
  4. In same pan, heat last 1 tsp of oil on medium. Add celery, broccoli, cauliflower, garlic powder, and red pepper flakes. Cook until slightly browned and veggies are al dente, about 6 minutes. Make sure to scrape up the browned bits on bottom of the pan! (Why, you ask? Because “there’s flavor in the brown!” as Karla Hall would say…)
  5. Remove from pan and add to rest of salad. Toss to combine. The greens will wilt a bit more under the residual heat of the veggies!
  6. Make the dressing: combine hummus, red wine vinegar, lemon juice, and salt and pepper in a small bowl and stir vigorously until hummus is slightly runny and can be poured.
  7. Drizzle over salad and toss to combine. Add more red wine vinegar or hummus dressing as you please!
  8. Crumble some feta cheese on top. Serve salad as a side, or top with leftover sweet potato wedges and chickpea patty (I love “MorningStar Farms Mediterranean Chickpea Burgers”!). A fried or poached egg would also be scrumptious 🙂
  9. I also added a few chopped almonds and dried figs for a little extra crunch and sweetness!

DSC00690

DSC00700

DSC00704

Stuffed Mediterranean Portobellos

Mmmmm… so excited about this one. I just got home from visiting my sister in California, and attending CSM (the national Physical Therapy Conference) in Las Vegas, and I sure am ready to get back to my routine! After a lot of meals out and taxing my tummy with foreign foods (after all, the West Coast IS kinda like a different country…), I feel like I need to reset my system with some healthy, meat-free meals.

Enter stuffed mushroom caps. While in Vegas, we had a Duke Alumni and Friends reception and one of the dishes they served were stuffed mushrooms with goat cheese and bread crumbs. Hence the inspiration for this recipe. While there’s no goat cheese and no bread crumbs or panko, I tried to capture the same depth of flavor and that to-die-for gooey, cheesy texture while keeping it light and heart-healthy. Since I’m a sucker for Mediterranean food, I decided to stuff larger portobello mushroom caps with quinoa, chickpeas, olives, capers, and lots of feta, plus some other classic Med-style ingredients.

I love the combination of the lemon and parsley in this recipe, combined with the slightly tangy flavor of the capers and saltiness of the kalamata olives. The quinoa also brings a nutty taste, and of course the mushrooms and chickpeas give the entire dish a meatiness without actually requiring any meat (although if you really miss it, ground turkey would be delish).

I’m just happy because I got to finally use my truffle oil. There is nothing greater in the realm of gourmet food than truffles. Just saying.

Have a great week, everyone!

DSC00619

Stuffed Mediterranean Portobellos
Recipe Type: Main Dishes, Gourmet
Cuisine: Mediterranean, Vegetarian
Author: Claire McCormick of “Claire Tastes”
Prep time:
Cook time:
Total time:
Serves: 10
Looking for a healthy vegetarian dinner idea for tonight? Look no further- these stuffed Mediterranean ‘shrooms are sure to satisfy, and you won’t miss the meat one bit!
Ingredients
  • 10 portobello mushroom caps, cleaned and stems removed
  • 1 1/2 cups quinoa, dry
  • 1 small onion, sliced
  • 1 1/2 tbsp minced garlic
  • 1 tbsp olive oil
  • 1 lemon
  • 6 roma tomatoes, quartered
  • 1 small jar roasted red peppers
  • 1 large bunch fresh parsley (about 1/2 cup minced)
  • 4 cups fresh baby spinach
  • 2 cans chickpeas, drained and rinsed
  • 1/2 cup kalamata olives, rinsed and chopped roughly
  • 1 small jar capers
  • 1 cup feta cheese, crumbled
  • 1 tbsp Greek seasoning
  • salt and pepper, to taste
  • truffle salt, for finishing (optional)
  • truffle oil, for finishing (optional)
Instructions
  1. Preheat oven to 425 degrees.
  2. To clean mushrooms, carefully pull the stems to one side until they pop off. Using a small spoon, gently scrape out the gills inside the cap (remember, they’re mushrooms, not rocks, so it shouldn’t take a lot of force!) and turn mushroom over to discard the remains into a trash can. Don’t worry if you don’t get every single gill out- just go for the majority!
  3. Gently rub the top of the mushroom cap with a moist paper towel.
  4. In a casserole dish or baking sheet sprayed with cooking spray, place mushrooms (cavity-side down) and cook 5 minutes, just until they are thoroughly dried out. Remove from oven and set aside until ready for filling.
  5. Prepare quinoa according to package directions.
  6. In a medium saucepan, cook onions and garlic until soft- about 4 minutes. Add to cooked quinoa and toss. Set aside.
  7. In a food processor, combine tomatoes, roasted red peppers, parsley, 1 tbsp olive oil, and juice from 1/2 of lemon. Pulse until roughly chopped- this should take <10 seconds! (Don’t over-pulse!)
  8. Using a spatula, spoon mixture into a large colander and drain excess water.
  9. To same food processor, add chickpeas, spinach, and remaining lemon juice. Pulse until roughly chopped, about 5 seconds. Transfer mixture to a large bowl.
  10. When tomato mixture has drained, add to bowl with chickpeas.
  11. Stir in kalamata olives and capers.
  12. Add 1 tbsp (or to taste) Greek seasoning, salt and pepper. Stir to combine.
  13. Toss in the cooked quinoa and feta.
  14. Fill each mushroom cap (remember those?) with about 1/4-1/3 cup of filling (depending on the size of the mushroom). Pack down into the cavity with the back of the spoon.
  15. Sprinkle additional feta, truffle salt, and pepper over top of each mushroom. Place back into casserole dish or baking sheet.
  16. Bake for 15 minutes, or until feta has softened and browned slightly.
  17. Remove from oven, and drizzle with the teensiest bit of truffle oil (optional). Cool for a few minutes before serving!
Serving size: 1 mushroom Calories: 315 cal Fat: 10 g Carbohydrates: 45 g Fiber: 10 g Protein: 15 g

DSC00608See all those gills in there? Those will give the mushroom a musty taste. Make sure to clean your mushroom caps before filling!

DSC00609To clean, gently remove stems and scrape gills out with a small spoon. Also use a damp paper towel or dish rag to clean the tops of the caps.

DSC00613Clean(er) fungus FTW!

DSC00614Stick in the preheated oven for about 5 minutes to dry them out.

DSC00574Cook onions and garlic until soft.

DSC00577Toss in onions and garlic with the cooked quinoa. Set aside.

DSC00575Process tomatoes, parsley, lemon juice, olive oil, and roasted red peppers.

DSC00581Drain in a colander to get rid of excess water.

DSC00582Process chickpeas, spinach, and the remaining lemon juice.

DSC00584Transfer to a bowl and toss.

DSC00585Roughly chop kalamata olives.

DSC00586Add to bowl with chickpeas, along with the quinoa, capers, and drained tomato mixture.

DSC00587Add feta, Greek seasoning, and salt and pepper. At this point, you could definitely eat this on its own, or set some aside for a quick and healthy salad later in the week! (See note at bottom of this post)

DSC00616…Or you could keep going! Fill each mushroom cap with some of the filling and gently press down into the cavity.

DSC00634Sprinkle with more feta, salt (I used my truffle salt here!), and pepper. Bake at 425 degrees for 15 minutes, or until feta has softened a bit and gotten a little brown on top!

DSC00626Drizzle with truffle oil while they’re still hot, and allow to cool for a few minutes. Serve over a bed of greens with a side of some fresh orange slices!

Ben and I enjoyed the leftovers from this recipe all week long! This supper was half of a leftover ‘shroom, some more of the quinoa salad (warmed), steamed veggies, parsley, and a poached egg on top! DSC00637

Lemon Balsamic Salmon w/ Rosemary & Garlic Quinoa

Last night, one of my dear friends from Duke undergrad, Jessie, and I cooked up a delicious salmon dinner together! We decided on a balsamic marinated baked salmon, with hints of lemon and rosemary. Served over rosemary-garlic quinoa with a spinach salad on the side! It was the perfect meal for a busy week of class for both of us (she’s a med student at Duke now!), and it was such a sweet time that we had just chatting in the kitchen (with our aprons on, of course) and sitting on big fluffy pillows by the fire. It was the coziest night I can remember in a while!

The nice thing about this recipe is that it uses frozen salmon fillets that you can just take out of the freezer and thaw when you’re ready. The whole thing comes together in less than a half hour, since the salmon cooks so quickly. Next time, I think I’m going to try to broil it from completely frozen and see if that makes any difference in the texture.

Feel free to play around with the spices- up, down, however you like. You could also completely toss the lemon balsamic idea and come up with your own marinade- I was originally going to do a honey teriyaki glaze (keep an eye out for a recipe coming soon!). As far as this one goes, I think next time I might use a tad less rosemary (I always get a little overzealous when it comes to fresh herbs) and perhaps a little more lemon to balance out the balsamic. Other than that, the marinade was delish! The flavor was just light enough to compliment the salmon, and the garlic and onions in the quinoa added the perfect amount of extra “spice.” And definitely make sure to have the strawberry and goat cheese spinach salad on the side!

Enjoy!

DSC00264

Lemon Balsamic Salmon w/ Rosemary & Garlic Quinoa
Recipe Type: Dinner, Main Dish
Cuisine: Seafood
Author: Claire McCormick of “Claire Tastes”
Prep time:
Cook time:
Total time:
Serves: 2-4
A simple, flavorful recipe for oven-baked salmon using fresh lemon and rosemary! Serve with my rosemary and garlic quinoa and a spinach salad on the side.
Ingredients
  • 2 6 oz. salmon fillets, thawed
  • 1/4 cup balsamic vinegar
  • 1/4 cup extra virgin olive oil
  • 1 tbsp Dijon mustard
  • 1/2 tsp pepper
  • 1/2 tsp salt
  • 1 tsp minced garlic
  • 1 tsp fresh minced rosemary
  • 1/2 tsp lemon zest
  • 1 1/2 tsp fresh lemon juice
  • 4 lemon slices
  • extra rosemary, for garnish
  • 1 cup dry quinoa
  • 2 cups water
  • 1 small onion, diced
  • 1 tbsp fresh rosemary, minced
  • 1 heaping tsp minced garlic
  • 1 tbsp olive oil
Instructions
  1. Preheat oven to 400 degrees.
  2. Prepare a baking sheet by covering with foil and spraying generously with cooking spray or a bit of oil.
  3. In a small bowl or tupperware, combine vinegar, olive oil, Dijon, salt, pepper, garlic, rosemary, lemon zest, and lemon juice. Whisk together until smooth. Reserve about 1/3 of mixture for later (this will be the dressing for the salad!).
  4. Pour the remainder of the marinade into a large ziplock bag. Add the salmon and massage the marinade into both sides of the fish.
  5. Refrigerate for at least 15 minutes.
  6. Meanwhile, add olive oil to saute pan and turn heat to medium high. When pan is hot, add diced onion, 1 tbsp minced garlic, and 1 heaping tsp fresh, minced rosemary. Cook 3-5 minutes or until onion is soft. You can also add a bit more lemon zest, and some salt and pepper for extra flavor!
  7. Place salmon on prepared baking sheet and drizzle with a bit of the reserved marinade. Top each fillet with extra rosemary and two lemon slices.
  8. Bake at 400 degrees for 12-15 minutes or until fish flakes easily with a fork.*
  9. While salmon is baking, cook quinoa according to package directions.
  10. When quinoa is done, stir in the garlic and onion mixture. Turn heat to low to keep warm.
  11. Remove salmon from oven and serve over quinoa.
  12. We also served with a spinach salad on the side: simply add spinach to a salad bowl and top with sliced strawberries and crumbled goat cheese! Drizzle with a bit of the reserved marinade for a tasty balsamic dressing.
Notes
*Our salmon wasn’t completely thawed so we baked it for about 15 minutes, then broiled it on high for an additional 3 minutes!

DSC00245

DSC00254

DSC00266

DSC00259

DSC00273

DSC00269

DSC00274

Brown Butter Green Beans & Radish Sauté

While celebrating with my in-laws in Pittsburgh this year, I had the privilege of testing out this new recipe, adapted slightly from Williams-Sonoma’s Home Recipe Collection. Everyone loved it, and it was certainly worth the attention to detail, if you have the time on a busy Thanksgiving before all the guests arrive (or you have someone to delegate to!). The garlic, mustard, and tarragon meld perfectly and complement the bite of the sherry vinegar, and sautéing the radishes mellows out their flavor a bit so that they don’t overpower the rest of the veggies! They also provide a splash of bright red color, especially appreciated on a holiday on which brown and white (brown stuffing, white turkey, brown gravy, white potatoes, white dinner rolls, etc. etc.) seem to be the theme. A definite “must-try” for your Thanksgiving feast next year!

We have so much to be thankful for. I hope you’re enjoying your day as much as I am enjoying mine!

Happy Thanksgiving, ya’ll, and God bless!

Green Beans and Radishes

Brown Butter Green Beans & Radish Sauté
Recipe Type: Side Dish
Author: Claire McCormick of Claire Tastes
Prep time:
Cook time:
Total time:
Serves: 8
The bold flavors of garlic, tarragon, whole grain mustard and sherry vinegar intermingle and play off of each other perfectly in this dish. Sautéed with green beans, spicy radishes, and topped off with toasted pine nuts, this is a much lighter (and tastier!) alternative to the traditional, calorie-laden green bean casserole. A perfect choice to add to your Thanksgiving recipe box!
Ingredients
  • 1 1/2 lbs green beans, rinsed and ends trimmed
  • 1 tbsp canola or vegetable oil
  • 1 package (about 15) radishes, trimmed and quartered
  • 2 tbsp sherry vinegar
  • salt and pepper, to taste
  • 3 tbsp unsalted butter
  • 1 tbsp minced garlic
  • 1 tbsp whole grain mustard
  • 1 1/2 tsp dried tarragon
  • 1/4 cup pine nuts, toasted*
  • *Toast pine nuts (or nuts of choice- hazelnuts or walnuts would also work well!) on a regular baking sheet at 350 degrees for 6-10 minutes, tossing occasionally, until nuts are golden brown and toasted.
Instructions
  1. Boil a large pot of salted water and add green beans. Cook for about 4 minutes, then blanch by rinsing with cold water to stop the cooking process. Beans should be bright green in color!
  2. In a large sauté pan on medium heat, warm the oil. Place the radishes cut-side down and cook for 4 minutes, stirring occasionally. Add sherry vinegar and continue to stir until all of the liquid is evaporated, about 1 minute more. Sprinkle with salt and pepper and transfer to a medium bowl.
  3. In same pan, heat butter until melted and just starting to brown- about 1 minute.
  4. Add garlic, mustard, and tarragon and stir continuously for about 1 minute.
  5. Add green beans and radishes to pan and toss with brown butter sauce until warmed through, about 1-2 minutes.
  6. When ready to serve, toss with pine nuts and transfer to a warm serving bowl.

Recipe adapted from http://www.williams-sonoma.com/recipe/green-beans-brown-butter-radish.html