Savory Mushroom “Cobbler”

Calling all meat n’ potato lovers out there!

DSC00423

I’m not a big fan of beef, or red meat of any sort, but I saw a recipe similar to this one last fall while watching The Chew, aka my all-time favorite show (perfect for watching on the iPad while on the treadmill! I swear everyone at the gym thinks I’m a 40 year old housewife with way too much time…). On the show, Chef Curtis Stone shared his recipe for a Steak & Mushroom Cobbler, which appealed to even to my quasi-vegetarian tastebuds. I figured it was something I had to try, maybe doctor up a bit so I wasn’t just purely copying. I love the idea of a “cobbler” made out of all the ingredients you would find in a stew. Basically, I guess anything baked with little mounds of crust on top could be considered a “cobbler,” but for some reason we always think of cobbler as something you have after Thanksgiving dinner that is filled with apples, cherries, and/or other sweet things.

When I decided to use pot roast meat in this recipe instead of steak, it all of a sudden reminded me exactly of the Beef Stew my mom always made in the Crock Pot growing up. And then things took off from there. I decided to add potatoes for a bit more heartiness and sauce-soaking potential (sweet, of course- why wouldn’t you use sweet potatoes when given the option?), peas and rosemary for some much-needed color (you know I can’t completely ignore my veggie-loving tendencies), and substituted the Elvis biscuits with the baking powder ones my mom would always serve with our stew. I also added a little cheddar cheese. It just seemed to fit.

I also found I needed to add a little more thickener- just a touch of corn starch- to the original recipe (perhaps because I used more beef broth, since the carton I had was 8 oz. larger than the 24 oz. portion Stone recommends). The result was a light gravy-like sauce that provided the perfect thickness to nestle in between the veggies and stew meat. The biscuits on top were nice and toasty around the edges, but still soft and doughy on the inside- perfect for soaking up the gravy. I definitely recommend adding some type of fresh herb as well. If not rosemary (which provided just the right degree of woody fragrance to complement the savory), then perhaps try sage or thyme.

Let’s just say my husband was a happy camper.

Savory Mushroom Cobbler
Recipe Type: Stews, Casseroles
Cuisine: Comfort Food
Author: Claire McCormick of “Claire Tastes”
Prep time:
Cook time:
Total time:
Serves: 8-12
It’s like having beef stew, pot pie, and cobbler all at the same time! You won’t want to miss out on this one. I think I actually saw my husband licking his bowl out of the corner of my eye. Cut the biscuits up into fun shapes with cookie cutters to give the dish a fun and elegant twist!
Ingredients
  • 2 lbs pot roast meat, cut up into small cubes
  • salt and pepper
  • 4 tbsp olive oil
  • 2 small yellow onions, chopped
  • 1 10 oz package sliced white mushrooms
  • 2 tsp minced garlic
  • 1 package onion soup mix
  • 1 medium sweet potato, chopped into small cubes
  • 4 large carrots, chopped horizontally into ~1/2″ “buttons”
  • 2 tbsp all-purpose flour
  • 1 32 oz. carton beef broth
  • 1/2 cup dry red wine
  • 2 tbsp Dijon mustard
  • 1/2 tsp dried thyme
  • 3/4 cup frozen peas
  • 1 sprig fresh rosemary, finely minced
  • 1 tbsp corn starch
  • 4 slices sharp cheddar cheese
  • FOR THE BISCUITS:
  • 2 cups all-purpose flour
  • 1 tsp salt
  • 1 tbsp sugar
  • 3 tsp baking powder
  • 1/2 cup shortening
  • 3/4 cup milk
  • 1 tsp garlic powder
  • 1/2 tsp dried rosemary
Instructions
  1. Chop pot roast into small chunks, if not already done. Season liberally with salt and pepper.
  2. Heat 1 tbsp of the oil in a large skillet on high heat.
  3. Add pot roast and cook until brown, about 5 minutes, turning occasionally.
  4. Remove pot roast and juices from skillet and set aside in a medium bowl.
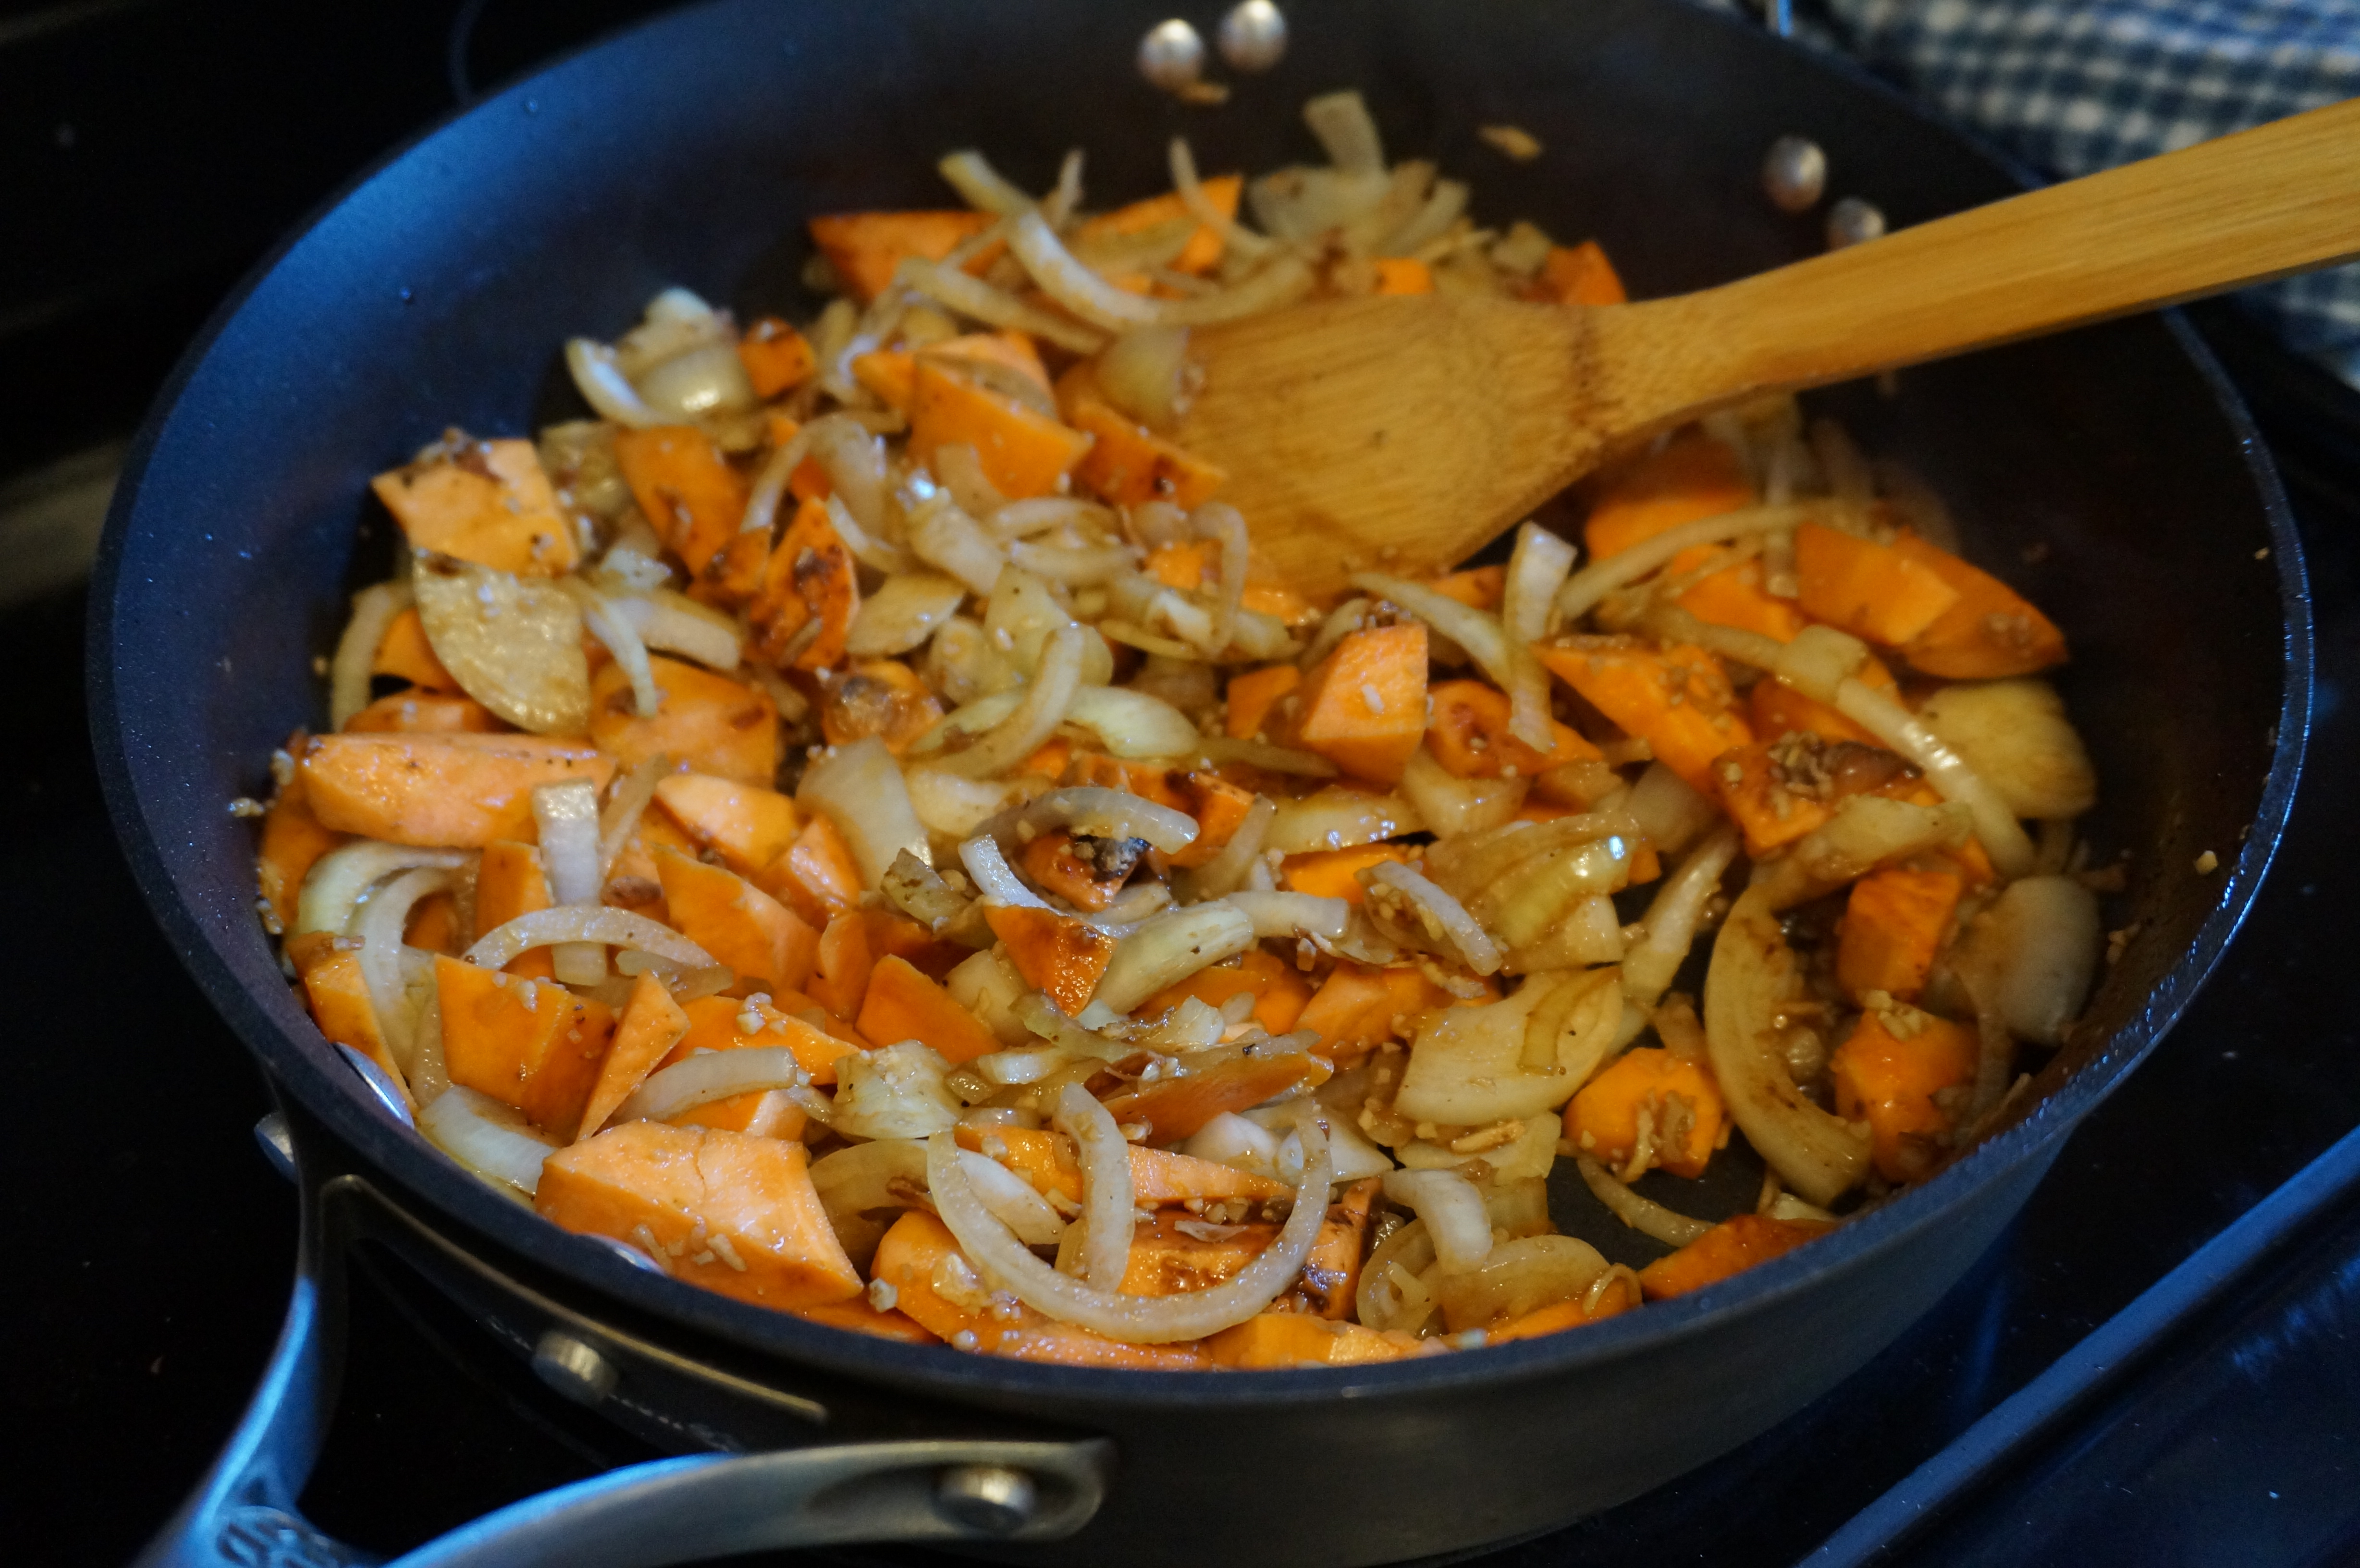
  5. In skillet, heat another 1 tbsp of oil. Add onion, sweet potatoes, garlic, and onion soup mix. Cook until onions are soft, stirring occasionally, about 3 minutes.
  6. Remove from skillet and add to the same bowl as the pot roast.
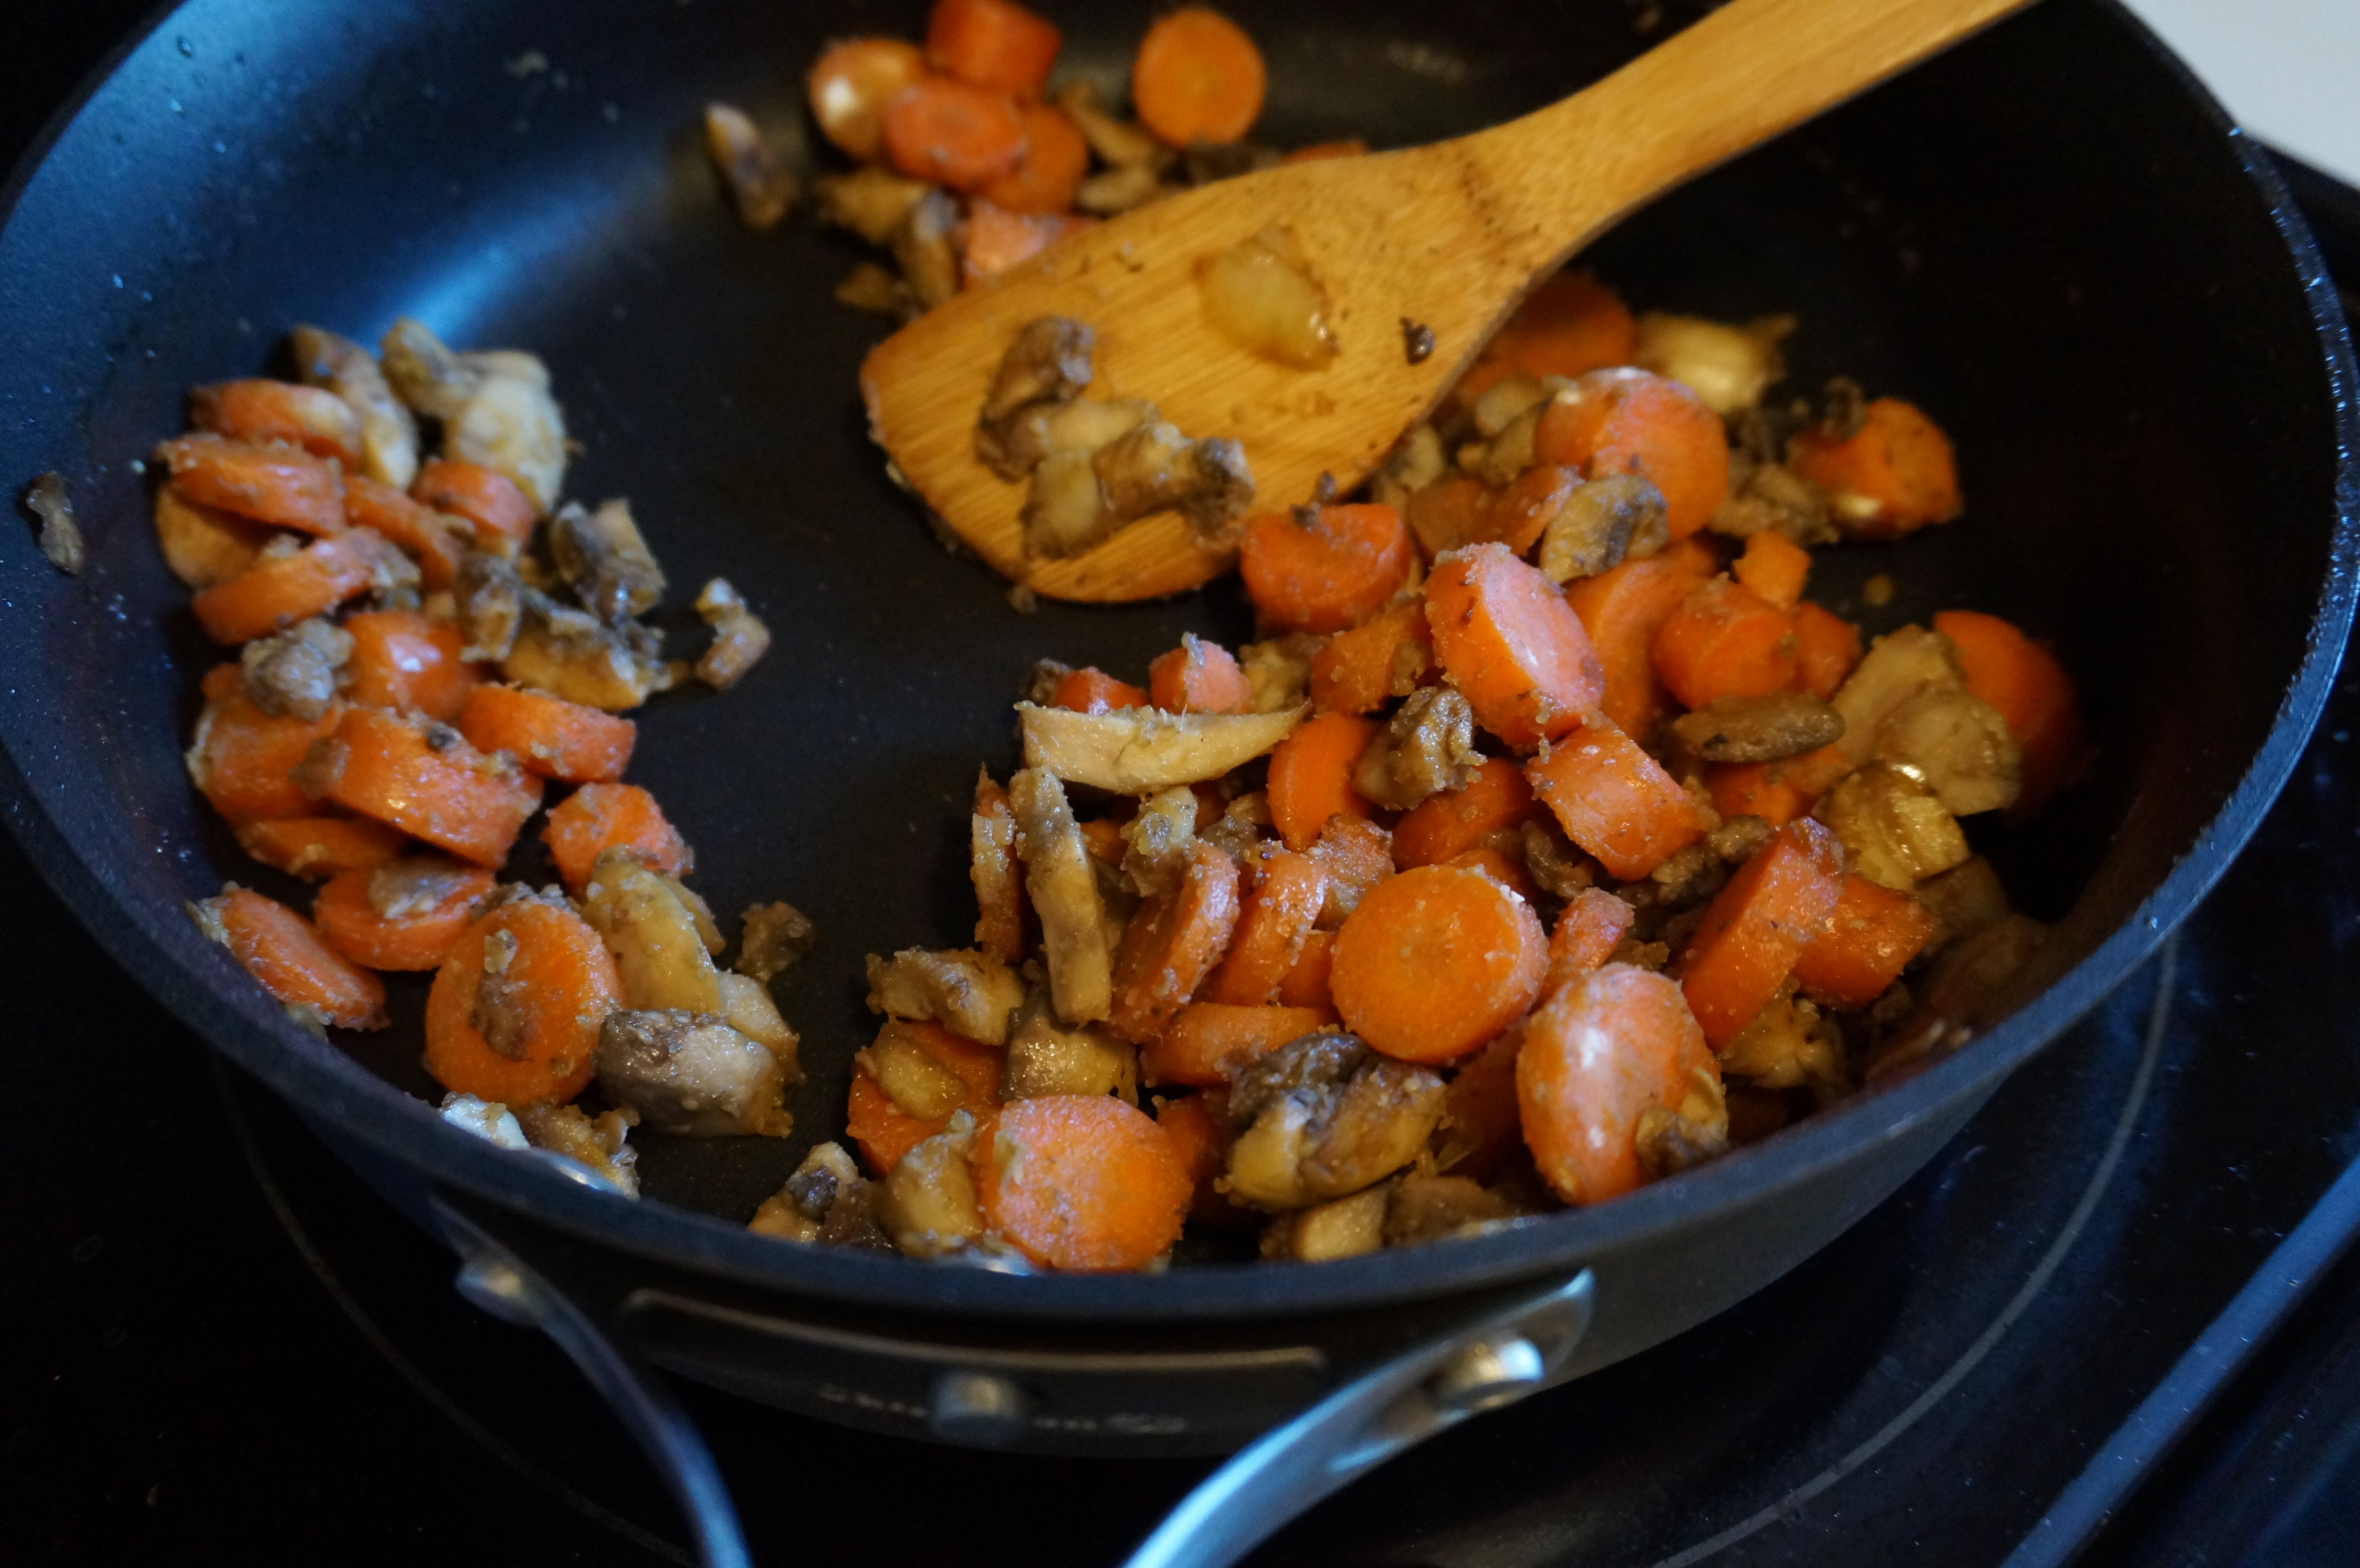
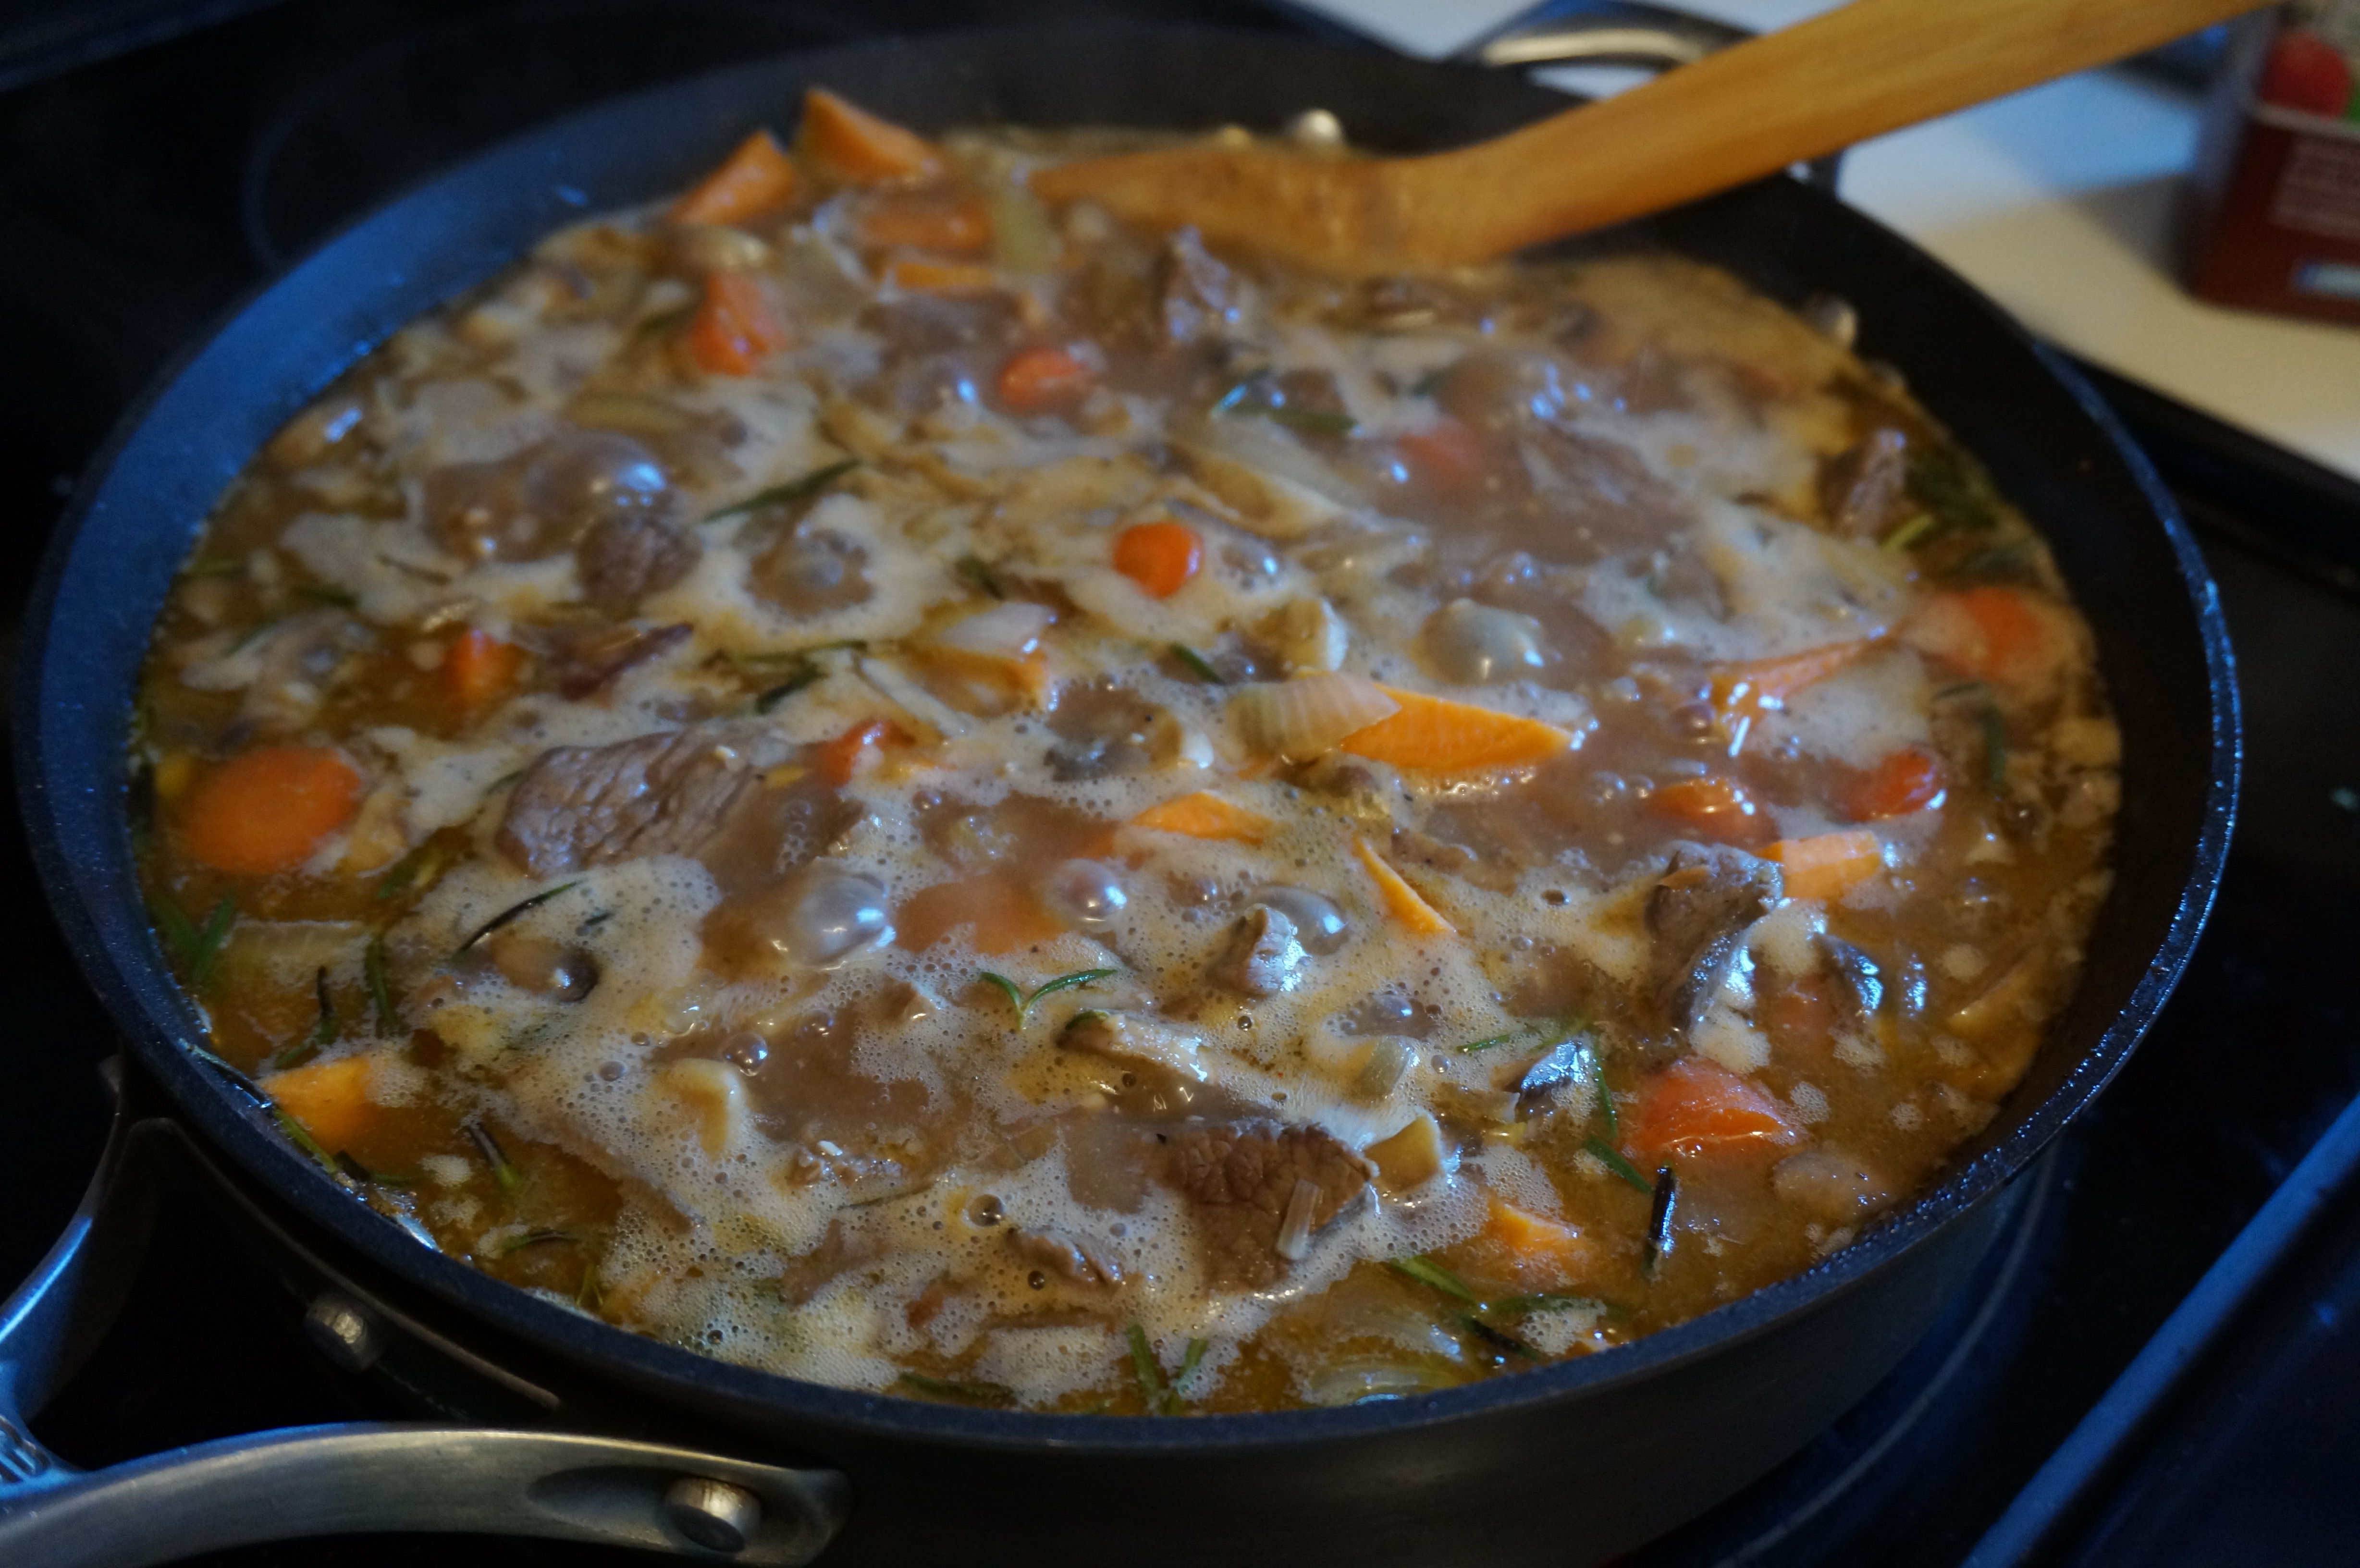
  7. Add the remaining 2 tbsp oil to skillet. Add mushrooms and carrots and cook until carrots are soft, about 3 minutes. Stir in 2 tbsp flour and stir well until combined.
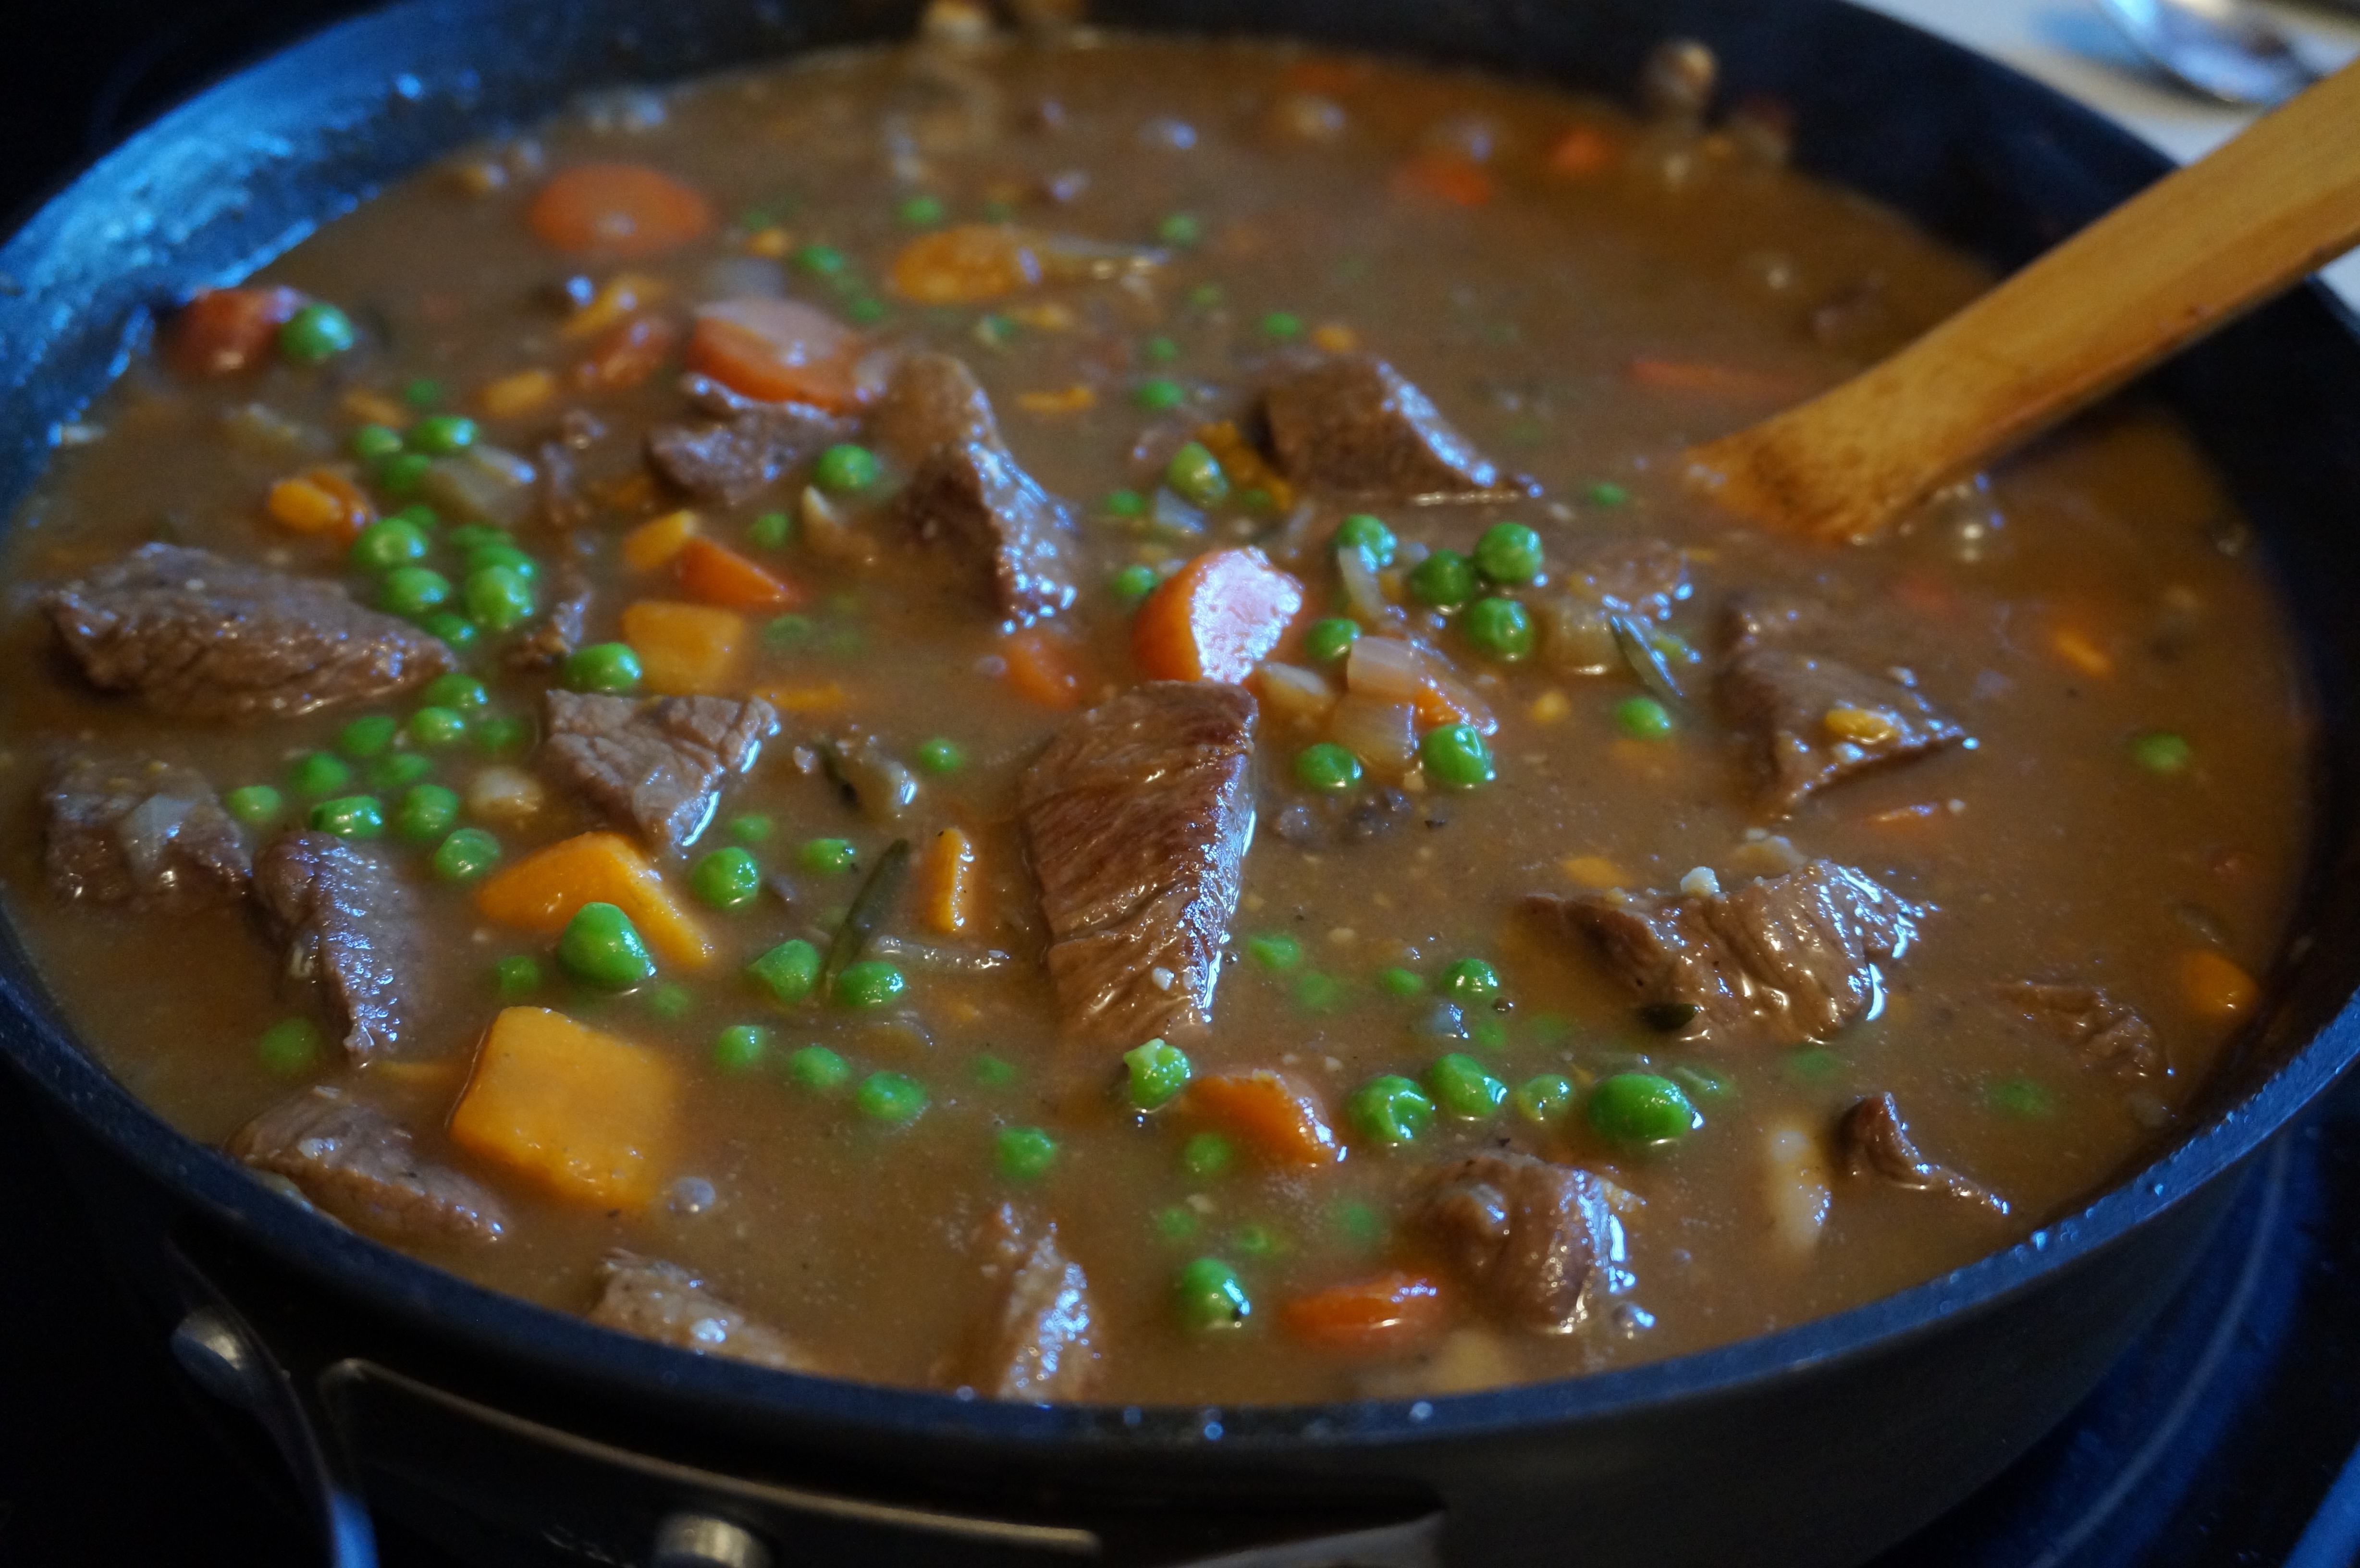
  8. Return the beef, potato, and onion mixture to the skillet with the carrots and mushrooms. Add beef broth, wine, mustard, thyme, and peas. Sprinkle fresh rosemary on top. Season with salt and pepper. Stir well.
  9. Bring stew to a boil and reduce to medium heat to maintain a steady simmer. Simmer about 15 minutes until the broth has reduced a bit.
  10. Add corn starch and stir. The stew should have thickened by now such that it has a thin gravy-like sauce.
  11. Pour stew into a lightly sprayed 9×12 casserole dish. Sprinkle with additional dry rosemary.
  12. Using the same cookie cutter you used for the biscuits (recipe below), cut the cheddar slices into shapes (or just tear into strips- but this is way less fancy!)
  13. Layer cheese on top of the stew in the casserole dish. Add the cut biscuits so that they are slightly overlapping the cheese.
  14. Lightly drizzle biscuits with olive oil.
  15. Preheat oven to 375 degrees.
  16. Bake for 30 minutes, or until biscuits are a deep golden-brown in color and stew is bubbling.
  17. Remove from oven and cool for at least 5 minutes. Serve with biscuits on top!
  18. FOR THE BISCUITS
  19. In a medium bowl, combine flour, salt, sugar, and baking powder.
  20. Cut shortening into flour mixture, using two knives and running them across one another until the mixture forms fine crumbs.
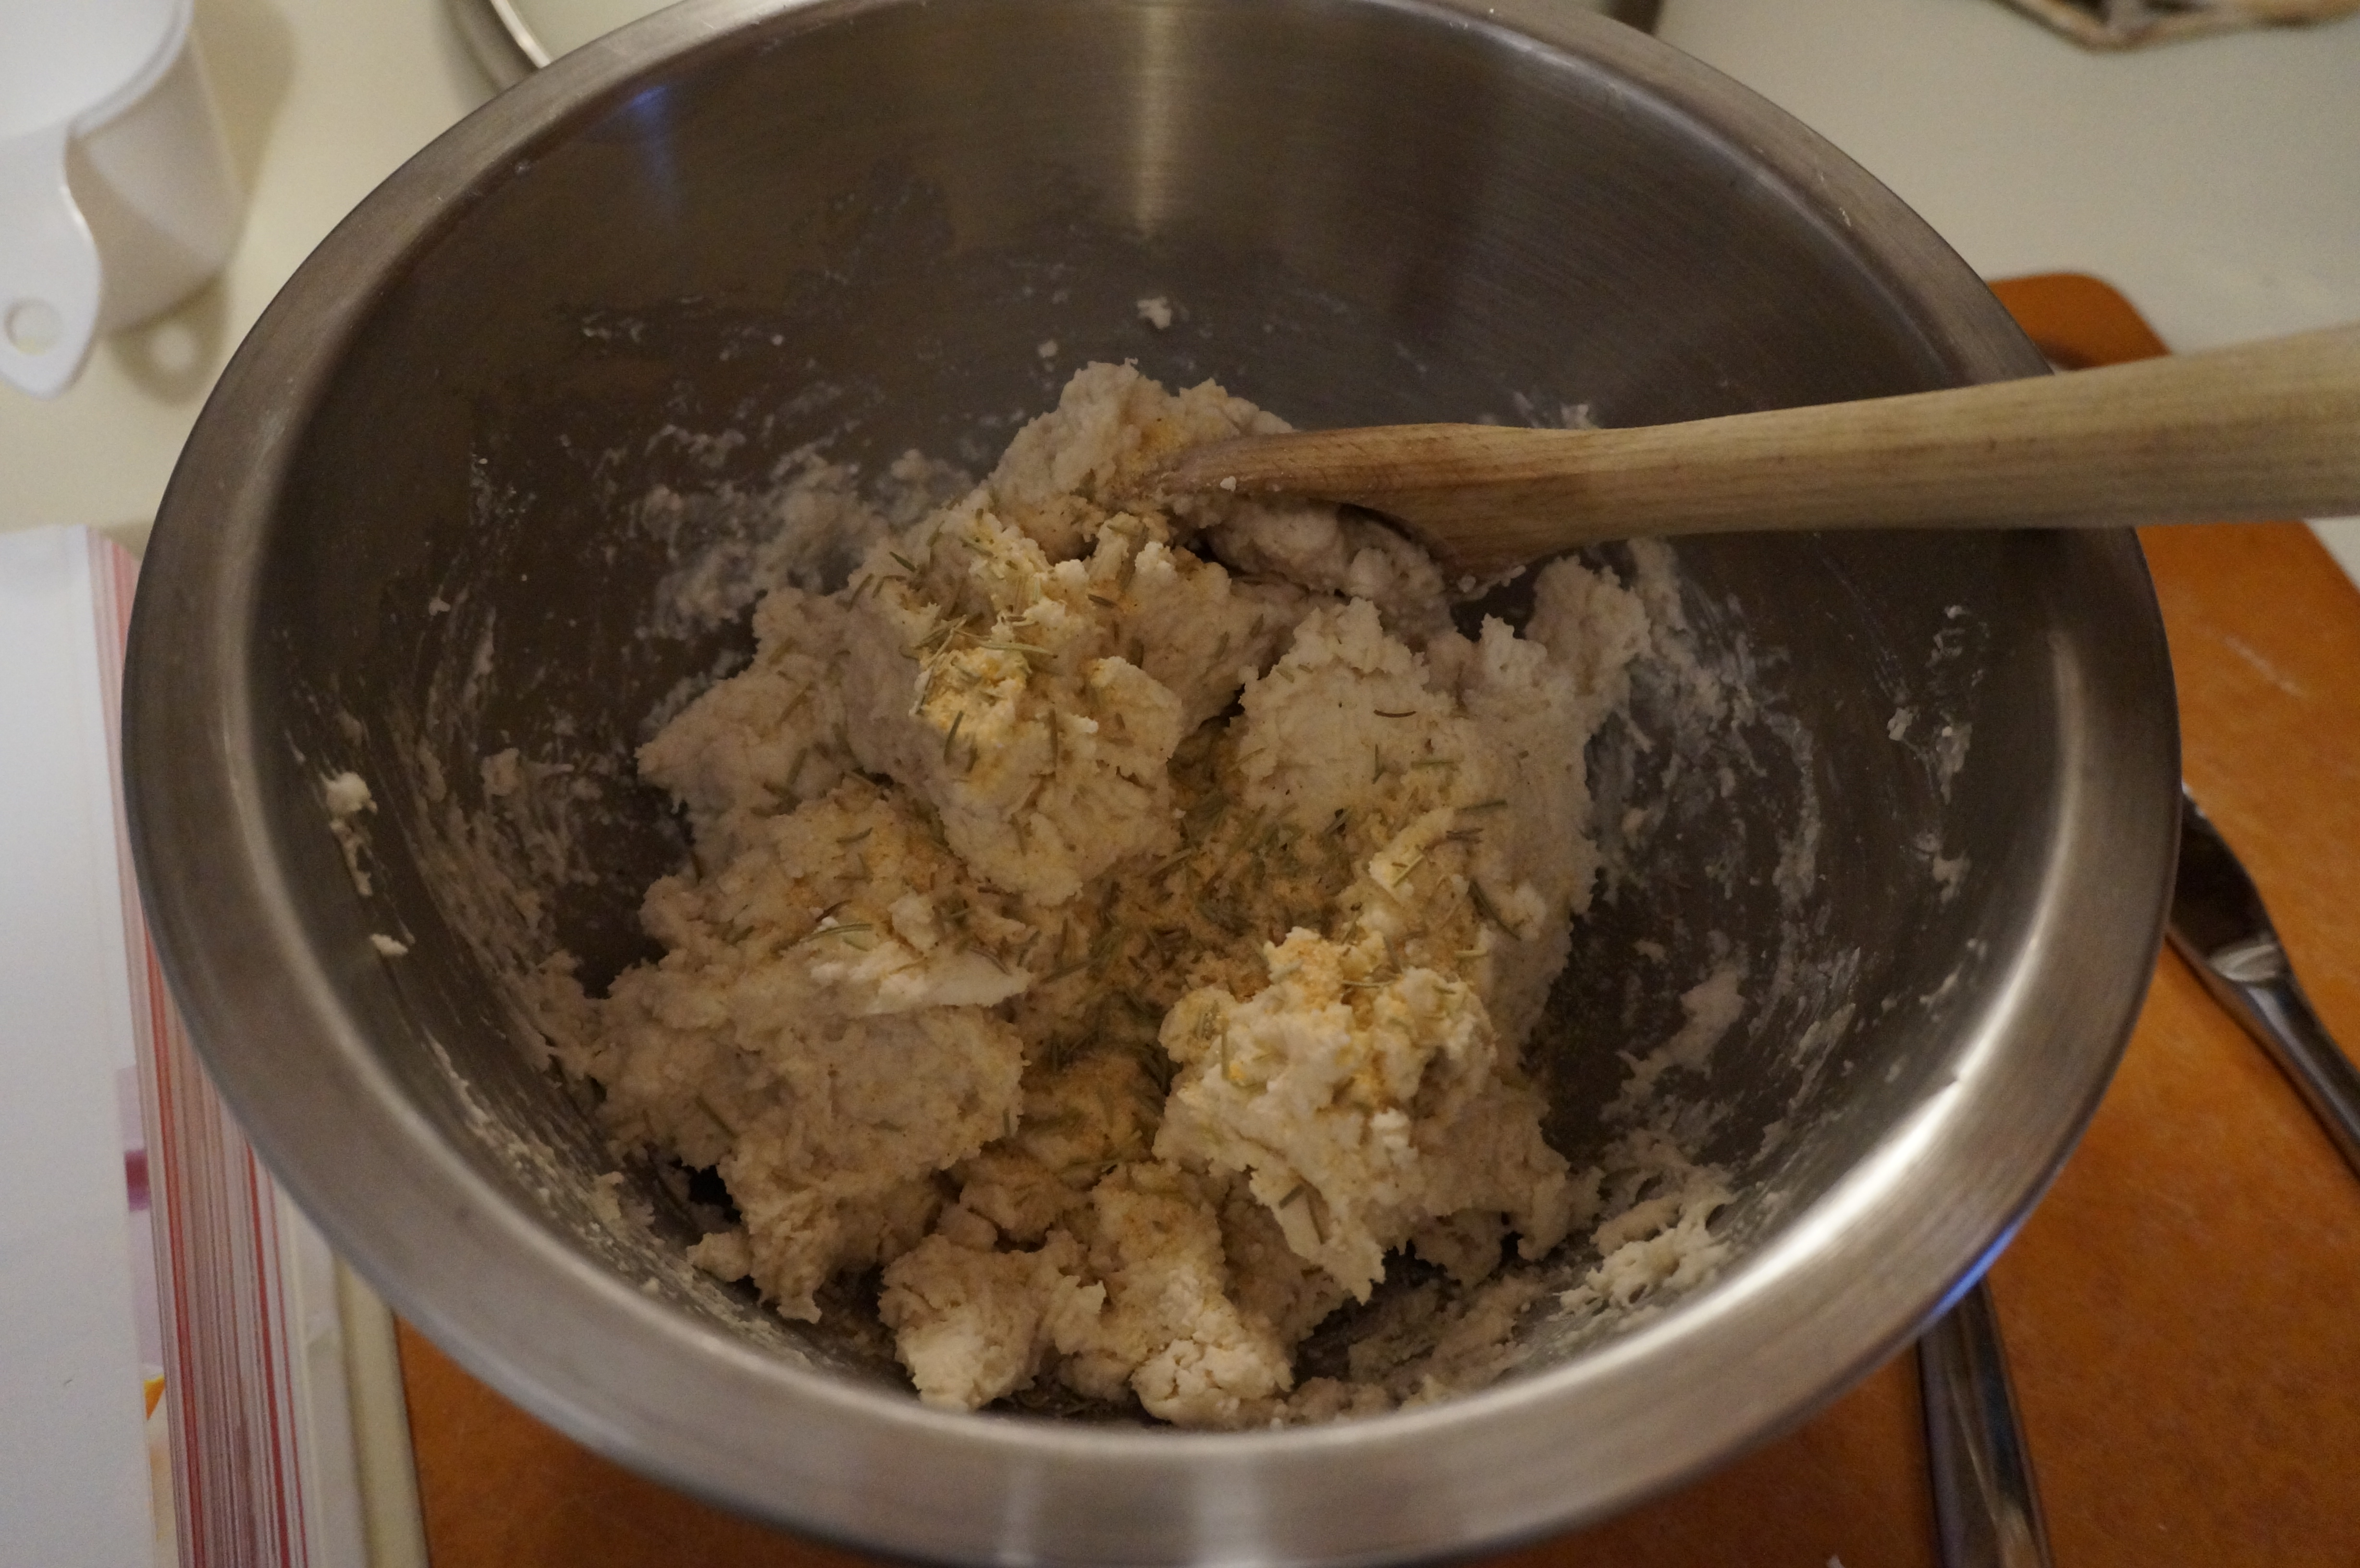
  21. Add garlic powder and dried rosemary.
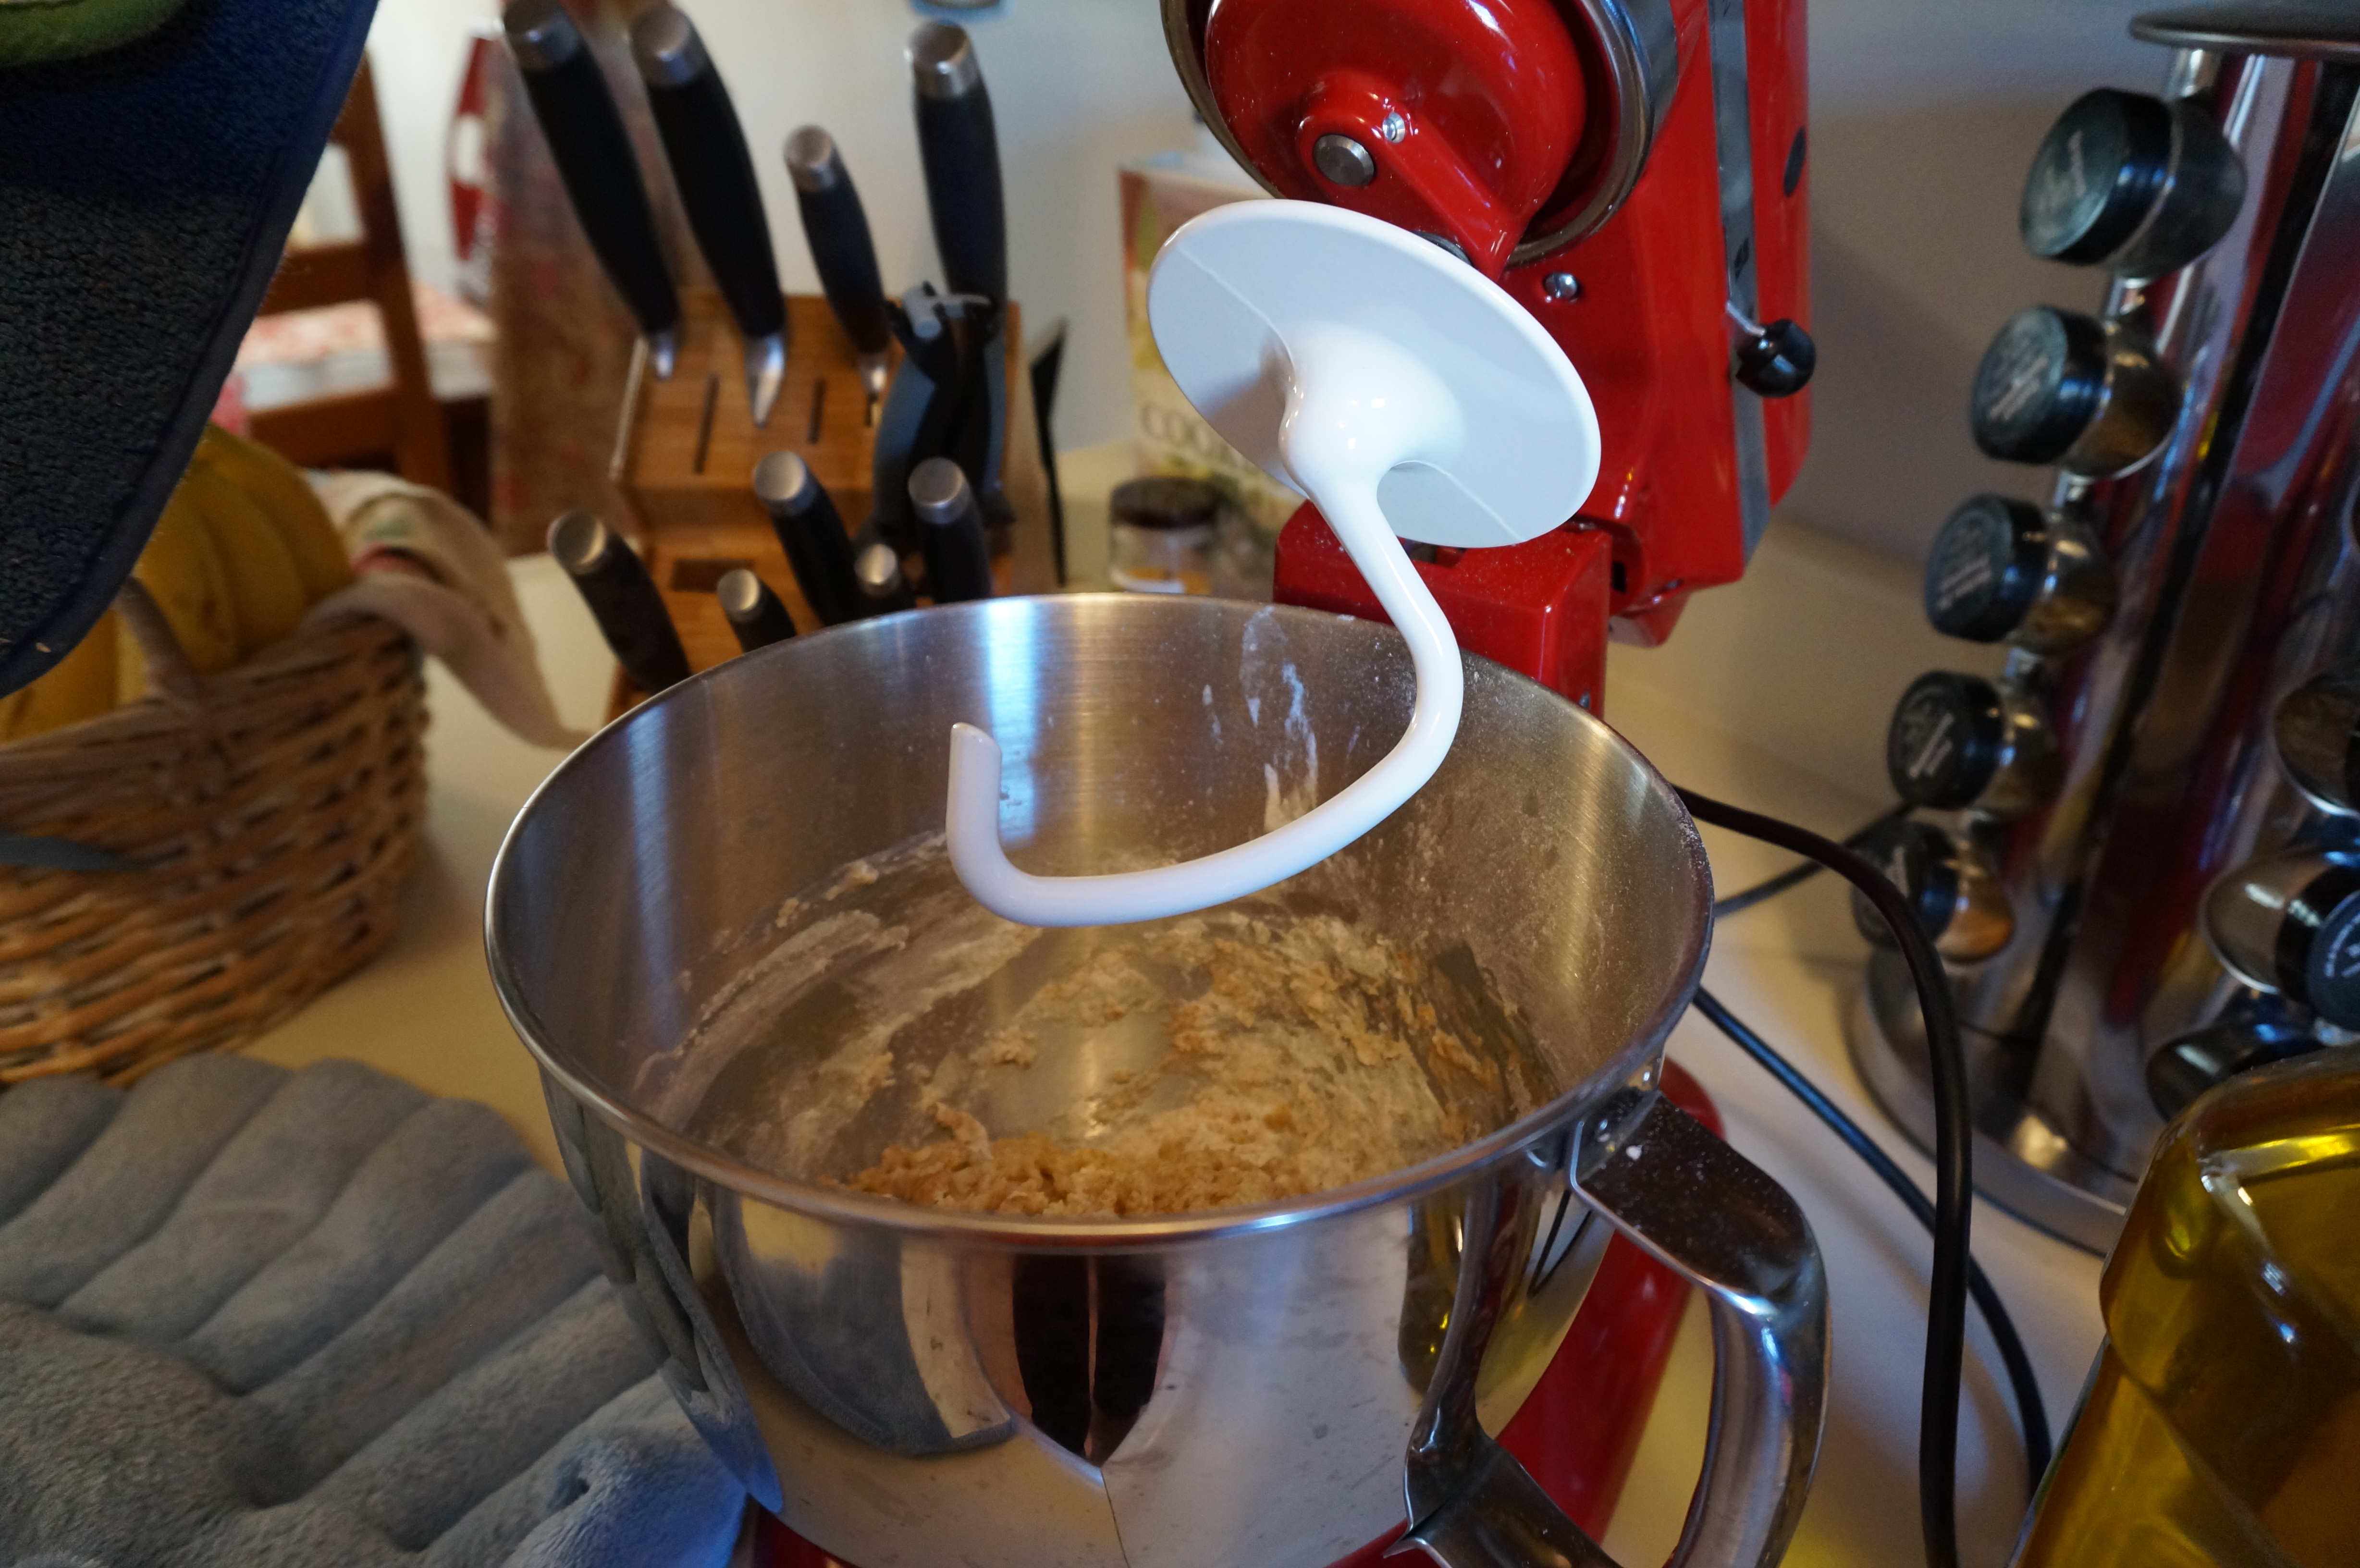
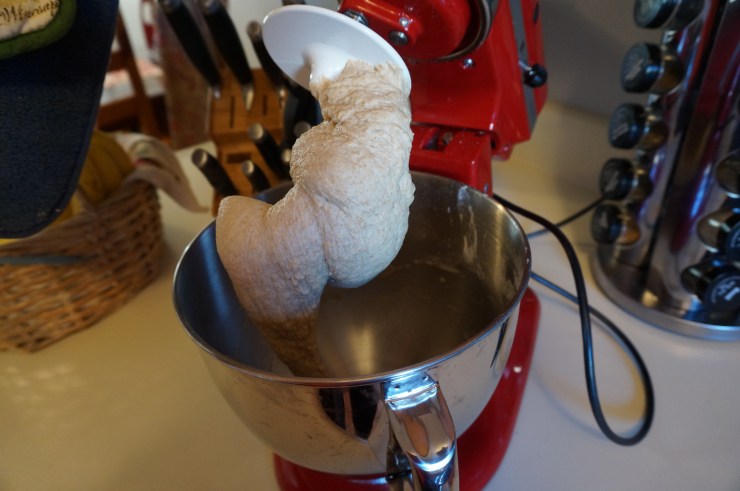
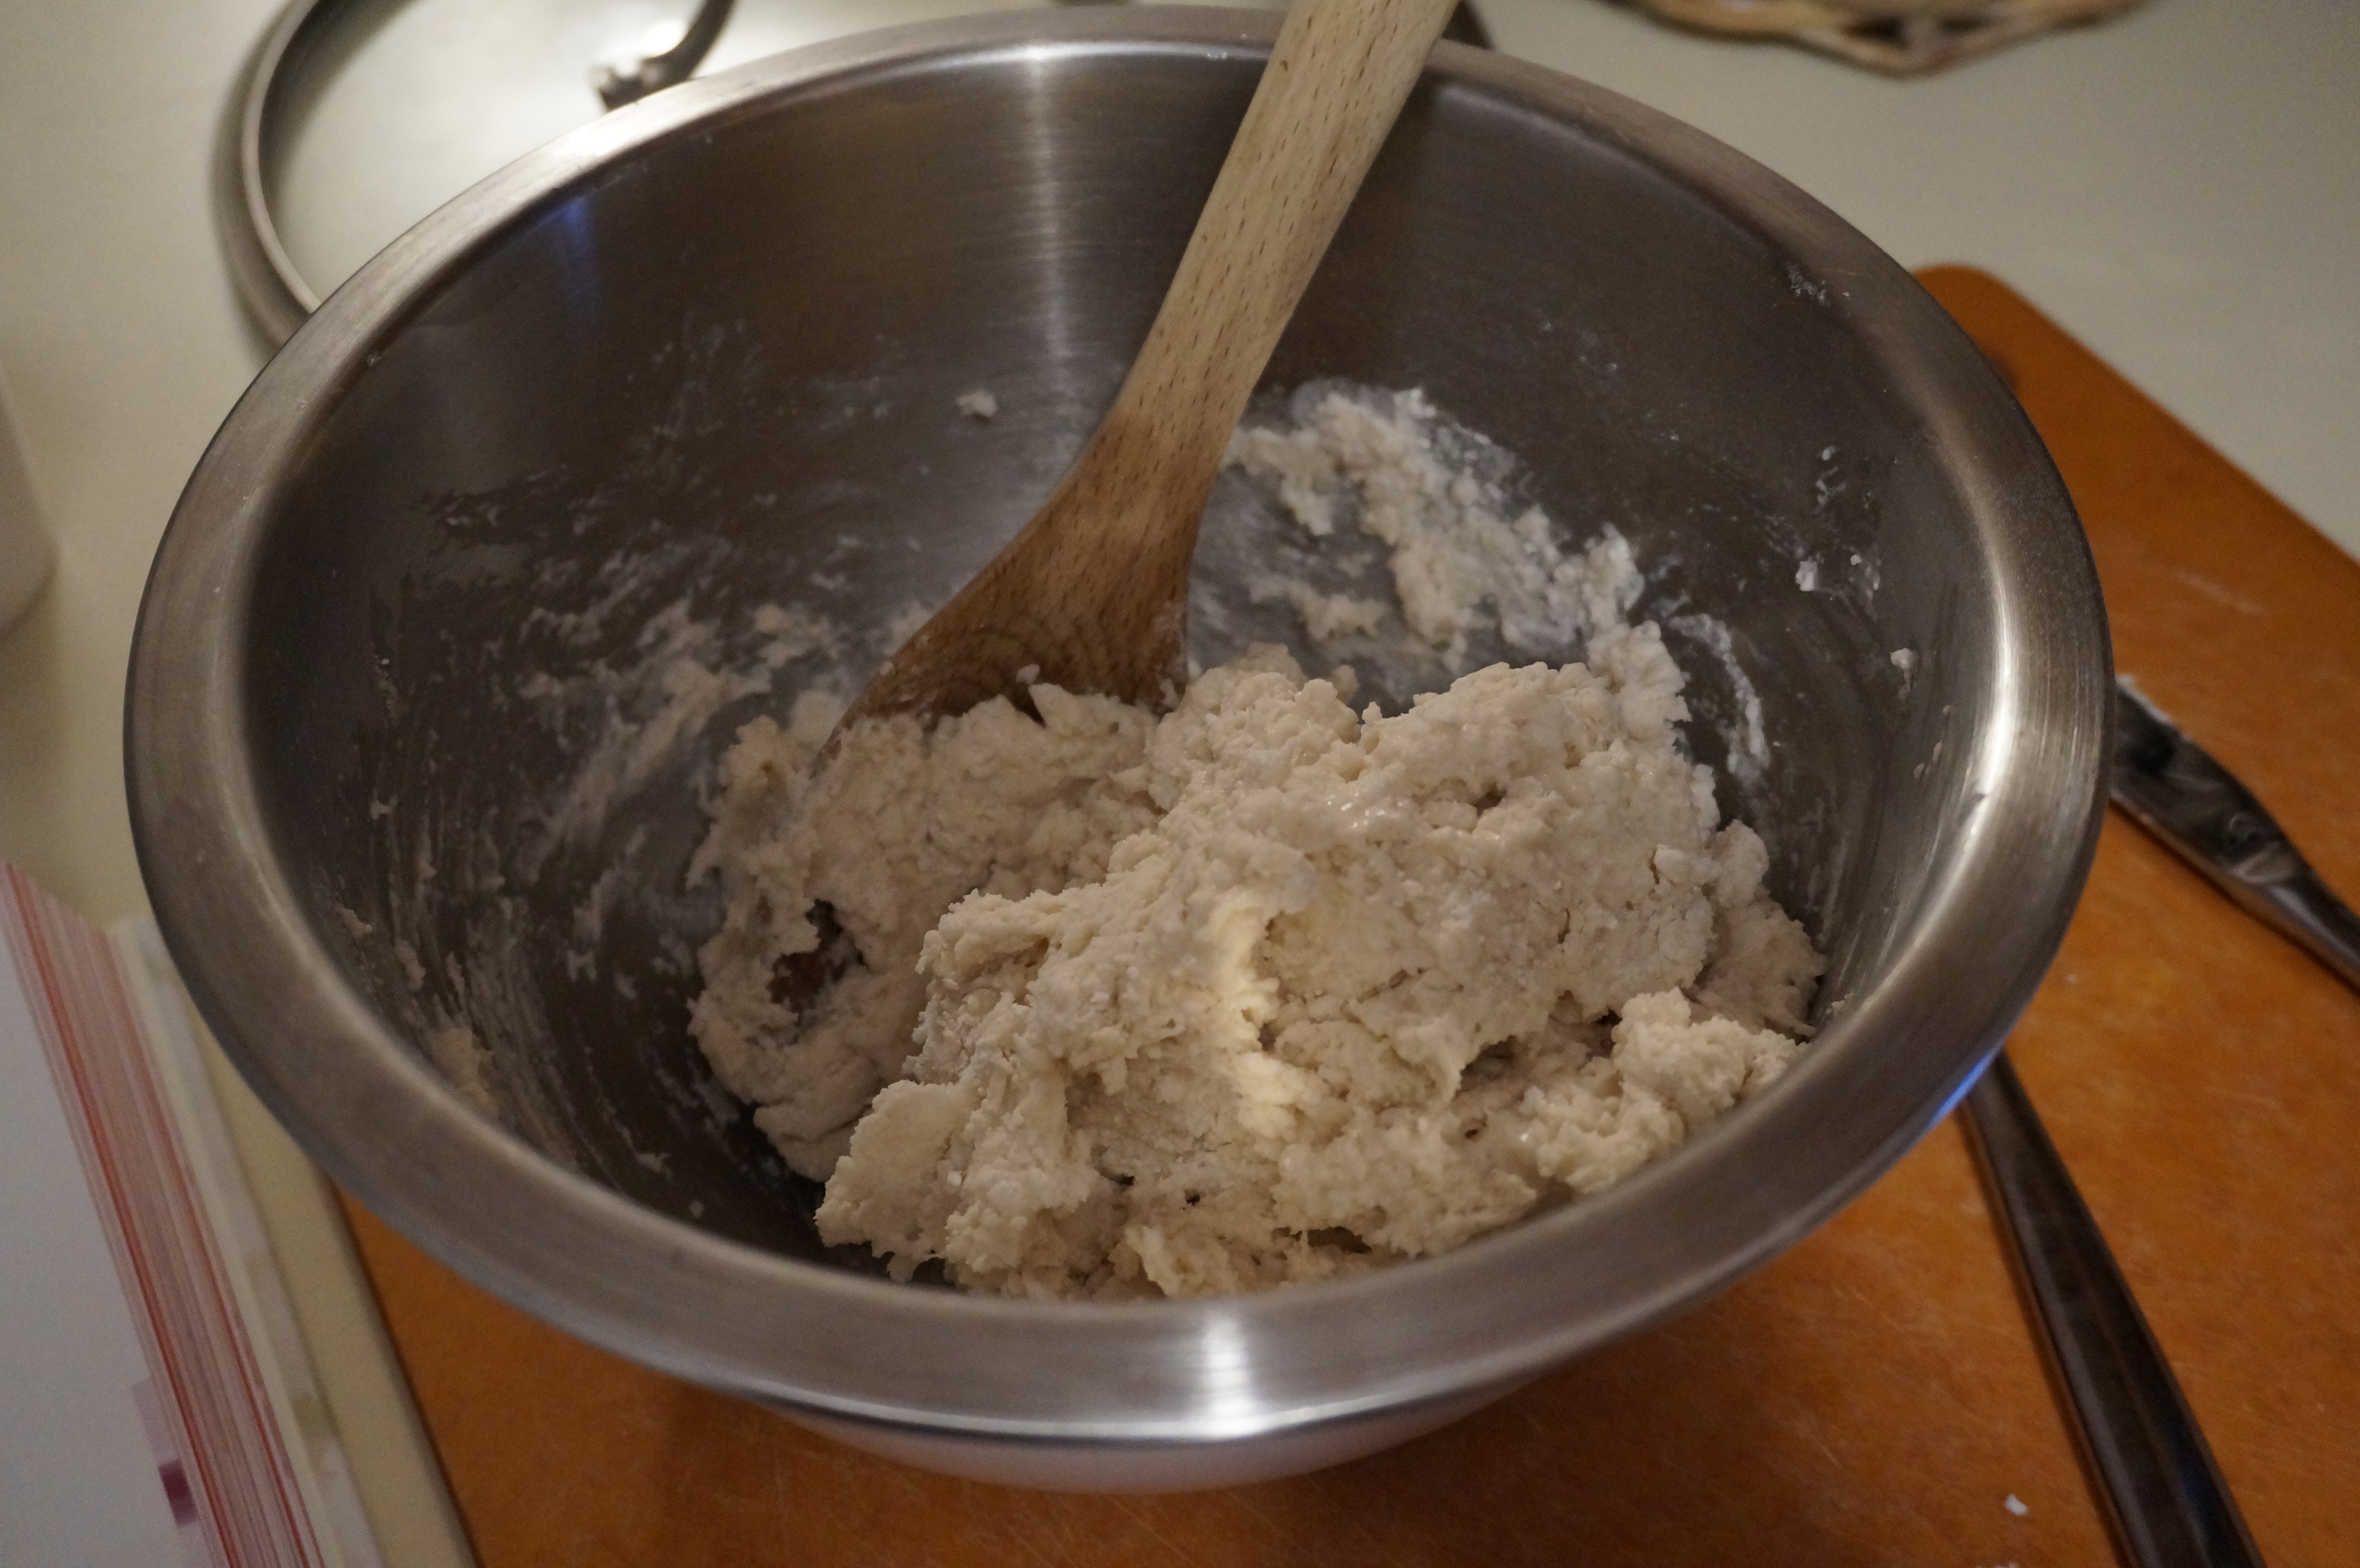
  22. Add milk and stir until the dough just comes away from the side of the bowl. The dough will be sticky!
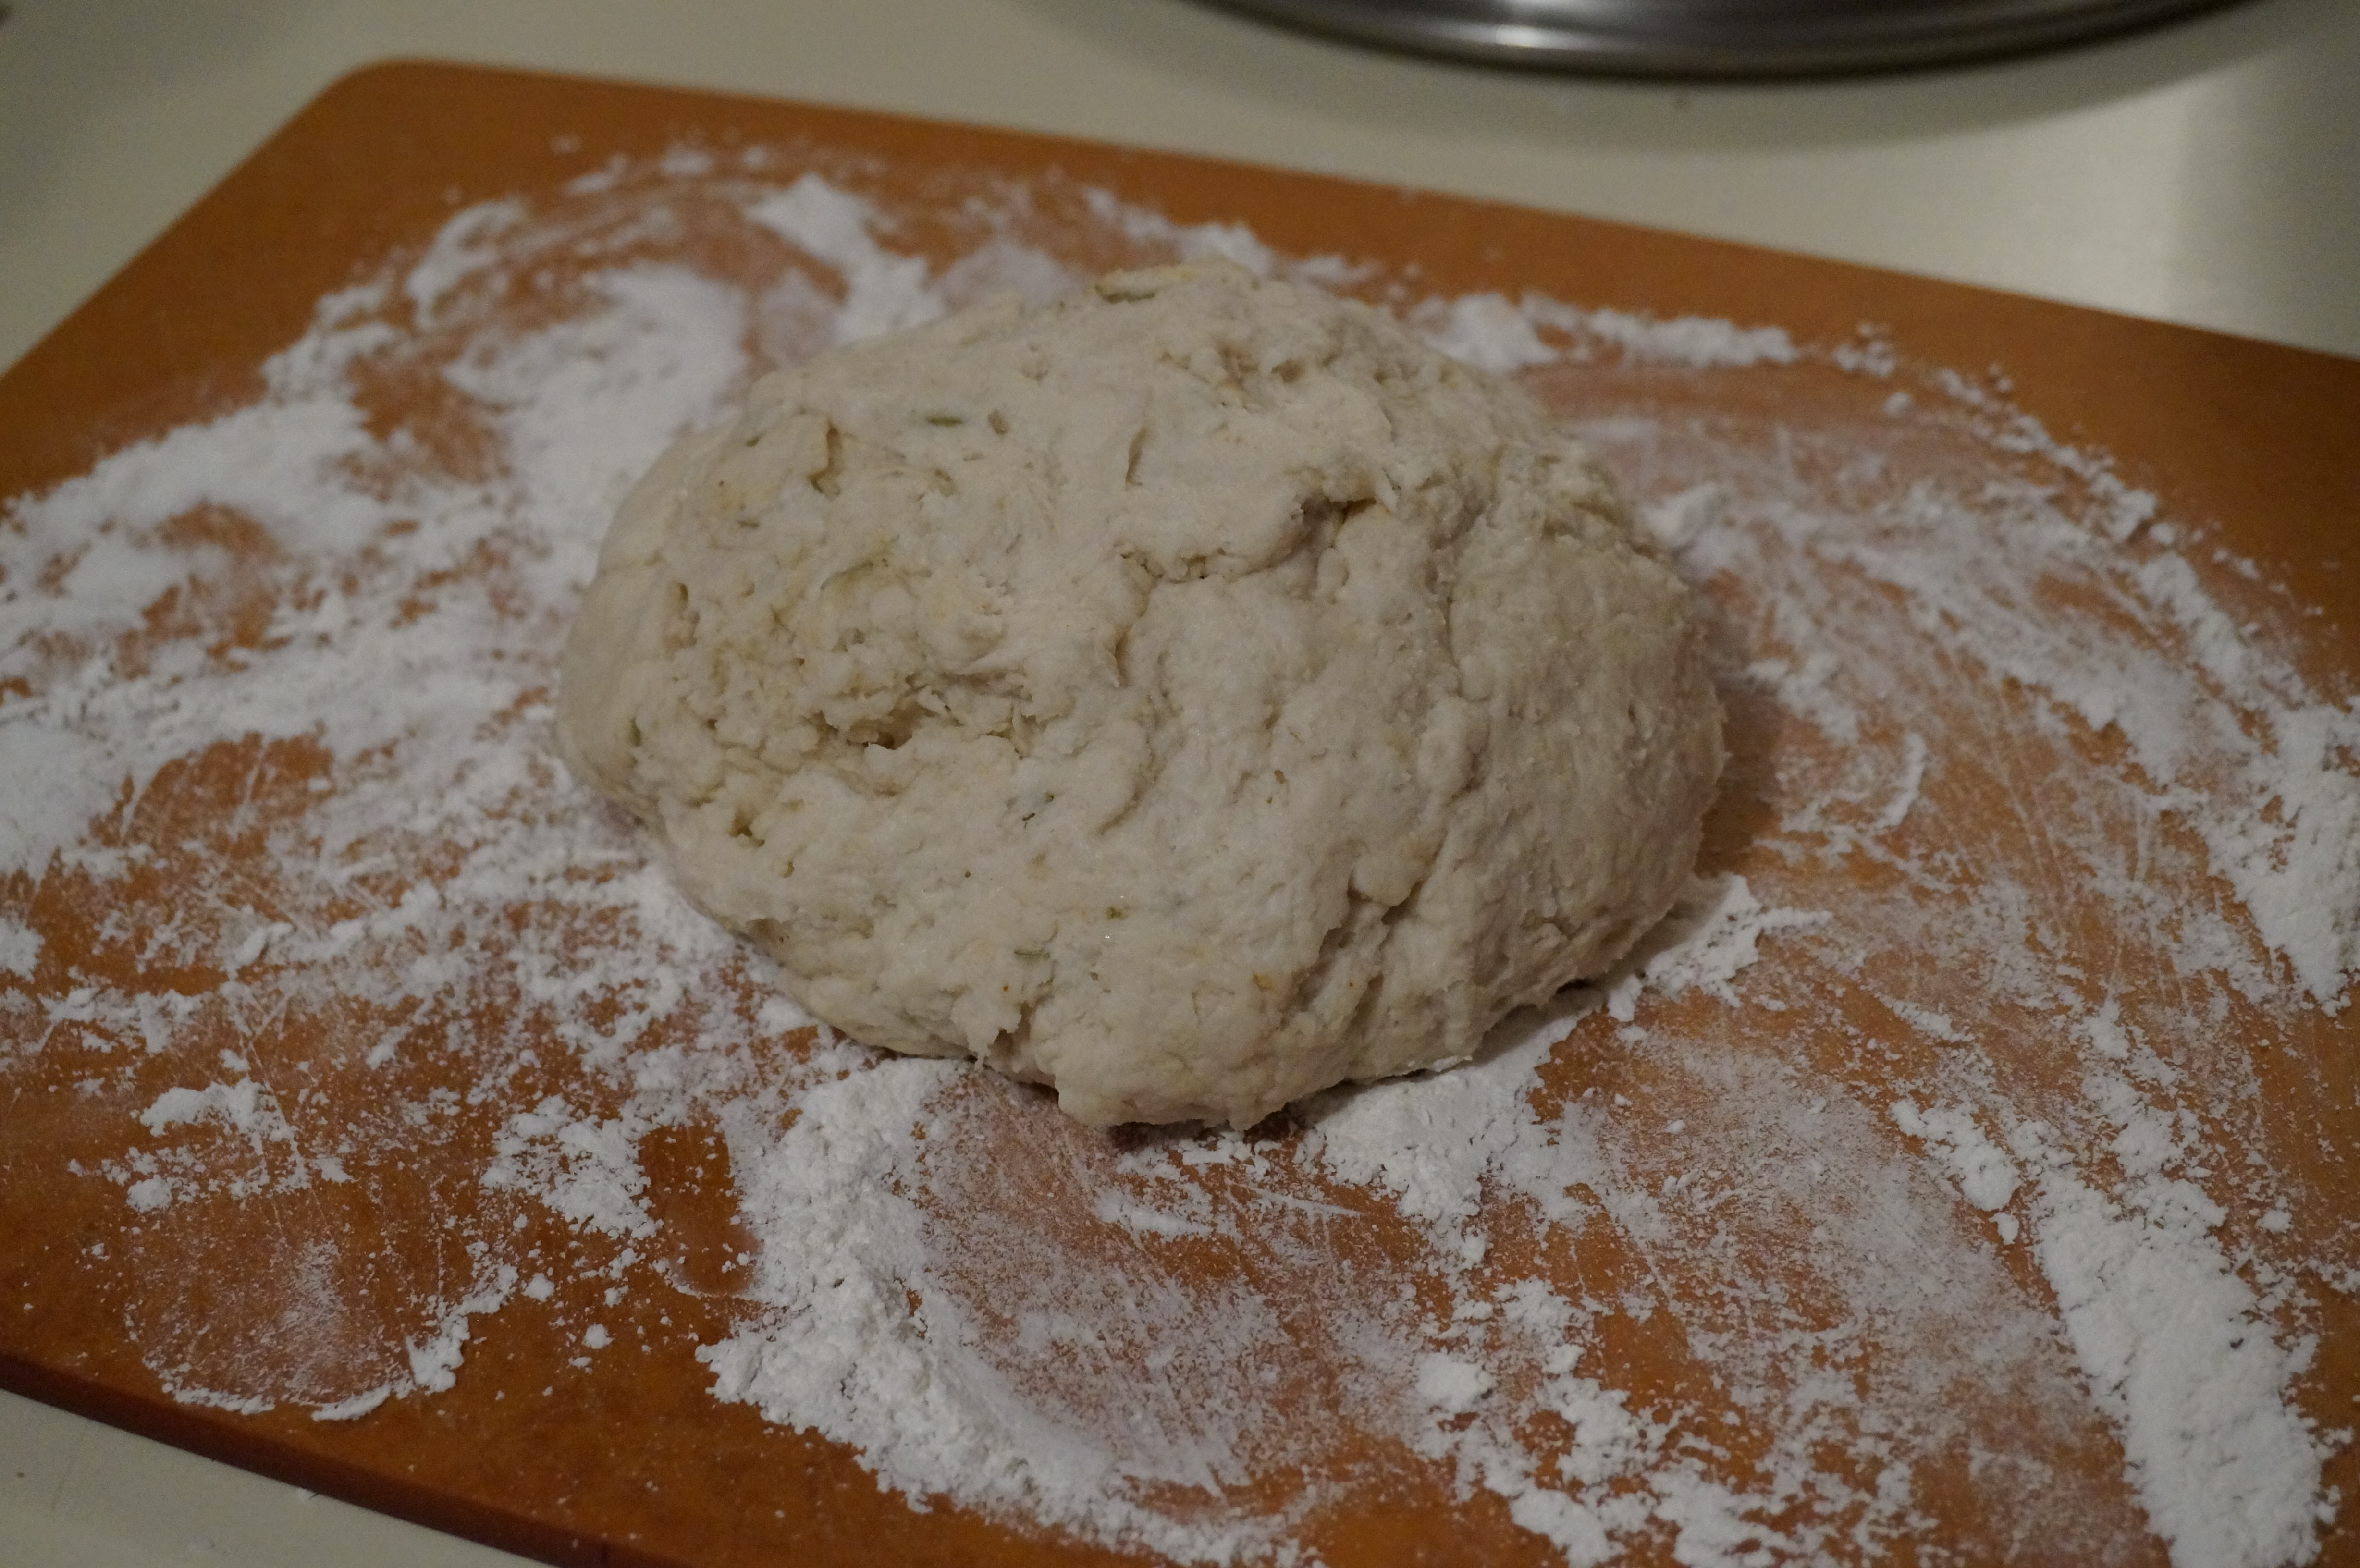
  23. Transfer dough to a lightly floured surface and knead about 15 times.
  24. Flatten or roll to about a 1/2″ thickness. Use cookie cutters (any shape you like!) or an inverted wine glass to cut biscuits.
  25. (At this point, add this dough to the top of the stew to act as the “cobbler”- as described above. Alternatively, you could bake them separately by placing them on a nonstick cookie sheet at 450 degrees for 12 minutes.)

DSC00351

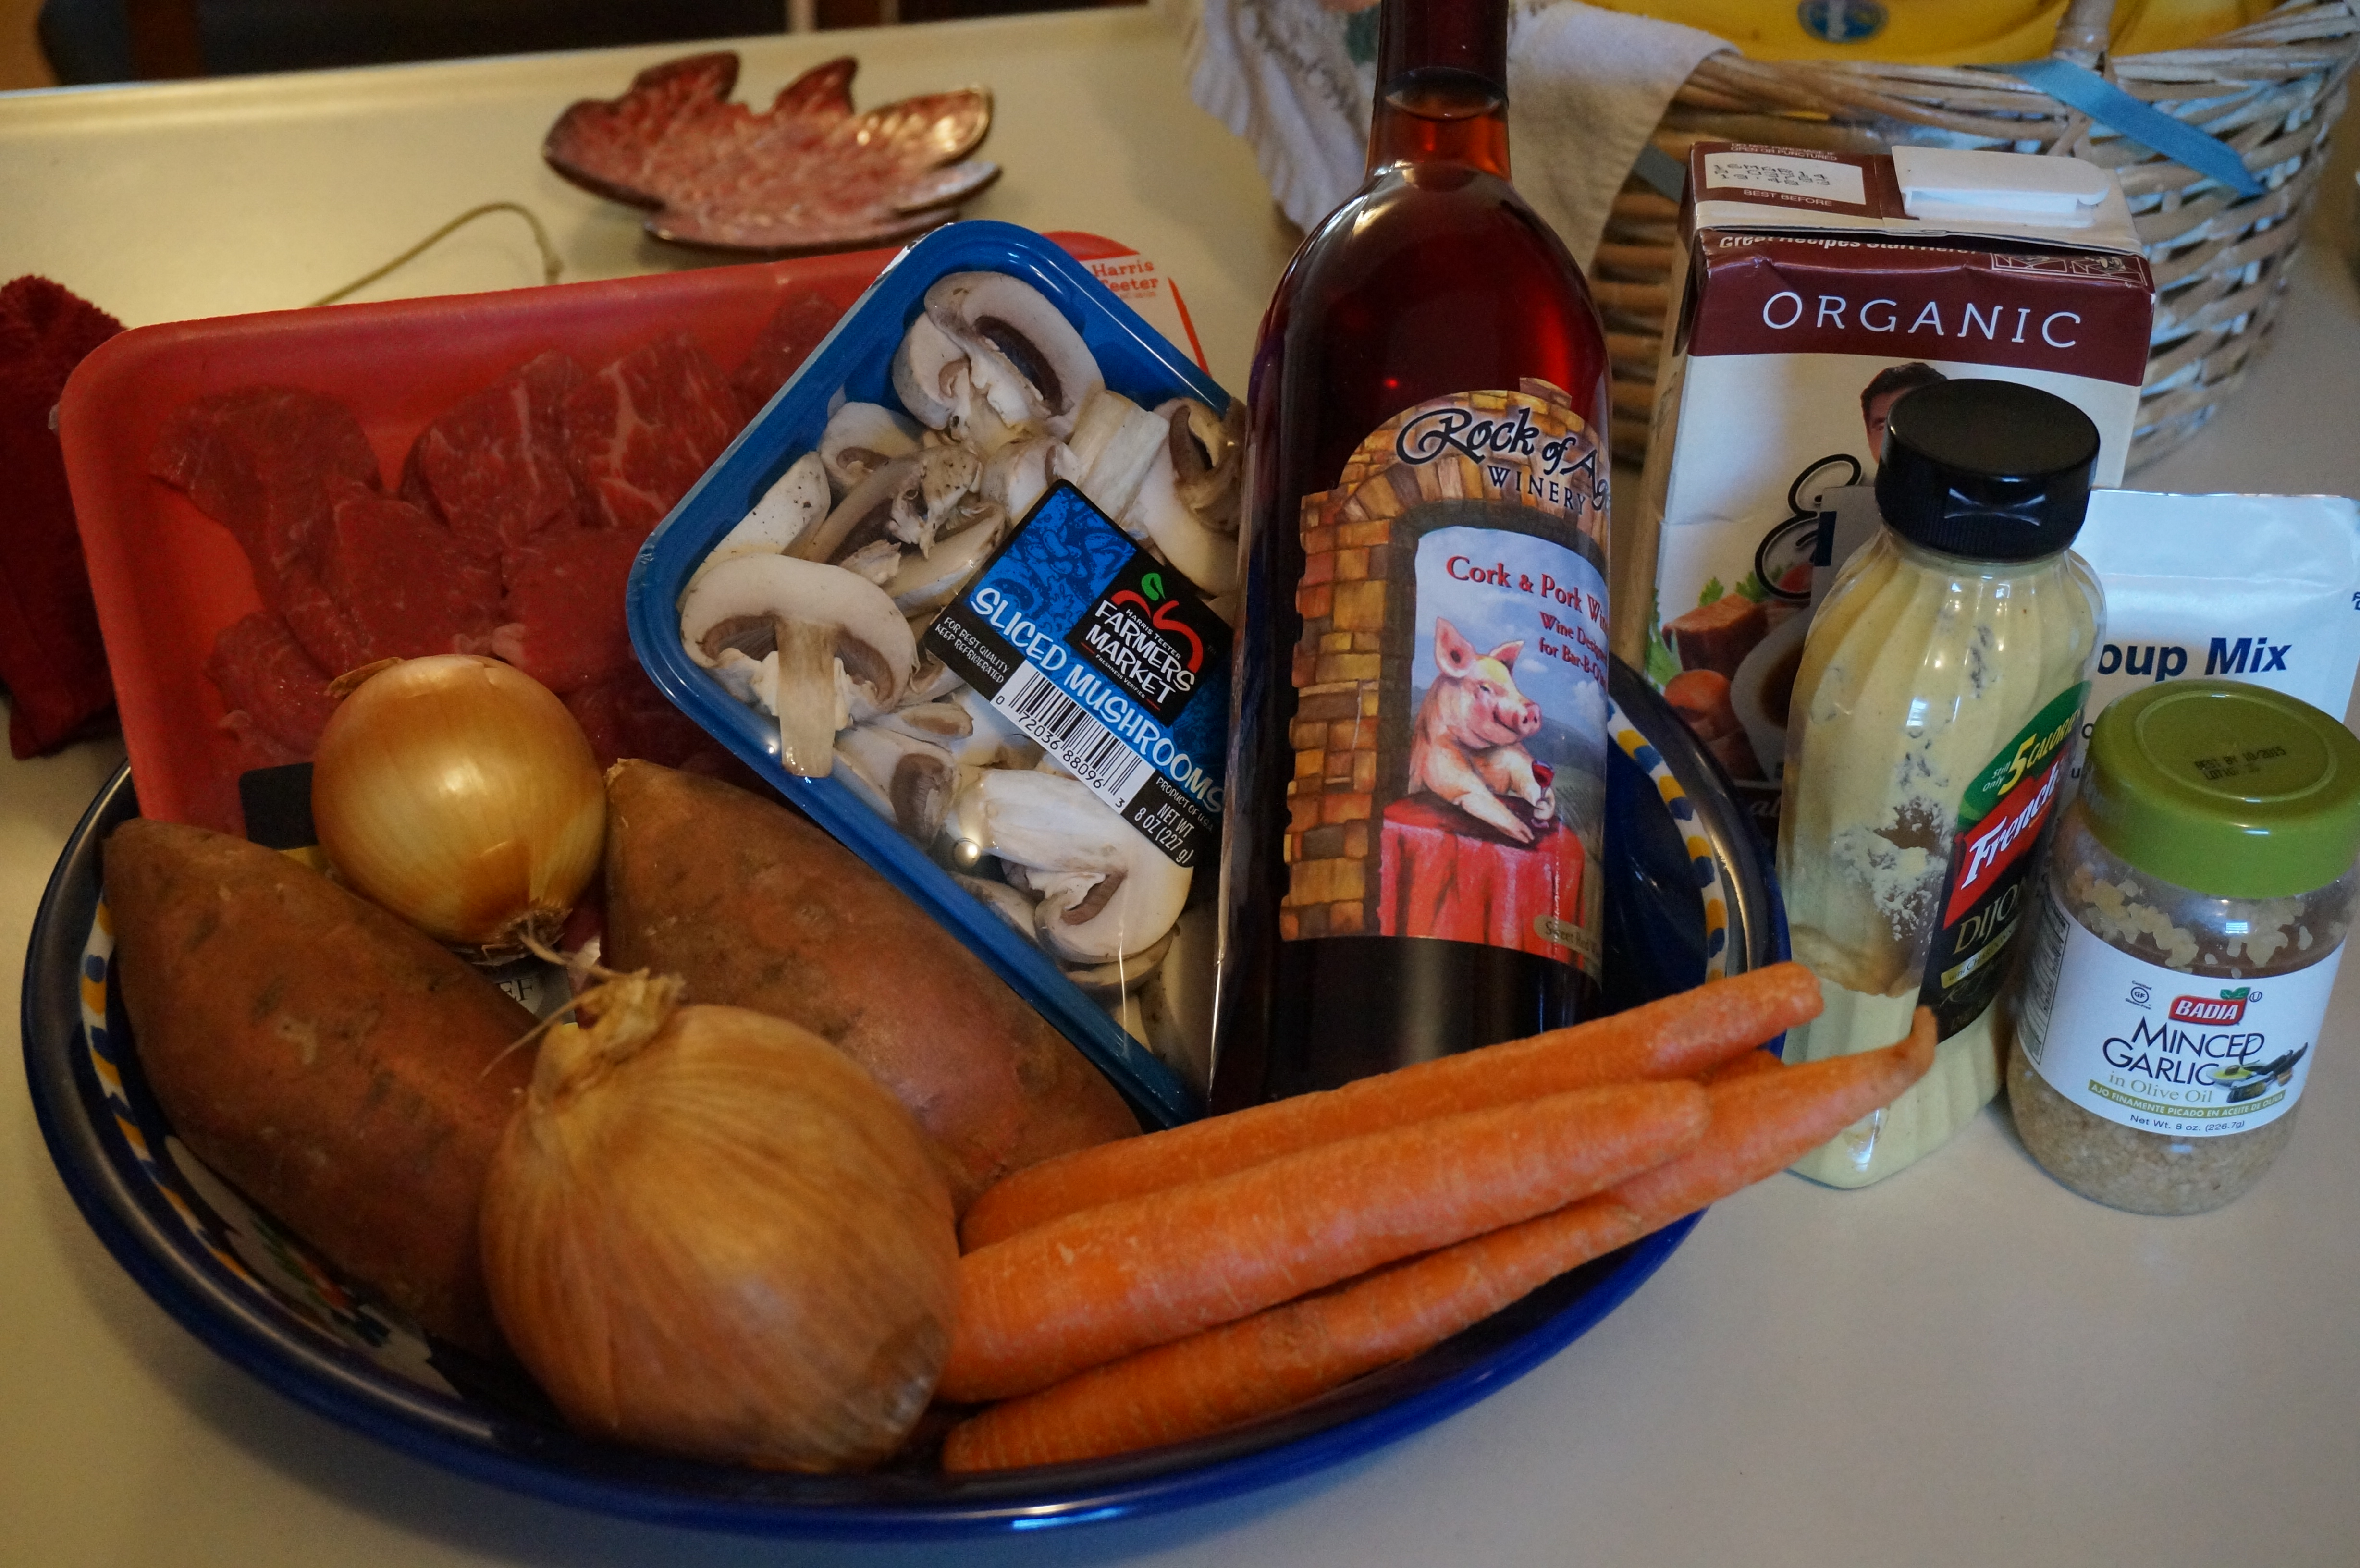
Gather your ingredients!

DSC00353

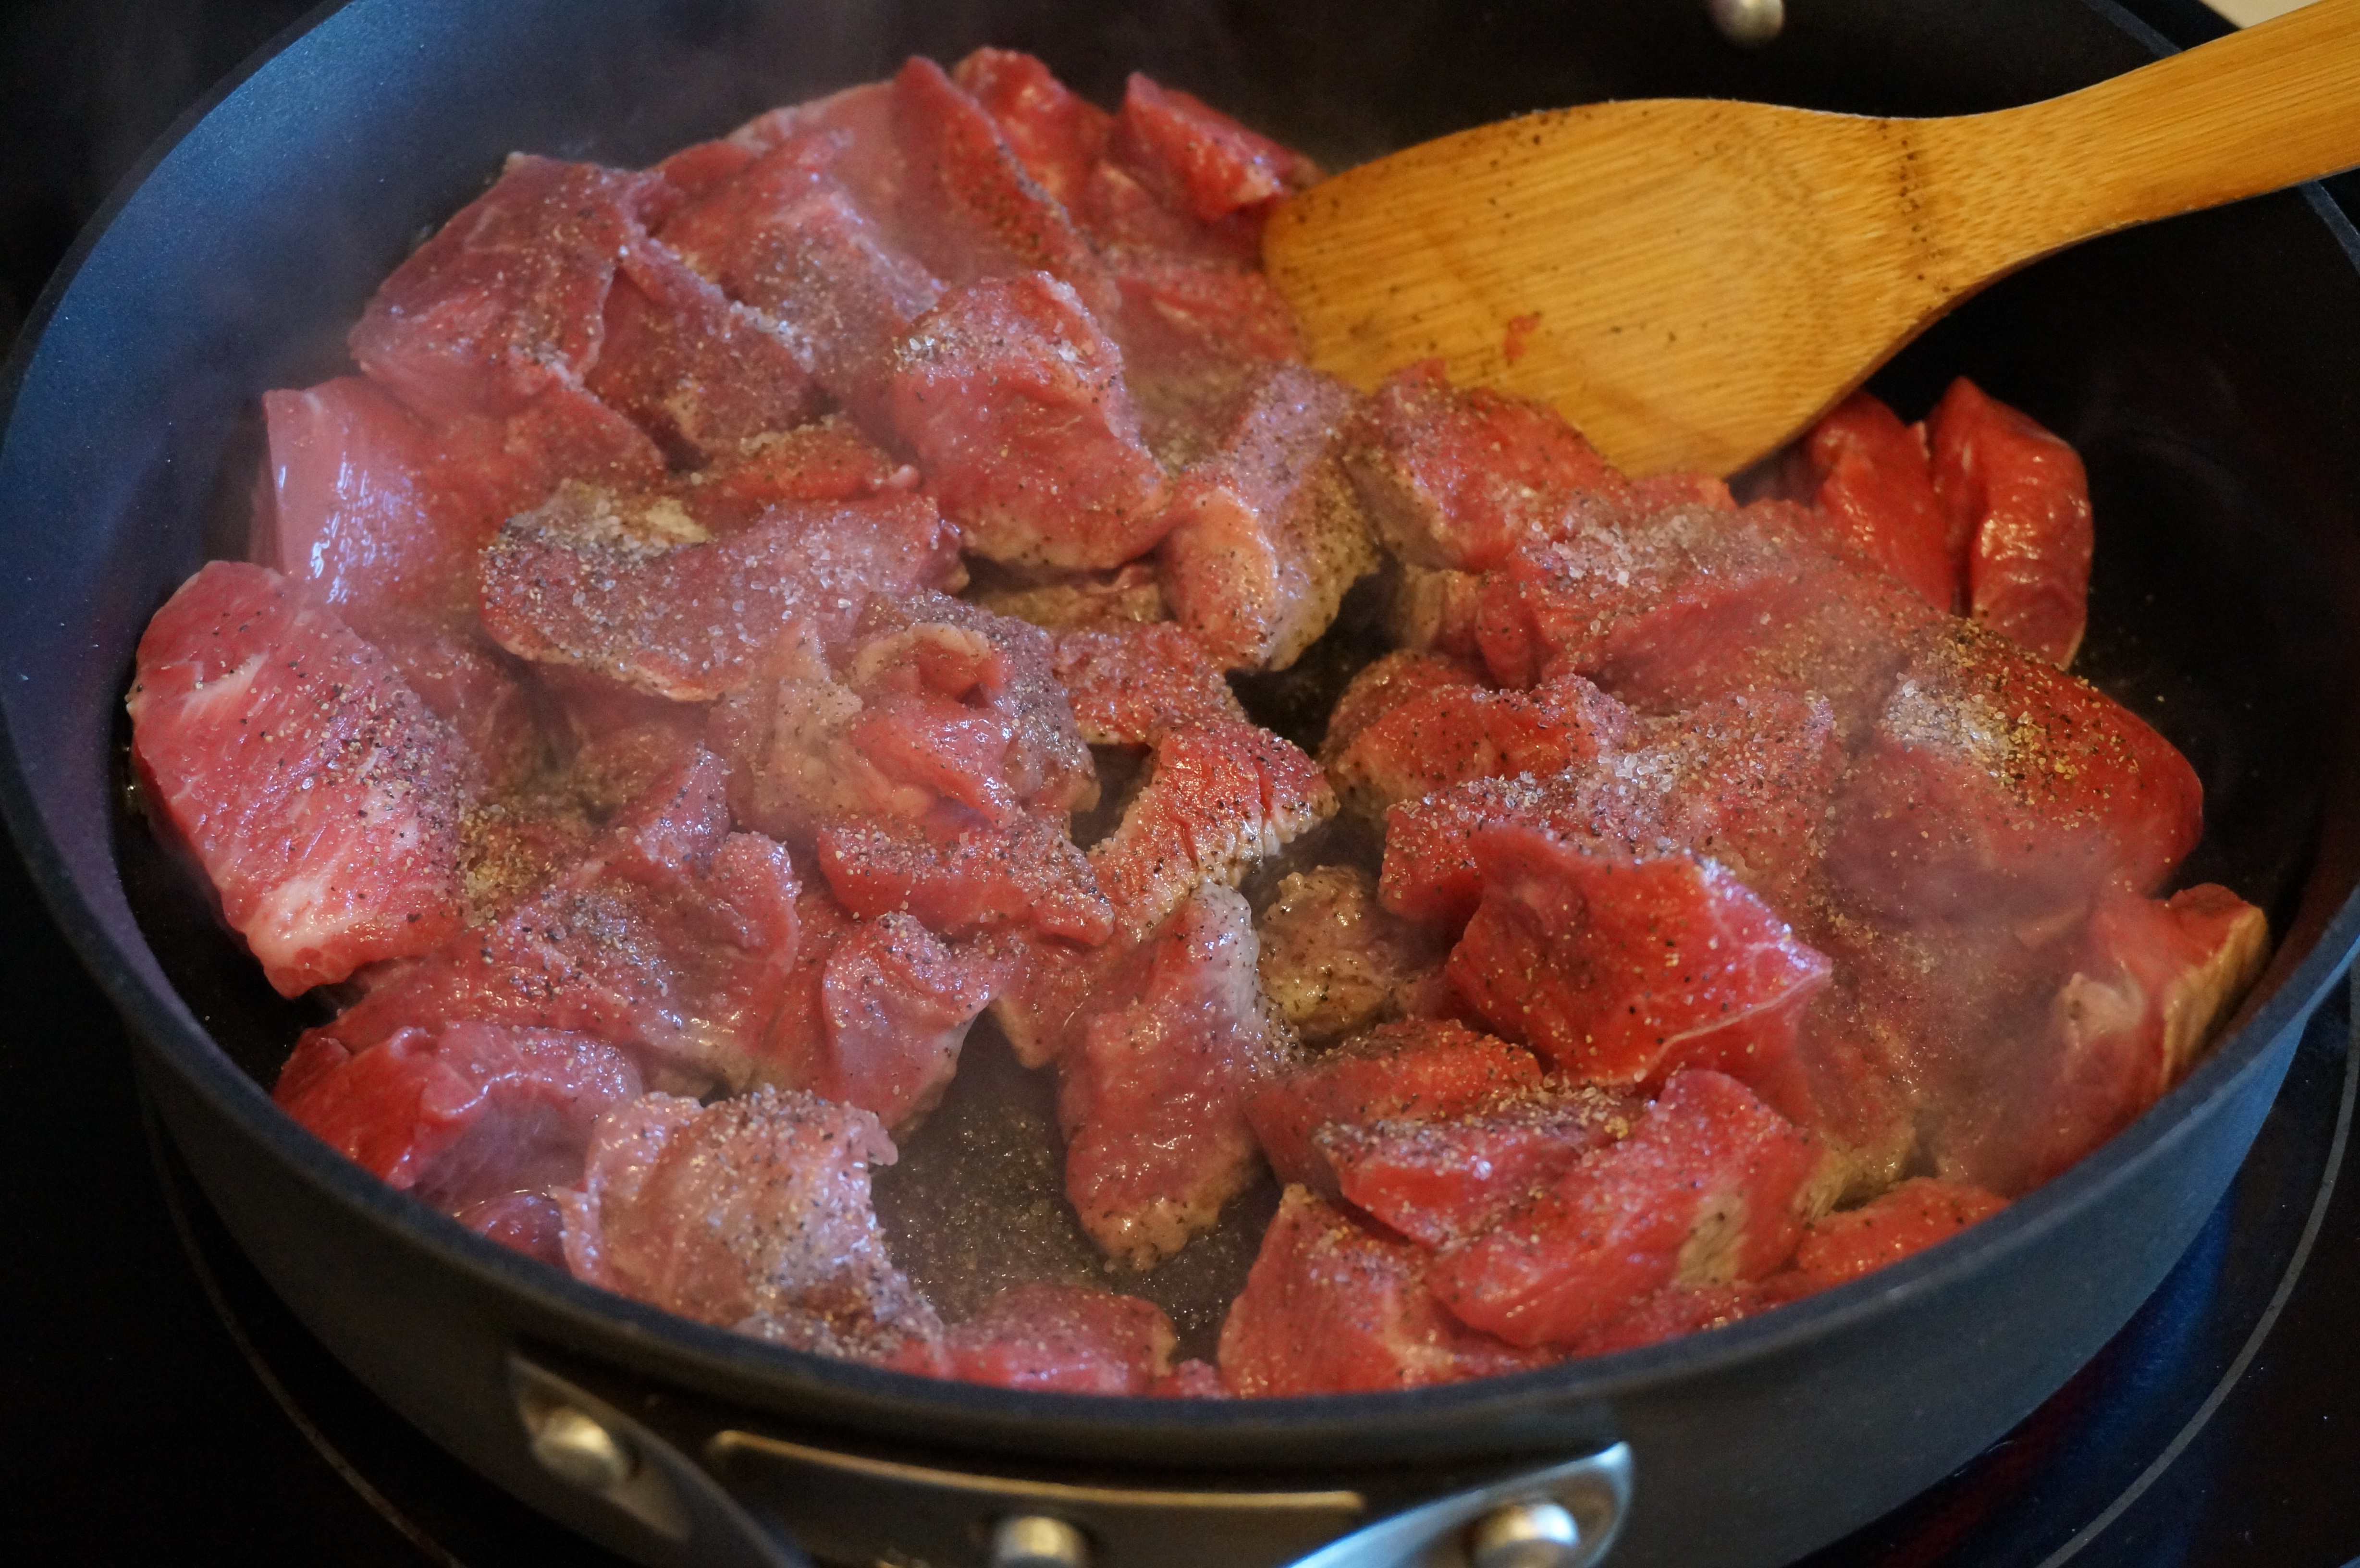
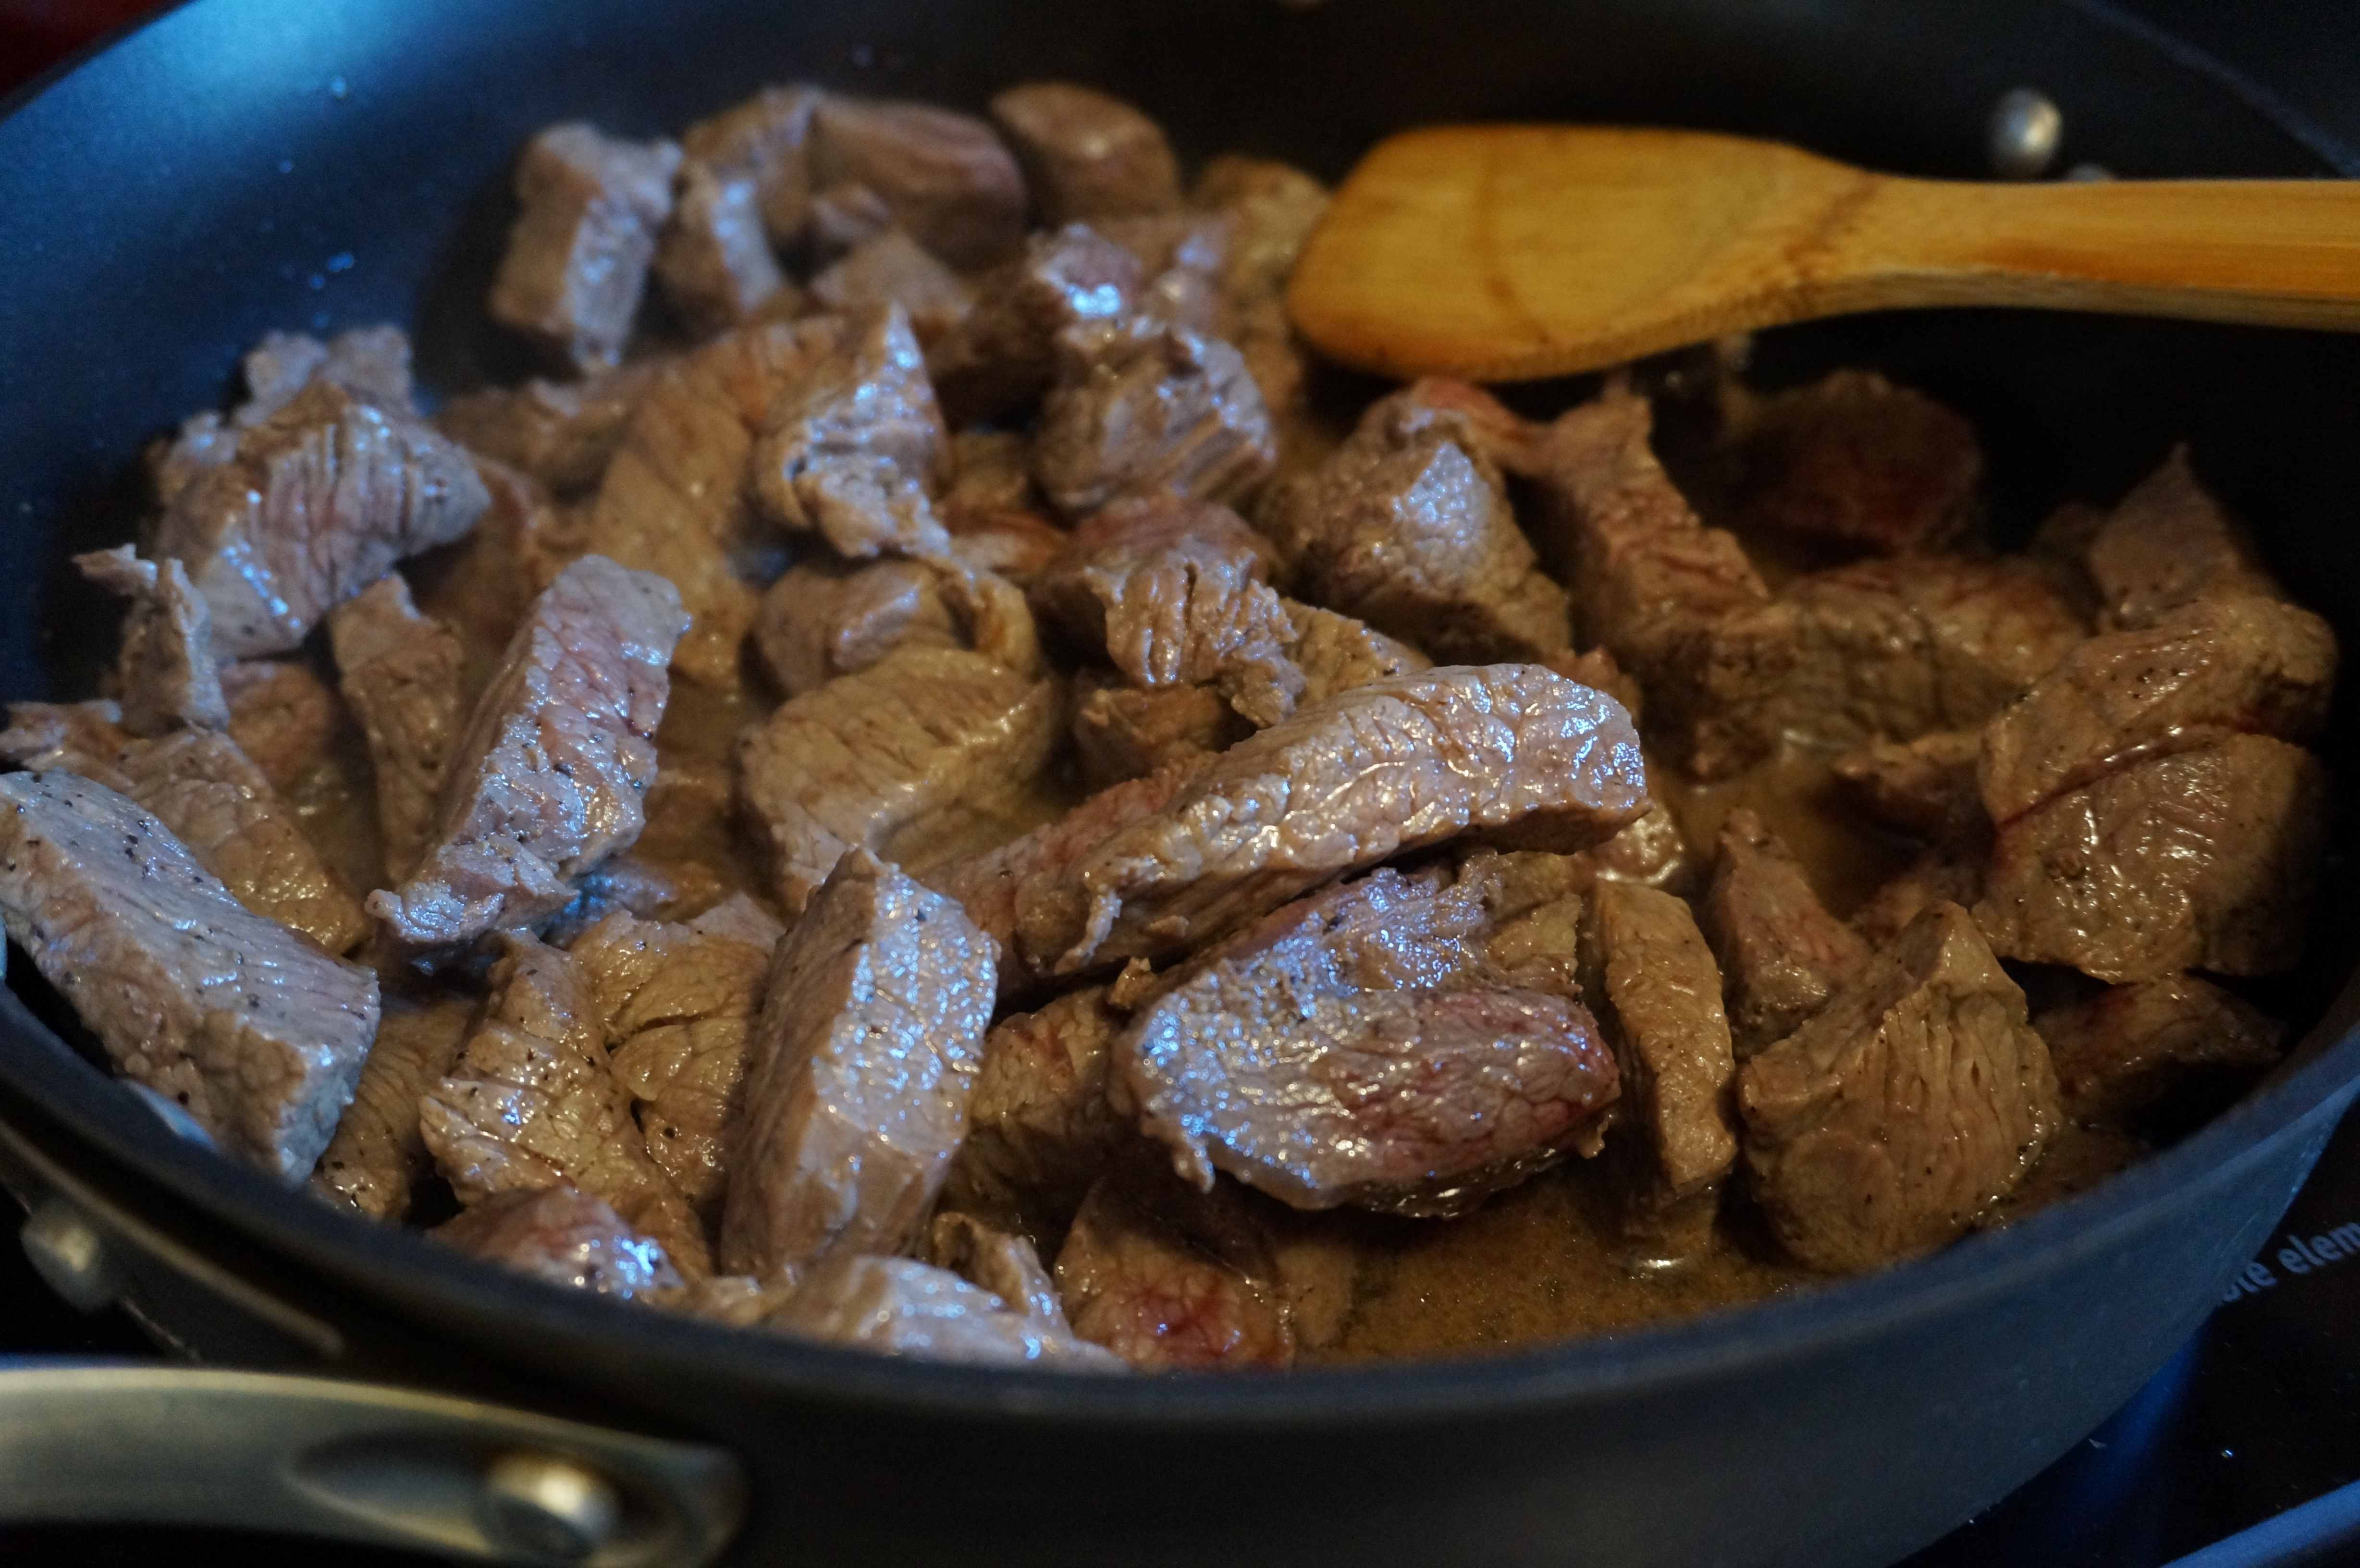
Season and brown the meat.

DSC00358

Set aside browned meat in a medium bowl.
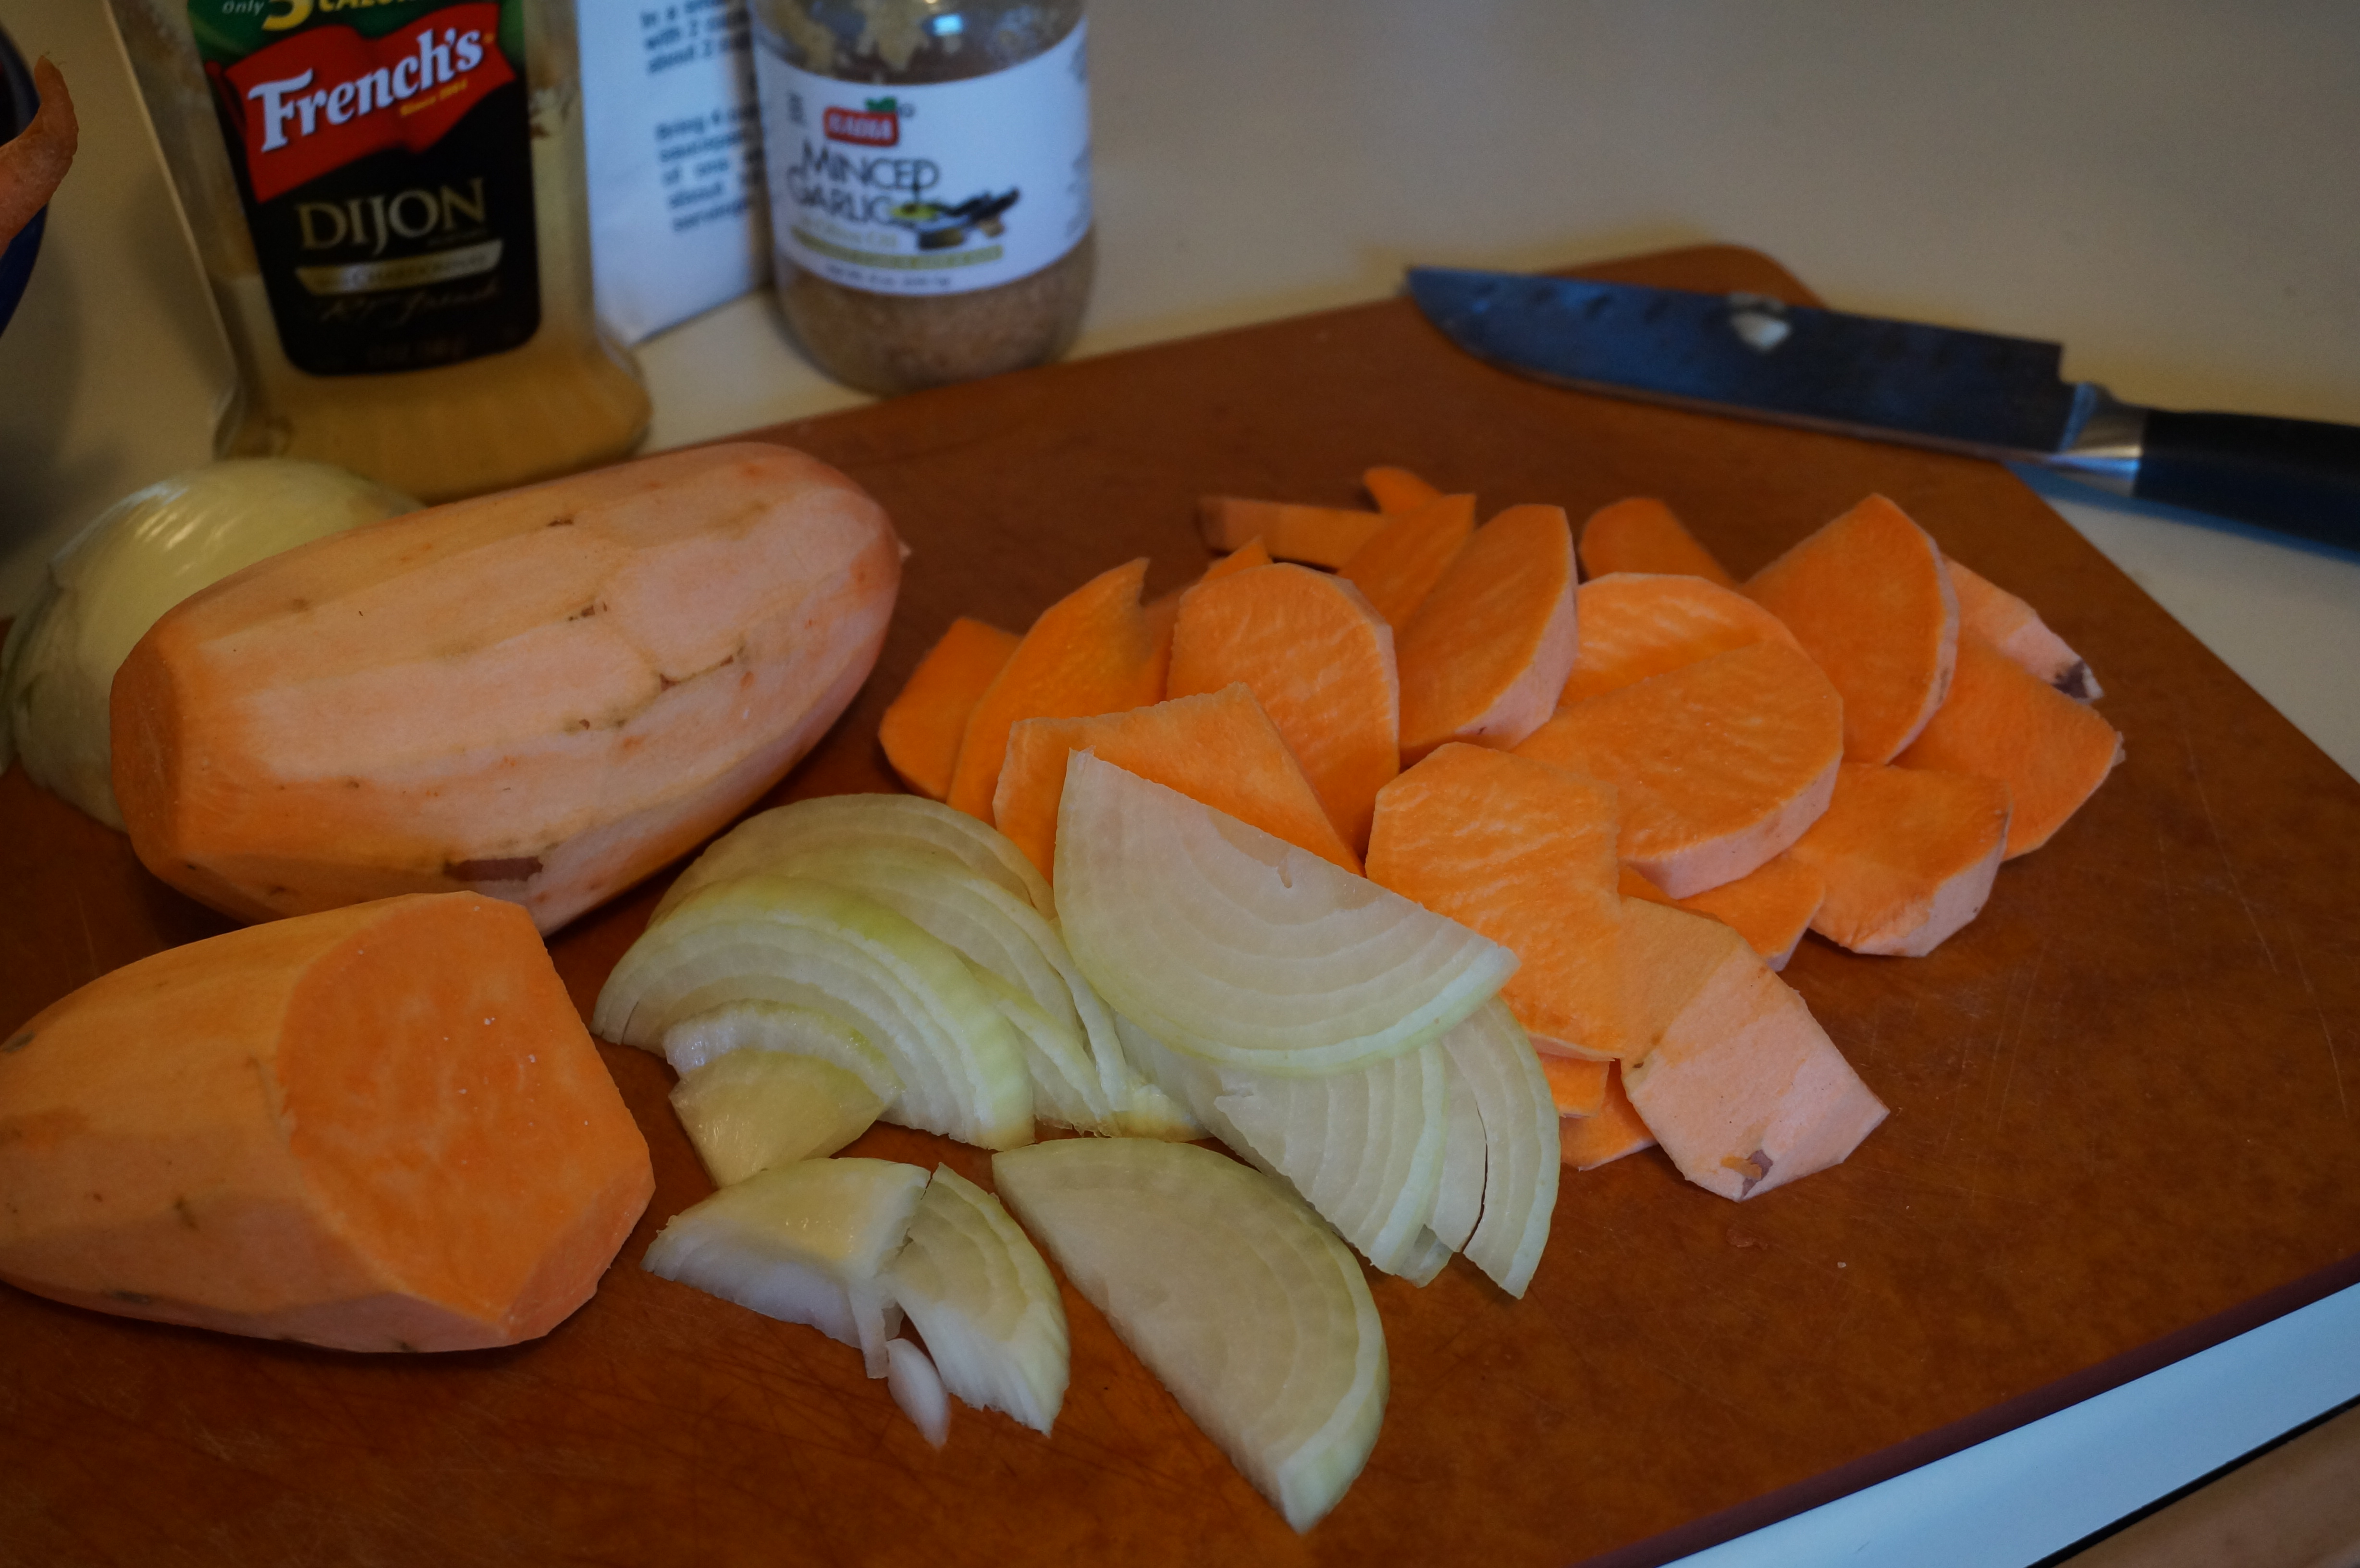
DSC00360

Chop, chop, chop!

DSC00362

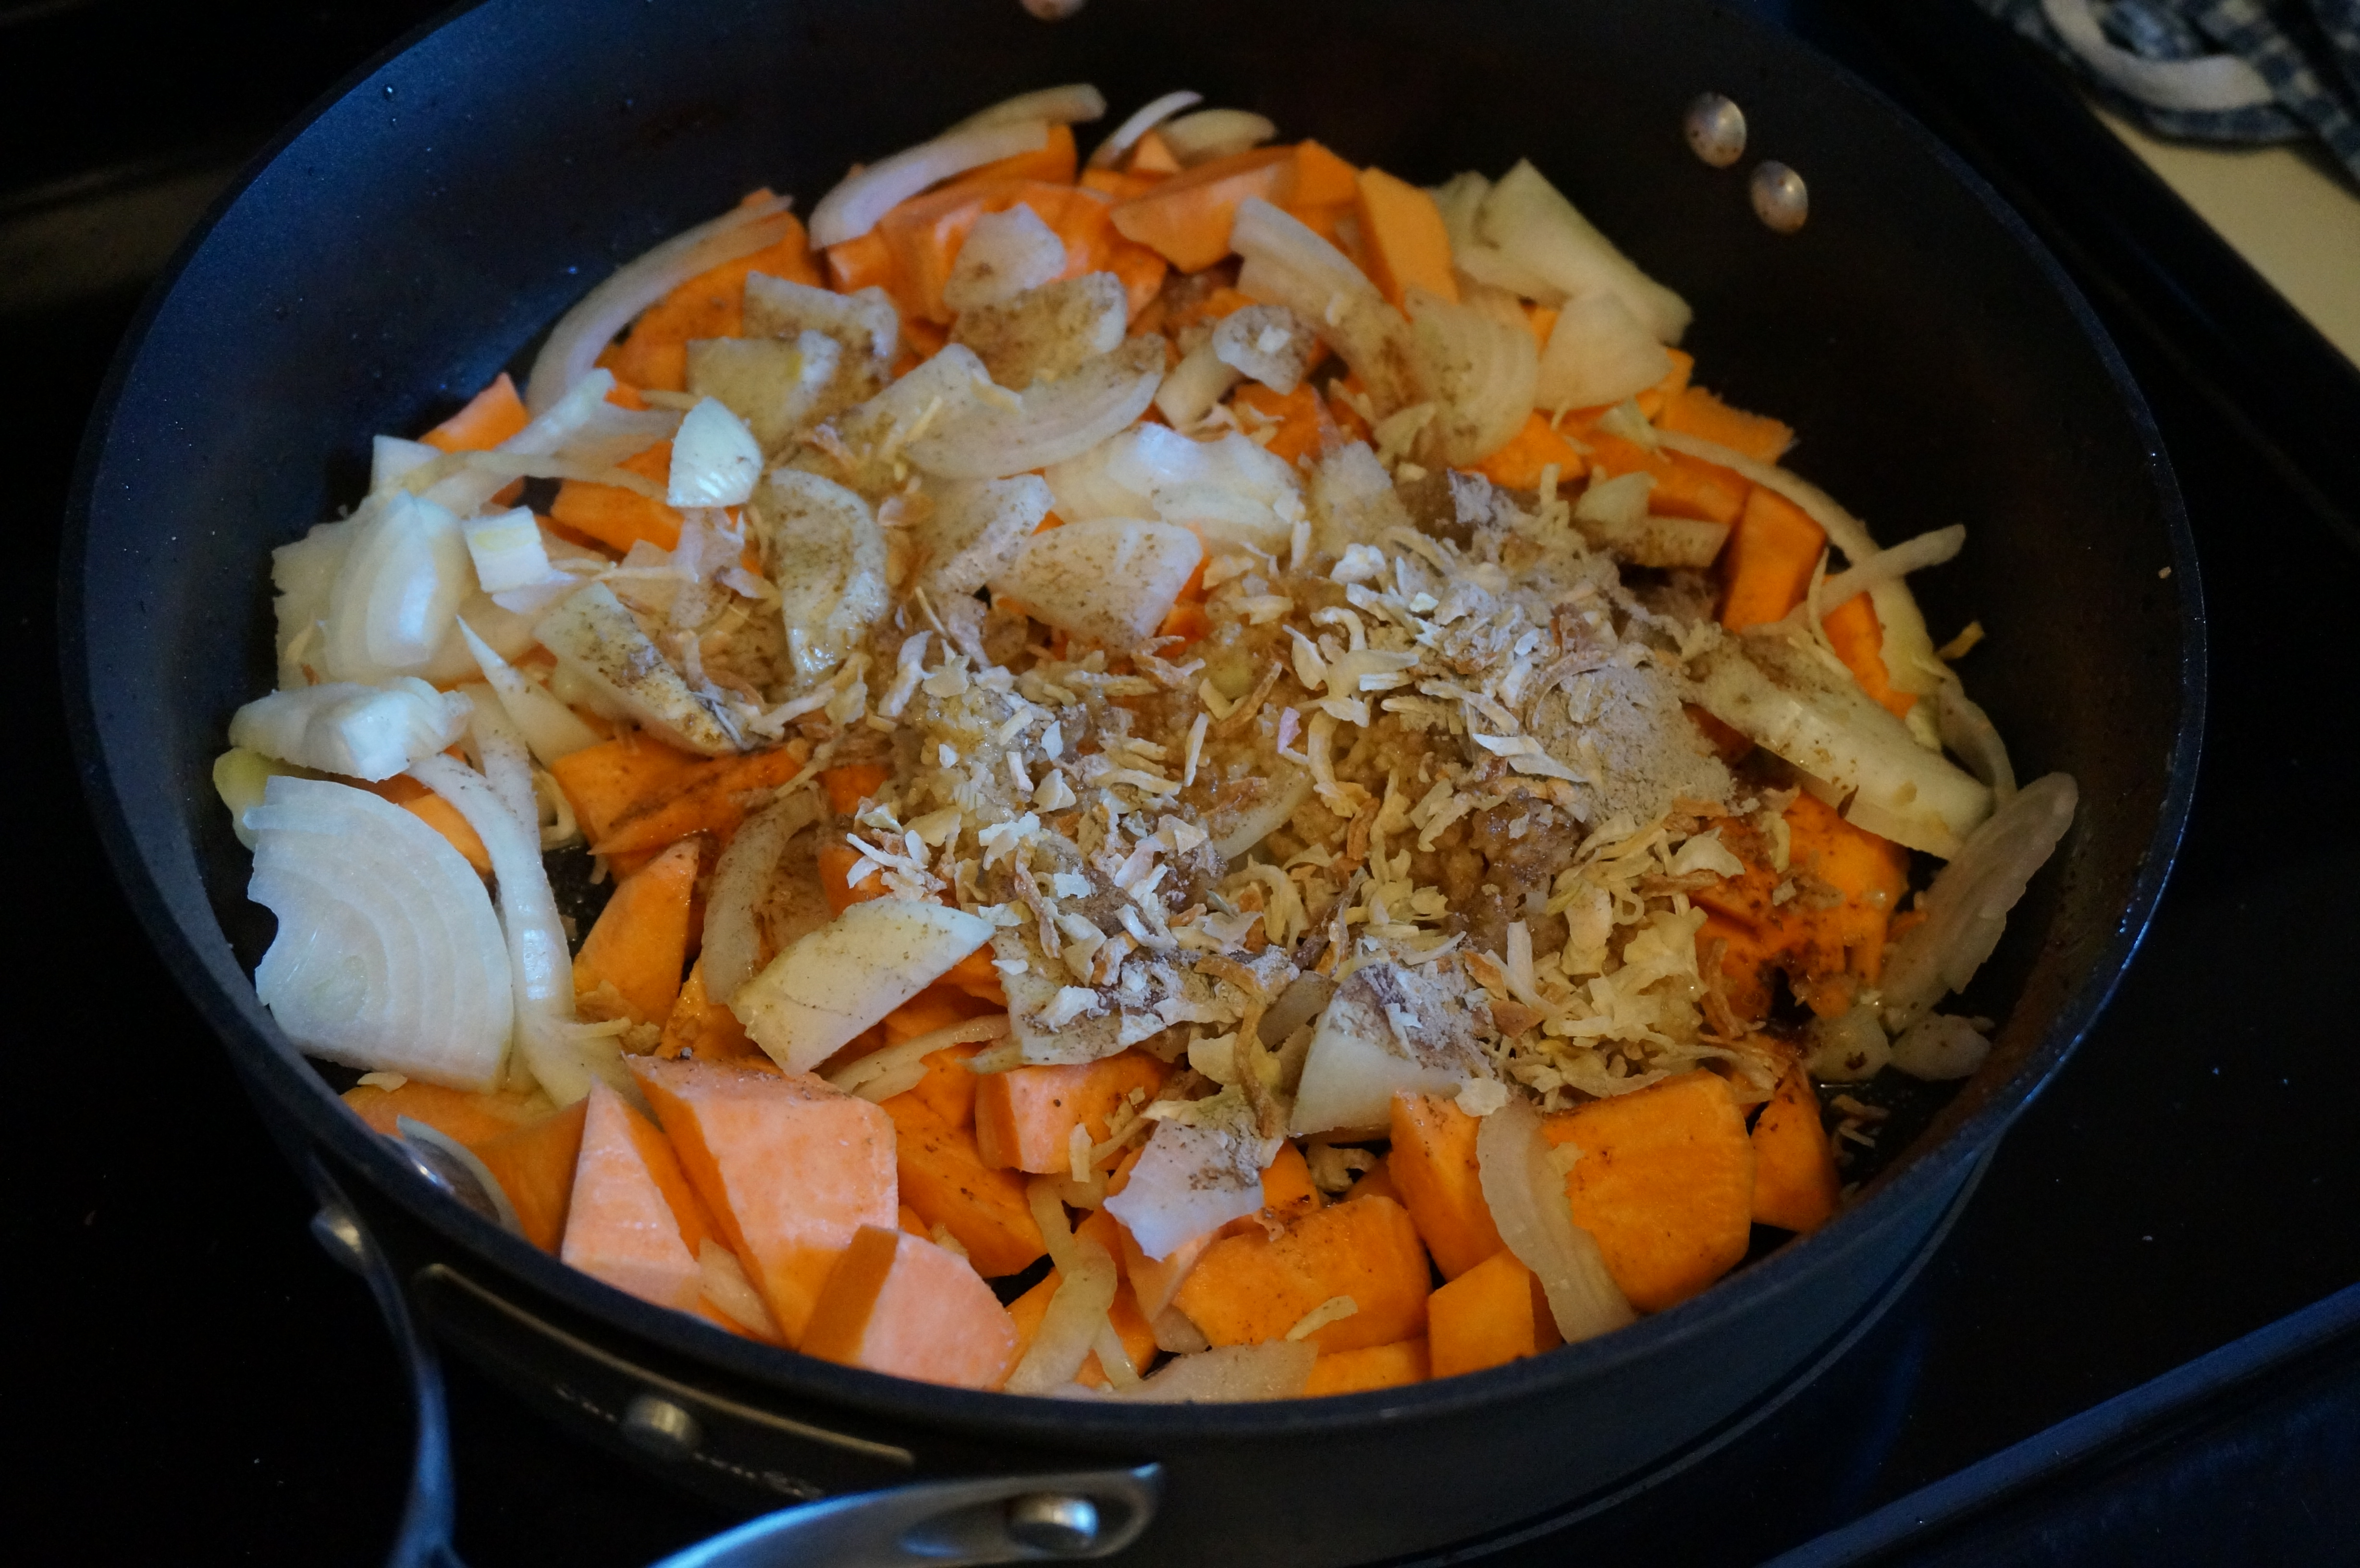
Add onion soup mix and garlic to sweet potatoes and onions.

DSC00365

 Then let them party in the meat bowl.

DSC00368

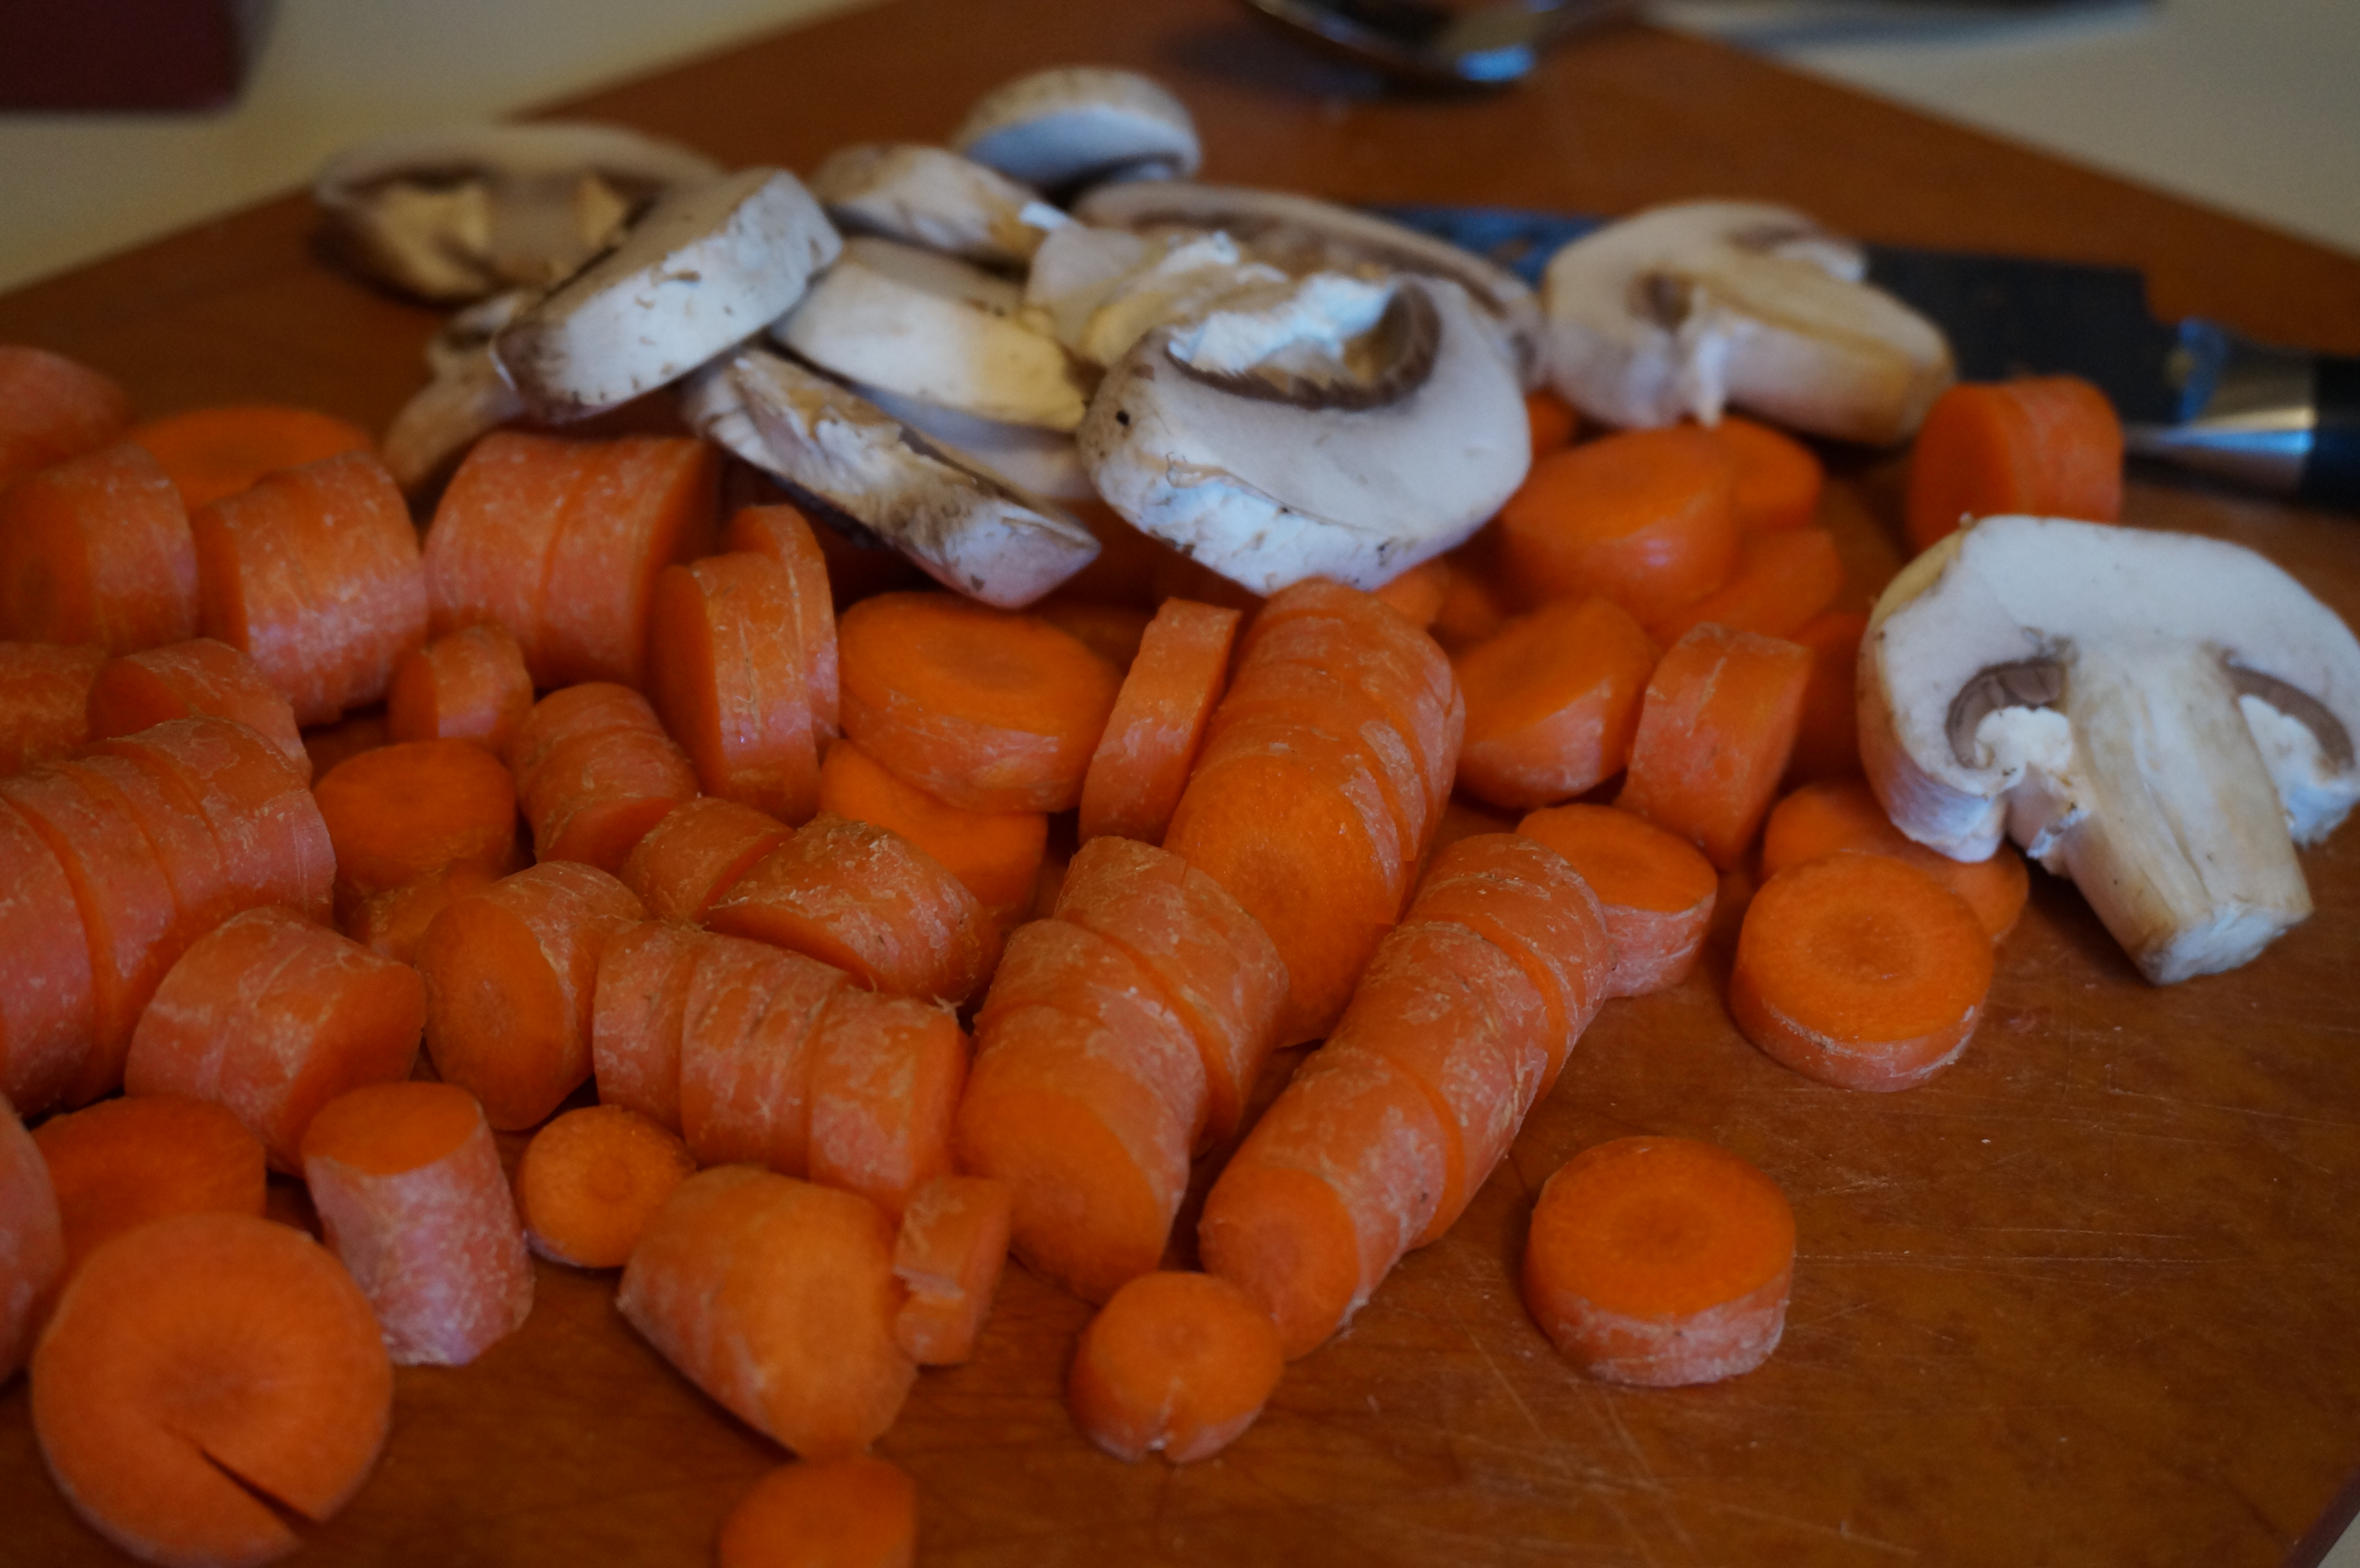
More chopping… (who said this was a quick one?)
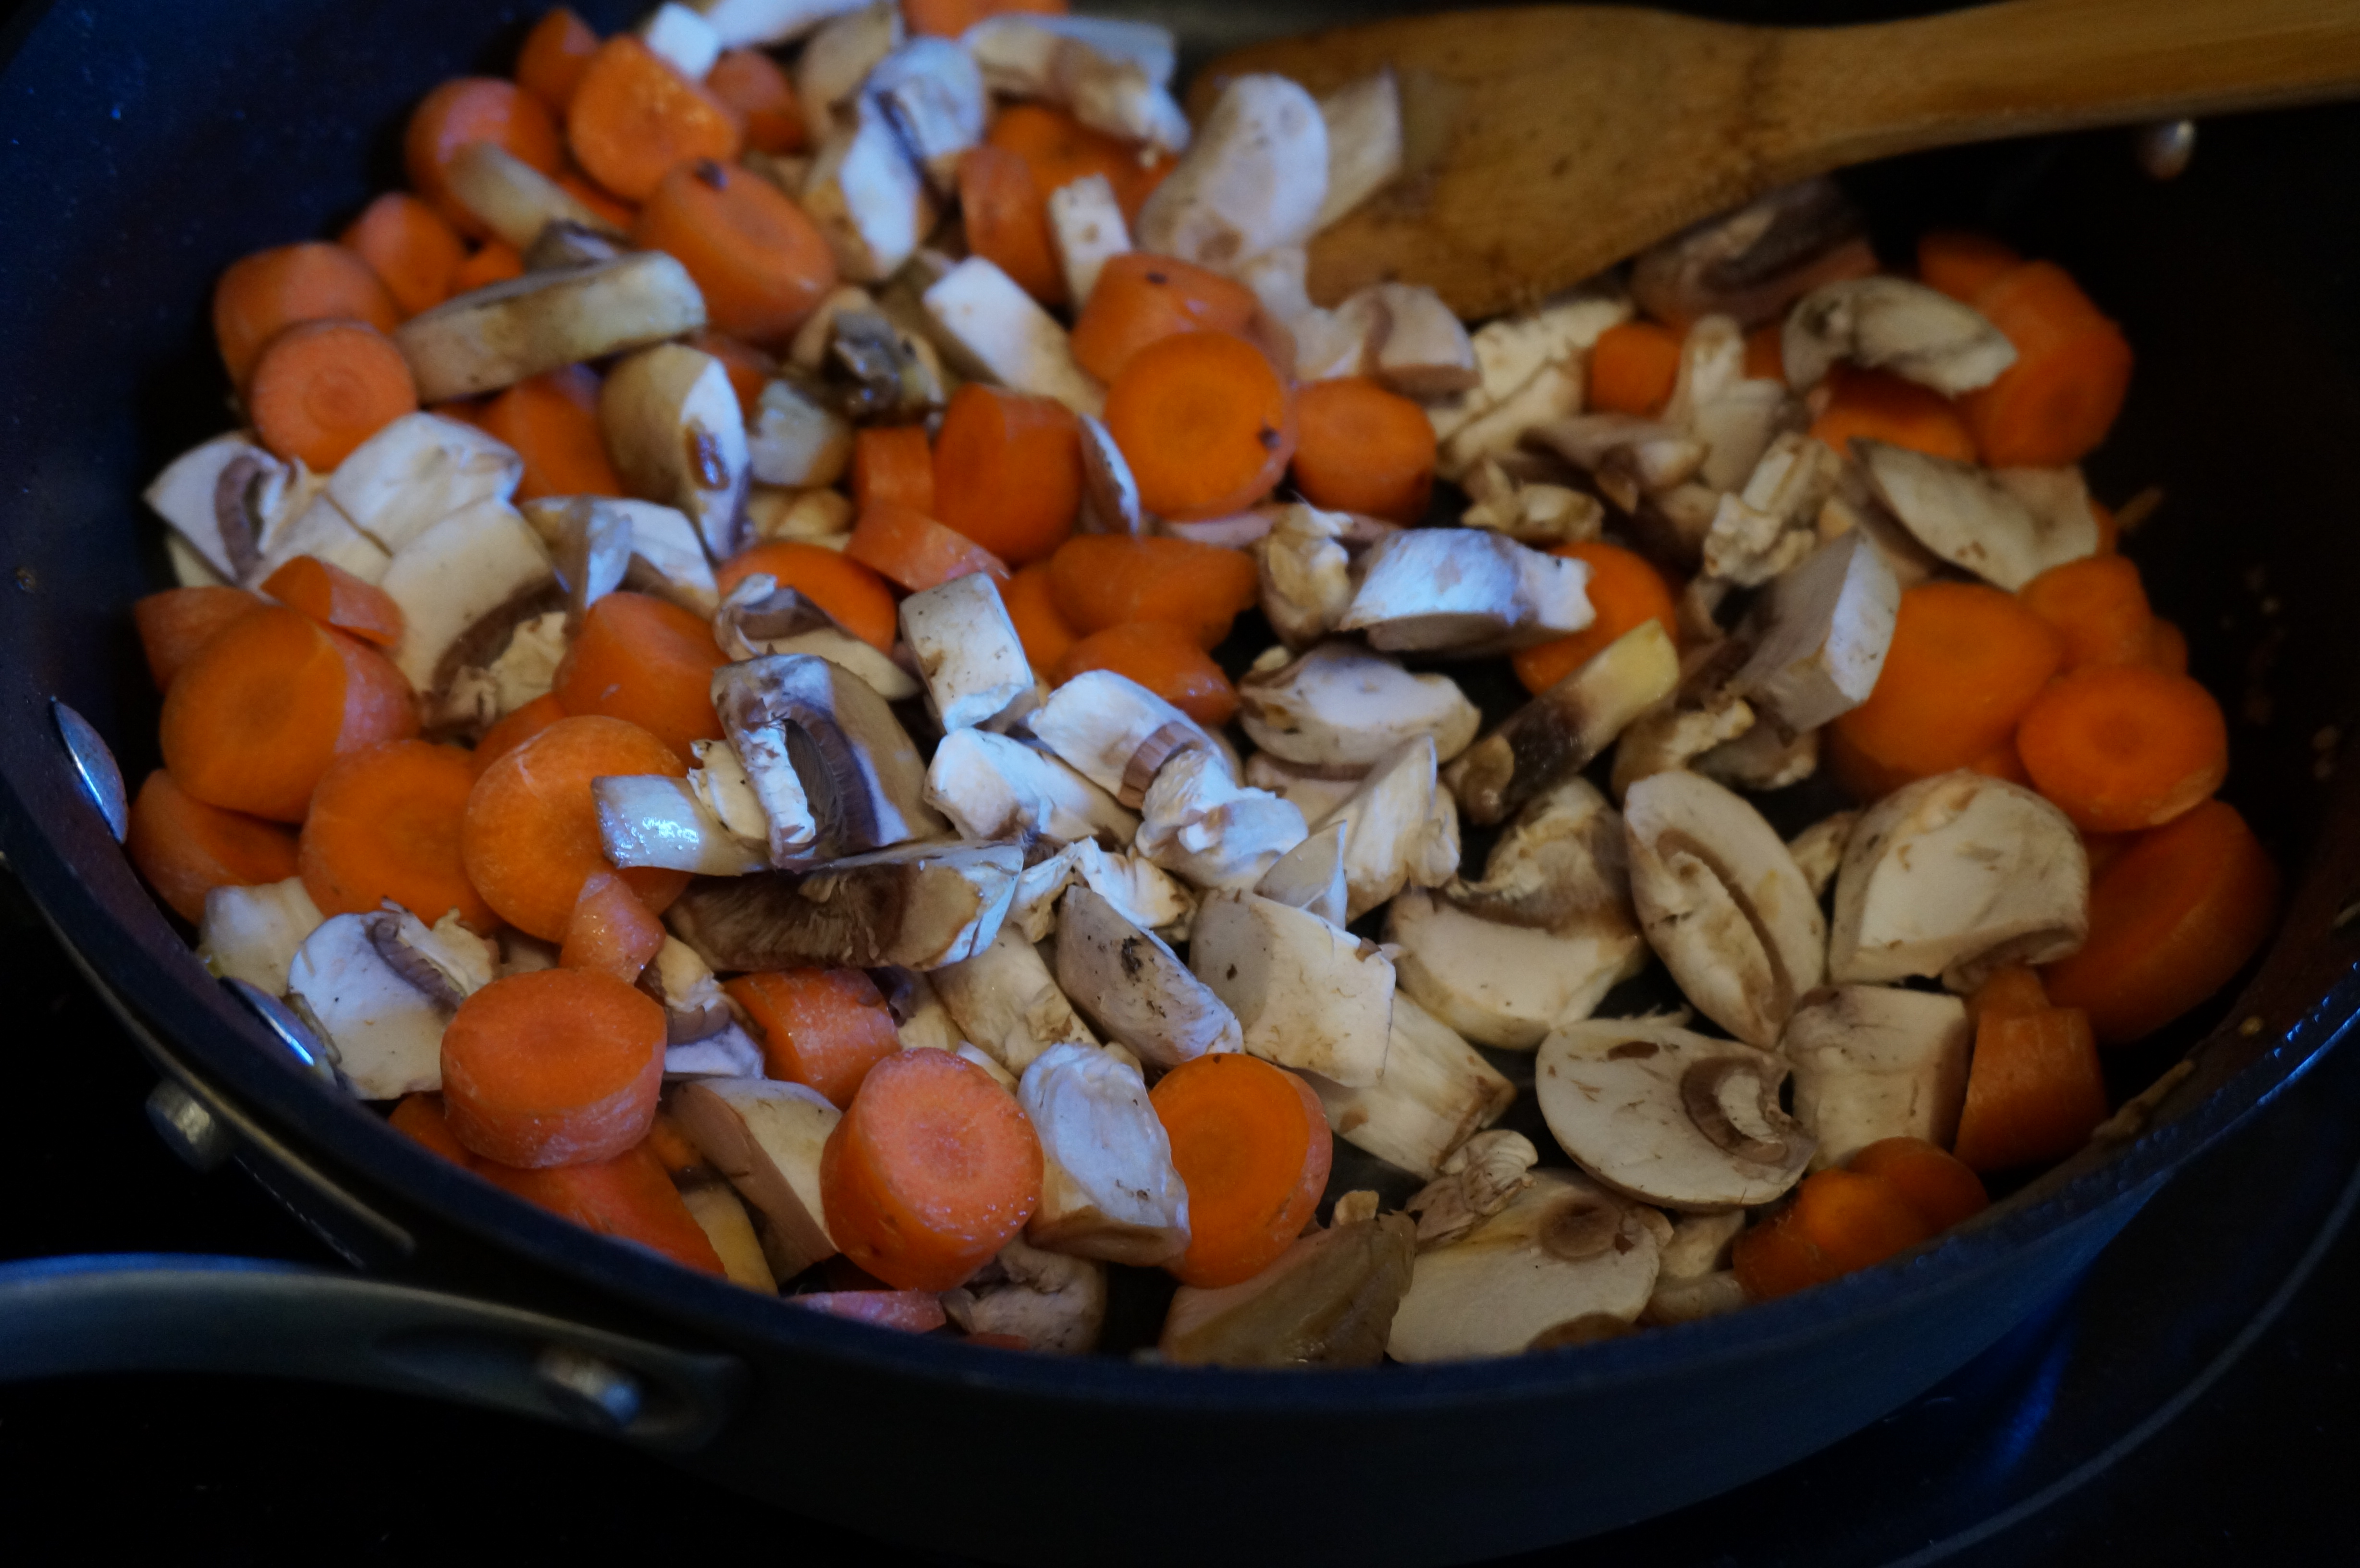
DSC00369

Cook until soft.

DSC00370

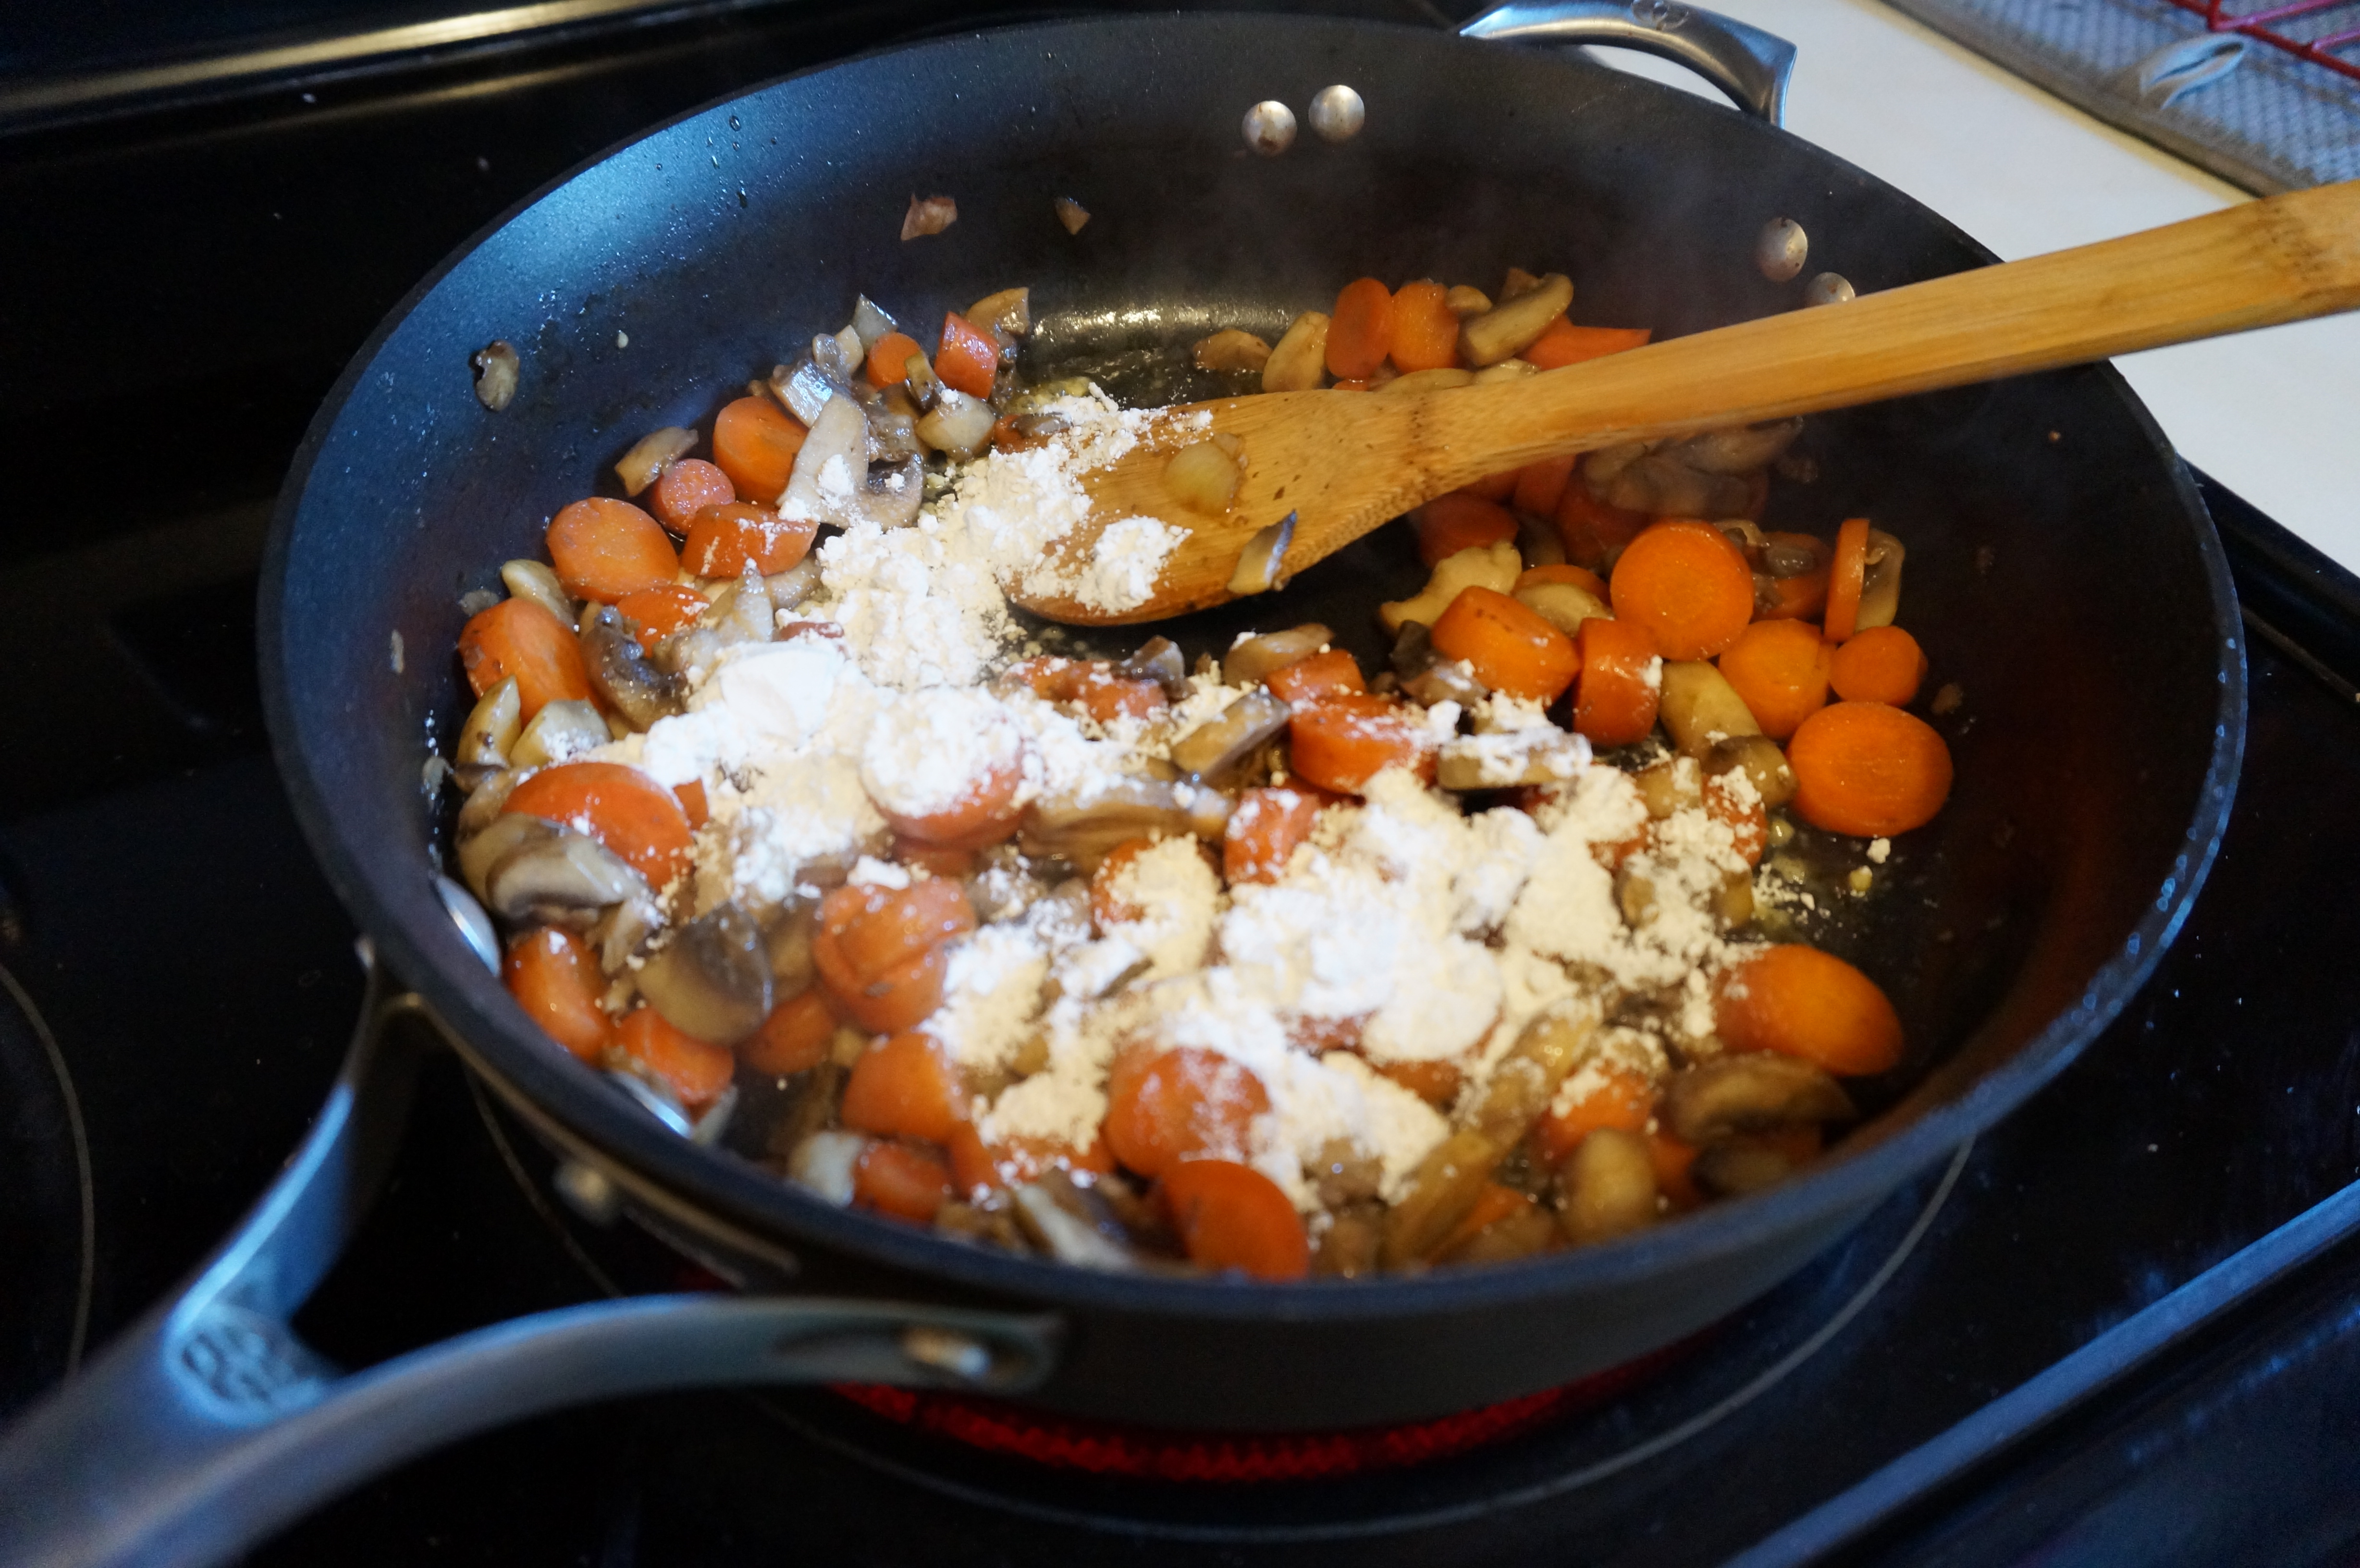
Adding flour acts as a thickener for the sauce!

DSC00371

DSC00372

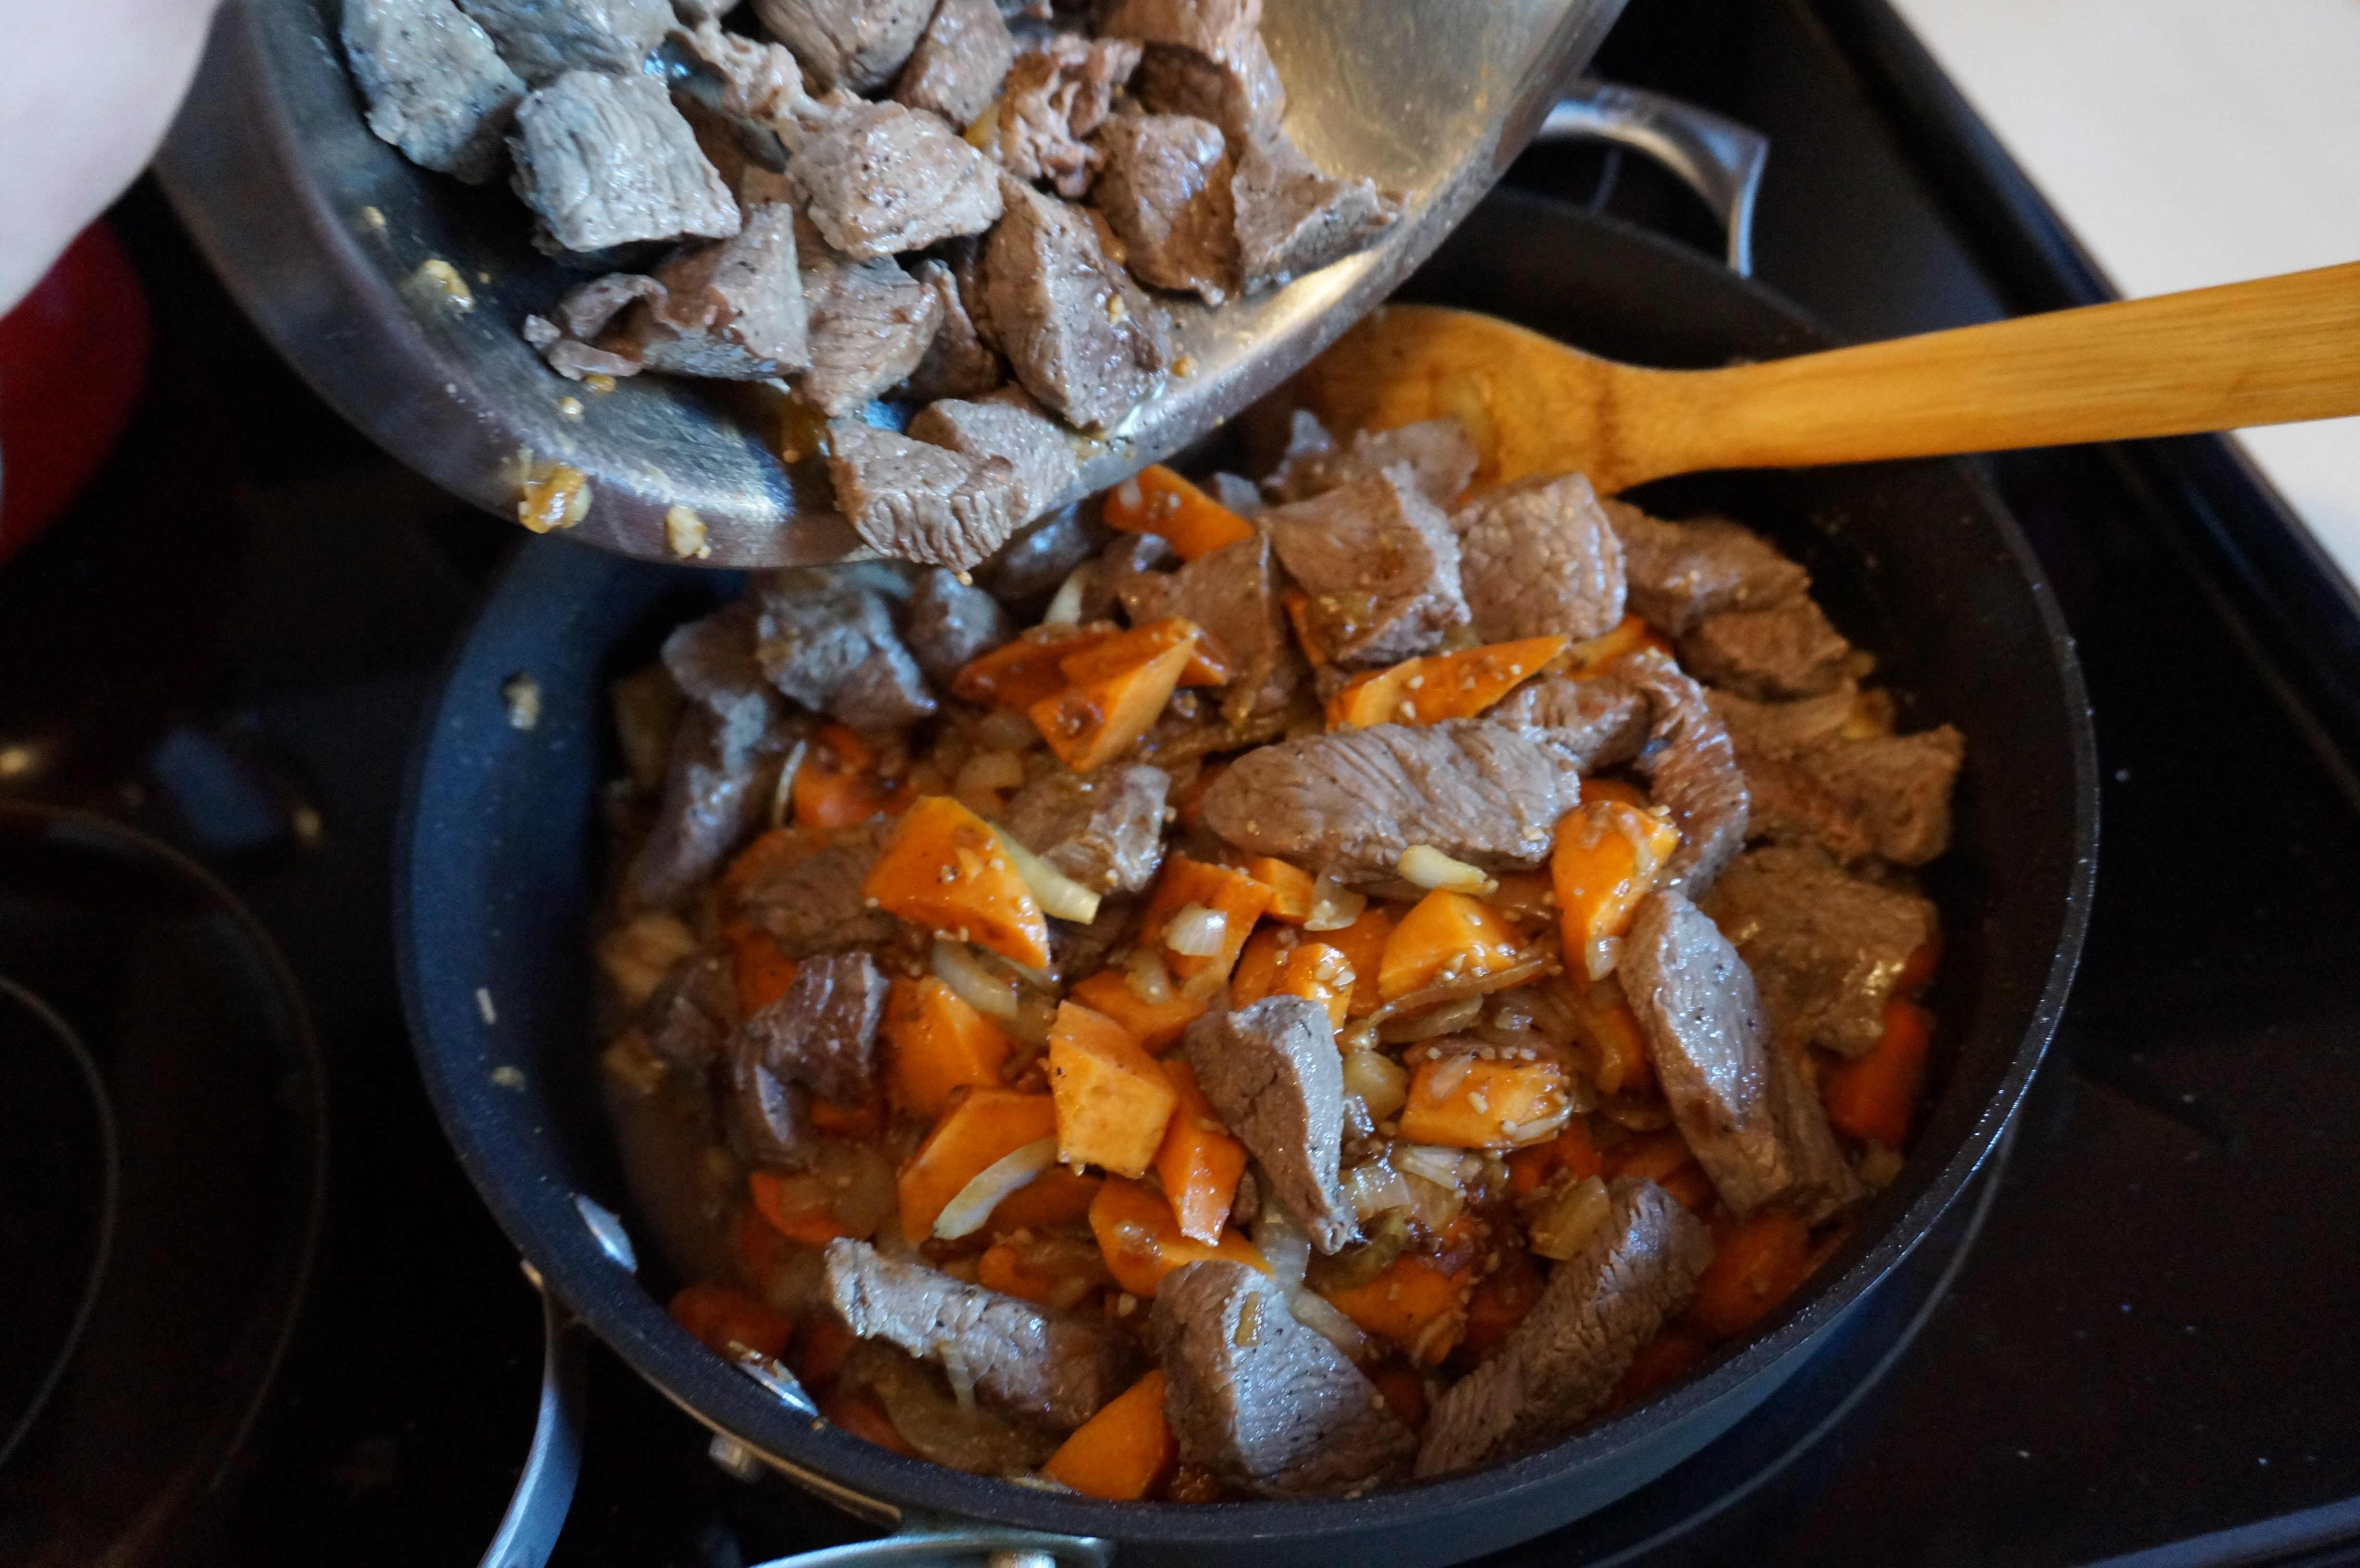
 Add back the meat and onions.

DSC00374

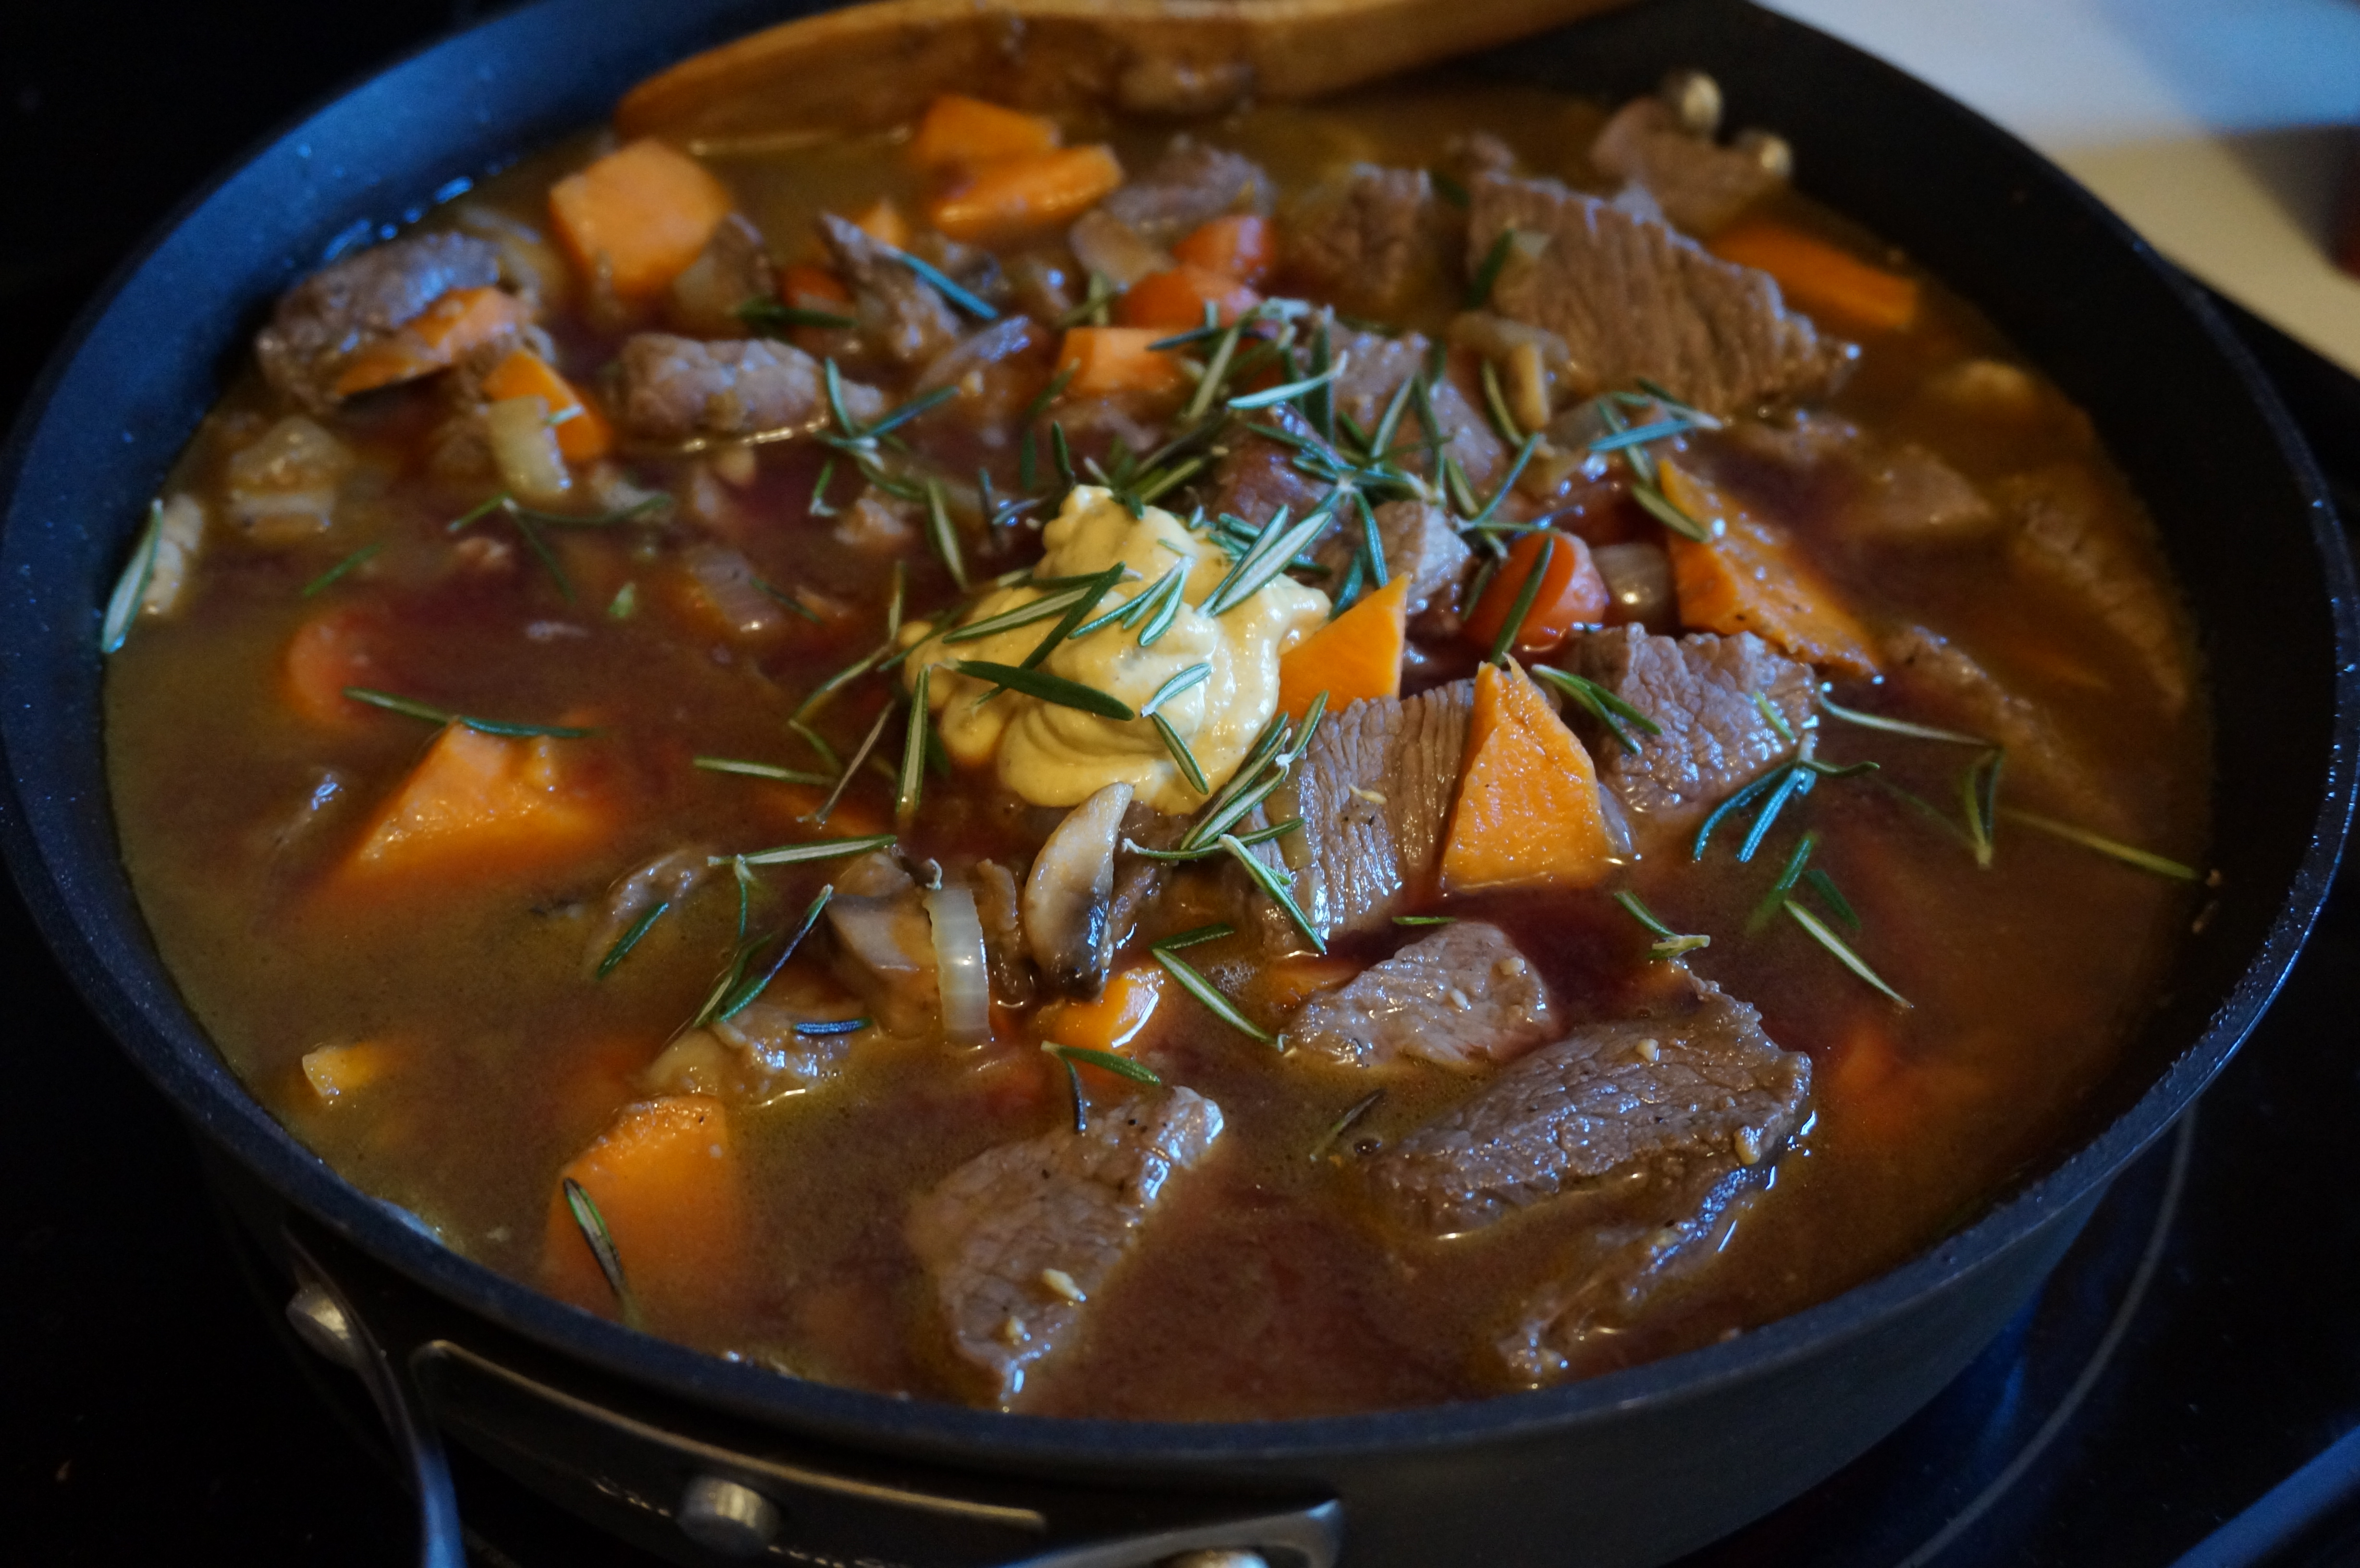
Add the broth, spices, mustard, wine, and peas.

DSC00377

Simmer at least 15 minutes. Mine took closer to 20!

DSC00381

Add corn starch right at the end to thicken the sauce.

DSC00397

Transfer to casserole dish and sprinkle with a bit more rosemary.

DSC00398

Add dry ingredients to medium bowl. Cut in shortening.

DSC00399

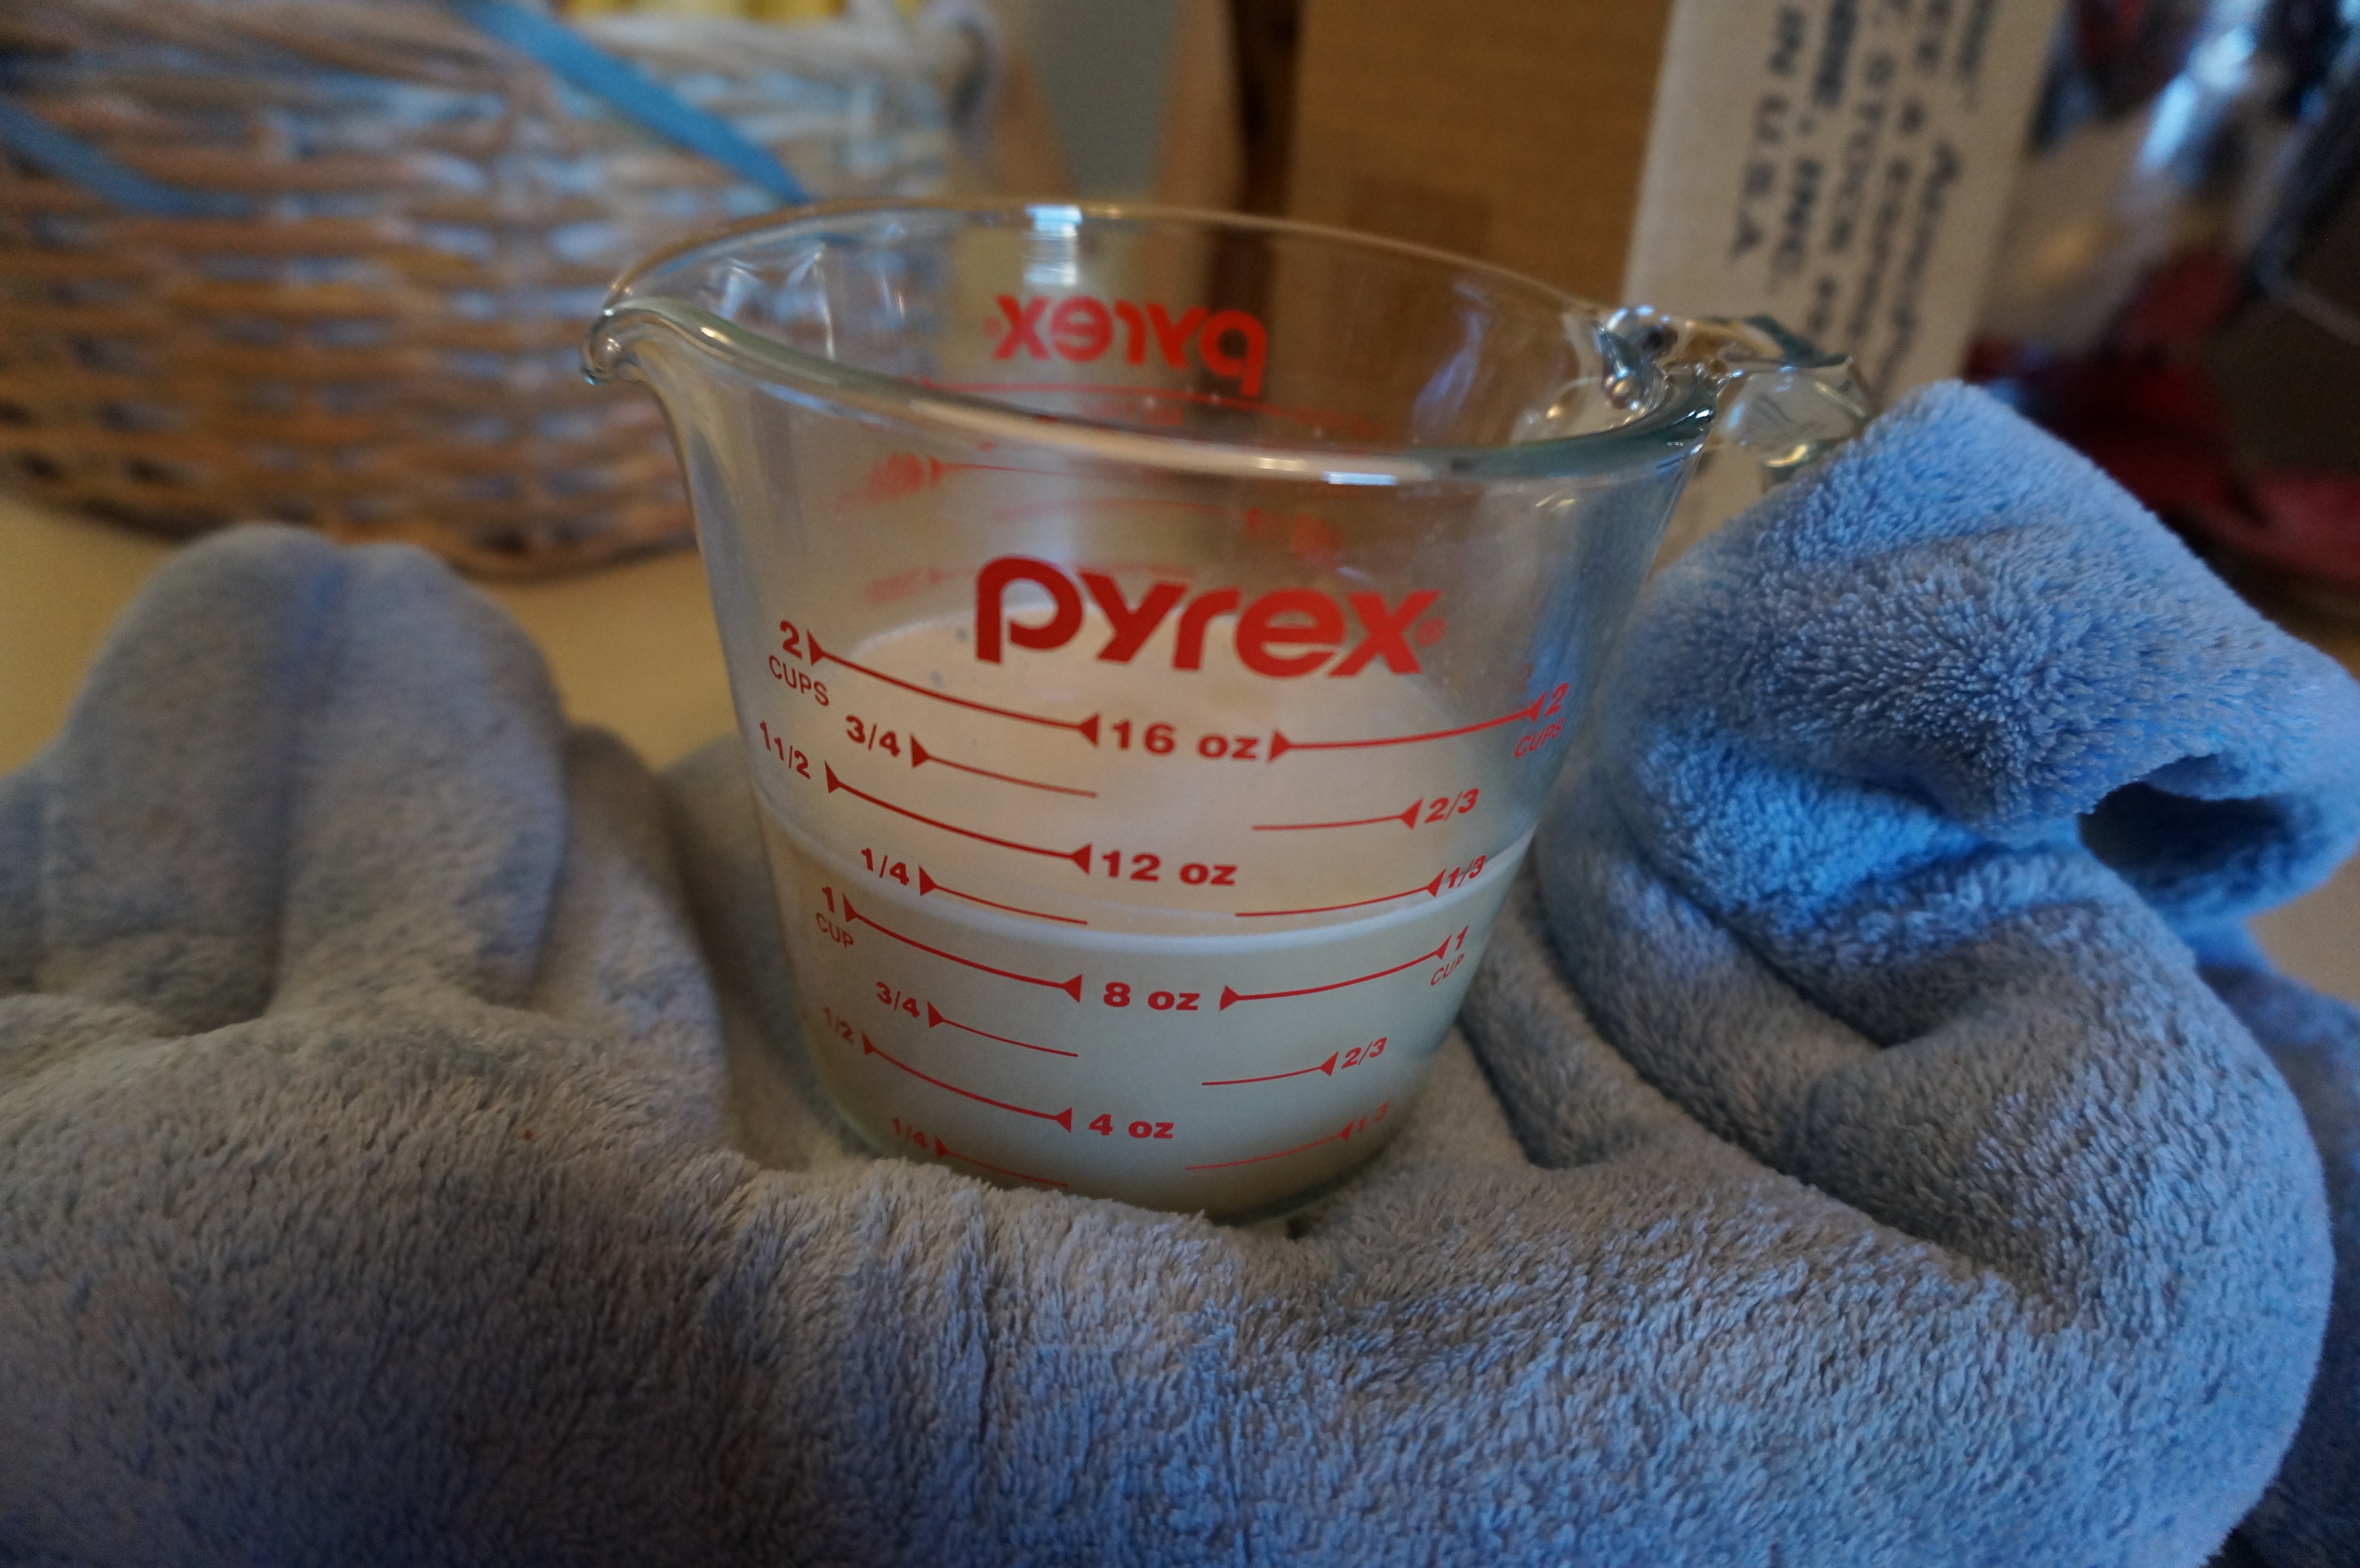
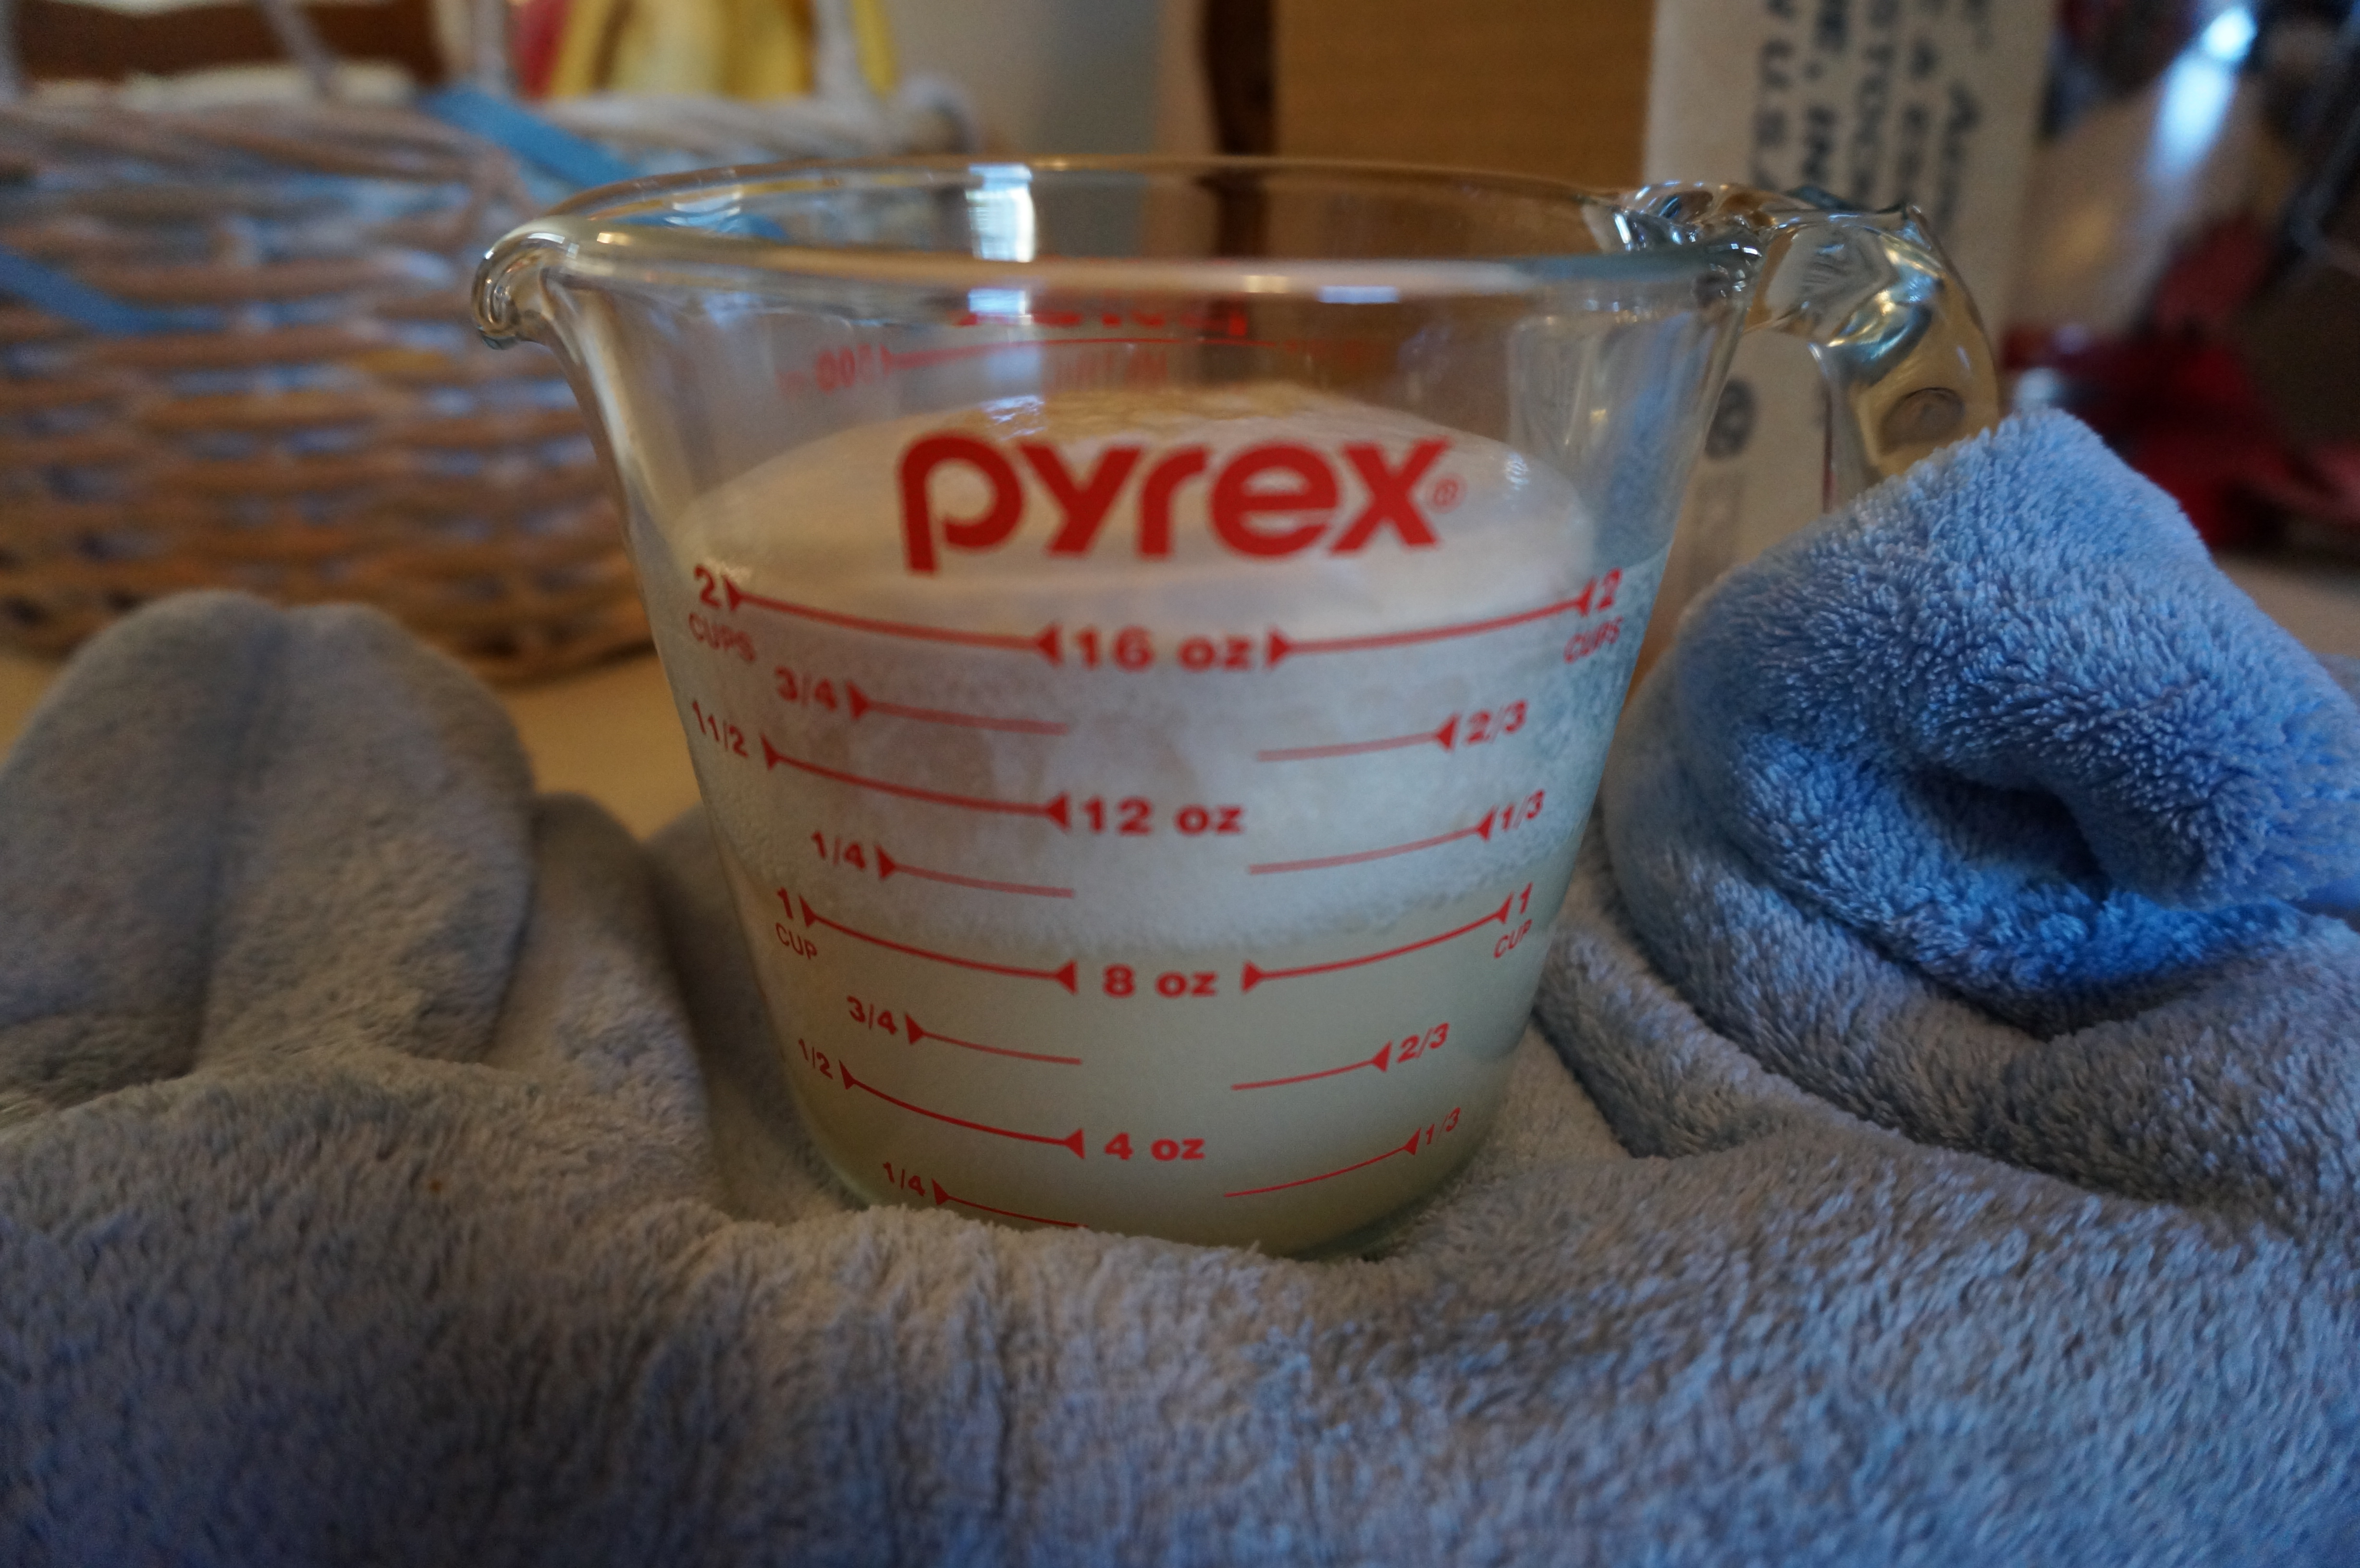
Add milk until the dough just comes off the edge of the bowl.

DSC00402

Transfer to lightly floured surface and knead.

DSC00406b

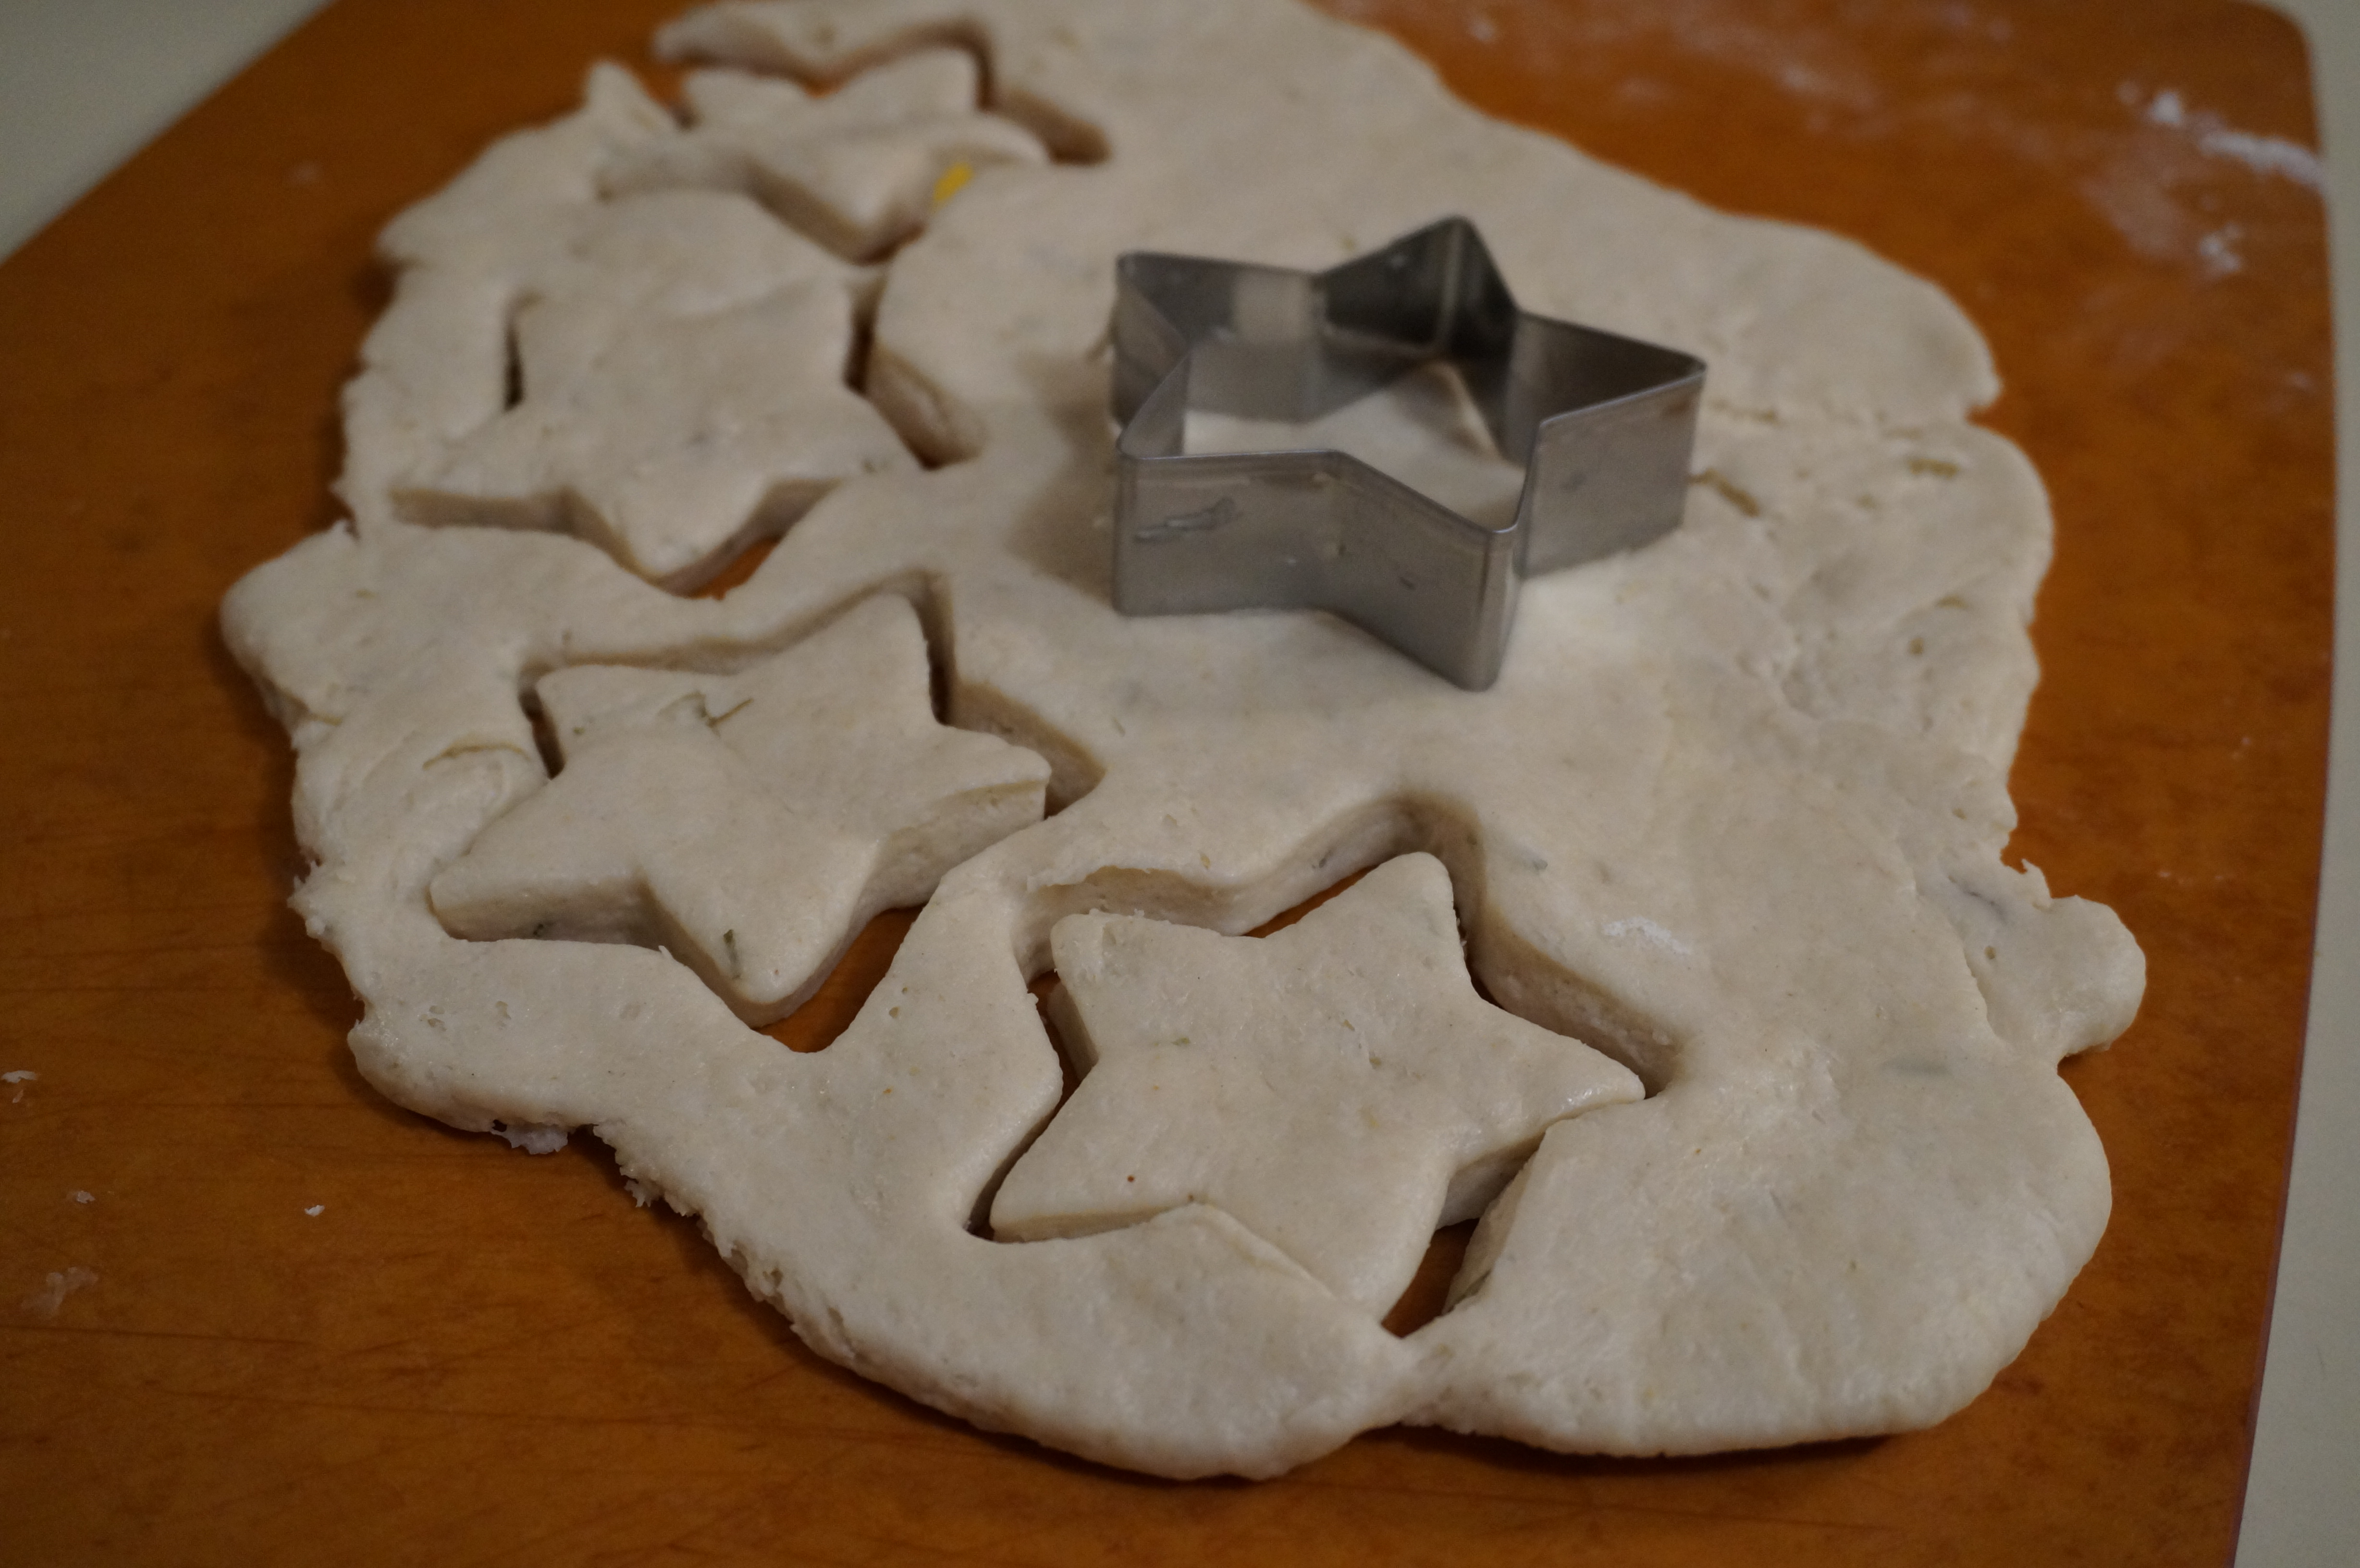
Roll out into a disc about 1/2″ thick and cut into star shapes with a cookie cutter!

DSC00407

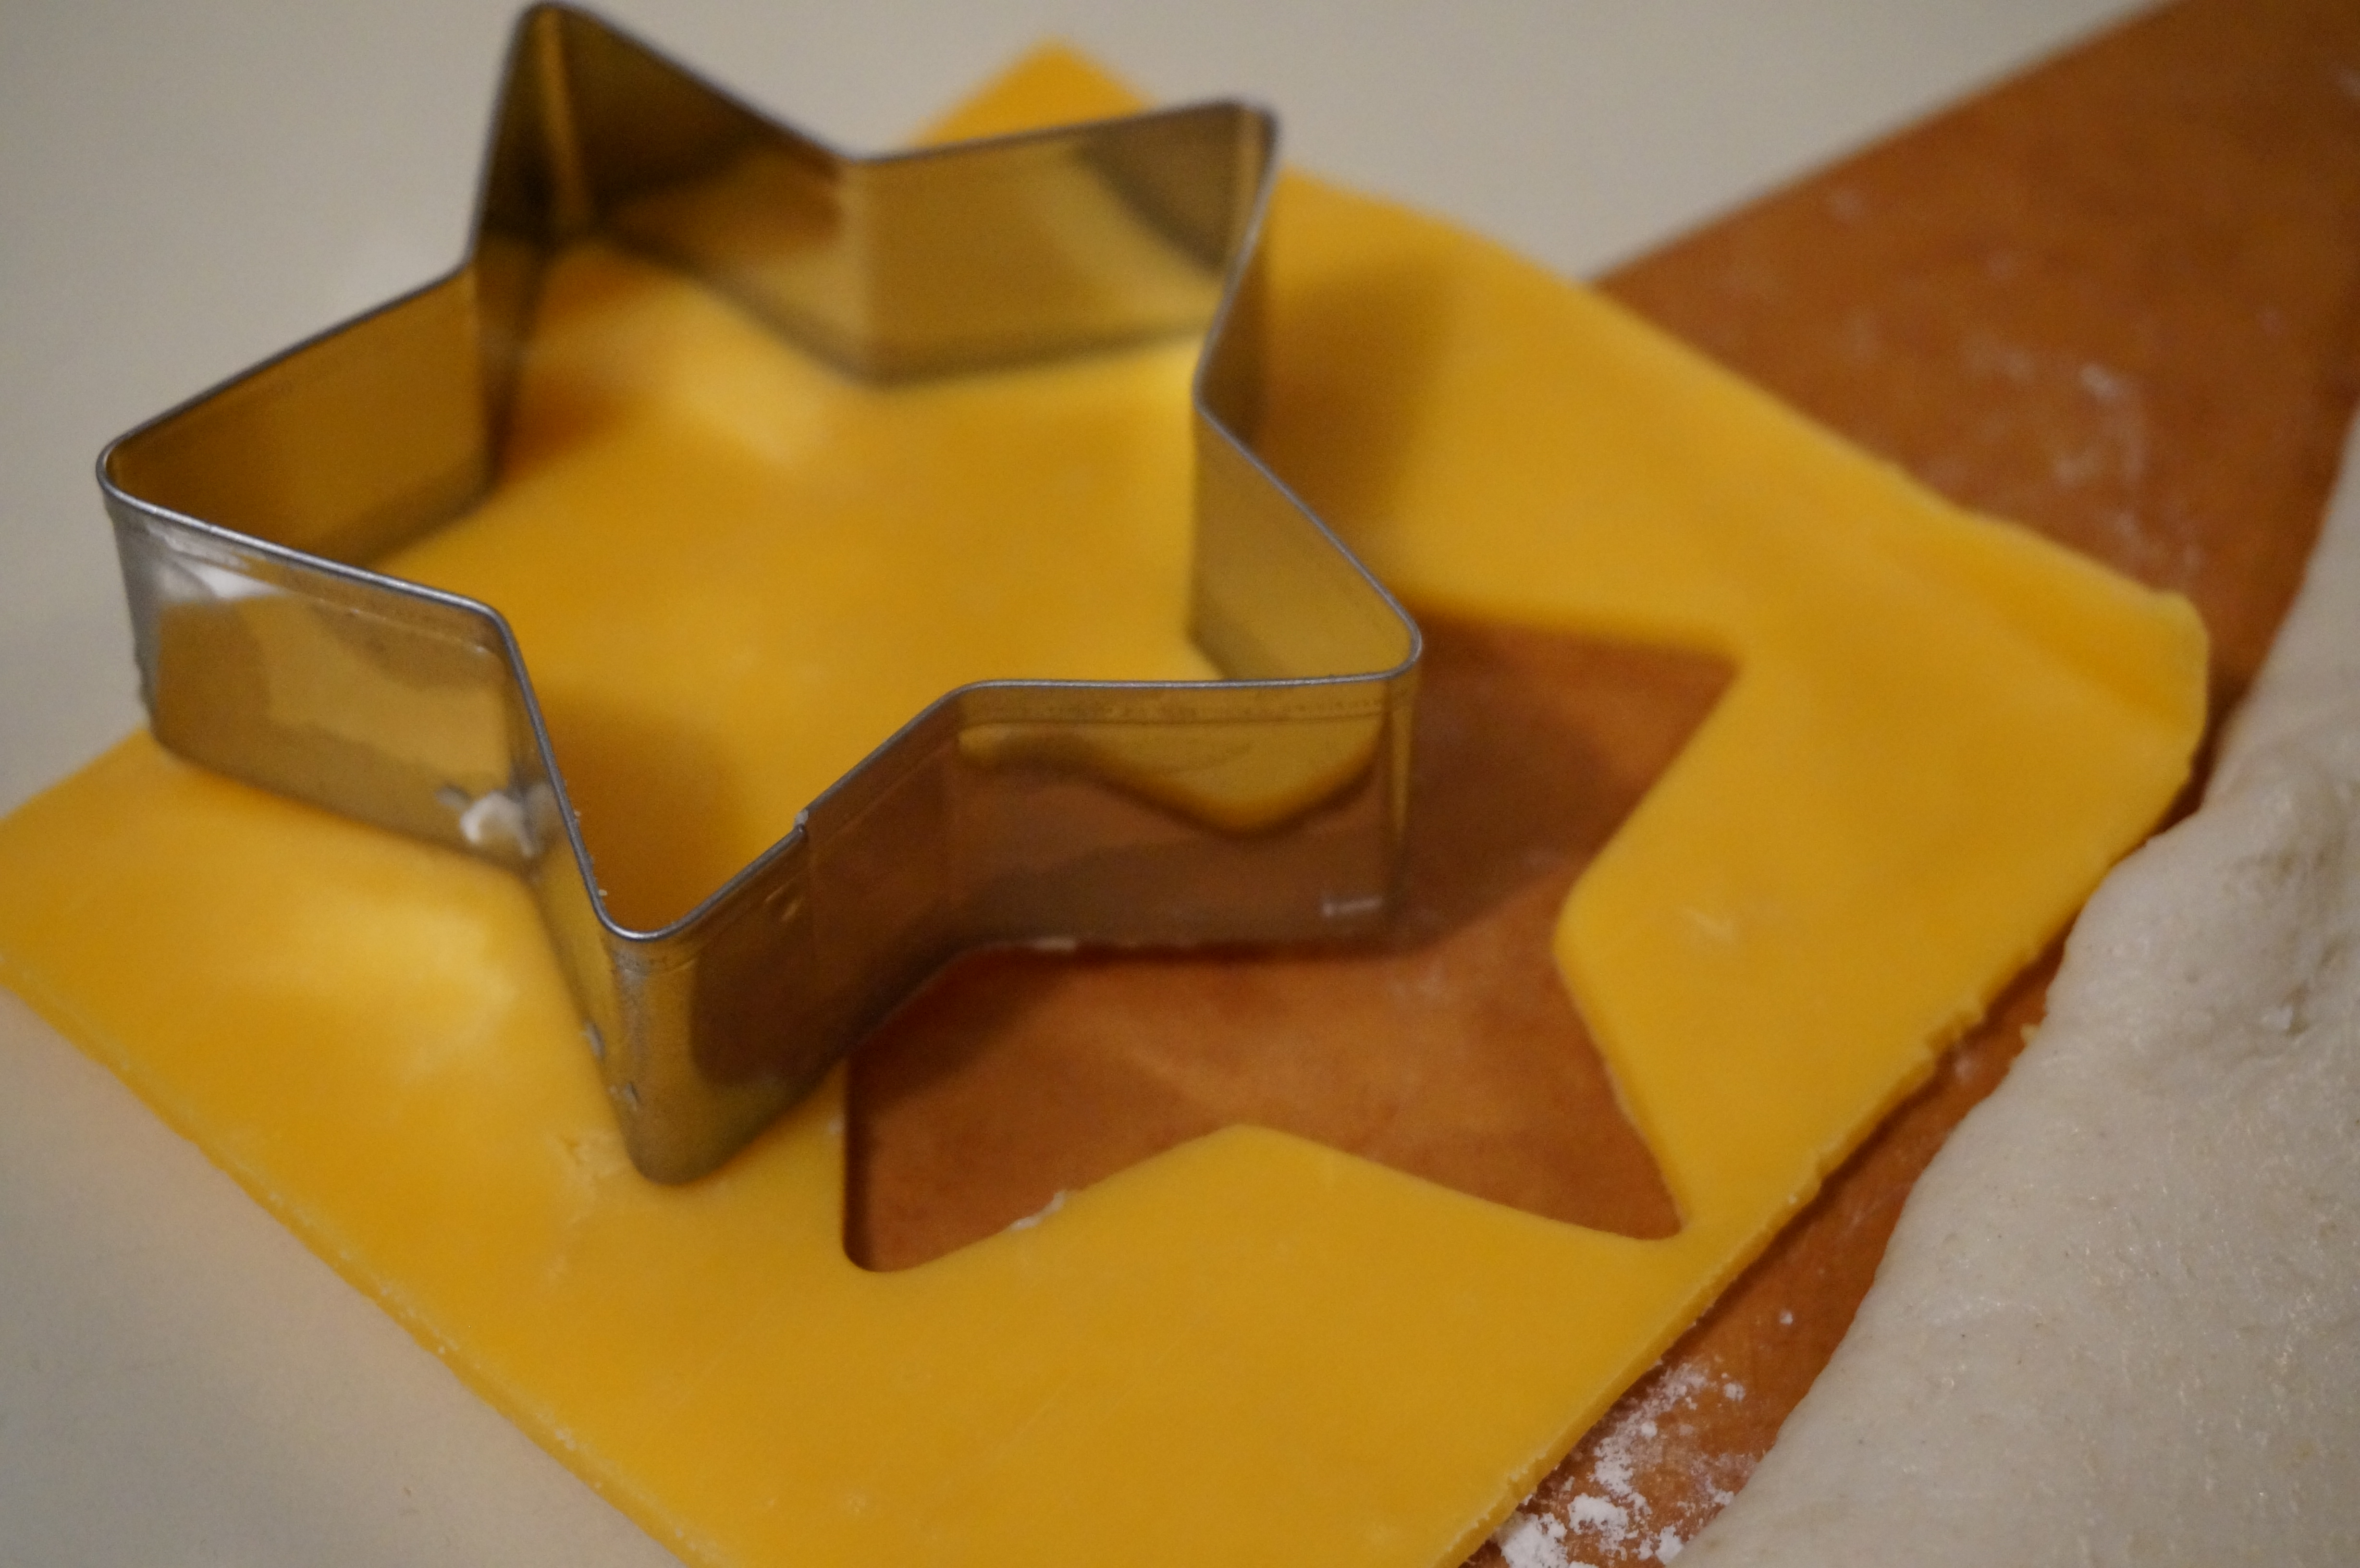
Do the same with the cheese…

DSC00409

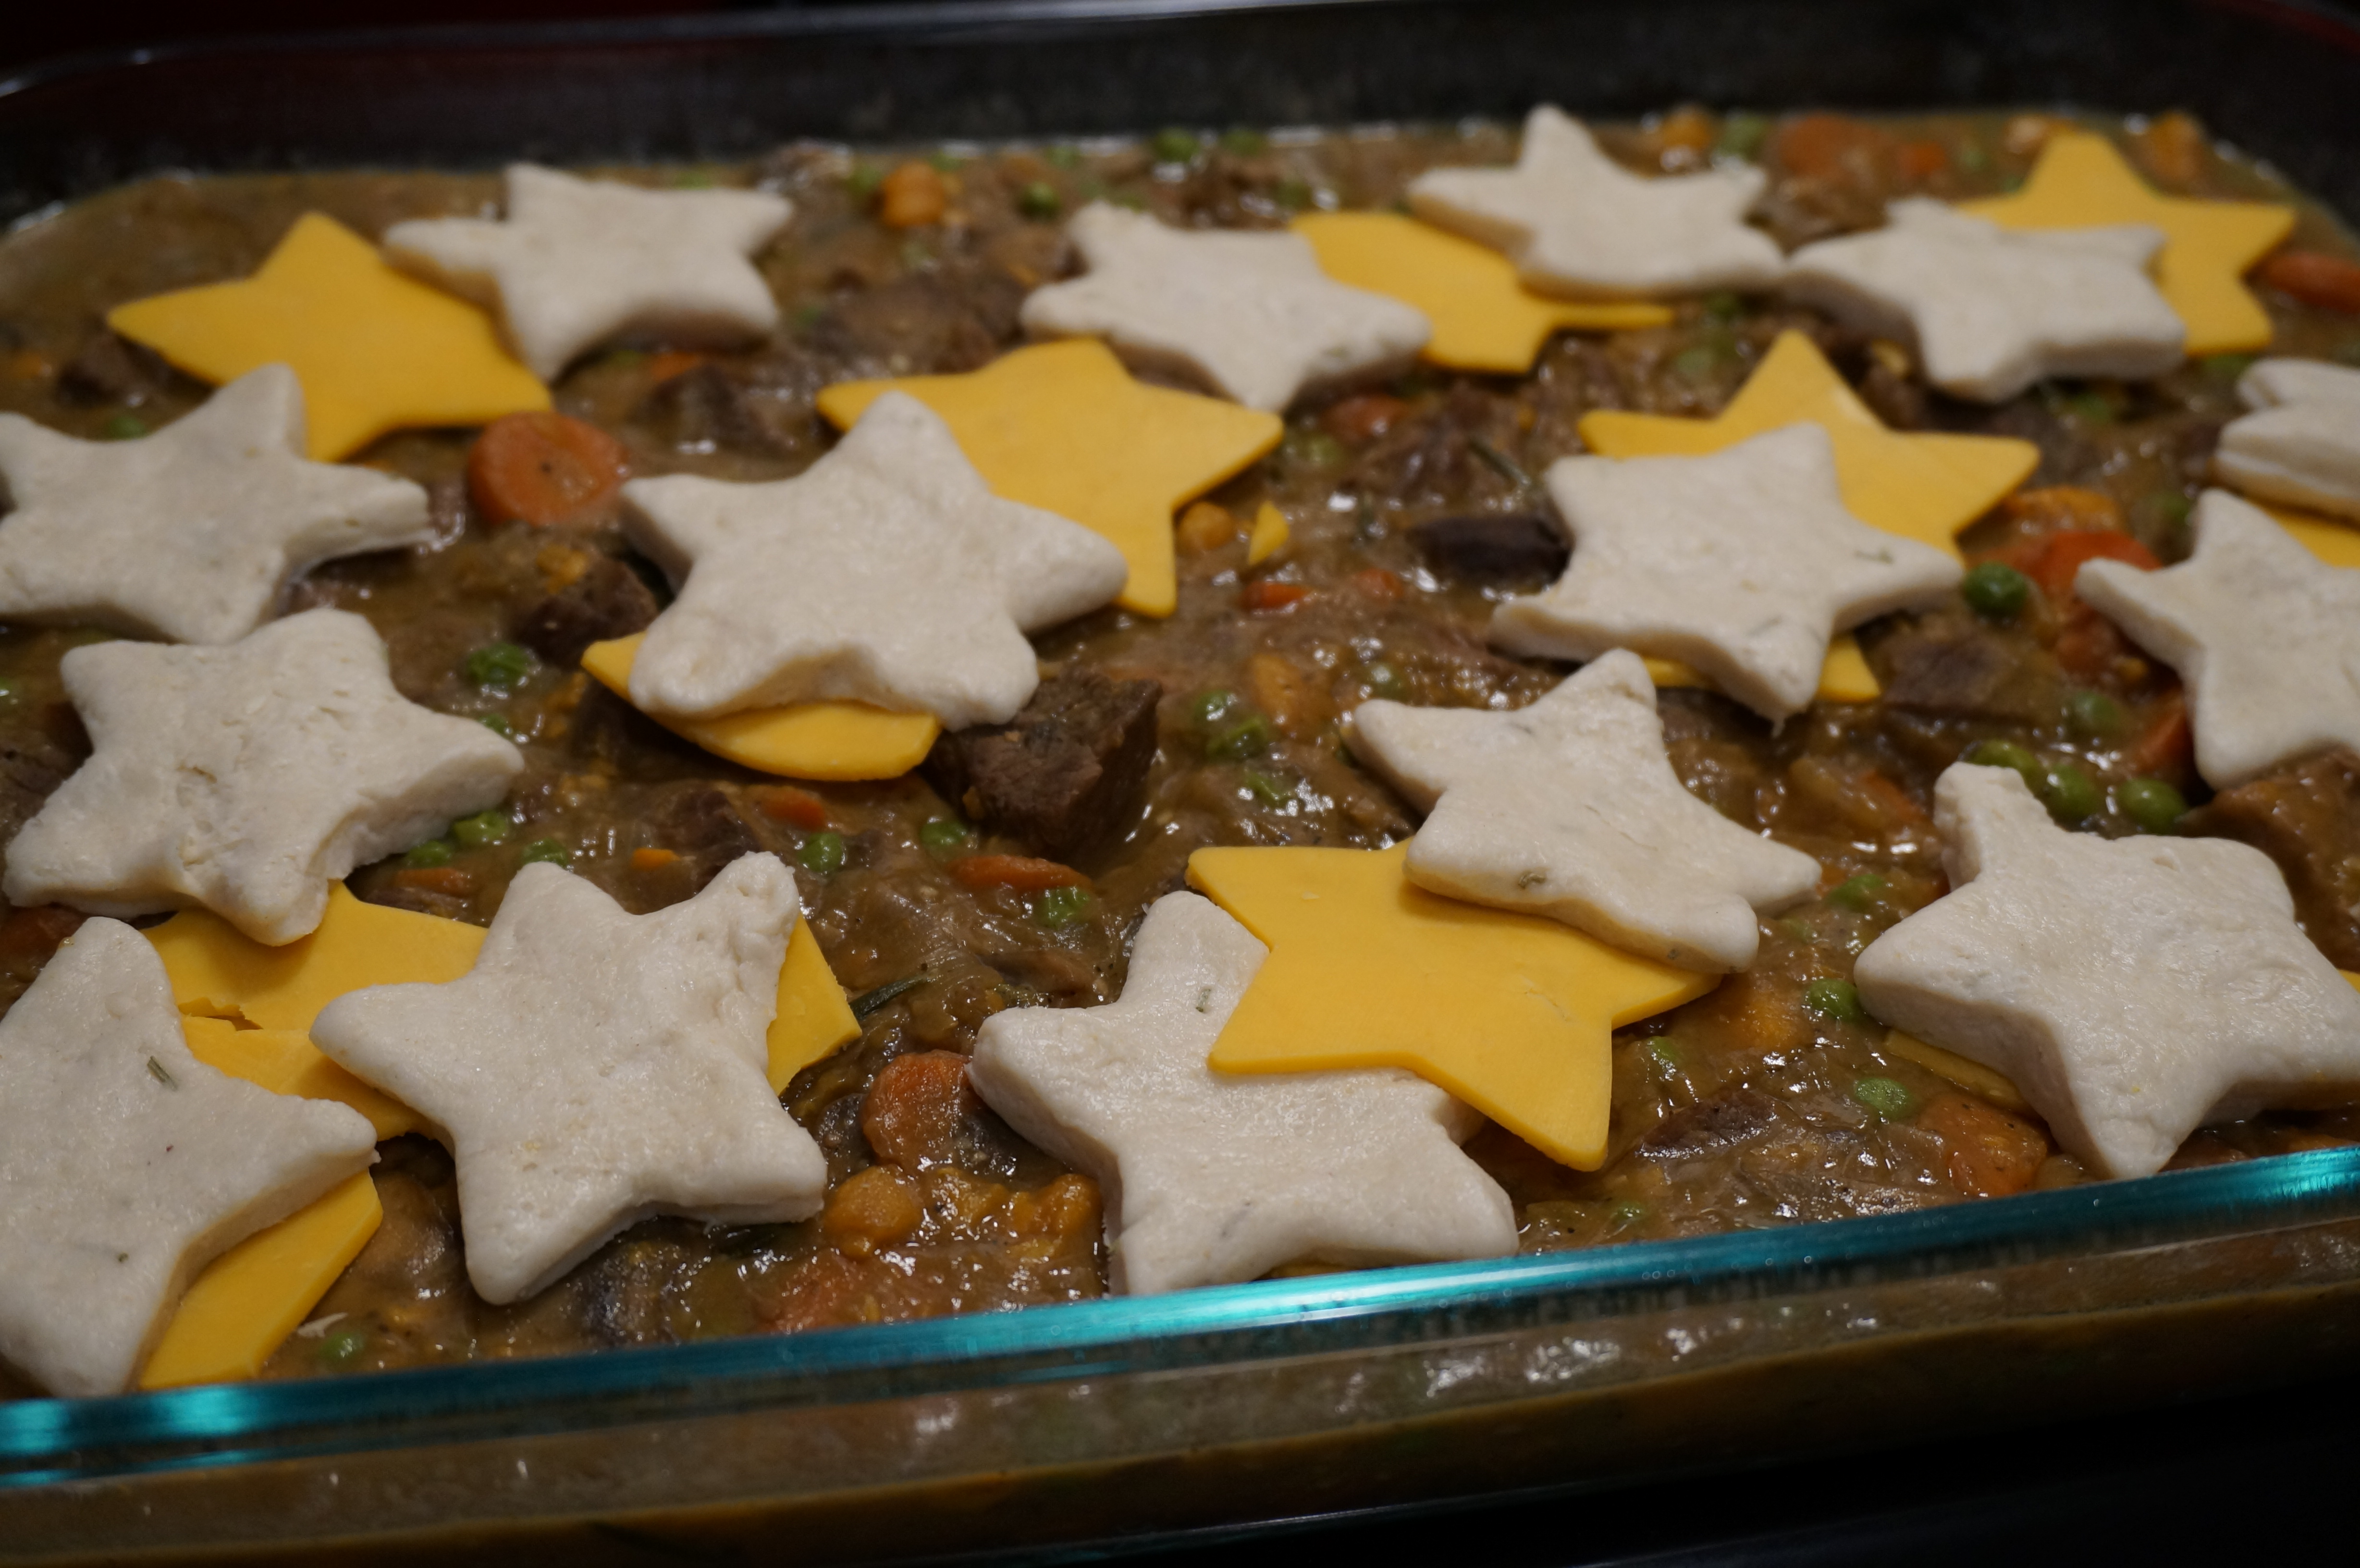
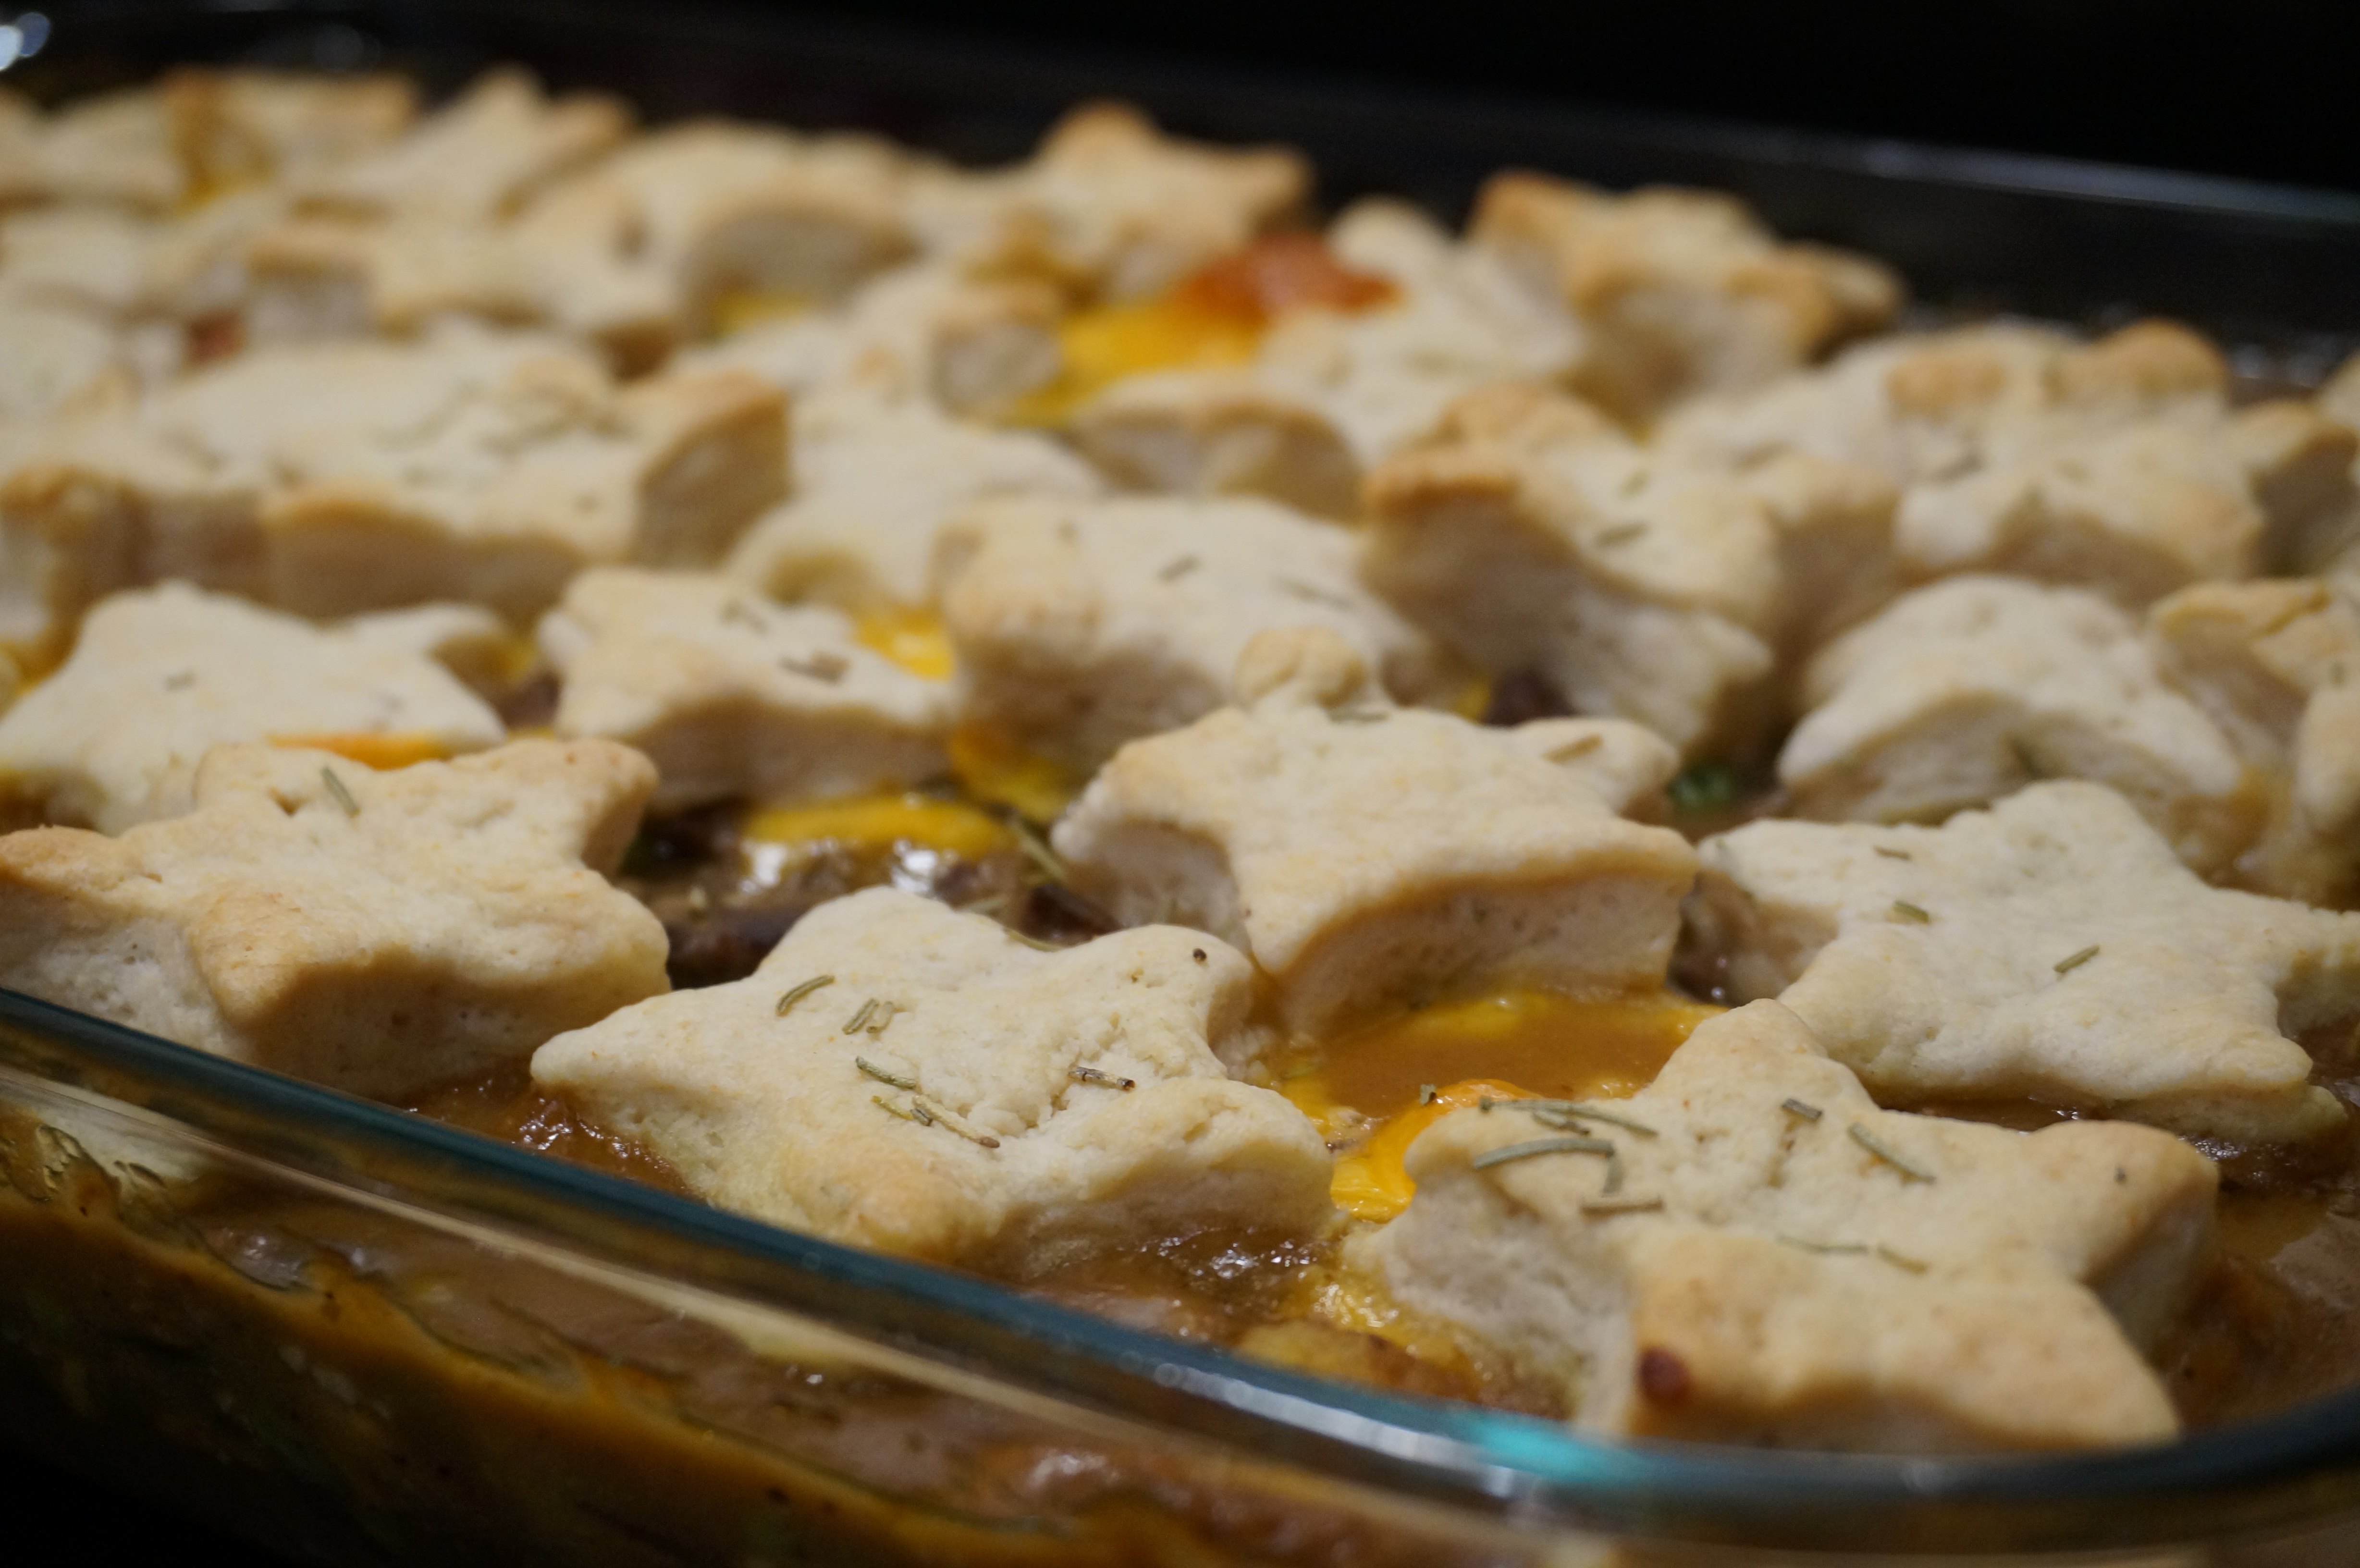
Layer the cheese and biscuits, slightly overlapping, on top of the stew. Sprinkle with more rosemary and drizzle with a bit of olive oil.

DSC00420

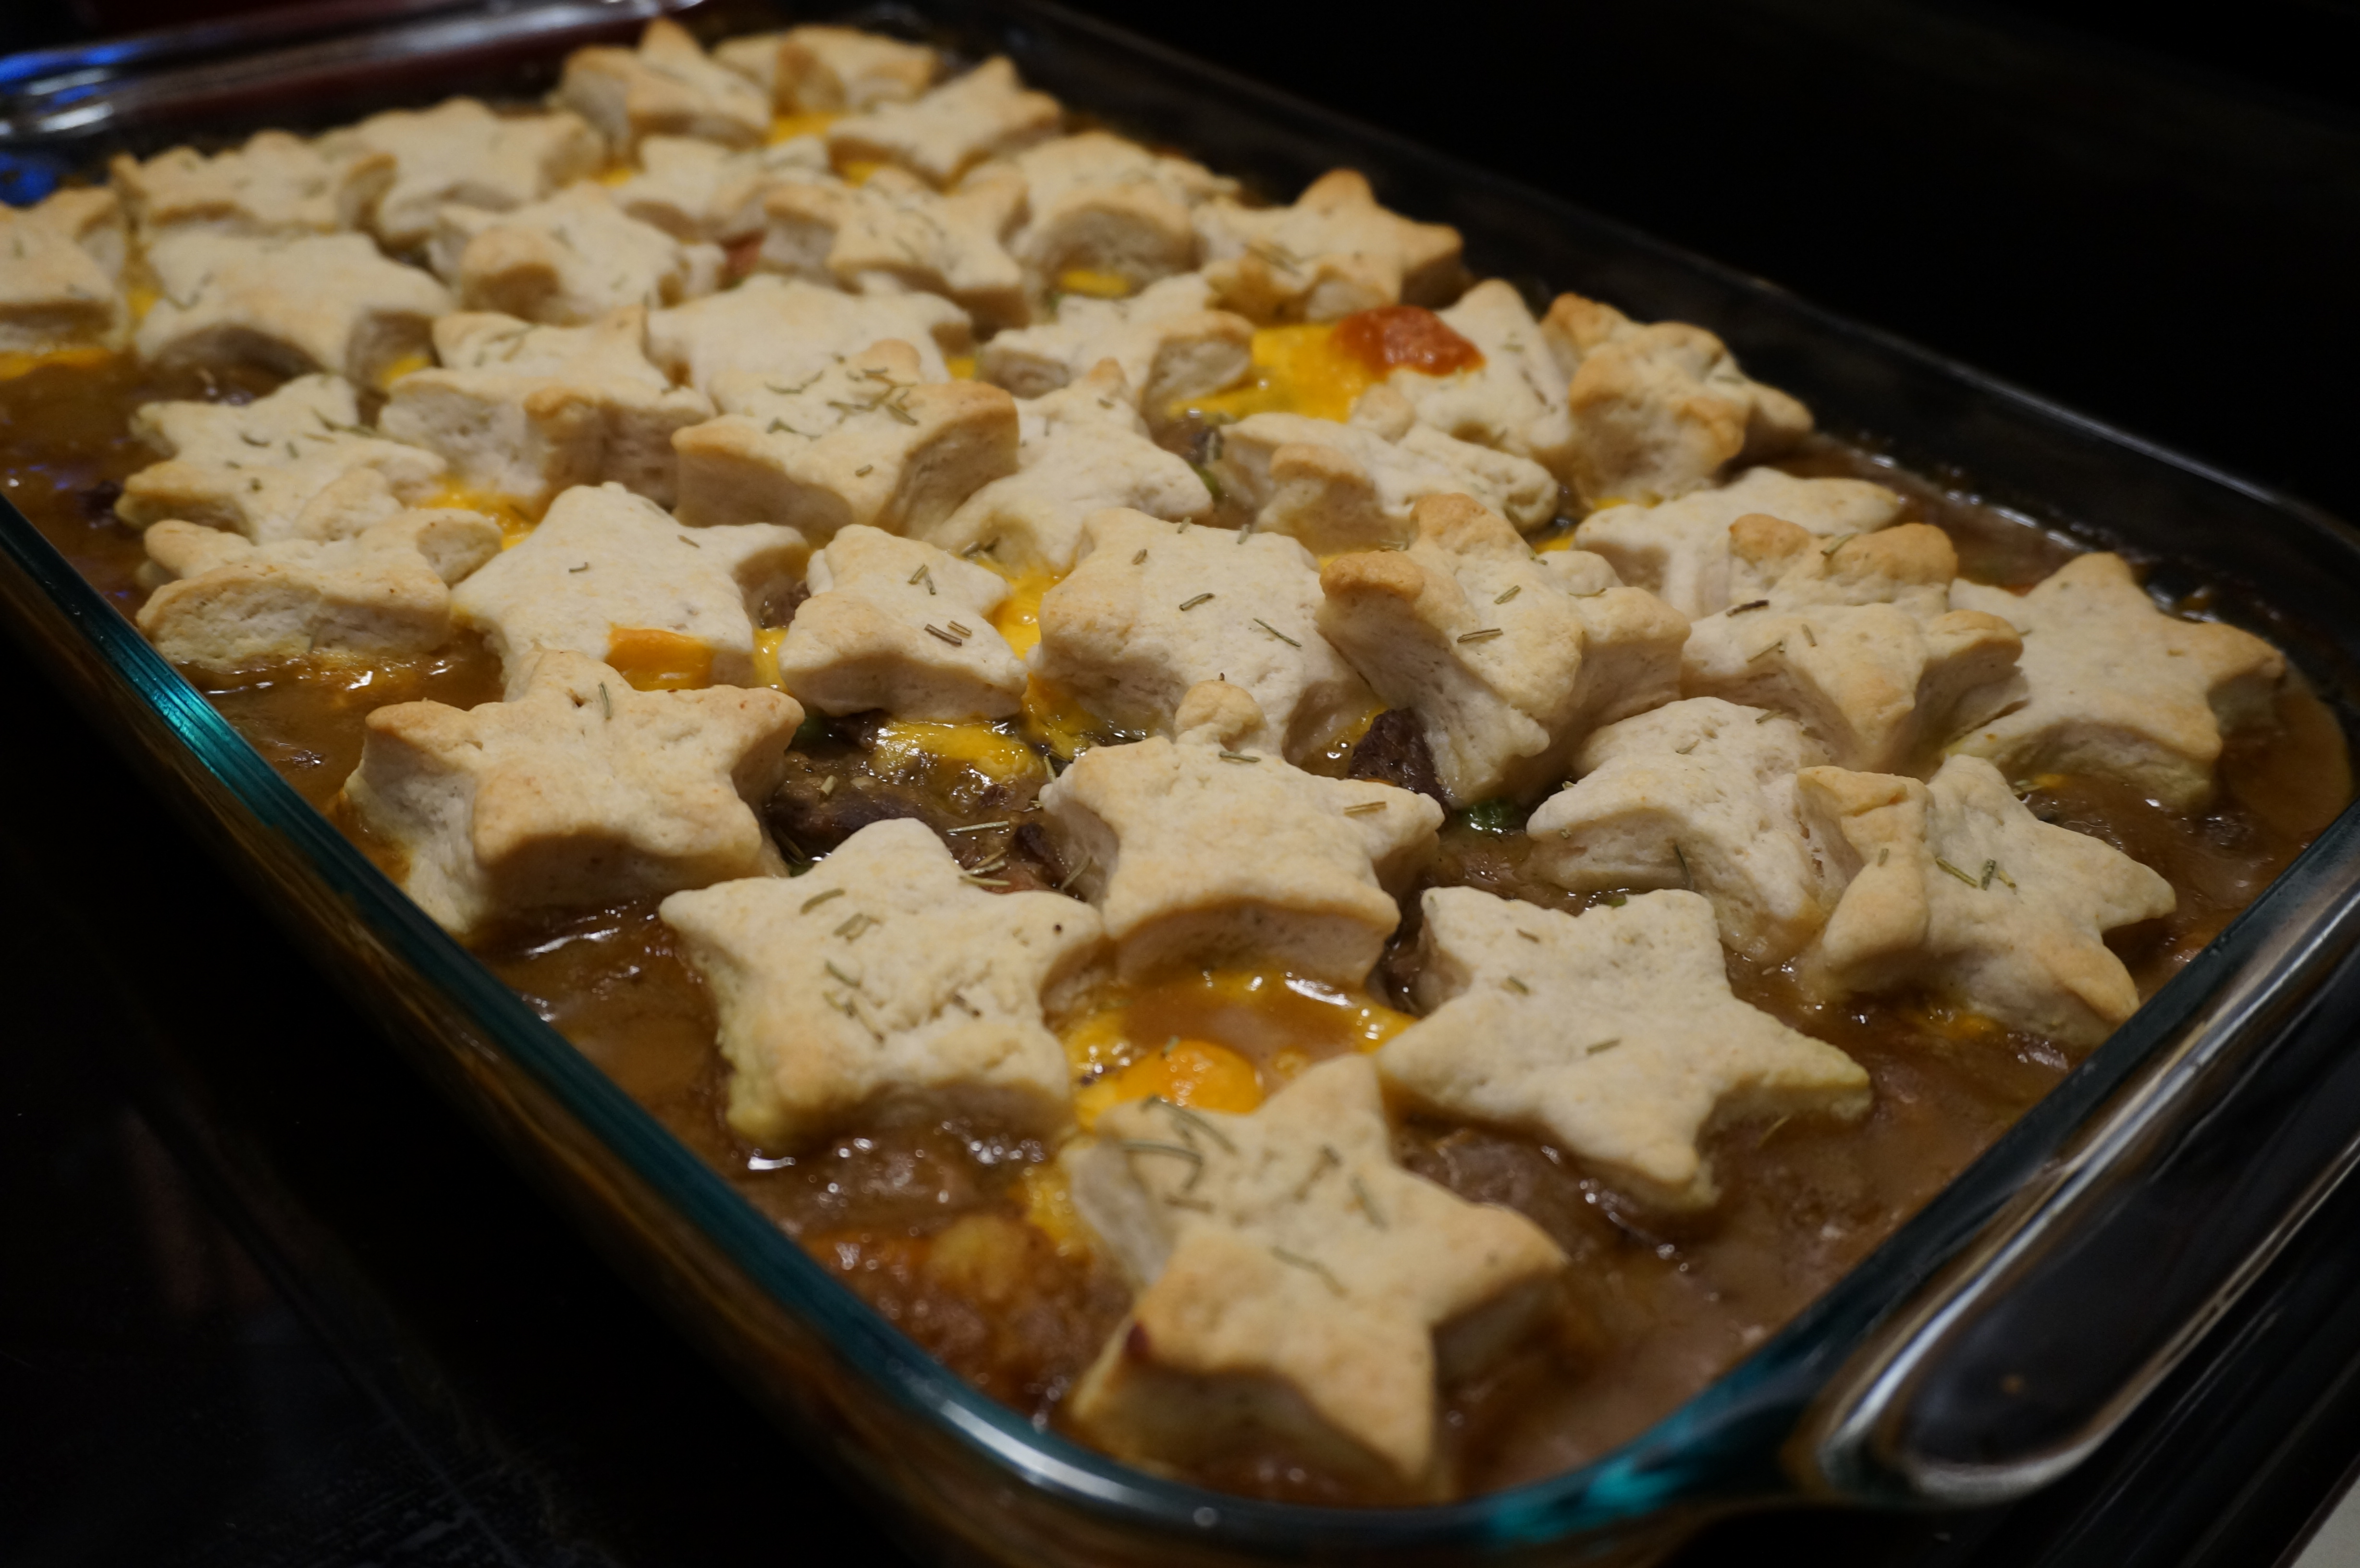
Bake at 375 deg for 30 minutes or until biscuits are deep golden-brown and stew is bubbly.

DSC00423

Allow to cool for at least 5 minutes (this will also help “set” the stew so it’s easier to ladle out)

DSC00430

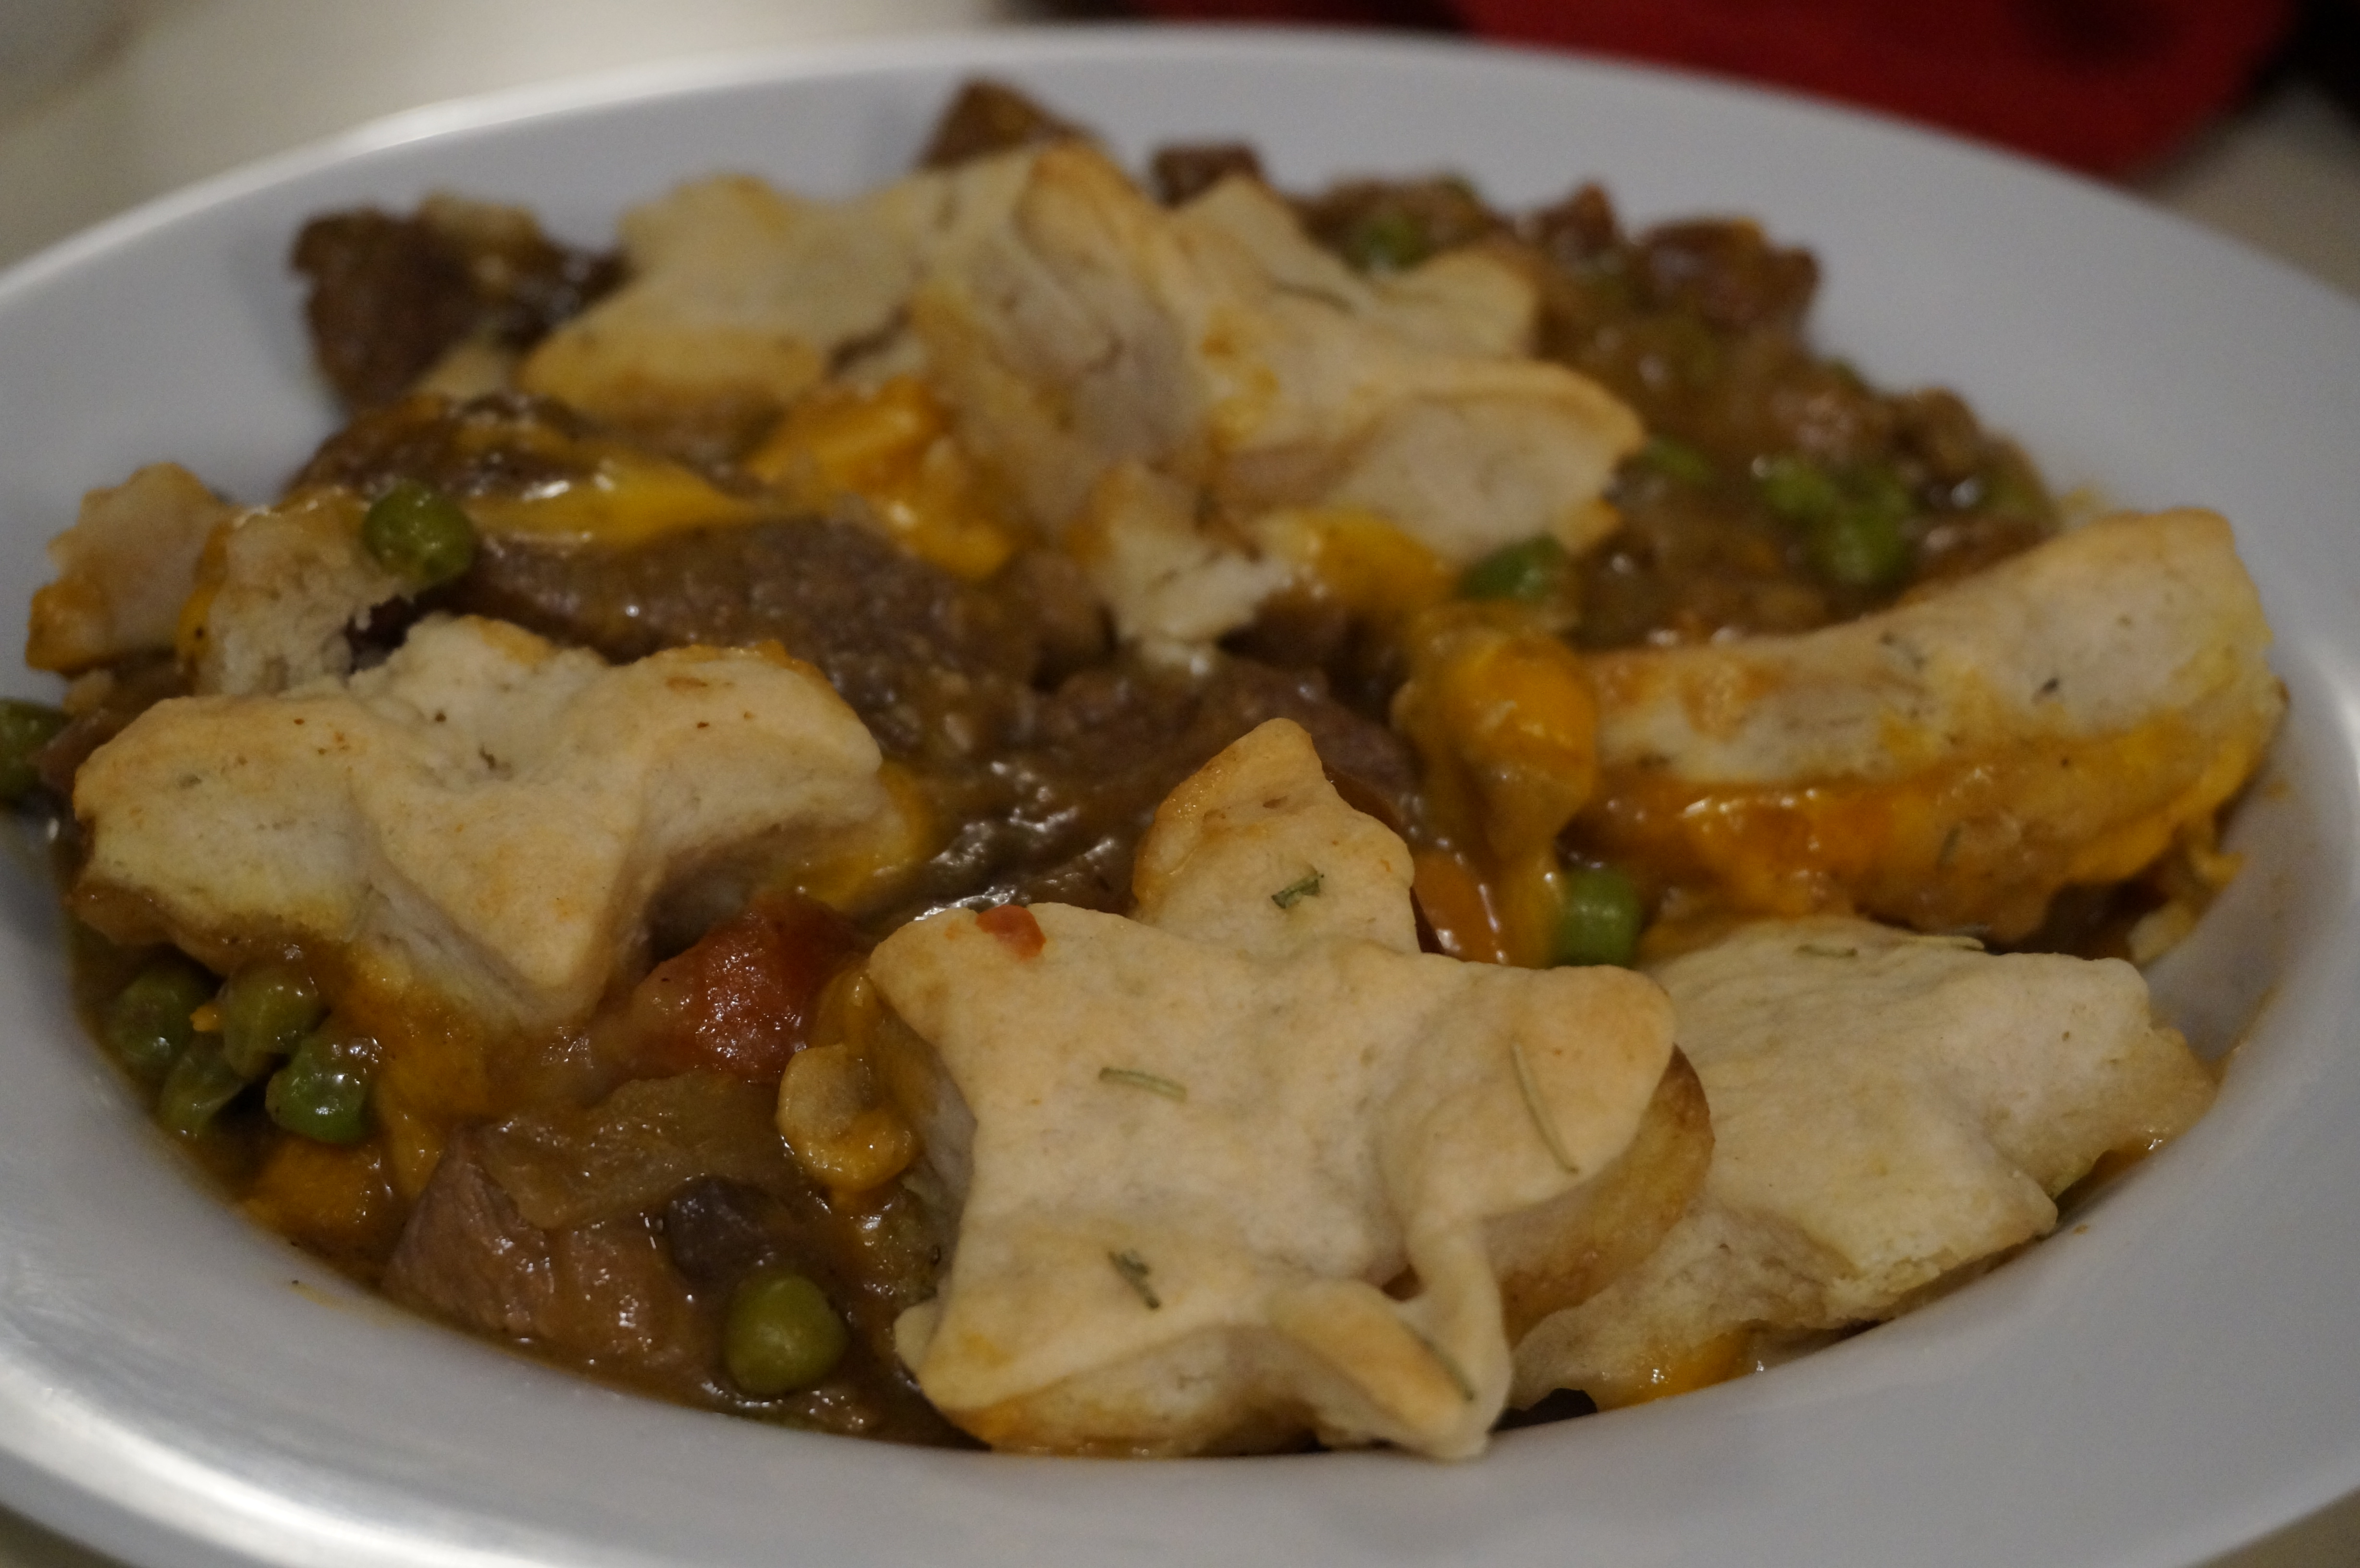
Ladle into shallow soup bowls and serve with biscuits on top.
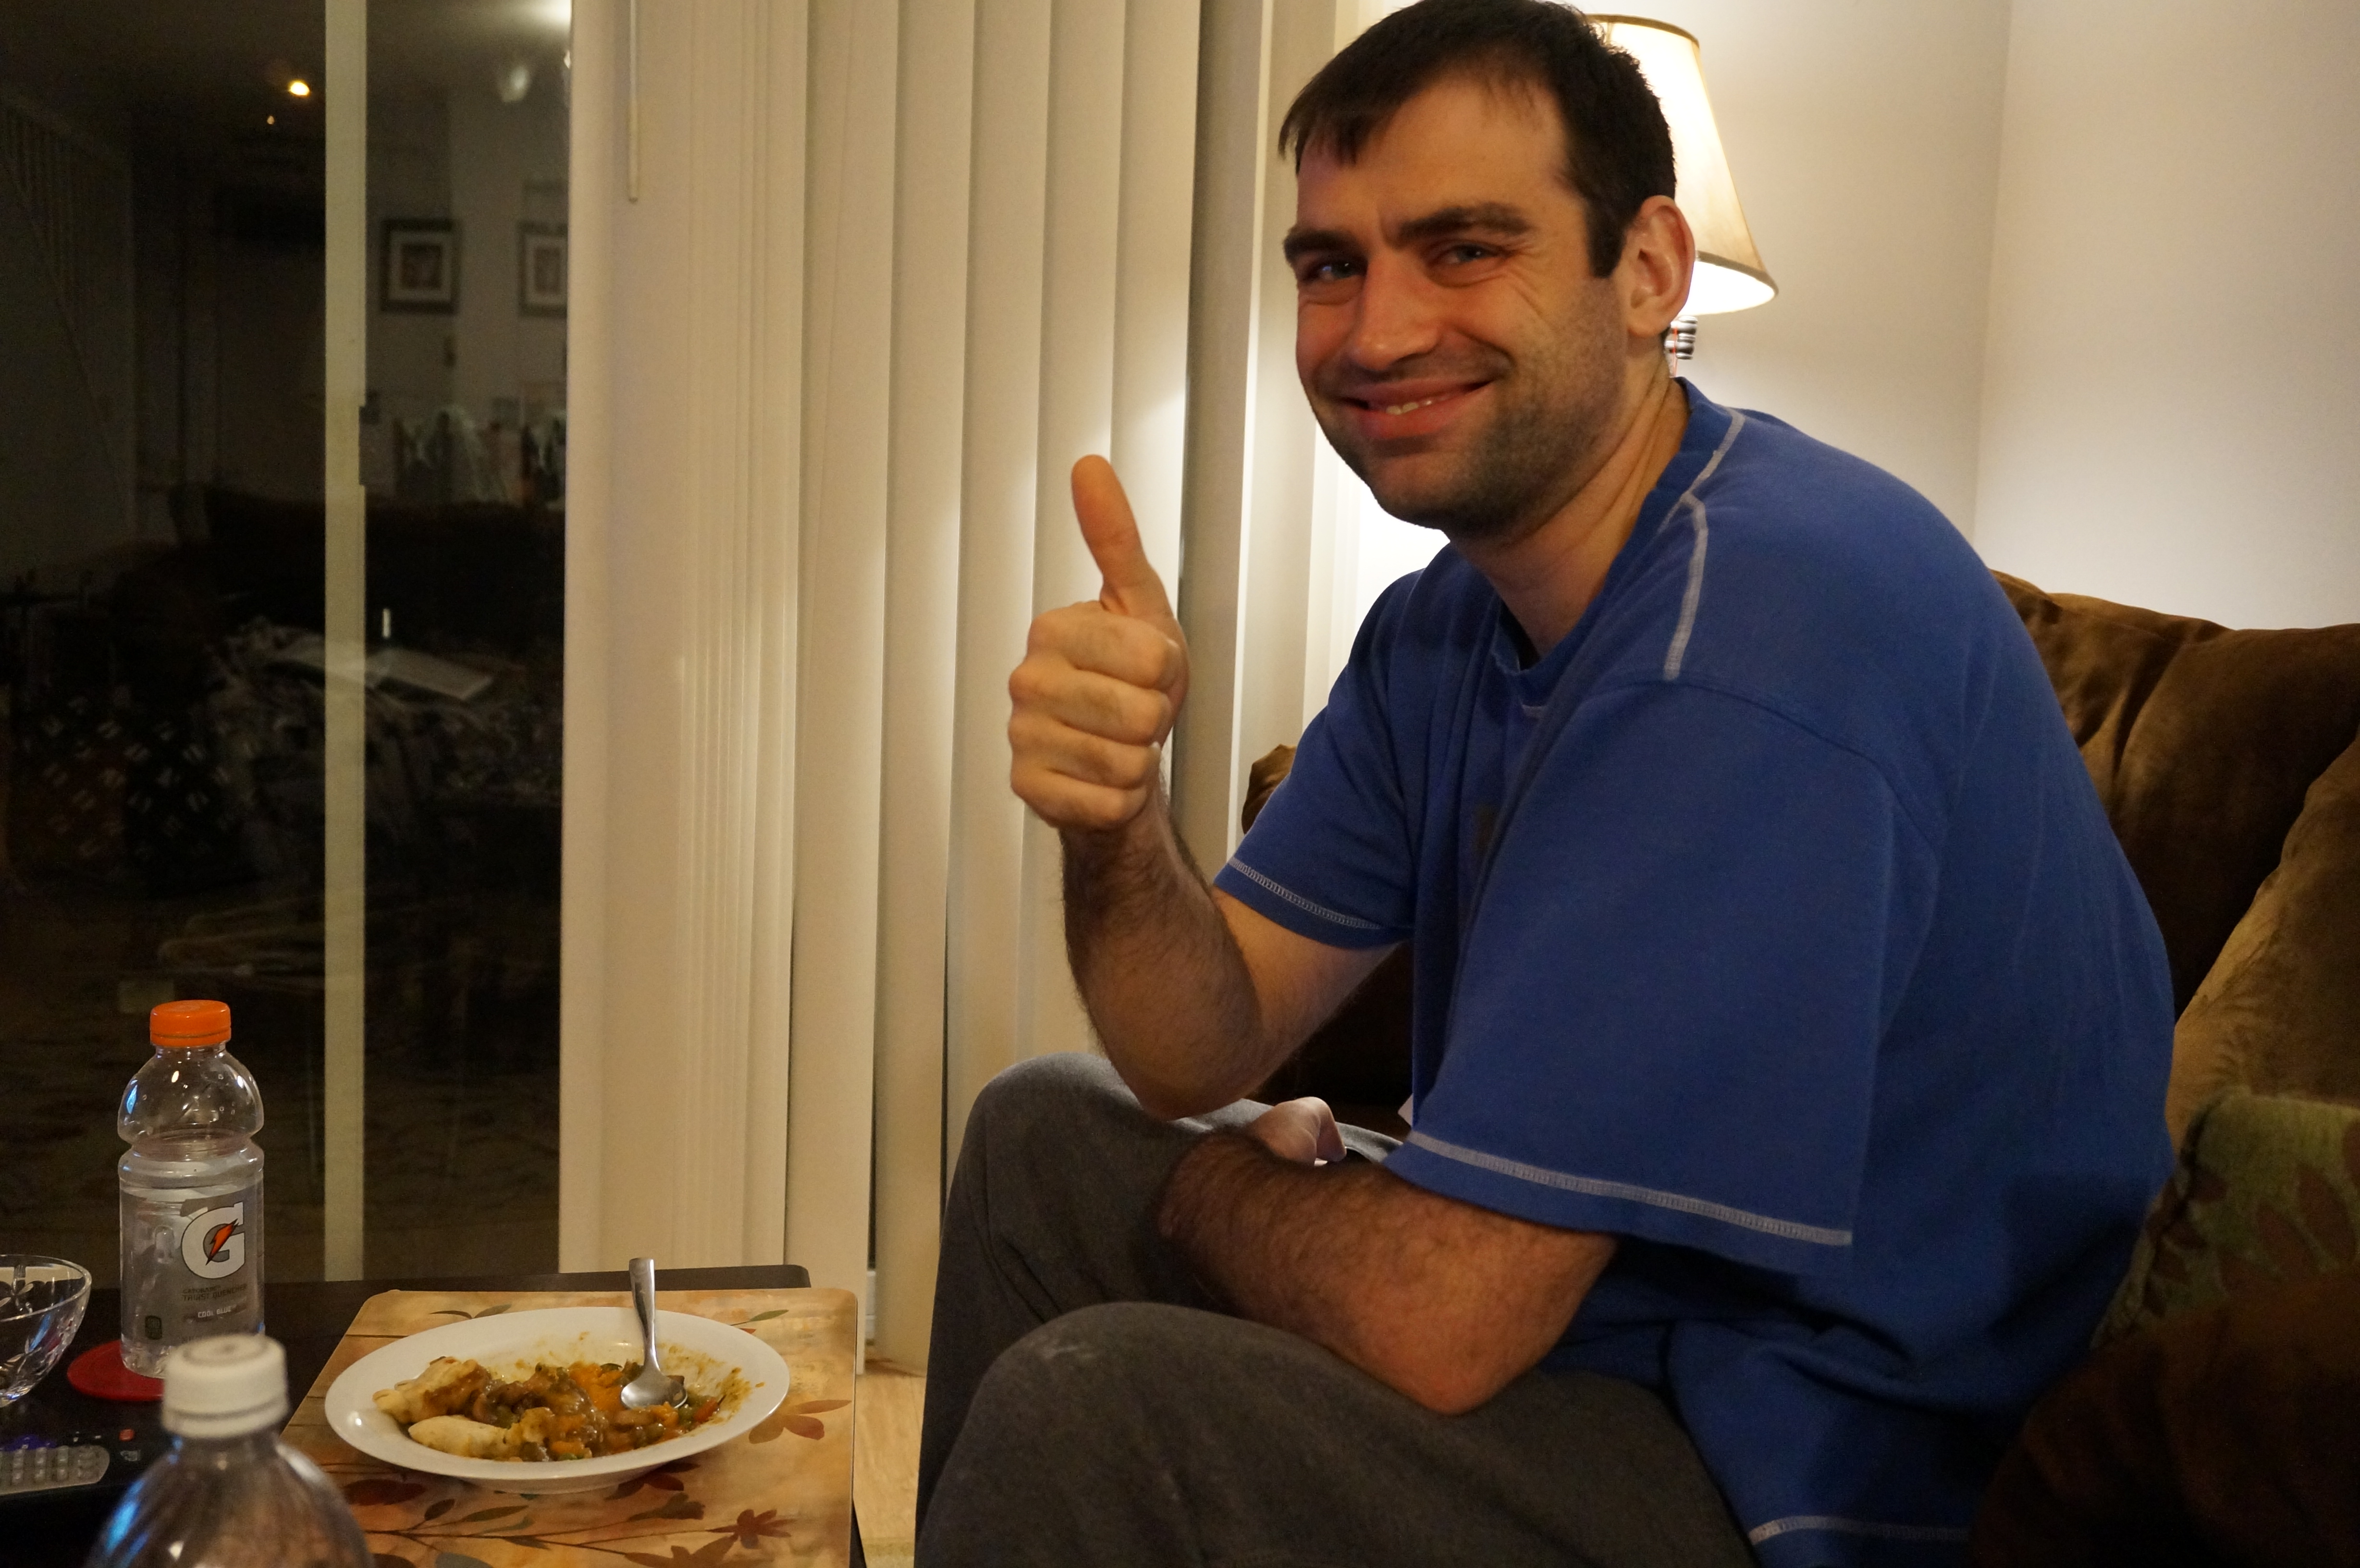
DSC00431

Happy husband! 🙂

Hawaiian BBQ Pizza (Plus Fool-Proof Pizza Dough Recipe!)

DSC00339

Pizza is one of those things that always seems like a ton of work to make myself. My sister makes it all the time and seems to have it down to a science. Every week she and her husband have “pizza night” with their friends in San Clemente, their little surfer town in Southern Cal where everyone walks around barefoot and it never rains. So I am told. (I’ll be visiting her in just a few weeks, and then we’ll see if that’s the truth!) Anyway, I’ve always wished that I could just throw together some flour, yeast, and water, let it grow, and just toss whatever scraps I have left in the fridge on top. Voila! Pizza is made.

But is it really that easy? I wish! I have classically been bad at making my own pizza dough. Maybe I’ve been overwhelmed by the number of recipes out there for all the different tastes and types of crust- thick, thin, whole-wheat, partial-wheat, chewy, crusty, crispy, cheesy, gluten-free, gluten-full, etc. etc. etc. Yikes! Which one do I choose? They even make dough out of cauliflower these days.

Then, there’s the issue of what to do if one of the dough ingredients- water, flour, yeast- is just the teensiest bit “off.” If the yeast is old, the water too cold, you add too much (or too little) flour, not enough sugar, and the stars aren’t perfectly aligned, your pizza may be ruined. I’ve made the mistake before of keeping my yeast in an opened jar in the fridge for way too long before using it again. The result was a chewy, taffy-like pizza crust that did NOT rise and did NOT stretch when I tried to pull it apart. Definitely not blog worthy (although it may have ended up on here anyway :P).

But this time, I think I finally got it right. I used a recipe from Iowa Girl Eats and adapted it a little bit to make it partially whole-wheat. I also doubled the recipe so I could save half of the batch and make another pie later in the week.

The rest went like clock-work. I LOVE the fact that for pizza, the hardest part is the dough and you can literally throw on top anything you have on hand. You can also get creative with the sauce! In the past, I’ve experimented a bit with some BBQ bases as opposed to the traditional tomato. Especially when you have BBQ flavored or Jerk-style chicken leftovers, a smoky BBQ sauce underneath a layer of meat and veggies makes for a perfect pairing. I’ve fiddled a bit with my sauce depending on which spices I have- bottled hickory BBQ sauce mixed with some ketchup, cumin, smoked paprika, brown sugar, and a pinch of chili powder makes for an awesome base! I wouldn’t suggest using a Mediterranean or herbed-style chicken with this, though. Instead, I’d recommend an Alfredo base, pesto, or traditional tomato sauce.

I ended up doing half shredded chicken that was left over from tacos (*guilty*) but was still perfectly good! There wasn’t quite enough meat though to cover the entire pie, so I topped the other with shredded up deli ham. When I think ham on pizza, I immediately jump to pineapple and black olives, so it quickly turned into a “Hawaiian BBQ” pizza. No complaints here! My husband loves the combo, and so do I. (Pineapple on top of pizza confused me for the longest time, but I finally gave up trying to figure it out. One does not question the ways of the pizza topping gods). Added some kale, broccoli, tomatoes, and shredded “fancy” mozzarella (don’t ask me what makes it “fancy” because all I saw was a plastic Harris Teeter resealable bag…) and stuck it in the kiln- er, oven.

Twelve-ish minutes later and we had a delicious pizza on our hands! The crust was soft but still crispy around the edges, and not tough on the bottom as has occasionally happened to me in the past!

Perfect for Friday “take-in” date night!

Hawaiian BBQ Pizza (Plus Fool-Proof Pizza Dough Recipe!)
Recipe Type: Pizza
Cuisine: Dinners
Author: Claire McCormick of “Claire Tastes”
Prep time:
Cook time:
Total time:
Serves: 8-12
Pizza has never been easier! Experiment with your toppings and sauce to make a perfectly personalized pie (see what I did there? eh? eh?)
Ingredients
  • DOUGH RECIPE (2 MEDIUM PIZZAS)
  • 1 cup warm water (how hot? it was described to me as “hot-tub” temperature)
  • 3 tsp (about 2 of the pre-packaged) dry active yeast
  • 2 Tbsp honey
  • 2 cups all-purpose white flour
  • 1 cup whole wheat flour
  • 2 Tbsp olive oil
  • 1/2 tsp salt
  • (FOR ONE PIZZA)
  • 1/2-3/4 cup BBQ sauce (your favorite kind!)
  • 1/3 cup ketchup
  • 1 tsp cumin
  • 1 tsp smoked paprika
  • 1/2 tsp chili powder
  • 1/8 tsp red pepper flakes (optional)
  • 1 Tbsp brown sugar (optional)
  • 1 small can sliced black olives, drained
  • 1 small can sliced pineapple, drained and cut into chunks
  • 2/3 (or as much as you want) cup leftover shredded chicken (pork or turkey would also work!)
  • ~ 6 slices deli ham, shredded into small pieces
  • 1/2 cup fresh kale, chopped
  • 3/4 cup broccoli florets
  • 1/2 cup grape tomatoes, sliced (or chopped whole tomatoes, but make sure to de-seed so they’re not making the crust too soggy!)
  • 1/2 cup shredded mozzarella cheese
Instructions
  1. For the dough: In a measuring cup, combine water, yeast and honey and stir until dissolved and liquid has a “murky” appearance. Allow it to sit somewhere warm for about 10 minutes (I used a heating pad on low!) until it foams up.
  2. Add oil and stir again.
  3. Add entire mixture to the bowl of a stand mixer. Using the mixer or a regular wooden spoon, gradually add salt and flour and stir to combine.
  4. Once dough has somewhat come together, attach the dough hook and set mixer to “stir” setting for kneading.
  5. “Knead” until dough comes together- about 5-7 minutes. If too sticky or watery, add a BIT more flour and reassess your patient- er, dough! (too long of a day at PT school!)
  6. Lightly oil a bowl. Remove dough, form a nice ball out of it, and set it in the oiled bowl.
  7. Cover loosely with a dishcloth and allow to rise in a warm spot for at least an hour.
  8. When dough has doubled in size, punch it down a bit and separate into two smaller balls.
  9. Allow each ball to continue to rise for another 30 min to an hour.
  10. At this point, you can refrigerate/freeze the dough for later, or keep going with your recipe! (I kept one and put the other in the fridge).
  11. Preheat oven to 400 deg.
  12. Oil a pizza pan with cooking spray or olive oil. No skimping here!
  13. Spread dough out on pan into a circle, starting in the center and working your way out with your fingers!
  14. In a small bowl, combine BBQ sauce, ketchup, and spices. Whisk together thoroughly.
  15. Use the back of a spoon to spread the sauce over the top of the dough, leaving about a 1/2″ rim around the edges.
  16. Layer kale, meat, veggies, olives, and pineapple over the top. Sprinkle with the cheese.
  17. Bake at 400 deg for 10-15 minutes (watch this carefully, as the crust can burn easily depending on the thickness you’ve chosen!)
  18. Remove from oven, cool at least 5 min, and slice!

DSC00303

 Just starting out with the yeast and water base… not foamy yet! Set on a heating pad to low to help kick start the process.

DSC00308

All foamed up after about 10 minutes!

DSC00309

DSC00310

“The Claw”

DSC00313.jpg

After kneading for a few minutes…

DSC00316

…and the dough should look like this.

DSC00321

Let her rise (sorry, for some reason I don’t have a picture of the risen dough!) and then spread out onto a pizza pan with fingers.

DSC00322

Whip up some sauce!  

DSC00323

Now for the fun part! Spread the sauce on to your liking.

DSC00324

Add the veggies first

DSC00326

Then the meat

DSC00329

And extras…

DSC00330

Top with the cheese. Into the oven for a hot second…

DSC00334

Presto!

DSC00345

DSC00349

Served here with some honey-balsamic broccoli slaw. It’s pizza night, ya’ll!

“Blue Devil Blues” Muffins

For mornings after Duke losses, when all you want to do is sing the “Blue Devil Blues…”

DSC00297

“Blue Devil Blues” Muffins
Recipe Type: Muffins, Snacks
Author: Claire McCormick of “Claire Tastes”
Prep time:
Cook time:
Total time:
Serves: 18
For mornings after Duke losses, when all you want to do is sing the “Blue Devils Blues…”
Ingredients
  • 1 cup all-purpose flour
  • 1/3 cup old fashioned oats
  • 1 tbsp baking powder
  • 1/4 tsp salt
  • 1 cup milk
  • 1 1/2 cups raisin brain cereal
  • 1 egg, lightly beaten
  • 1/2 cup applesauce
  • 1/4 cup firmly packed brown sugar
  • 2 tbsp vegetable oil
  • 1 tsp vanilla
  • 1/2- 3/4 cup blueberries (I used frozen!)
Instructions
  1. Preheat oven to 400 deg.
  2. Spray a muffin pan with cooking spray, or place a cupcake liner in each slot.
  3. In a large bowl, whisk together flour, oats, baking powder, and salt.
  4. In a small bowl, combine raisin bran cereal, milk, egg, applesauce, sugar, oil and vanilla. Whisk thoroughly until foamy.
  5. Add wet ingredients to dry and stir until just combined. Batter will be lumpy!
  6. Fold in blueberries and give a light stir. Don’t be alarmed when your batter turns blue like mine did! 🙂
  7. Bake at 400 deg for 20 minutes, or until tops of muffins are springy and a toothpick comes out clean!

DSC00283

DSC00295

Lemon Balsamic Salmon w/ Rosemary & Garlic Quinoa

Last night, one of my dear friends from Duke undergrad, Jessie, and I cooked up a delicious salmon dinner together! We decided on a balsamic marinated baked salmon, with hints of lemon and rosemary. Served over rosemary-garlic quinoa with a spinach salad on the side! It was the perfect meal for a busy week of class for both of us (she’s a med student at Duke now!), and it was such a sweet time that we had just chatting in the kitchen (with our aprons on, of course) and sitting on big fluffy pillows by the fire. It was the coziest night I can remember in a while!

The nice thing about this recipe is that it uses frozen salmon fillets that you can just take out of the freezer and thaw when you’re ready. The whole thing comes together in less than a half hour, since the salmon cooks so quickly. Next time, I think I’m going to try to broil it from completely frozen and see if that makes any difference in the texture.

Feel free to play around with the spices- up, down, however you like. You could also completely toss the lemon balsamic idea and come up with your own marinade- I was originally going to do a honey teriyaki glaze (keep an eye out for a recipe coming soon!). As far as this one goes, I think next time I might use a tad less rosemary (I always get a little overzealous when it comes to fresh herbs) and perhaps a little more lemon to balance out the balsamic. Other than that, the marinade was delish! The flavor was just light enough to compliment the salmon, and the garlic and onions in the quinoa added the perfect amount of extra “spice.” And definitely make sure to have the strawberry and goat cheese spinach salad on the side!

Enjoy!

DSC00264

Lemon Balsamic Salmon w/ Rosemary & Garlic Quinoa
Recipe Type: Dinner, Main Dish
Cuisine: Seafood
Author: Claire McCormick of “Claire Tastes”
Prep time:
Cook time:
Total time:
Serves: 2-4
A simple, flavorful recipe for oven-baked salmon using fresh lemon and rosemary! Serve with my rosemary and garlic quinoa and a spinach salad on the side.
Ingredients
  • 2 6 oz. salmon fillets, thawed
  • 1/4 cup balsamic vinegar
  • 1/4 cup extra virgin olive oil
  • 1 tbsp Dijon mustard
  • 1/2 tsp pepper
  • 1/2 tsp salt
  • 1 tsp minced garlic
  • 1 tsp fresh minced rosemary
  • 1/2 tsp lemon zest
  • 1 1/2 tsp fresh lemon juice
  • 4 lemon slices
  • extra rosemary, for garnish
  • 1 cup dry quinoa
  • 2 cups water
  • 1 small onion, diced
  • 1 tbsp fresh rosemary, minced
  • 1 heaping tsp minced garlic
  • 1 tbsp olive oil
Instructions
  1. Preheat oven to 400 degrees.
  2. Prepare a baking sheet by covering with foil and spraying generously with cooking spray or a bit of oil.
  3. In a small bowl or tupperware, combine vinegar, olive oil, Dijon, salt, pepper, garlic, rosemary, lemon zest, and lemon juice. Whisk together until smooth. Reserve about 1/3 of mixture for later (this will be the dressing for the salad!).
  4. Pour the remainder of the marinade into a large ziplock bag. Add the salmon and massage the marinade into both sides of the fish.
  5. Refrigerate for at least 15 minutes.
  6. Meanwhile, add olive oil to saute pan and turn heat to medium high. When pan is hot, add diced onion, 1 tbsp minced garlic, and 1 heaping tsp fresh, minced rosemary. Cook 3-5 minutes or until onion is soft. You can also add a bit more lemon zest, and some salt and pepper for extra flavor!
  7. Place salmon on prepared baking sheet and drizzle with a bit of the reserved marinade. Top each fillet with extra rosemary and two lemon slices.
  8. Bake at 400 degrees for 12-15 minutes or until fish flakes easily with a fork.*
  9. While salmon is baking, cook quinoa according to package directions.
  10. When quinoa is done, stir in the garlic and onion mixture. Turn heat to low to keep warm.
  11. Remove salmon from oven and serve over quinoa.
  12. We also served with a spinach salad on the side: simply add spinach to a salad bowl and top with sliced strawberries and crumbled goat cheese! Drizzle with a bit of the reserved marinade for a tasty balsamic dressing.
Notes
*Our salmon wasn’t completely thawed so we baked it for about 15 minutes, then broiled it on high for an additional 3 minutes!

DSC00245

DSC00254

DSC00266

DSC00259

DSC00273

DSC00269

DSC00274

Honey Chipotle-Glazed Chicken Thighs, with Roasted Potatoes & Veggies

Ever since I decided I wanted to cook in a way that minimizes ingredients, cost, and dishes at the same time as maximizing yum-factor and leftover potential, I quickly fell in love with chicken and veggie bakes like this one, which I found originally on one of my favorite blogs, Kath Eats Real Food. The result was a big casserole-type dish with lots of nutrients, flavor, and a huge amount of wiggle-room to experiment with a ton of flavors and combinations! I think the best part is that you can literally use any combo of ingredients you already have in your fridge or pantry- even frozen ingredients work like a charm!

I’ve had a blast trying to come up with the tastiest new creations to experiment with, and my favorite by far has been the Lemon and Dill Chicken and Bean Bake (linked above- you may find that it actually looks quite similar to this recipe!). But since the weather has gotten colder, I decided a smokier flavor might be the best choice for my next chicken bake. I settled on this honey-chipotle-glazed chicken thigh bake, served over a combination of roasted red and sweet potatoes and mixed with kale, tomatoes, mushrooms, broccoli, and cauliflower. As expected, the juices from the chicken thighs drip down and do their magic, cooking the veggies in a flavorful, meaty “sauce” so that you don’t even need to add many spices at all to the veggies in order to get max flavor! The glaze on this chicken also is the perfect stickiness… next time I might even decide to make some slits in the chicken to allow it to seep down into the nooks and crannies and add an extra punch of honey-chipotle BAM to your bake. Yum!

DSC00233

Honey Chipotle-Glazed Chicken Thighs w/ Roasted Potatoes & Veggies
Recipe Type: Chicken Bake, Easy Dinners
Cuisine: Southwestern
Author: Claire McCormick of “Claire Tastes”
Prep time:
Cook time:
Total time:
Serves: 6
Try this simple recipe for baked chicken thighs with a delicious honey-chipotle glaze! Just toss some potatoes and veggies into a casserole dish and layer the glazed chicken on top. You’ll have a tasty, healthy casserole and leftovers for the whole week!
Ingredients
  • 6 boneless, skinless chicken thighs, patted dry
  • 2 1/2 tbsp olive oil
  • 2 tsp minced garlic (about 4 garlic cloves)
  • 1/2 tsp chili powder
  • 1/2 tsp jerk seasoning (if you have it)
  • 2 tbsp honey
  • 3 tsp apple cider vinegar
  • 1/2 tsp garlic powder
  • 1 tsp salt
  • 1 tsp cumin
  • 3/4 tsp cinnamon
  • 5-7 small red potatoes, chopped into ~1″ chunks
  • 2 sweet potatoes, chopped into ~1″ chunks
  • Any veggies you want! (I used, 1 bunch kale, 1 cup broccoli and cauliflower florets about 1/2 cup halved grape tomatoes, and a handful of sliced white mushrooms)
  • Extra garlic powder or onion powder (1 tsp), for dusting veggies
Instructions
  1. Preheat oven to 375 deg.
  2. Spray bottom of a large casserole dish with cooking spray.
  3. In a large bowl, toss all potatoes with olive oil and a little onion or garlic powder. Spread evenly in bottom of casserole dish.
  4. Throw veggies on top of potatoes. Stir gently so that they get coated with a bit of the oil (I sprayed them with a bit more cooking spray, too).
  5. In a small bowl, whisk together olive oil, garlic, chili powder, jerk seasoning, honey, vinegar, garlic powder, salt, cumin, and cinnamon (Yes, I know that’s a lot of spices!) until you get a pretty thick paste!
  6. Layer chicken thighs on top of potatoes and veggies. Drizzle with a little extra olive oil and rub each one with some of the glaze. Make sure to evenly divide the garlic, as it has a tendency to clump together! (Let’s share the garlic breath love, people!)
  7. Cover lightly with foil. Bake, covered, at 375 deg for 30 minutes. Remove foil and bake uncovered for 10-20 minutes longer, until chicken is no longer pink in center and potatoes are fork-tender.
  8. Allow to cool for a least 5 minutes before serving!
Notes
You could also use chicken breasts in this recipe, but I have to say, even as a white meat lover, the juiciness of the dark meat of these chicken thighs is definitely worth the extra few calories. Plus, it’s cheaper!

DSC00214

Layer potatoes and veggies in casserole dish, sprinkling with a touch of garlic powder or onion powder. Don’t you love all the colors? Sometimes I feel like the most intuitive way to cook nutritiously is by color!

DSC00221

Layer chicken thighs on top of veggies, drizzle with a bit of oil, and rub down with about a tablespoon or so of the sticky glaze you created. Bake at 375, uncovered for 30 minutes, and uncovered for 10-20 minutes until done.

DSC00233

Ta-da!

Sweet Potato Masoor Dahl

DSC00197

For some reason I have been craving Indian food all week. Maybe I’ve just been needing a change in flavor, with the holidays just behind us and too much chocolate and peppermint flavored yummies in my tummy. Or maybe I just like Indian a lot. After all, I’m a sucker for spices. And with this cold, blustery January day, I felt like it was high time for a solid crock pot recipe to warm up my bones. Okay okay, I know I’m not fitting into that “1 in 3 Americans affected by the Nor’ Easter Hercules” as many of my friends and family in CT (I actually almost convinced my mom earlier that I’d been wearing shorts and flip flops all day here), but hey! We get chilly days in Durham, too. And I’m a Southern girl now, which means my blood is not accustomed to anything lower than 40 degrees.

Moreover, as I see post after post on the Internet about New Year’s resolutions including eating healthier, exercising more, and striving to lose weight, I figured a heart-healthy and vegetarian dish that doesn’t skimp on heartiness or flavor would be welcome to many of my readers! [**Spoiler alert** If you don’t like curry or lentils, sorry, you’re out of luck for this one. Go visit my Pesto Chicken Monte Cristos post and be quiet.] Packed with vitamins and nutrients, this recipe is a complete protein when served over a grain such as brown rice or quinoa. Whether you’re looking to cut down on calories without sacrificing flavor, or you just want a healthy meal that’ll stick with you, this sweet potato dahl is the perfect choice. I can’t wait to share it with you!

I used masoor dahl here, which basically means red lentils. You can also use green/black lentils or even split peas, but I hear they take longer to cook. I prefer red lentils for that classic yellow hue that I always associate with Indian stews.

What I love about this recipe is that you can really add any veggies you want, as long as you chop them up thinly enough! (I might stay away from asparagus or sprouts, but that’s just me.) I used diced tomatoes (canned, of course- this recipe is for lazy people!), sweet potatoes (because as we all know, they are my weakness), yellow onions, cauliflower (frozen!), carrots, and baby spinach. Kale would also be amazing (they were out at the store, otherwise I probably would’ve used it for a bit more texture and chewiness).

Sweet Potato Masoor Dahl
Recipe Type: Slow Cooker, Easy Dinners
Cuisine: Indian
Author: Claire McCormick of “Claire Tastes”
Prep time:
Cook time:
Total time:
Serves: 8-10
The easiest red lentil dahl you will ever make! Throw all the veggies, lentils, and spices in the crock pot and set to high for 4 hours. Add cilantro and lemon juice just before serving. Ladle over quinoa with a dollop of plain yogurt on top.
Ingredients
  • 2 cups masoor dahl (red lentils), rinsed
  • 4 cups chicken stock (or vegetable stock to keep it vegan!)
  • 10 oz fresh baby spinach (kale would work great too!)
  • 2 medium sized sweet potatoes, chopped into small chunks
  • 4 whole carrots, chopped
  • 1 medium onion, chopped
  • 1 1/2 cups frozen cauliflower
  • 1 14 oz can low-sodium diced tomatoes
  • 1 tbsp minced garlic
  • 1 tbsp ground ginger
  • 1 tbsp curry powder
  • 1 1/2 tsp ground mustard seed
  • 1 tsp ground coriander seed
  • 1 tsp whole coriander seed (optional)
  • 1 tsp ground cumin
  • 1/4 tsp cayenne pepper
  • 1/2 tsp garlic powder
  • 1/8 tsp red pepper flakes
  • 2 tsp sugar
  • 1 1/2 tsp kosher salt
  • 4 tbsp lemon juice
  • handful of chopped cilantro, to taste (plus more for garnish)
  • plain Greek yogurt, for serving
  • 2 cups cooked quinoa or brown rice, for serving
  • multigrain flatbreads, for serving
Instructions
  1. Prepare veggies by chopping sweet potato, onion, and carrot.
  2. Add to crock pot.
  3. Add lentils, stock, and all spices.
  4. Set slow cooker to high for 3-4 hours, or low for 6-7 hours. You’ll know when the dahl is done when the lentils have broken down and gotten all mushy! (sounds gross but you know… I like that sort of thing :P)
  5. Just before serving, add spinach, cilantro, and lemon juice. Set slow cooker to warm.
  6. Warm flatbread in oven for a few minutes (for example, while you simmer the quinoa) or in microwave oven.
  7. Serve over rice or quinoa, with a dollop of plain yogurt and additional cilantro on top! Also great with flatbread for dipping, especially if you have a husband who’s a sucker for bread.
Serving size: 1 1/2 cups dahl and 1/2 cup cooked quinoa Calories: 130 Fat: 1 g Saturated fat: 0 g Carbohydrates: 22 g Fiber: 6 g Protein: 9 g

DSC00162

Gather all your ingredients- veggies, spices, and lentils. This is probably the hardest step of the entire recipe. You think I’m joking. Just wait.

DSC00167

Chop away at those veggies! (Ok, maybe THIS is the hardest part). Mmmm… sweet potatoes.

DSC00169

No lack of spices in this recipe. Gotta love Indian food for that. 🙂 I don’t know why I put them all in a bowl first. Probably because they look prettier that way.

DSC00170

Toss it all into the slow cooker and set to high for 3-4 hours, or low for 6-7.

DSC00172

What it’ll look like when it’s almost done!

DSC00182

Add your spinach, cilantro, and lemon juice…

DSC00193

Ready to serve!

DSC00197

DSC00199

Ladled over quinoa, and topped with a dollop of plain greek yogurt, more cilantro, and multigrain flatbread. Sweet Potato Masoor Dahl FTW!