Gorgonzola-Stuffed Burgers w/ Grilled Peach Salad

DSC01761

DSC01763

Gorgonzola-Stuffed Burgers
Recipe Type: Burger
Cuisine: American
Author: Claire McCormick of “Claire Tastes”
Prep time:
Cook time:
Total time:
Serves: 12-16
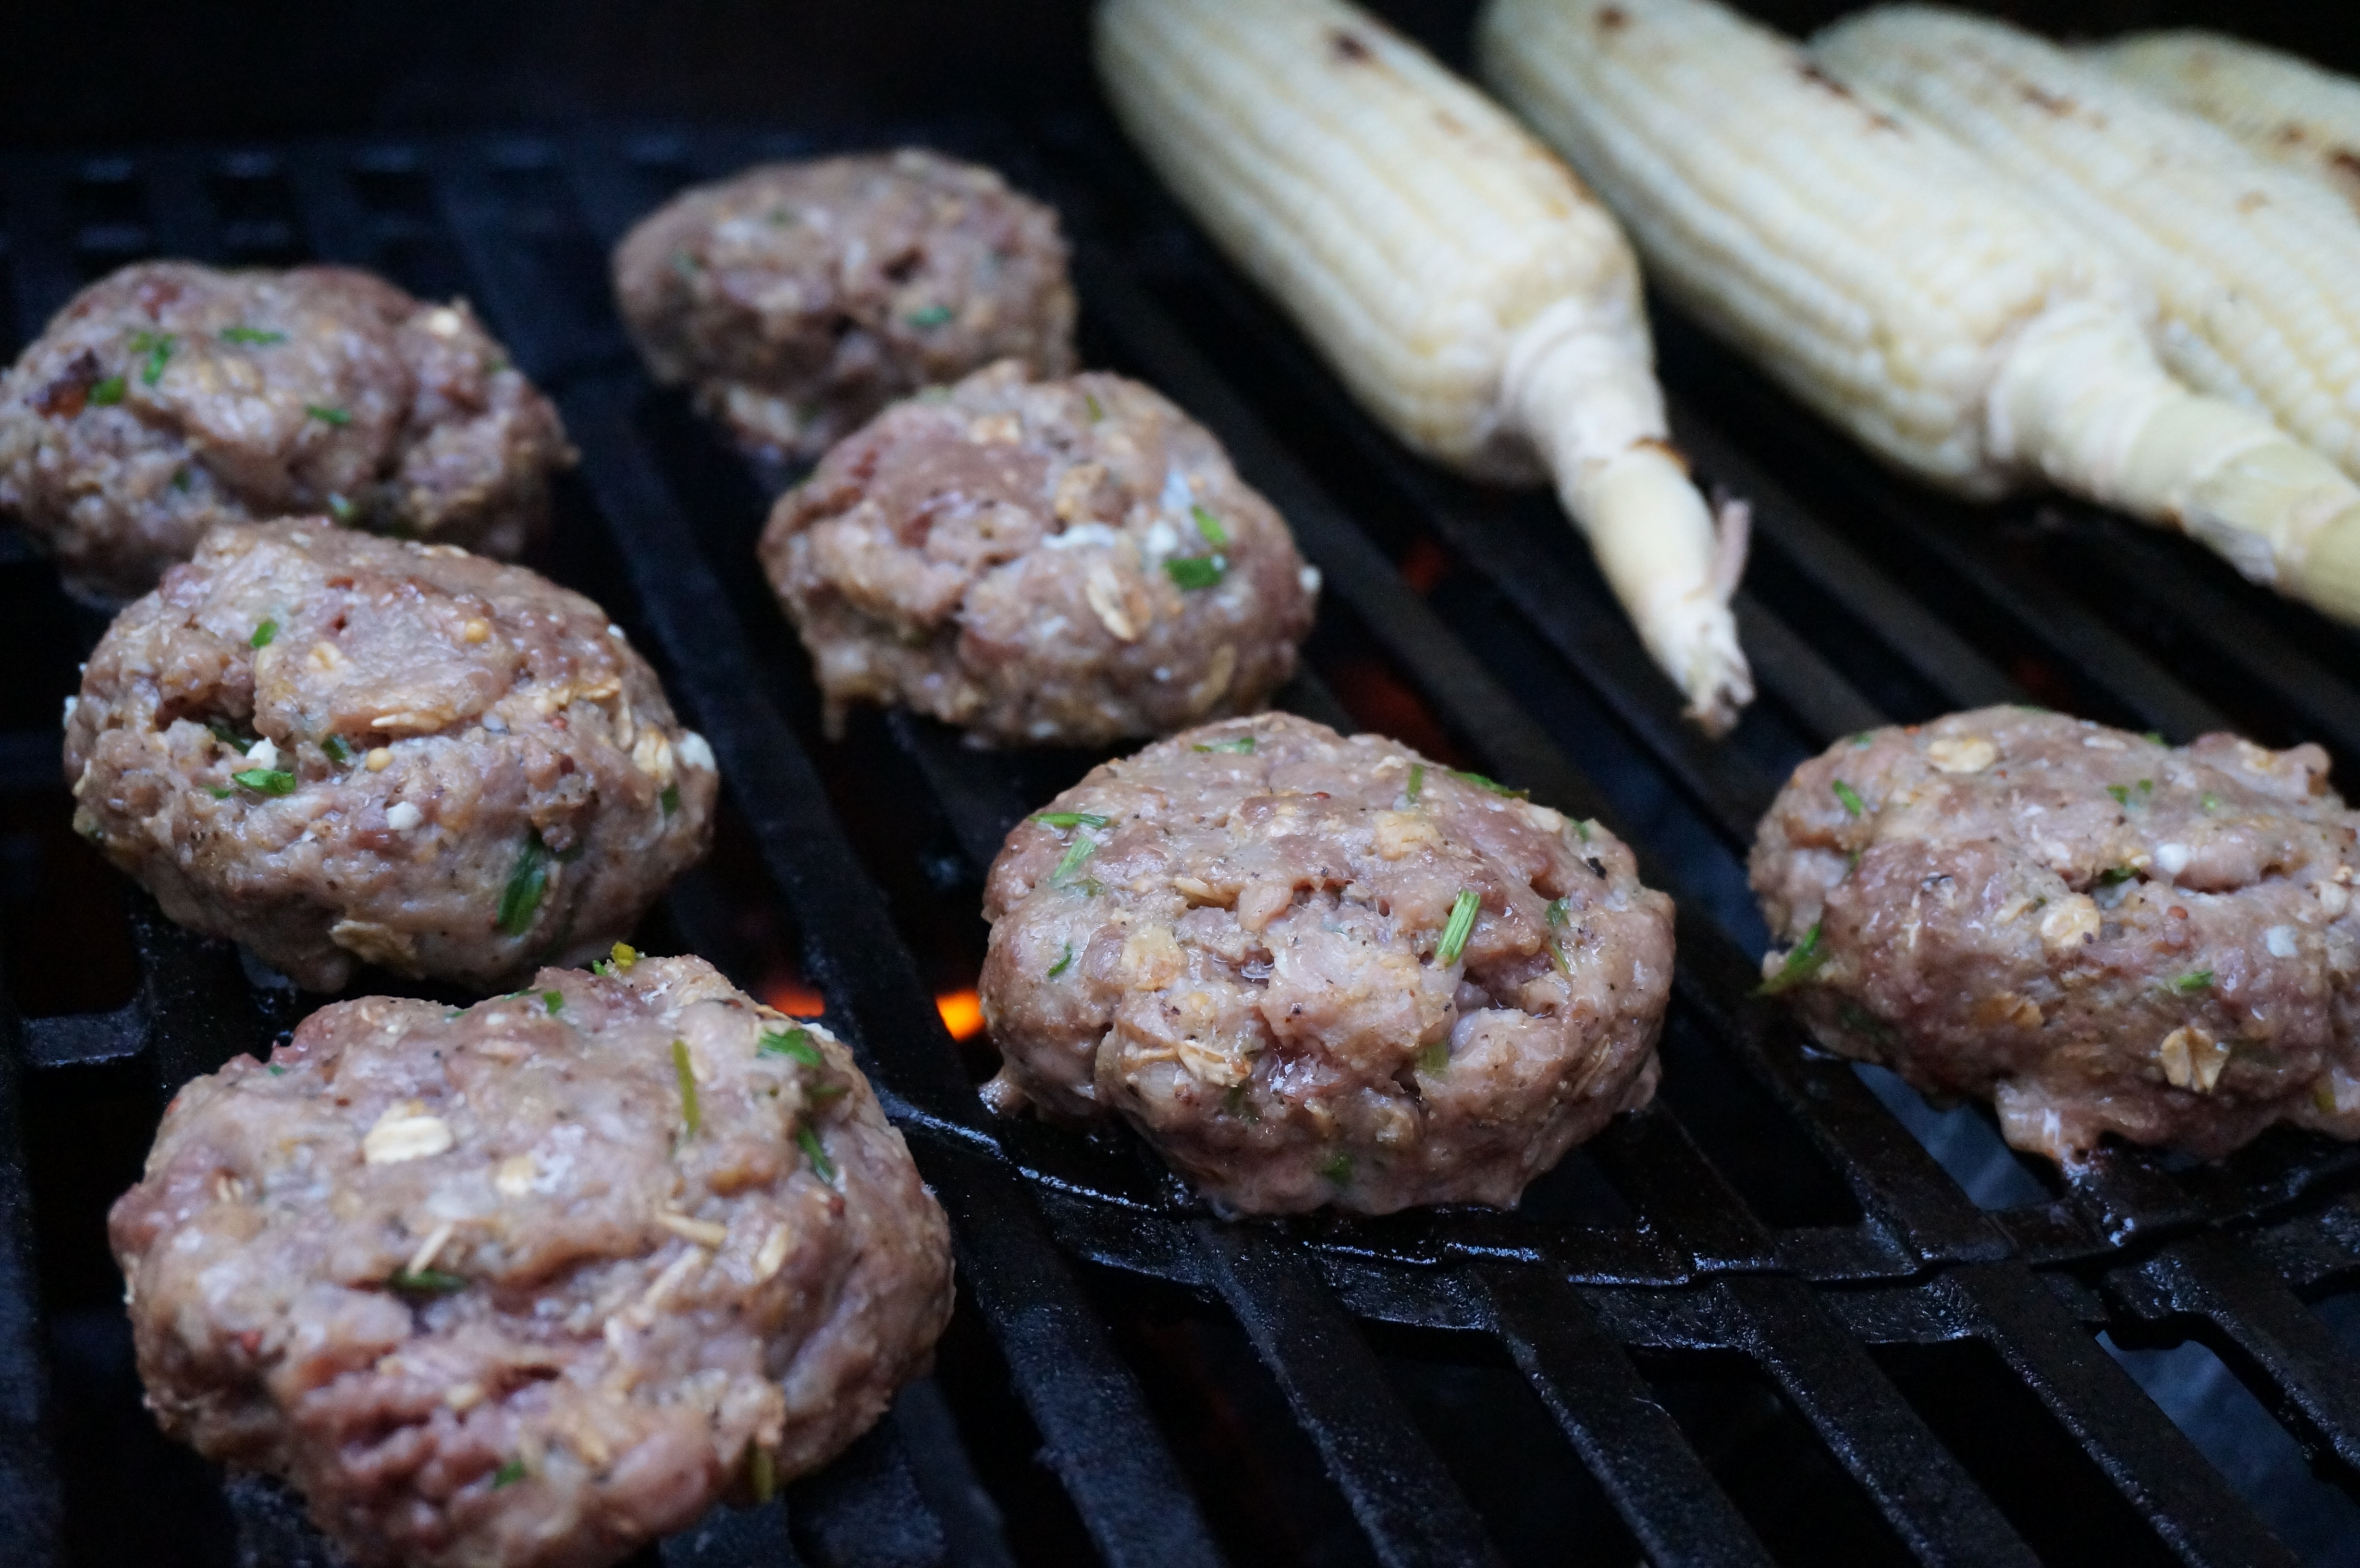
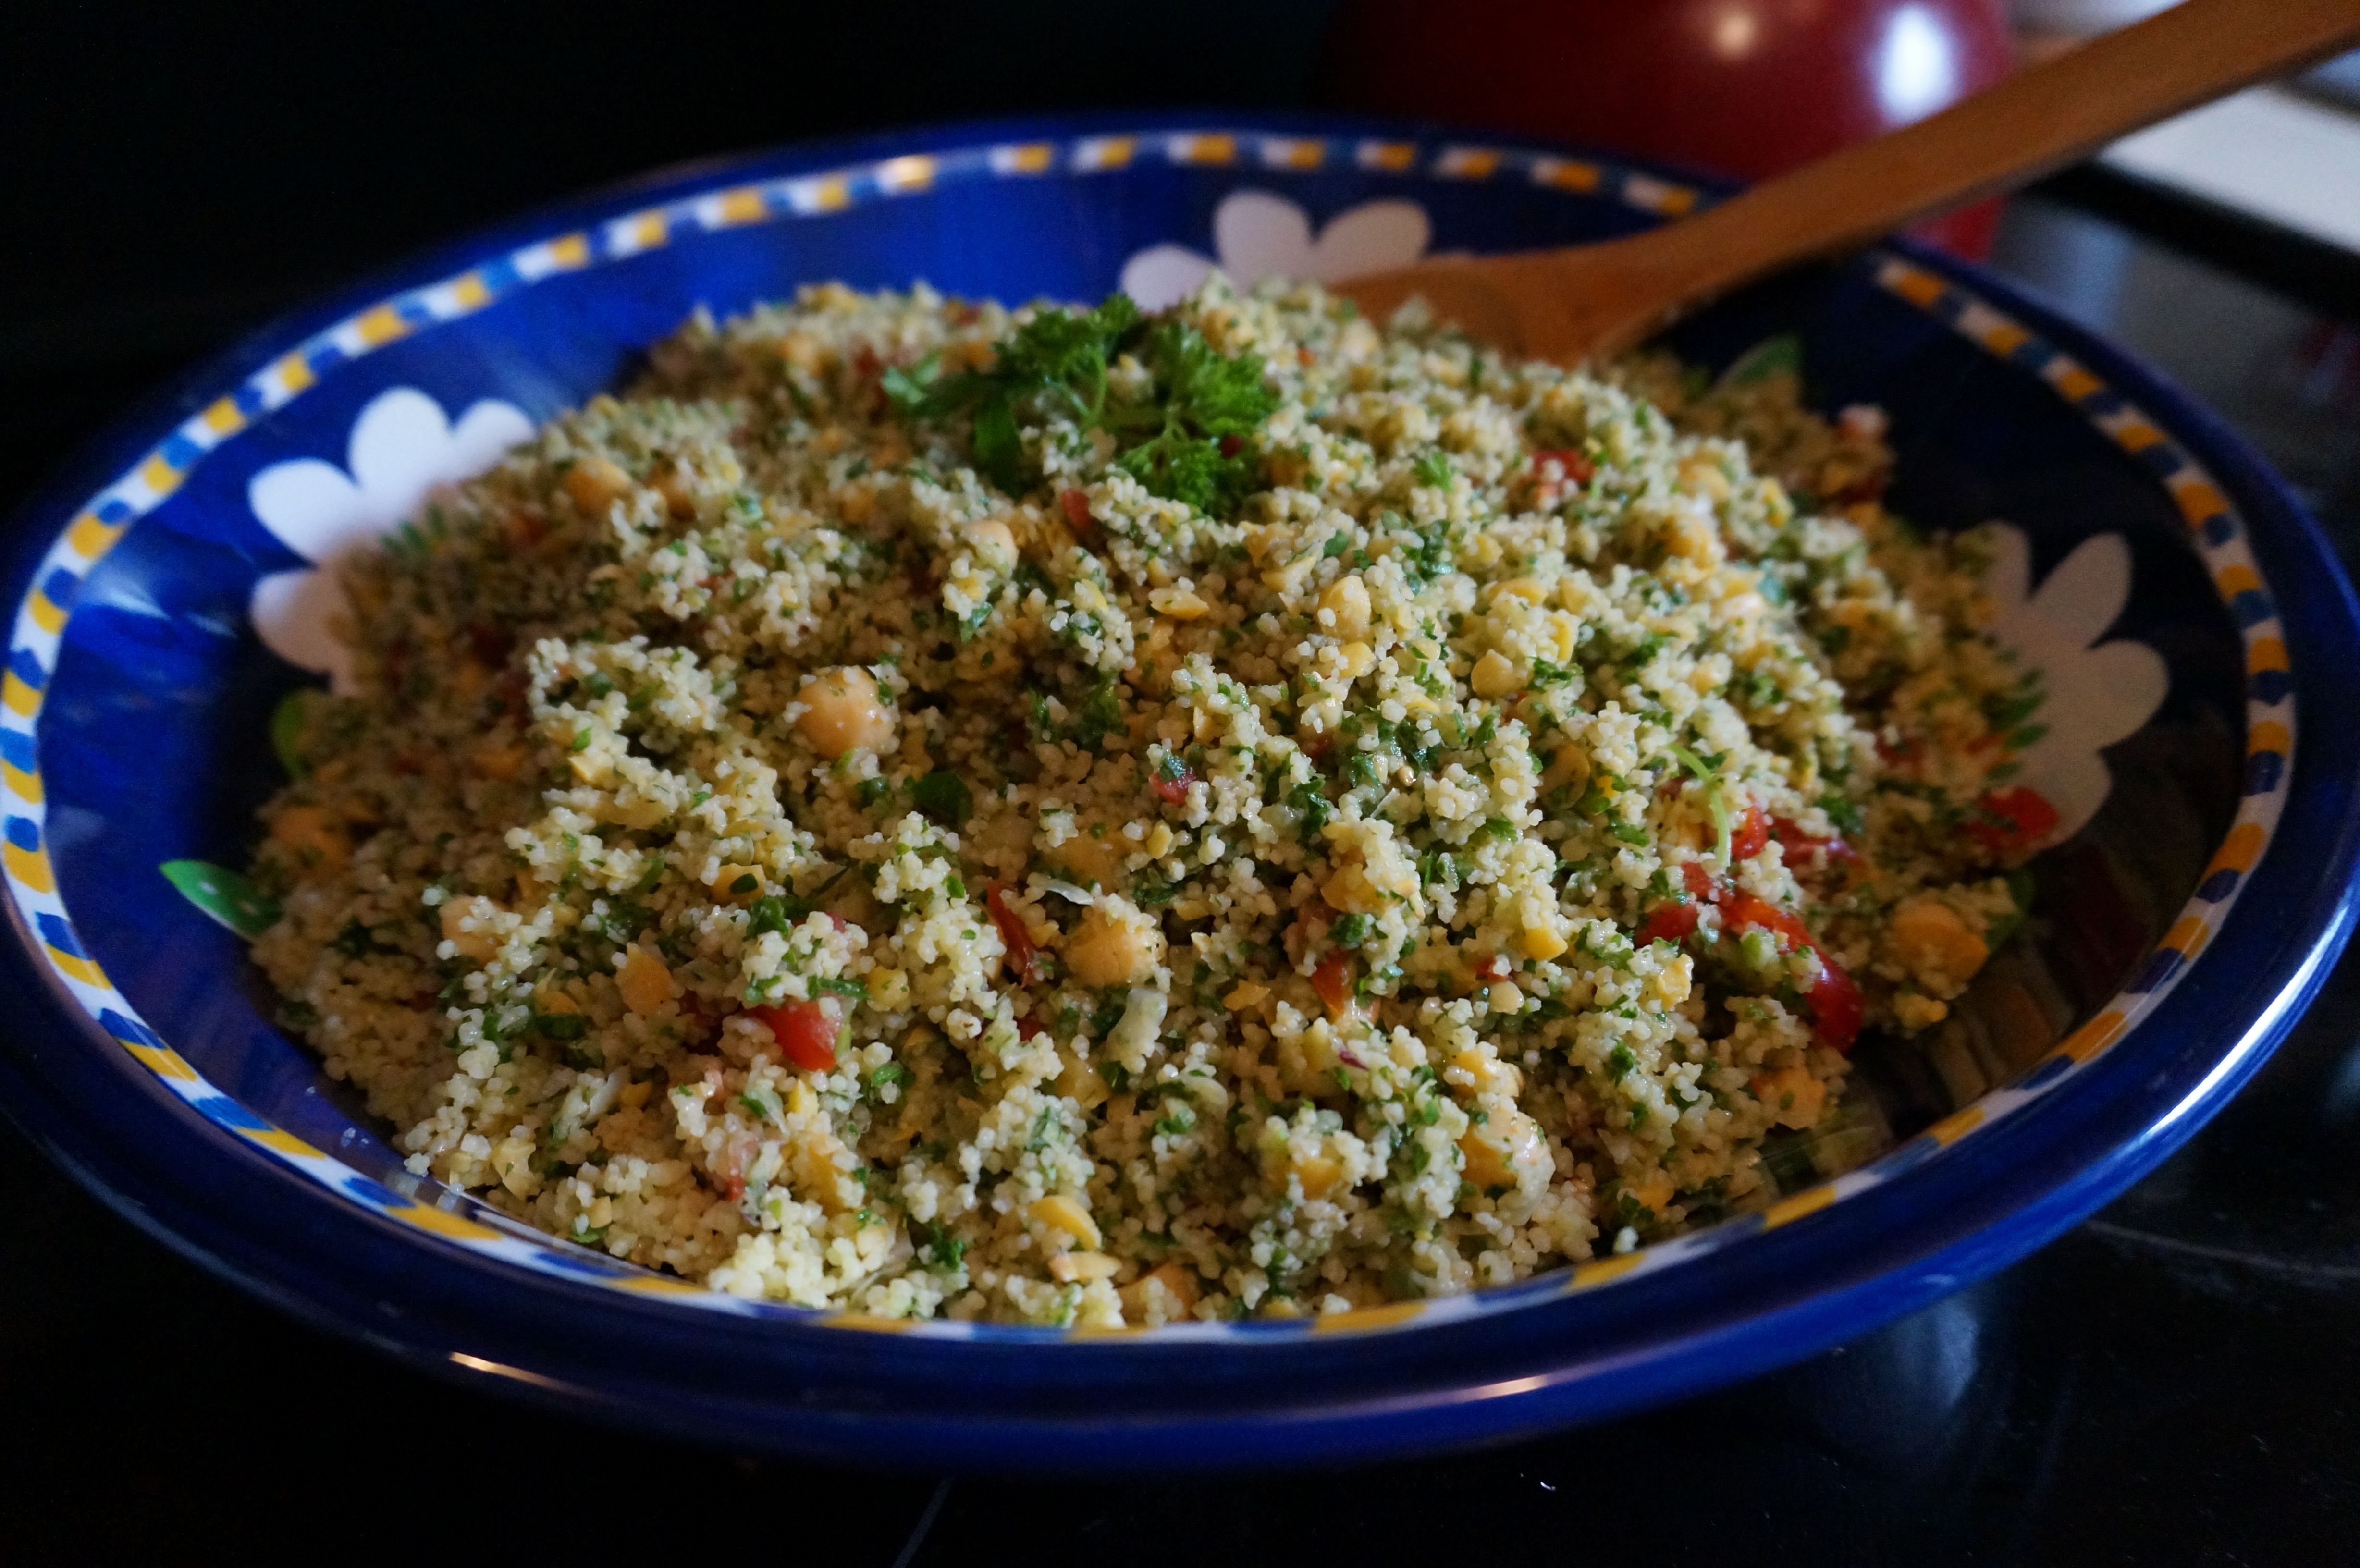
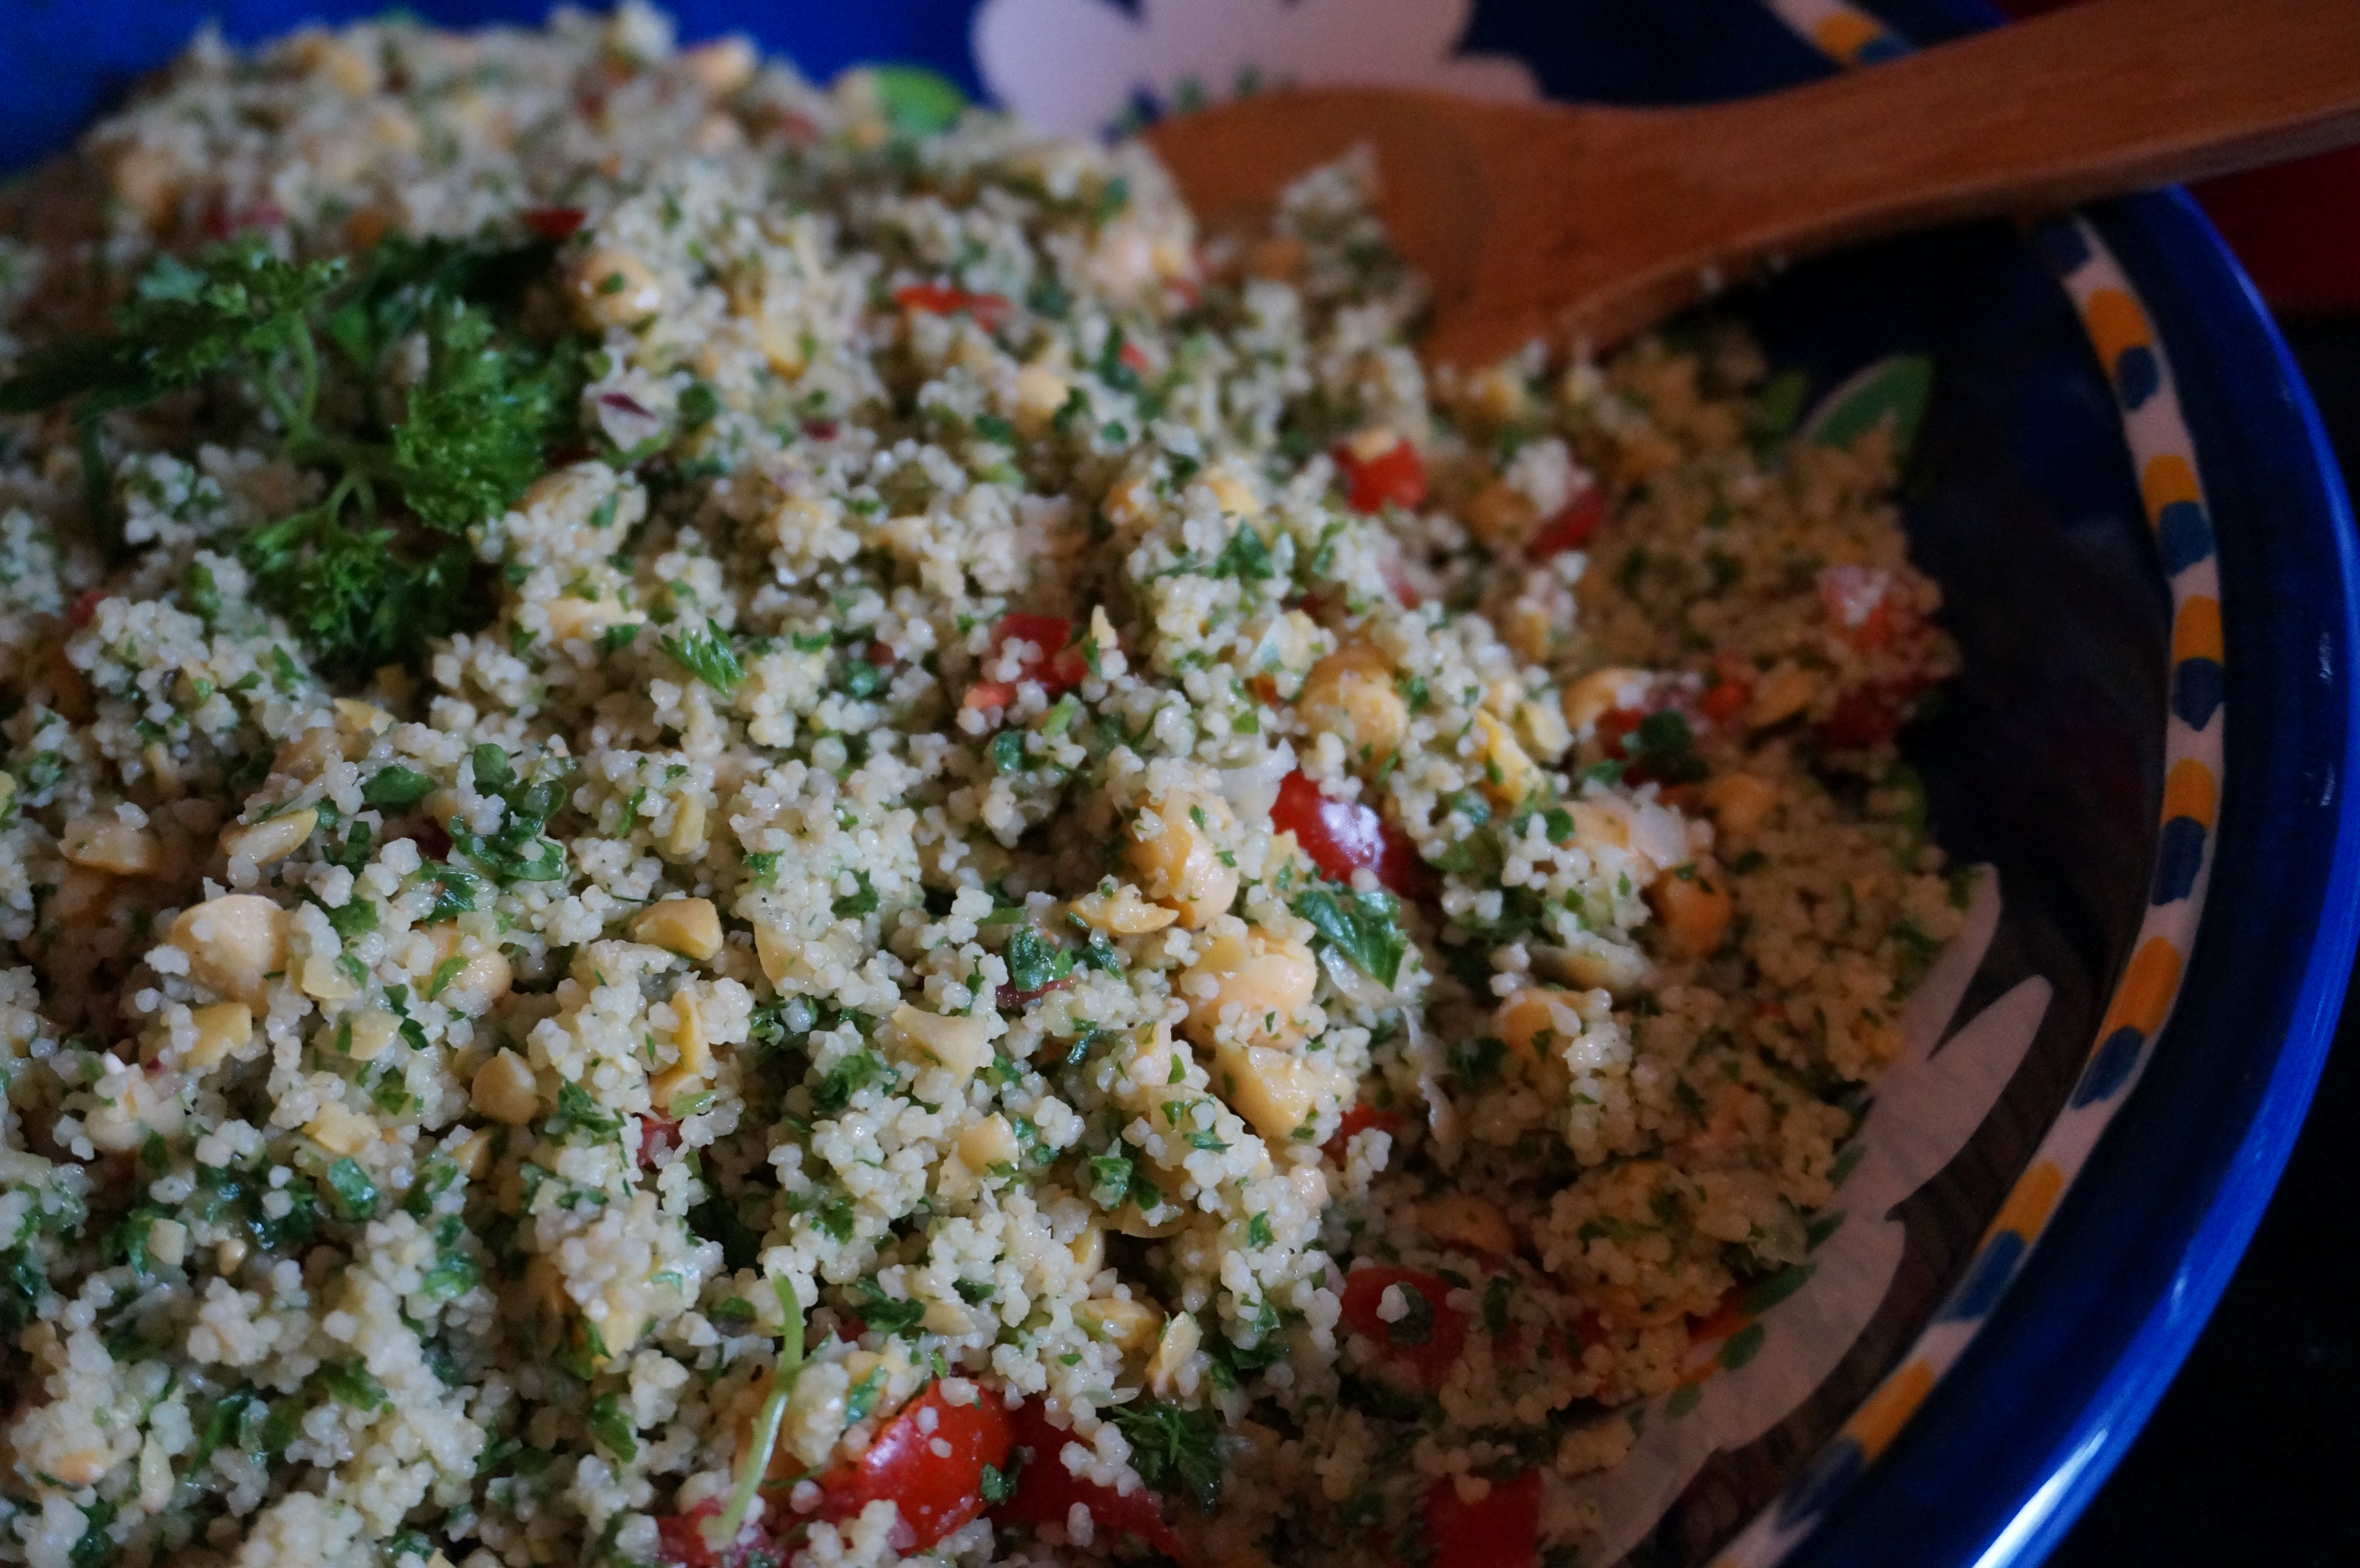
Why not stuff your burger with something delicious tonight? I stuffed these beef and pork patties with a bit of gorgonzola cheese and served ’em up with a dollop of Cville Farmers’ Market Strawberry-Rhubarb Jam. The combo of savory and sweet was unbeatable! Serve with corn on the cob and a side salad.
Ingredients
  • 1 lb ground beef (I used 80% lean)
  • 1 lb ground pork
  • 1 tbsp minced garlic
  • 1 tbsp whole grain dijon mustard
  • 1/4 cup fresh chives, chopped roughly
  • 1 tbsp italian seasoning (I had a creamy peppercorn dressing rub that I tossed in there!)
  • 1 tbsp Worcestershire sauce
  • 1/2 cup raw oats
  • 1/2 cup Panko bread crumbs
  • 2 eggs, beaten
  • 1 tbsp milk
  • 1 tsp each salt and pepper
  • 1 small container crumbled gorgonzola cheese
  • olive oil, for drizzling
Instructions
  1. Combine all ingredients above in a large bowl (except cheese and oil). Stir until well-incorporated.
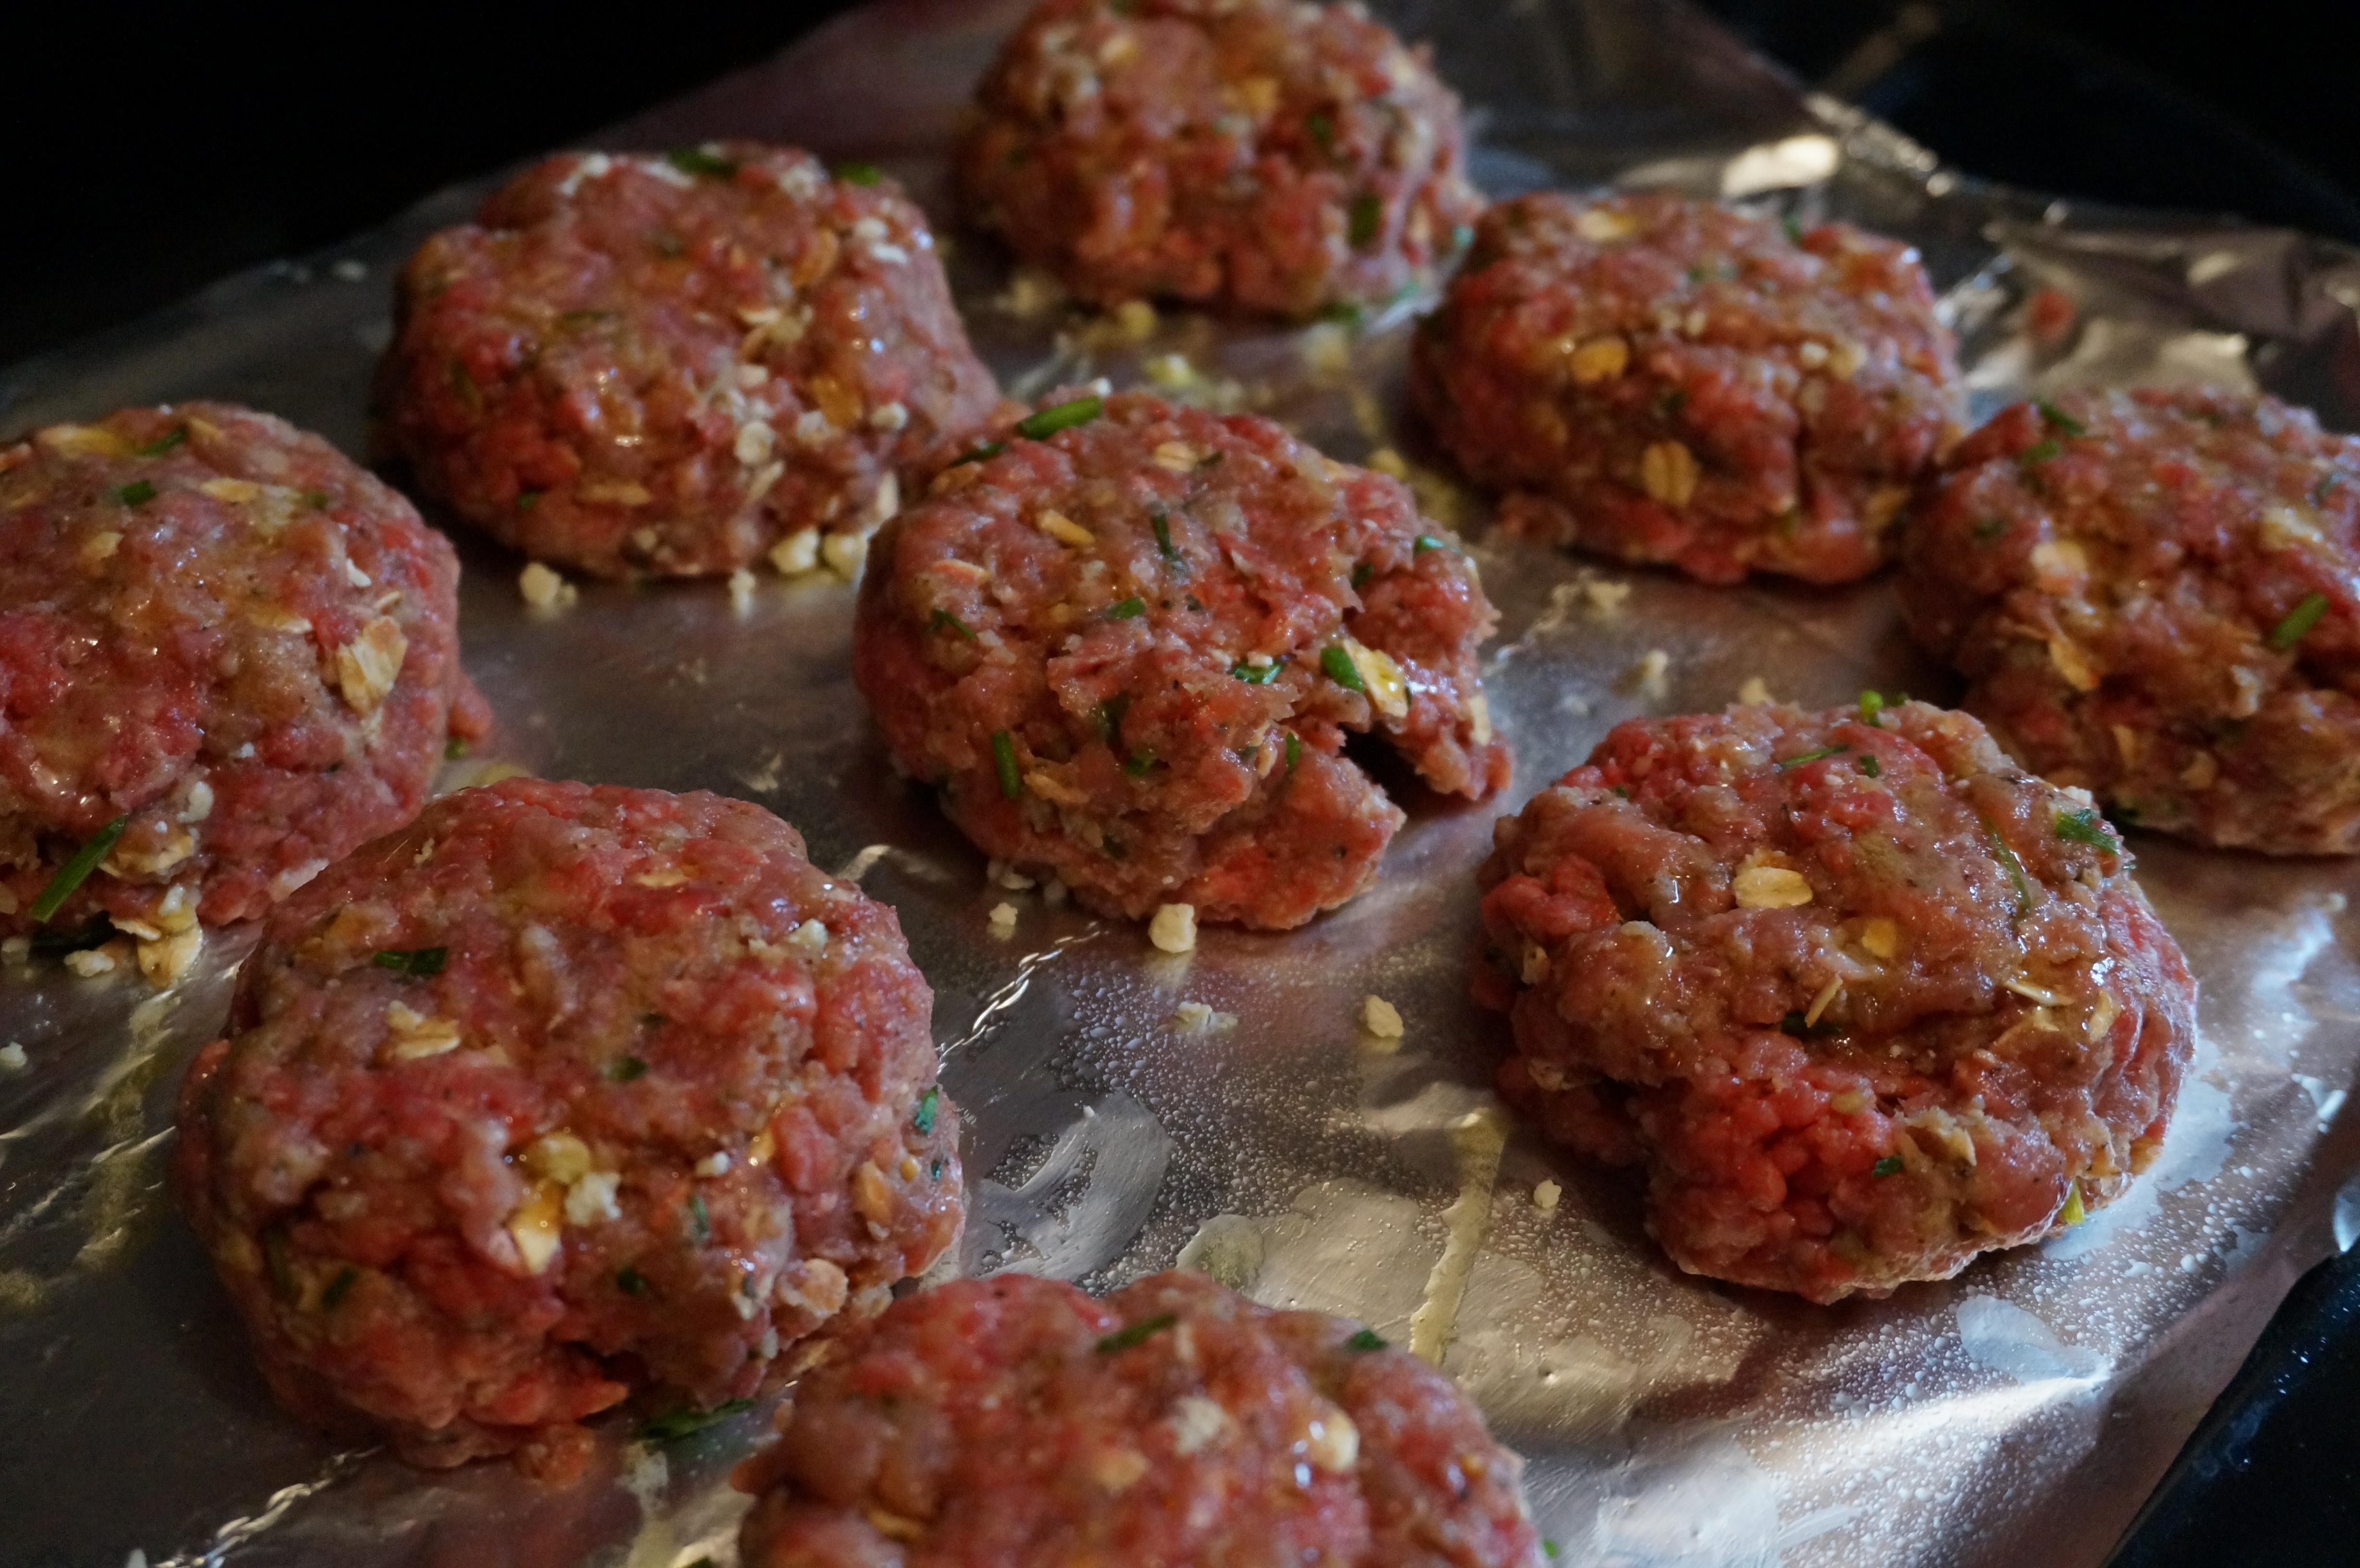
  2. Using hands, roll meat mixture into small balls (I made mine about 2 inches in diameter). Reserve a bit of meat mixture for “covering” the burgers later.
  3. Gently press thumb in center of each ball to make a small indentation in center.
  4. Roll about a teaspoon of gorgonzola cheese into a small ball (it helps if your hands are slightly wet to get the cheese to stick together) and press gently into each thumbprint.
  5. Press the sides of the patties inward to cover the cheese. If you need more meat to cover, use the reserved mixture from earlier!
  6. Drizzle lightly with olive oil and set aside until ready to grill.
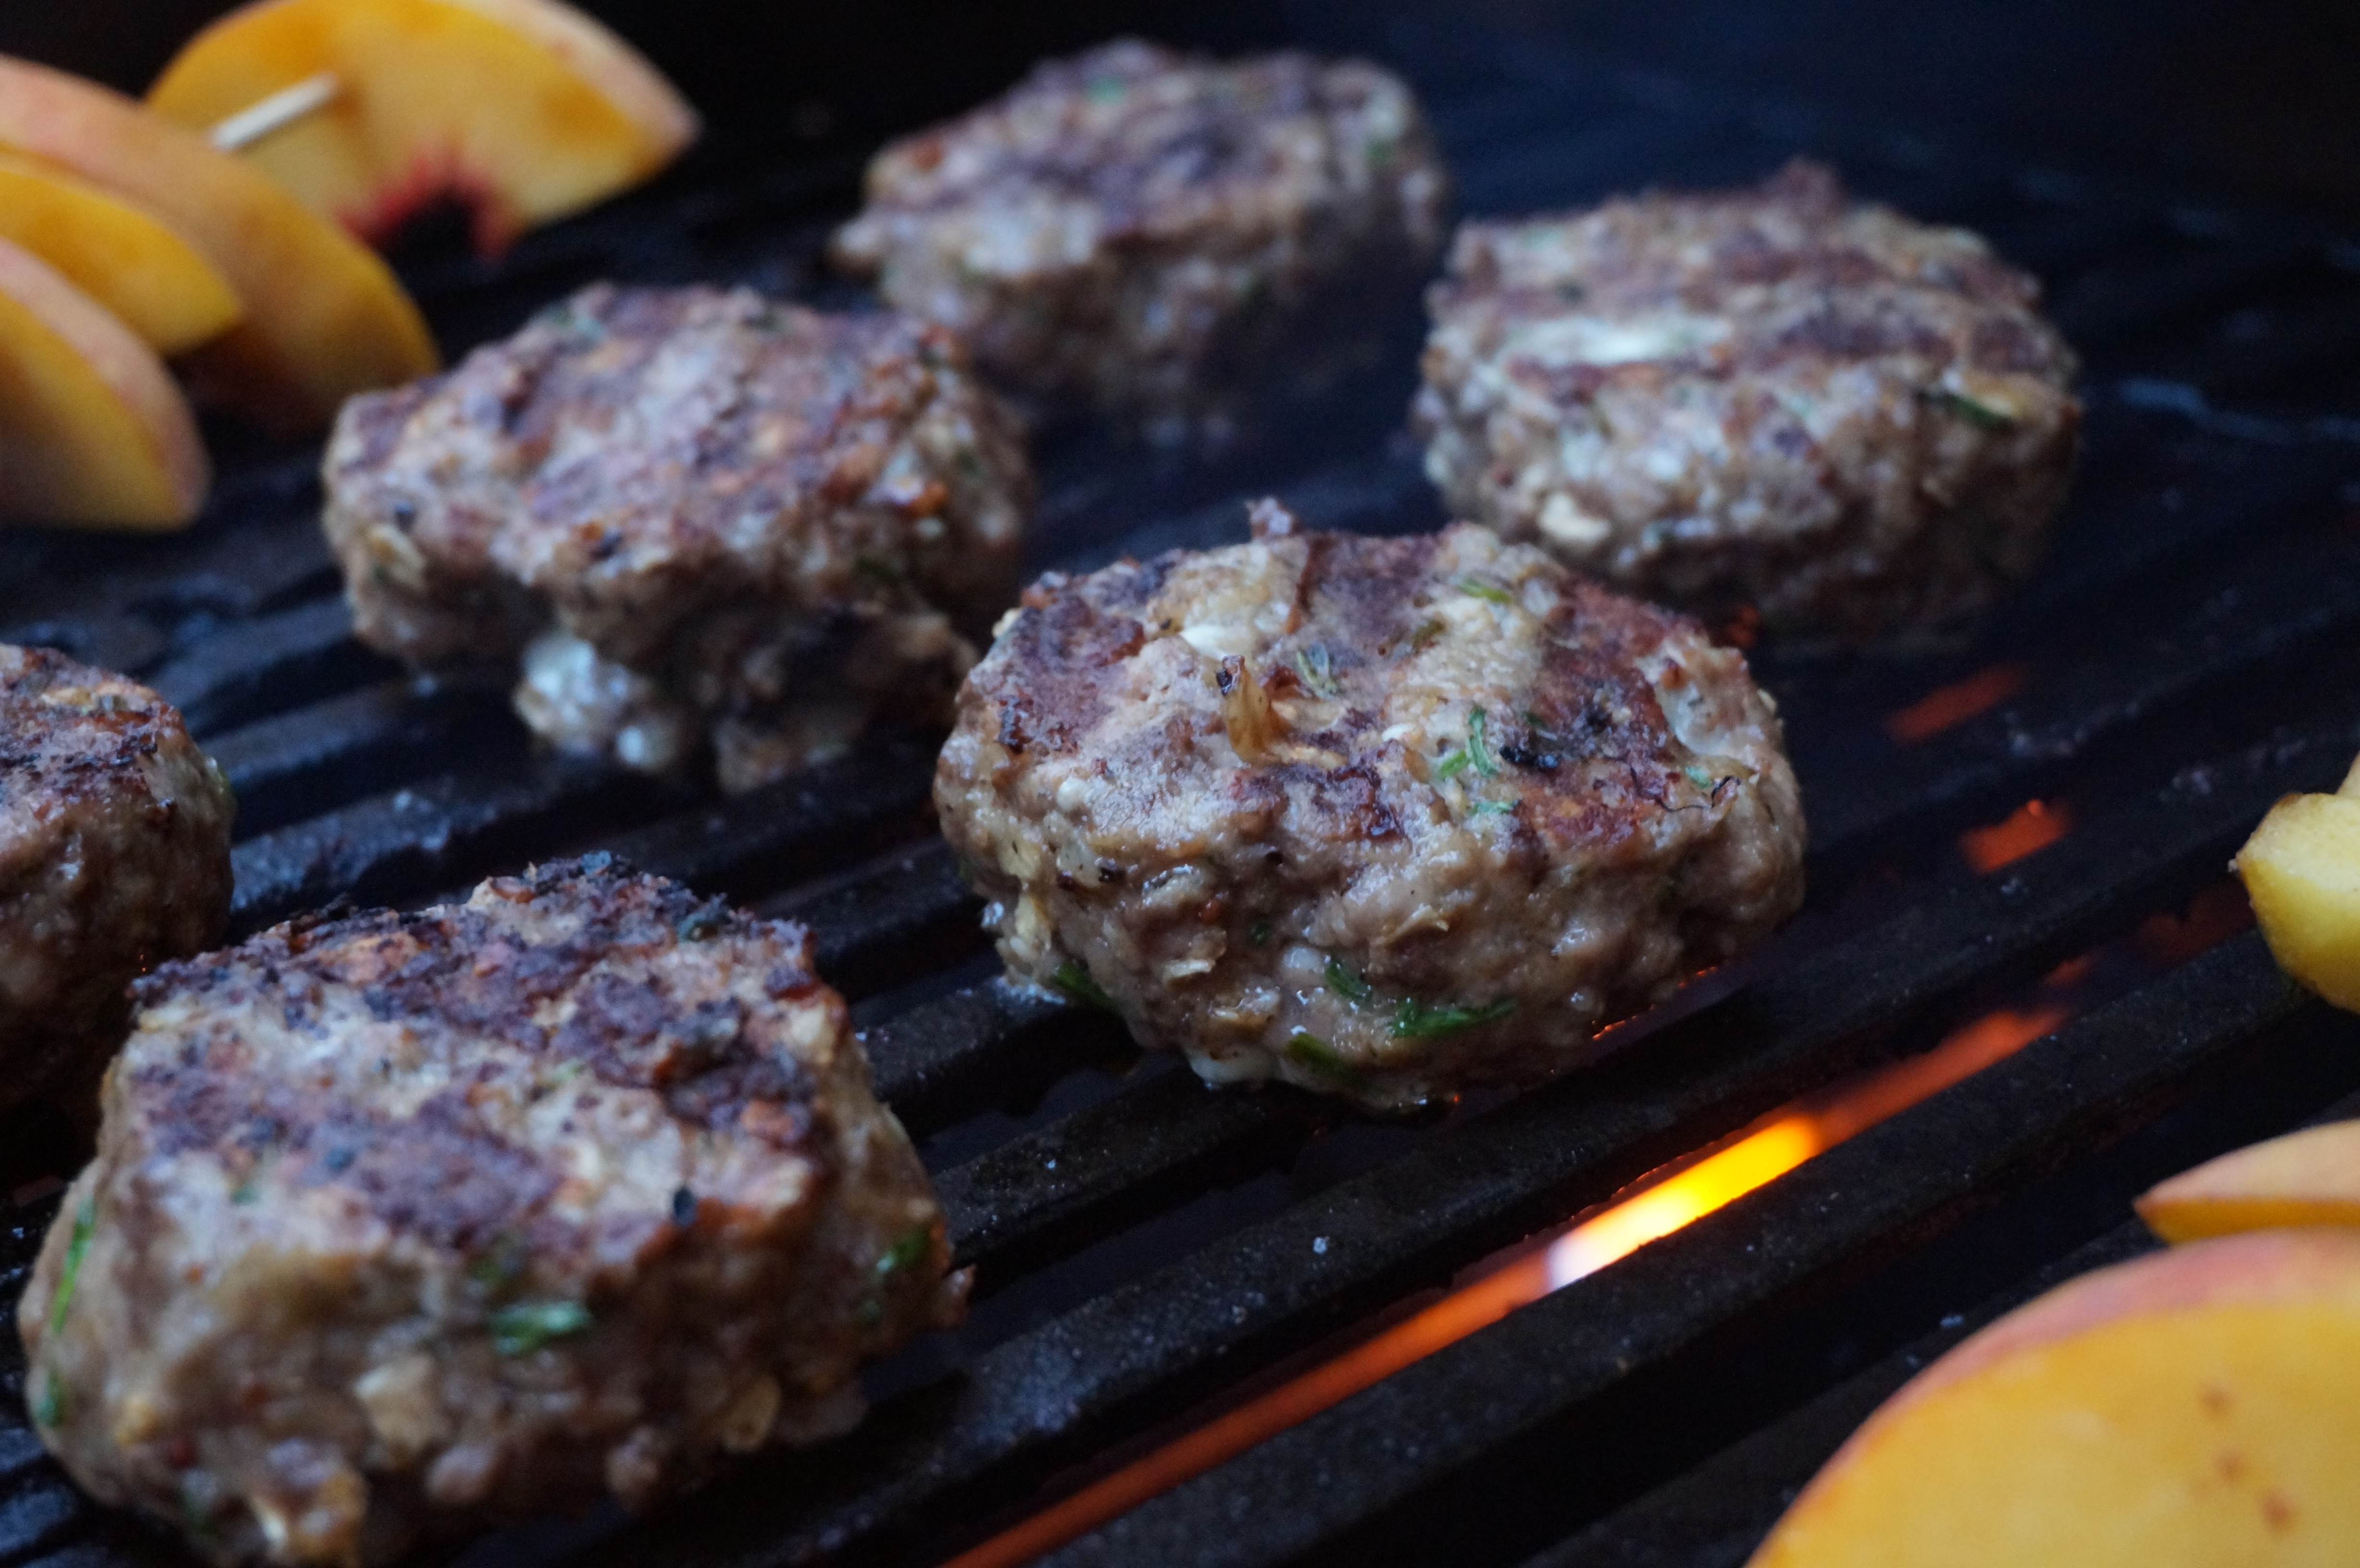
  7. Preheat grill to medium heat. Grill burgers about 4 minutes per side, or until tops begin to get juicy and you can see those fantastically delicious looking grill marks on the bottom!
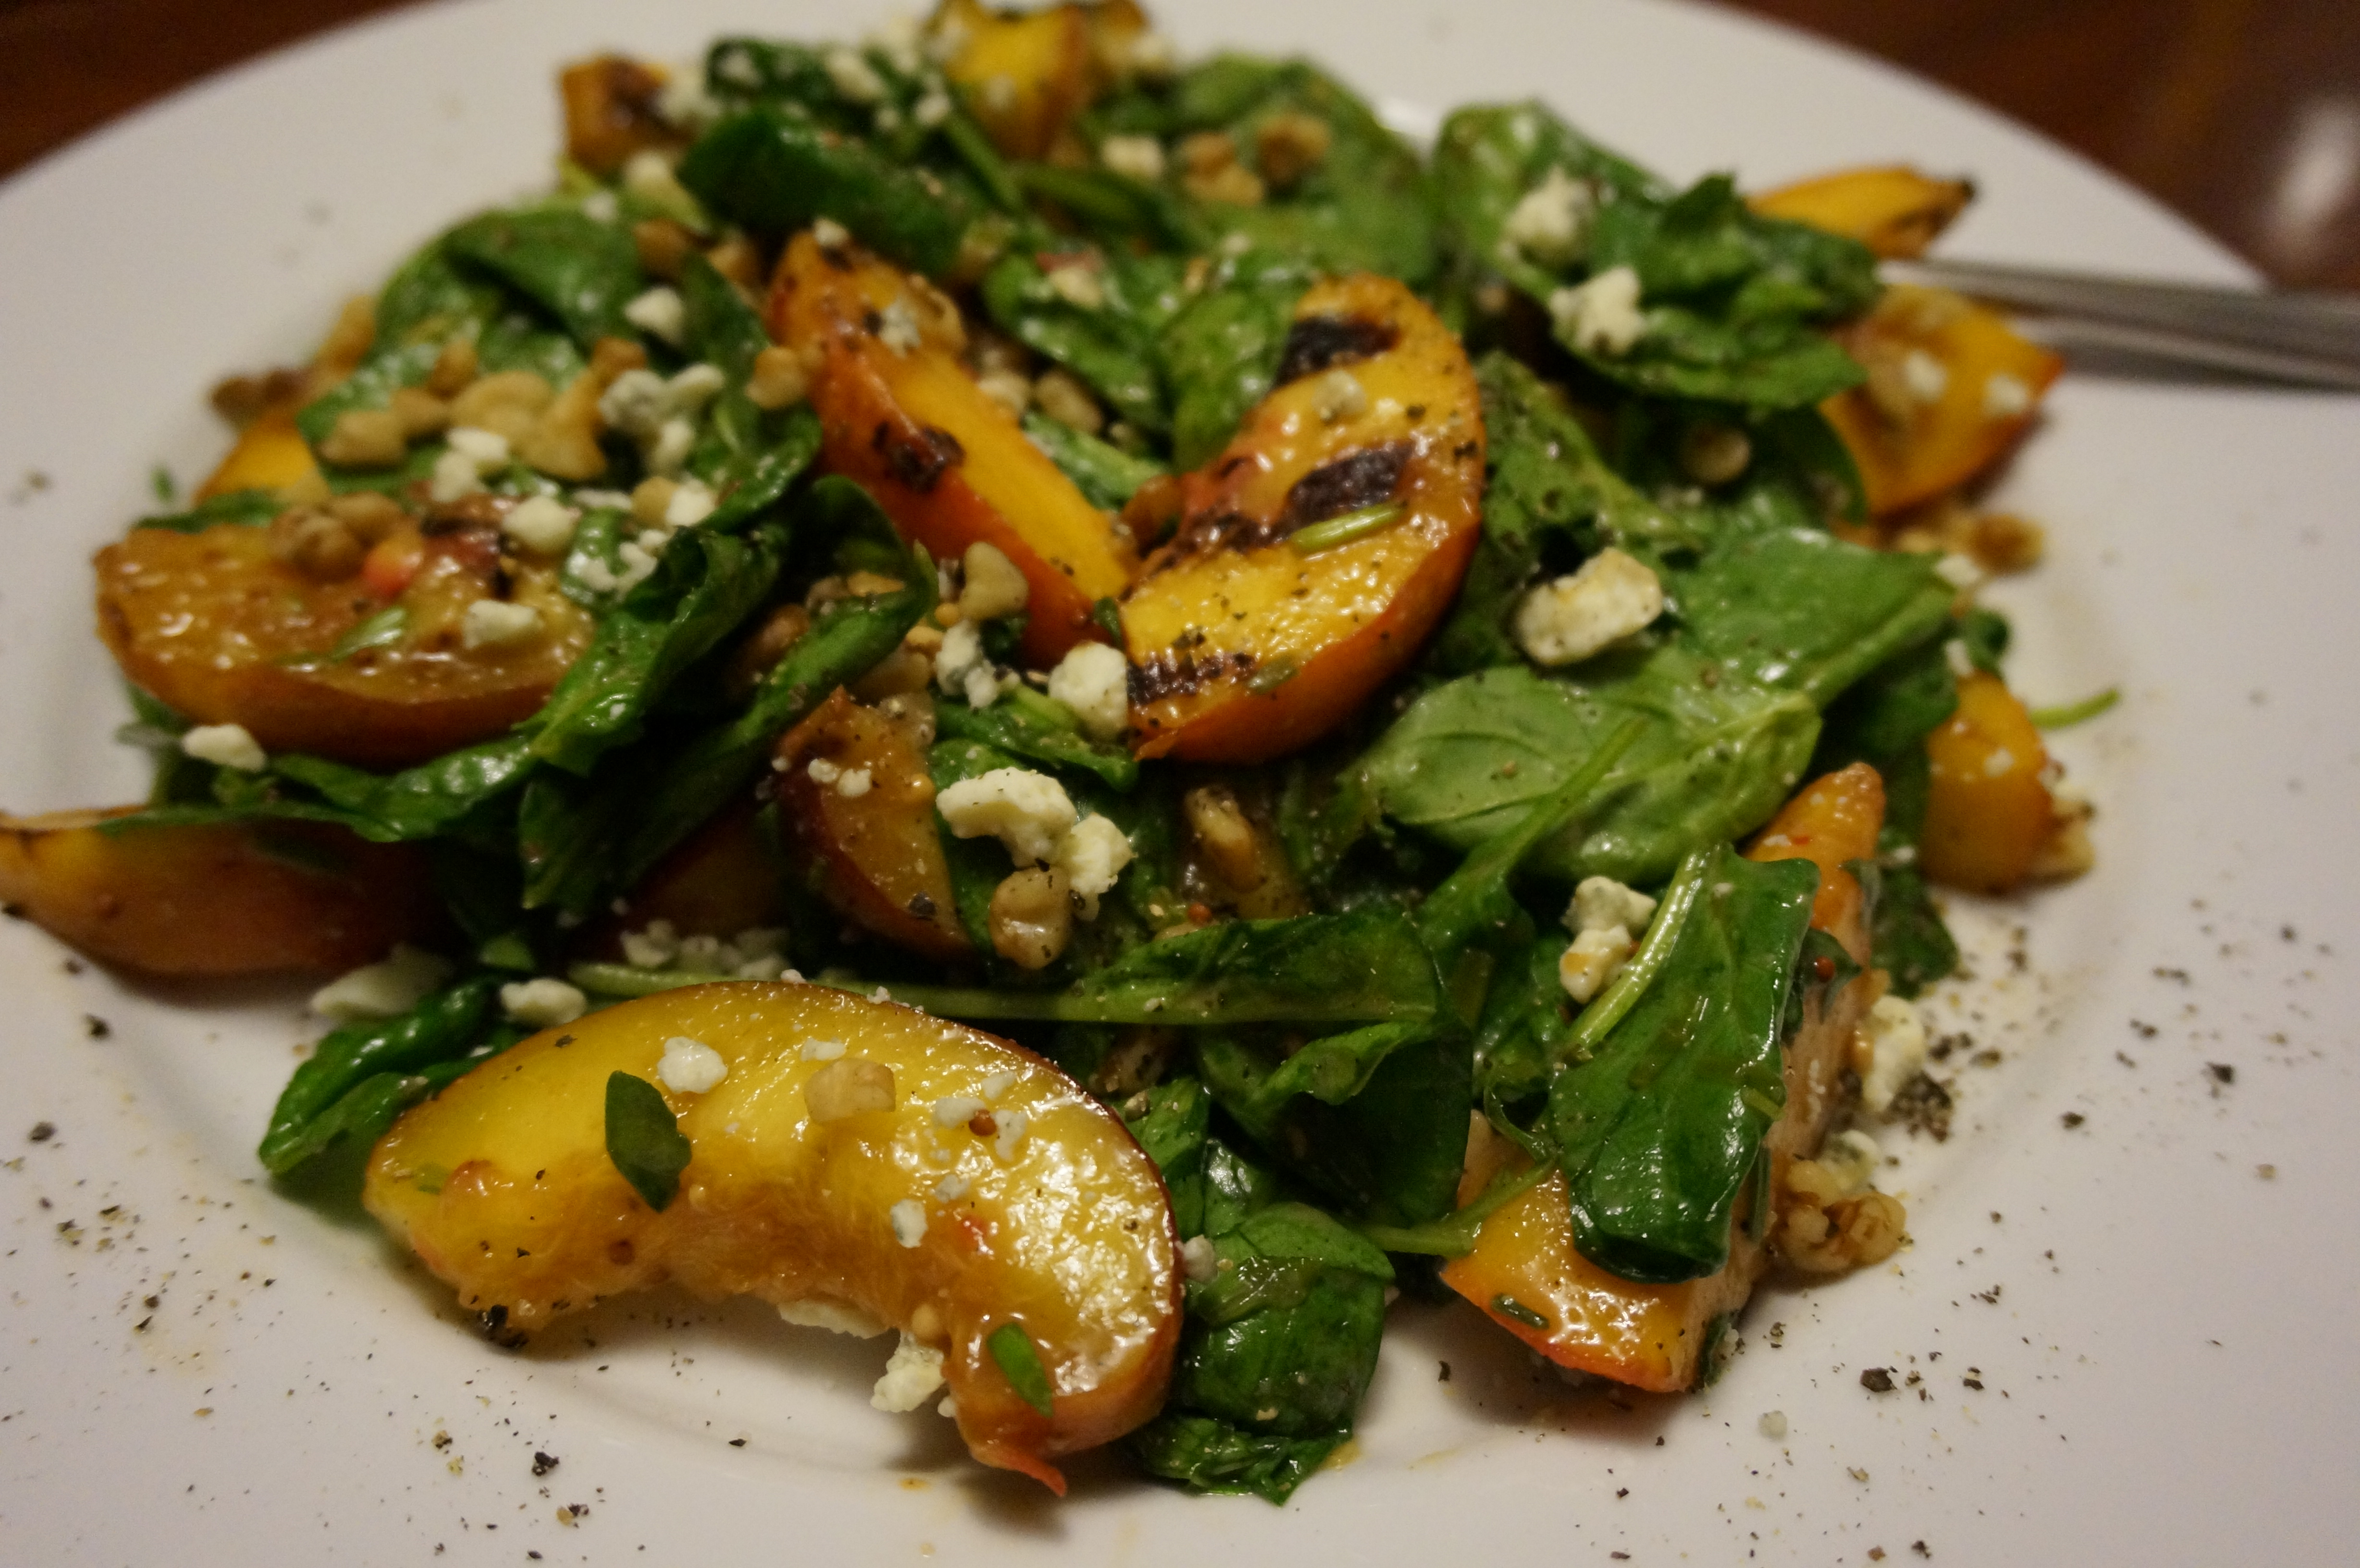
  8. Serve on a bun or with a dollop of jam over the top of the burger (I used a strawberry rhubarb jam that a friend brought us from the Cville farmers’ market and it was DELICIOUS!). Also delicious with a fruity side salad like my Grilled Peach Salad with Honey-Dijon Vinaigrette (see separate post), and corn on the cob (always!).

DSC01743

DSC01746

DSC01749

DSC01755

Couscous Tabbouleh

DSC01737This recipe for tabbouleh could NOT be easier. I didn’t have to heat up a pot on the stove, chop any veggies, or deal with mushy, overcooked grains. With whole wheat couscous, all you have to do is add boiling water and let them sit for a few minutes before fluffing with a fork (anyone wonder why it’s called “fluffing” btw? A fork doesn’t exactly seem like a good “fluffer”).

I added a TON of lemon juice, both fresh and from the bottle, for max tang factor . I also cut down on the amount of olive oil typically used in tabbouleh (aka ‘tabouleh’ or ‘tabouli’… I just chose the one with the most letters), as I didn’t want a salad to sit in my fridge dredged in oil for a week. Yes, that is how long I plan on keeping this stuff around. I’m gonna be a working woman now, people! I may add more oil and juice later if it gets too dry- we’ll see. Free free to do more or less of the oil/lemon to your liking.

I also added 2 cans of garbanzo beans to help increase the protein in the salad- it seemed like it was missing something “meaty.” As I plan to eat this as a main course most days, I wanted a bean in there to help keep me fuller for longer.

One more thing. Make sure not to skimp on the parsley. I used curly parsley because it’s a bit chewier and also easier to pluck from the stems (which is a super annoying task). Other than that, this salad takes less than 30 minutes and will only get better over time! With a food processor, you don’t need to chop any veggies or onions into perfect little slices- just pulse and add to the couscous!

This would be incredible over more greens with a fried egg on top and/or a little dollop of greek yogurt or crumbled feta (or both!). You could also serve it stuffed in a pita pocket or with some whole grain crackers on the side. Enjoy!
DSC01737

DSC01738

Couscous Tabbouleh
Recipe Type: Salad, Vegetarian
Cuisine: Middle Eastern
Author: Claire McCormick of “Claire Tastes”
Prep time:
Cook time:
Total time:
Serves: 12-20
Here is another easy and extremely versatile salad recipe, made with whole wheat couscous and packed with protein and fiber! I added garbanzo beans to bulk it up a bit and only used a bit of olive oil because I didn’t want it “overdressed.” Lots of lemon juice in this recipe, but feel free to add more or less oil/lemon if you prefer! This salad is great over greens, stuffed inside a pita, or served on whole grain crackers. It’d probably be excellent with a dollop of plain Greek yogurt on top as well. As always 🙂
Ingredients
  • 2 cups whole wheat couscous (TJ’s)
  • 1 cup boiling water
  • 1/4 cup extra virgin olive oil
  • 1 lemon, halved
  • 8 tbsp lemon juice, divided
  • 2 bunches parsley, rinsed and stems cut off
  • 1 cucumber, rinsed and peeled
  • 1/2 red onion
  • 2 cans garbanzo beans, rinsed and drained
  • 1 carton cherry tomatoes, rinsed
  • 1/2 tsp black pepper
  • 1 tsp salt
  • 1 tsp garlic powder
Instructions
  1. Pour couscous into a large bowl. Add boiling water and stir. Add olive oil and juice from 1/2 of lemon, plus 4 tbsp regular lemon juice.
  2. In a food processor, add parsley, cucumber, red onion, and juice from the other half of the lemon, plus remaining 4 tbsp lemon juice. Pulse until roughly chopped. (It helps to give it a quick stir after each pulse to avoid getting one big parsley “paste” with big chunks of red onion at the top of the bowl!)
  3. Using a spatula, add processed mixture to the bowl with the couscous.
  4. In food processor, add garbanzo beans and tomatoes. Pulse until just roughly chopped- two or three times for about 2-3 seconds is all you need!
  5. Add to the bowl with the other ingredients and toss to combine. Add pepper, salt, and garlic powder and stir.
  6. Serve with additional greens like spinach or kale and a dollop of plain yogurt on top, or stuffed in a pita pocket for a hearty sandwich!


Chicken Marsala Rice Bake

DSC01691

Chicken Marsala Rice Bake
Recipe Type: Chicken, Casserole
Cuisine: Italian
Author: Claire McCormick of “Claire Tastes”
Prep time:
Cook time:
Total time:
Serves: 12
A quick chicken marsala casserole with fresh parsley, peas, and a healthy dose of parmesan cheese! Serve with a side salad and some crusty bread for sopping up the extra juice!
Ingredients
  • 3 tbsp olive oil, divided
  • 1 small onion, sliced thinly
  • 3 tsp minced garlic
  • 16 oz sliced mushrooms
  • 1 small container capers
  • 1 1/2 tbsp flour
  • 1/2 cup marsala cooking wine
  • 1/2 cup low fat milk (I used 1%)
  • 2 cups reduced sodium chicken broth
  • 1 tsp salt
  • 1/2 tsp pepper
  • 1.5 lbs chicken cutlets, sliced thinly (about 6 cutlets total)
  • 1 1/2 cups instant brown rice, uncooked
  • 3/4 cup frozen peas
  • 1/2 bunch Italian parsley, chopped roughly (about 1/3 cup total)
  • 8 oz (?) freshly shredded or grated parmesan cheese
Instructions
  1. Preheat oven to 375 degrees.
  2. In a large skillet, heat 2 tbsp oil on medium-high. Add onions and mushrooms and cook until soft, stirring occasionally, about 7 minutes. Stir in capers.
  3. Add garlic, salt and pepper and stir to combine. Sprinkle flour over top and stir continuously for 1 minute.
  4. Reduce heat to a low simmer. Add marsala wine and milk, stirring until thickened- about 3-4 minutes.
  5. Transfer mixture to a small saucepan. Add chicken broth and simmer (careful not to let the liquid reduce too much- we will need it for cooking the rice later!).
  6. Meanwhile, sprinkle chicken cutlets with salt and pepper. Add 1 tbsp remaining olive oil to skillet and cook on medium-high heat until browned on both sides, about 2 minutes. Remove from heat.
  7. In a 9×13 casserole dish sprayed with cooking spray, add rice in a thin layer. (It will stick to the pan, sort of like flouring a cake pan!)
  8. Layer chicken on top of rice. Sprinkle peas over top.
  9. Carefully pour the mushroom sauce over the top of the casserole. Sprinkle with parsley.
  10. Cover tightly with foil and bake 35-40 minutes or until rice is cooked through (the time may change depending on what kind of rice you’re using!).
  11. Uncover, sprinkle with cheese and bake 5 more minutes until cheese is melted.
  12. **You can also make this a day in advance and either freeze it and reheat, or keep it in the fridge uncooked (the uncooked rice will soak up some of the liquid get a bit soft! You can add more liquid if you need to, although 2 cups worked for us) and then cook the next day. Make sure all the rice gets cooked- a few of our grains were a little “crunchy” still and we just stuck the casserole back in the oven!

DSC01646

DSC01648

DSC01657

DSC01664

DSC01666

DSC01691

Gourmet Grilled Pimiento Cheese Sandwiches, Starring Ninth Street Bakery Sourdough

DSC01624

DSC01633

I promise that this time I am actually using real cheese. But this is not just any grilled cheese recipe (you know the kind I’m talking about, with the gross perfect-right-angle-so-orange-it-probably-doesn’t-even-need-to-be-refrigerated type singles that come in their own little plastic packages). This is a GOURMET grilled cheese recipe. You know why? Not only because it tastes way better, but because the bread demanded it. I didn’t just use any bread, I used fresh Ninth Street Bakery bread! If you haven’t heard of this local bakery based in downtown Durham, NC, you need to go check it out. They sell all types of organic breads, pastries, and other baked goods, using only the highest-quality ingredients. They have a spot at the Durham Farmers’ Market, too- I swear every time I walk by I get a waft of something different and delicious. They’re always handing out samples of some creative hand pie or blueberry turnover.

Since I was using NSB’s sourdough French (it was a hard decision between this and the sunflower loaf!), I wanted to make sure to do this sandwich right. I decided to slather each slice with pimiento cheese (not local, I confess. judge me.), top it with some spinach and crushed tomatoes (oooh those were local and from the farmers’ market too!), and some leftover mole chicken I had on hand. I decided to toast the buttered slices on the stovetop first, then fill them up, close them and finish in the oven. This way I was sure to get that nice, crispy top and bottom instead of having one side of the bread all soggy from not flipping it before baking!

Try it and let me know what new grilled cheese creations you come up with! Thanks again to Ninth Street Bakery for making it possible for me to share this gourmet sandwich with ya’ll!

Gourmet Grilled Pimiento Cheese Sandwiches
Recipe Type: Sandwich, Grilled Cheese
Cuisine: Grilled Cheese, American
Author: Claire McCormick of “Claire Tastes”
Prep time:
Cook time:
Total time:
Serves: 8
Here’s a gourmet grilled cheese recipe perfect for a cooler summer night! Smothered with pimiento cheese and topped with fresh sautéed cherry tomatoes, spinach, and mole chicken! Serve it with a side salad or a nice n’ plump fried egg!
Ingredients
  • 1 loaf sourdough French bread (I used Ninth Street Bakery!)
  • 1/2 stick butter, melted
  • 1 tsp olive oil
  • 1 cup fresh cherry tomatoes
  • 2 cups fresh spinach
  • 1 12 oz container pimiento cheese, at room temperature
  • 1 cup leftover shredded chicken (I had some leftover mole chicken on hand that I wanted to use up!)
  • 1/2 tsp red pepper flakes
Instructions
  1. Heat oven to 350 degrees.
  2. In a large nonstick skillet, add olive oil and tomatoes. Cook on medium heat until soft, about 3 minutes. Crush tomatoes against side of skillet so that they are no longer plump.
  3. Add spinach to skillet and remove from heat, stirring, until wilted. Set entire mixture aside.
  4. Microwave the butter in a shallow dish until melted.
  5. Dredge each slice of bread or use a spoon to drizzle butter over both sides of bread. Place each slice in skillet and cook on medium-low heat for about 2 minutes per side, or until nice and golden-brown. (Don’t worry if it’s not completely browned- we’ll finish them in the oven!)
  6. Continue above step with remaining slices. Remove from heat and set on a few large paper towels. (It’s helpful to keep the slices in the order they were placed in the loaf to match sizes later!)
  7. Line up the slices of bread in order on a large baking sheet. Spread pimiento cheese on each slice of bread.
  8. On half of the slices, layer spinach and tomato mixture on top of cheese, followed by the chicken. Sprinkle on a few red pepper flakes if you like a little more heat!
  9. Close the sandwich with its “partner” slice.
  10. Bake 4 minutes at 350 degrees, then flip and bake 4 minutes more.
  11. Allow to cool slightly, then slice on the diagonal.
  12. Serve with a side salad (like my Southwestern Quinoa Salad) and a fried egg!

DSC01603

DSC01605

DSC01606

DSC01609

DSC01610

DSC01614

DSC01616

DSC01619

DSC01621

DSC01624


Smokey Grilled Cheeze Panini featuring “SPREAD”: “Cheeze that’s to LIVE for!”

DSC01587

Welcome to the first post of my new blog theme! Ben and I have been working on coming up with a new design for Claire Tastes for a while now, and we finally found this one! We wanted something that would showcase the pictures (I mean, that’s all that ya’ll look at anyway, isn’t it?) and otherwise be pretty minimalist. Keepin’ it classy. I can’t wait to see how this one evolves over time! Still working on a header logo, but I am told that I can’t do it all. Or at least not all at one time. 🙂

Anyway, this weekend was my White Coat Ceremony (more on that in a later post) and so my parents were down visiting from CT. Eager to do all the Durham-y things, we noshed at Nosh (see what I did there?), went to the Durham Farmers’ Market, went biking on the ATC (ok that was just me), took Samoa for a walk, and enjoyed a fun dinner at the Mediterranean Deli in Chapel Hill. Oh, I guess that last part isn’t Durham-y. But it is still amazing and you need to go.

At the Farmers’ Market (which my dad, who knows farmers’ markets, said was the “best one he’d ever been to”), I just had to introduce them to my “cheese friend Justin,” the long-haired, bearded man who stands just on the outskirts of the market near the fresh-squeezed lemonade stand. Justin and I bond almost every week as I bike down to the market, and every week I take his samples and have the (very legitimate) excuse that I “can’t actually buy anything today because I don’t have a way to get it back.” Well, this time, I told Justin, I will definitely be buying some “cheese” because my parents brought a car! Justin and his wife work at SPREAD, a Gourmet Plant Based “Cheeze” that is vegan, soy-free, dairy-free, and gluten-free. If you’re wondering what’s left to make anything good out of, there are always almonds! And that’s exactly what you’ll find here- its main ingredient is almonds! Low in saturated fat and rich in protein, vitamins, and minerals, SPREAD is freshly made in Downtown Durham and sold at Whole Foods as well as the Durham Farmers’ Market. You can like their Facebook page here.

DSC01596

DSC01597

I’m no vegan, and I don’t have an issue with gluten or soy products (or dairy, for that matter), Since I am a lover of all things almonds, I was instantly hooked. They sell a cheddar variety, smokey variety, and jalapeño variety. All are equally good (and yes, I know this because I sample them every week. Don’t judge me.) They taste almost like hummus, but a little more dense and well, cheesy. Justin has told me that they make a great sauce for mac and cheese, a theory which I definitely will be testing out. So far I’ve been sticking to using SPREAD (I bought a container of the smokey kind) on sandwiches and crackers. Uh-mazing! It gives a great little kick to a sandwich and works in place of hummus AND cheese. Since today was a rainy, dreary day here in Durham, I decided to make some grilled “cheeze” on Ezekiel bread (which I have also gotten into lately and LOVE). I added a bit of red pepper flakes and basil on top of the spread, topped with spinach, red onion, and tomato, and pressed it in the Geroge Foreman for about 6 minutes at 350 degrees. Served next to a mug of lentil soup with a dollop of greek yogurt on top, and some juicy red cherries!

The perfect cozy-day lunch! Happy Monday!

DSC01580

DSC01582

Smokey Grilled Cheeze Panini with Gourmet Plant-Based “SPREAD”
Recipe Type: Panini
Cuisine: Lunch
Author: Claire McCormick of “Claire Tastes”
Prep time:
Cook time:
Total time:
Serves: 1
The perfect lunch for a dreary Monday afternoon! I used SPREAD, a Gourmet Plant Based Cheeze made of almonds, and spread it on the bottom slice of this panini to give it an extra smokey kick!
Ingredients
  • 2 slices Ezekiel bread
  • 2 tbsp SPREAD Gourmet Plant-Based Cheeze (I used the “smokey” variety)
  • Sprinkling of red pepper flakes
  • Sprinkling of basil
  • Fresh spinach
  • 2 slices tomato
  • A few slices of red onion
  • S&P
  • Cilantro, to garnish
Instructions
  1. Preheat George Foreman or panini press to 350.
  2. Spread the Cheeze SPREAD on the bottom slice of bread.
  3. Sprinkle red pepper flakes and basil.
  4. Layer spinach, tomato, and red onion. Sprinkle with salt and pepper to taste.
  5. Top with other slice of bread.
  6. Press in George Foreman for 6 minutes, until cheese is melted and onions are soft.
  7. Serve on the side of a mug of lentil soup, with a dollop of greek yogurt and fresh cherries! Garnish with cilantro, if desired.


Crunchy Thai Noodle Salad

DSC01445

Crunchy Thai Noodle Salad
Recipe Type: Salad, Pasta
Cuisine: Thai
Author: Claire McCormick of “Claire Tastes”
Prep time:
Cook time:
Total time:
Serves: 16
I made this easy Thai noodle salad for a baby shower I was hosting, after making wayyyyy too much spaghetti earlier in the week!
Ingredients
  • Leftover spaghetti
  • 1 pound sugar snap peas
  • 1/2 cup vegetable oil
  • 1/4 cup rice wine vinegar
  • 1/3 cup soy sauce
  • 1 tablespoon honey
  • 2 tsp minced garlic
  • 1 ginger
  • 1 tsp garlic powder
  • 3 tablespoons toasted white sesame seeds, divided
  • 1/2 cup creamy peanut butter
  • 1 red bell pepper, cored and seeded, thinly sliced
  • 1 package Asian slaw (mixture of cabbage, grated carrots, peanuts, sugar snap peas)
  • 4 green onions, sliced
  • 3 tablespoons chopped fresh parsley
  • S&P
Instructions
  1. Cook sugar snap peas (either by steaming, or in the microwave!)
  2. For the dressing, whisk together vegetable oil, rice wine vinegar, soy sauce, honey, garlic, ginger, garlic powder, 2 tablespoons sesame seeds and peanut butter in a medium bowl.
  3. Combine spaghetti, sugar snap peas, peppers, Asian slaw mixture, and green onions in a large bowl. Pour the dressing over the mixture and combine.
  4. Serve sprinkled with peanuts or extra sesame seeds!

DSC01443