Smoked Salmon & Kale Salad with Orange-Dijon Vinaigrette

DSC02419
Smoked Salmon and Kale Salad with Orange-Dijon Vinaigrette

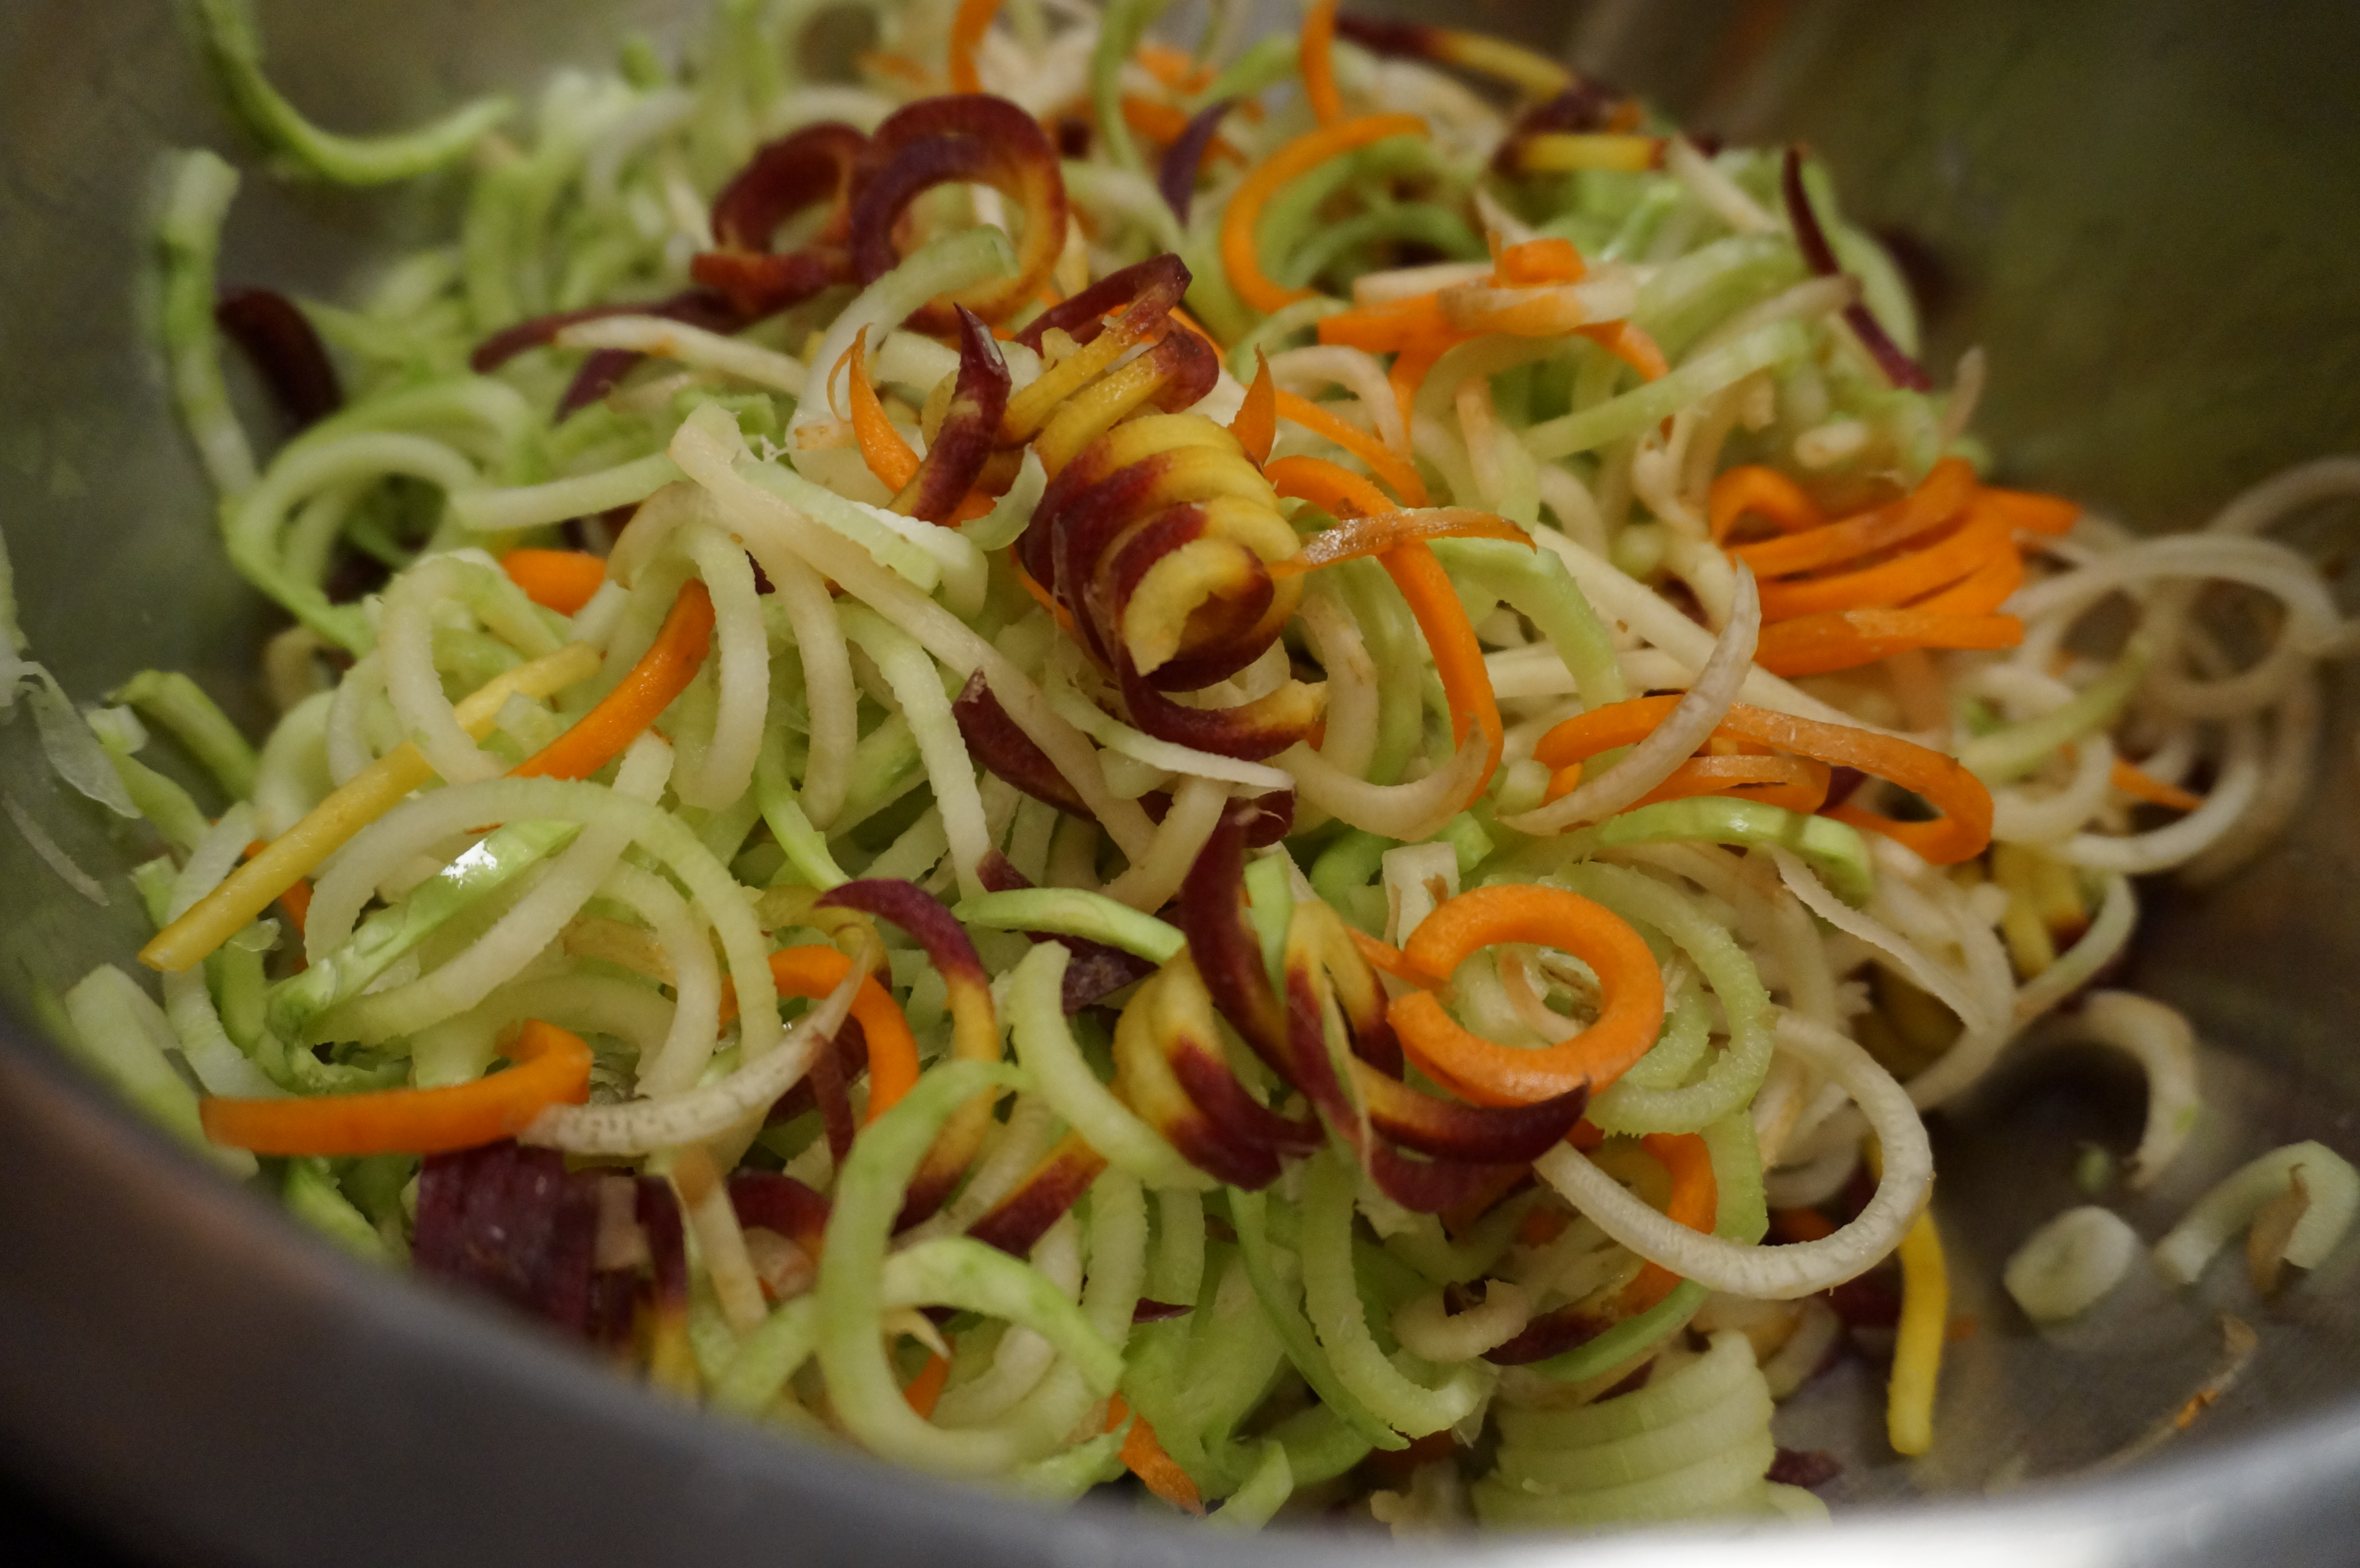
I think I am addicted to spiralizing. Or should I say, Spiralizing. I’m pretty sure I have been having dreams about spiralizing since Christmas. What do we have in our house that I can put through that baby? Carrot noodles? Zucchini noodles? Broccoli noodles? Meatball noodles? Yogurt noodles? Peanut butter noodles? Ok maybe not everything can be spiralized (if only…). But there is something magical about feeding a large cylindrical object (at which most 5 year-olds would turn their nose up) into a sharp blade (which YOU get to choose!) and watch long, slinky-like strips of carrots come out the other side.

(They’re not very good at ending up in the bowl you want them to, but they are TOTALLY worth a few carrot stains on the counter).

Consider your lives changed.

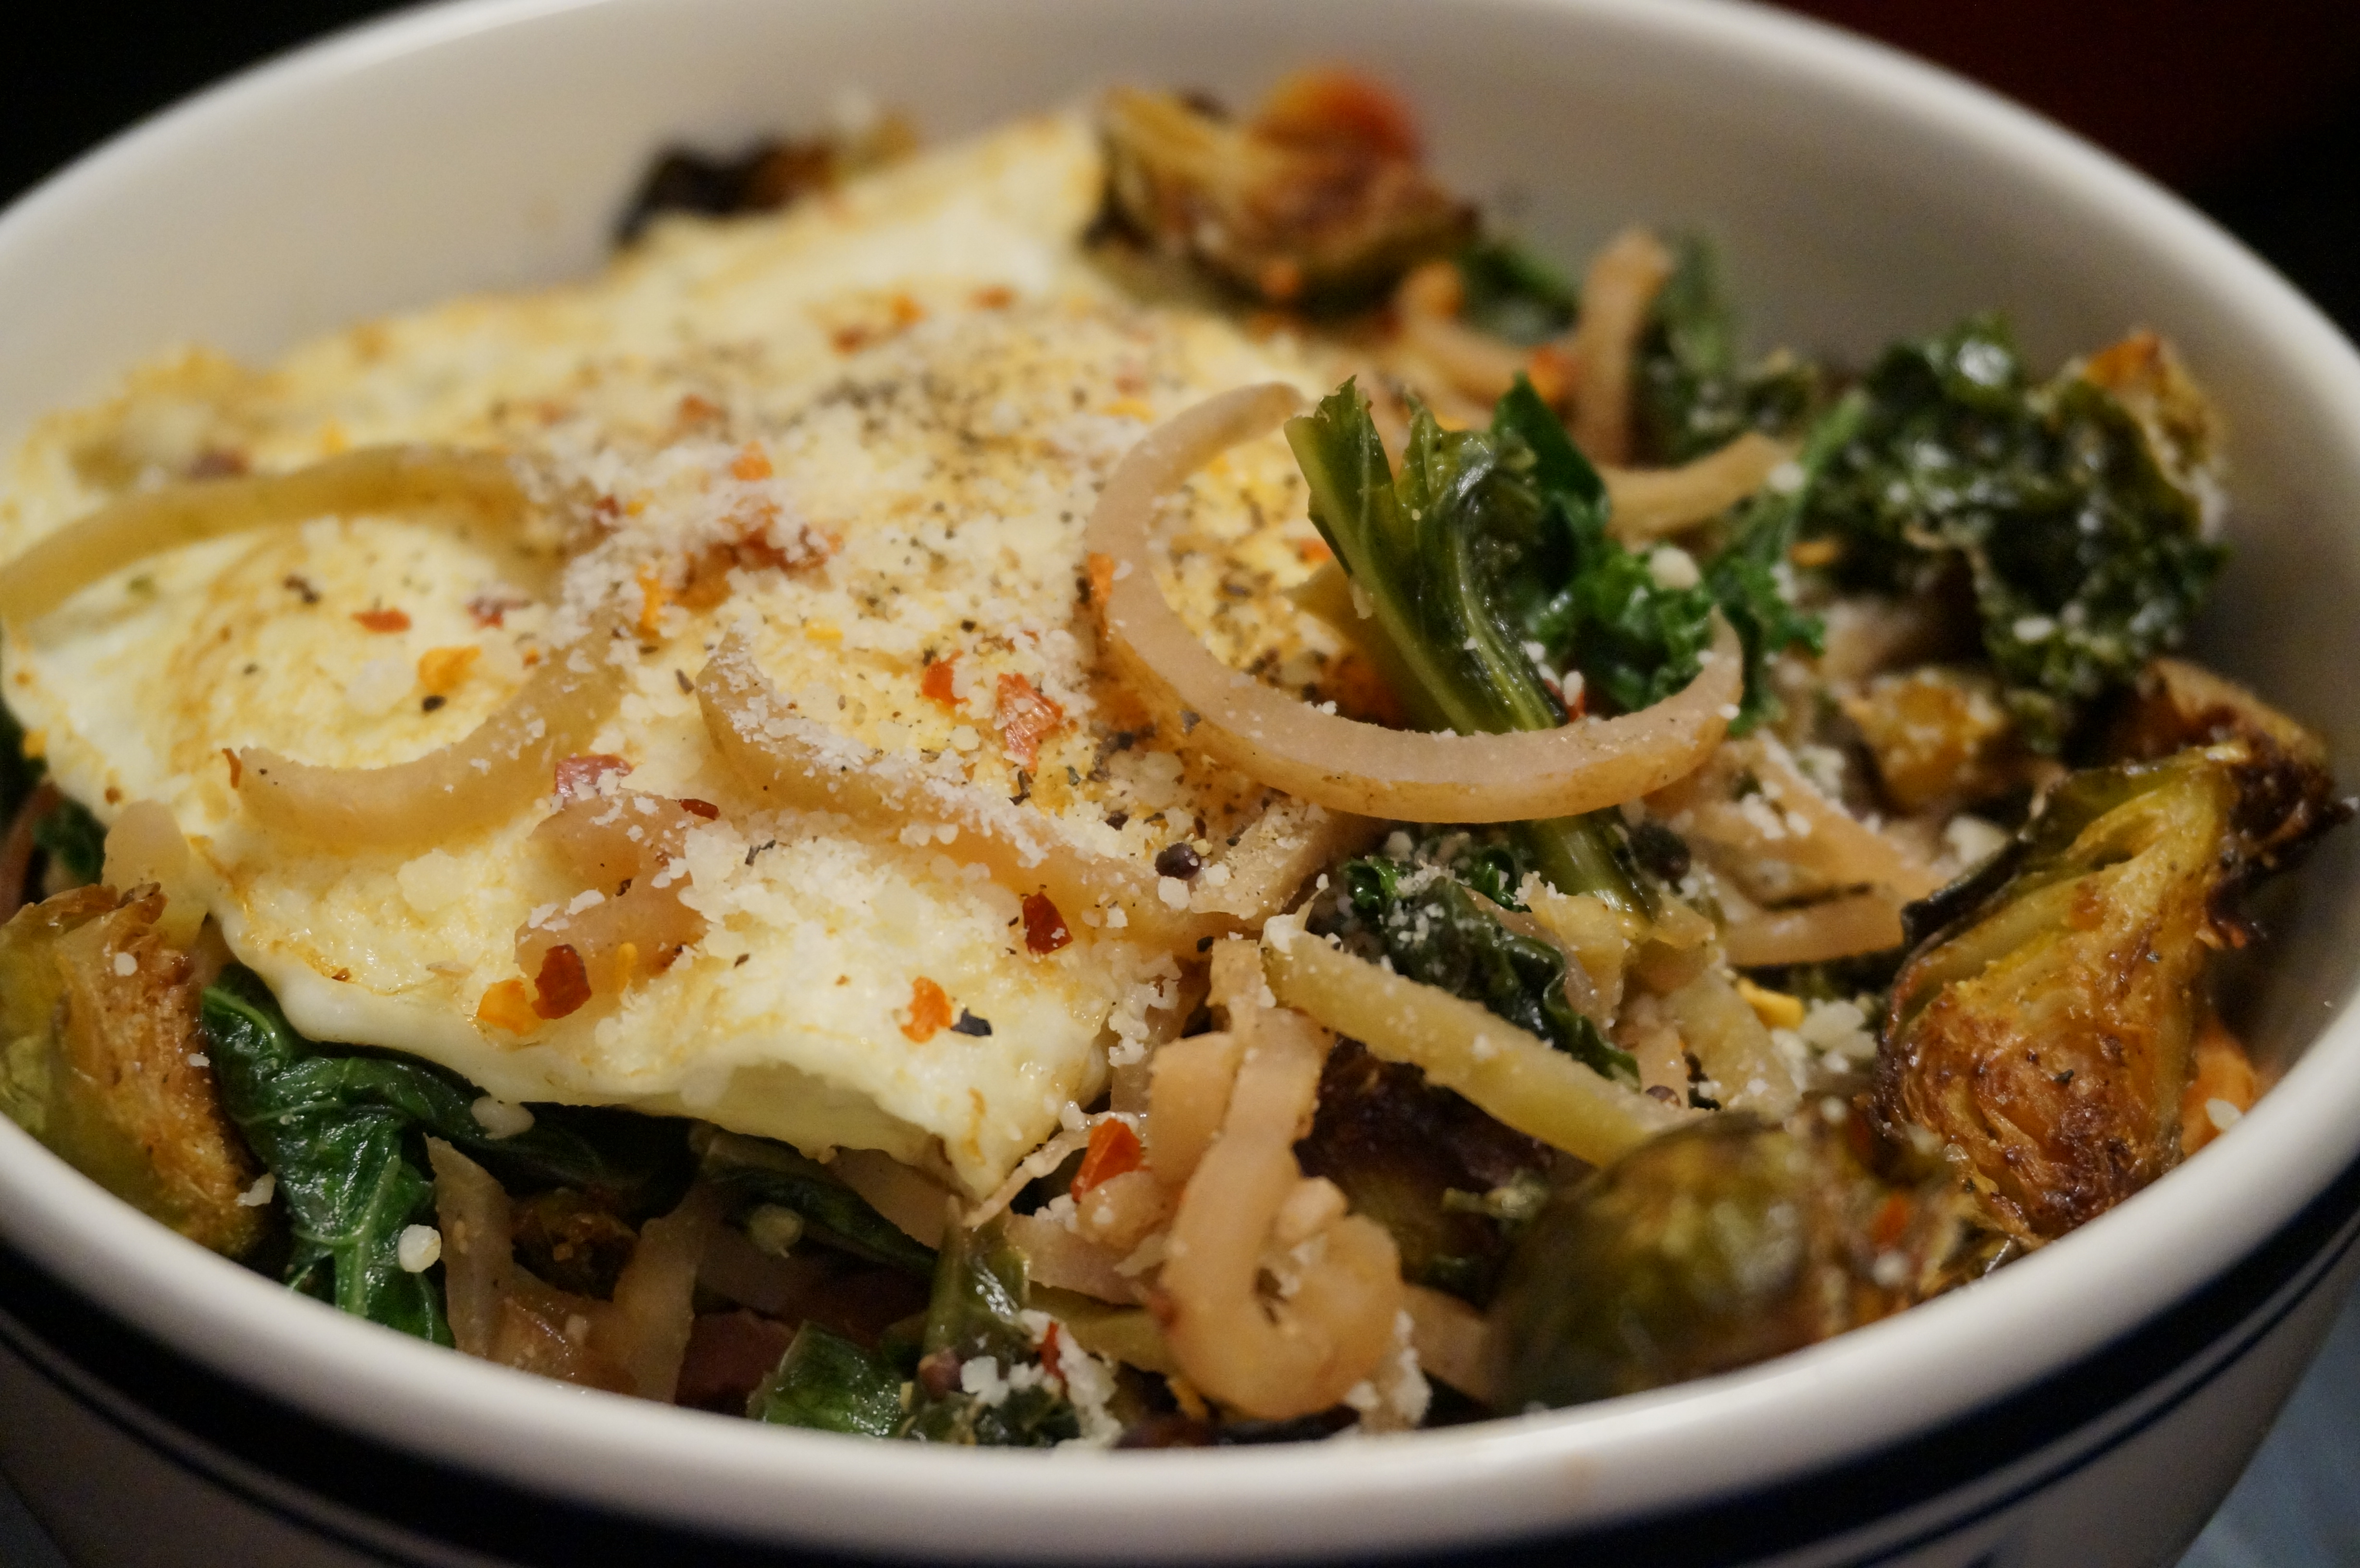
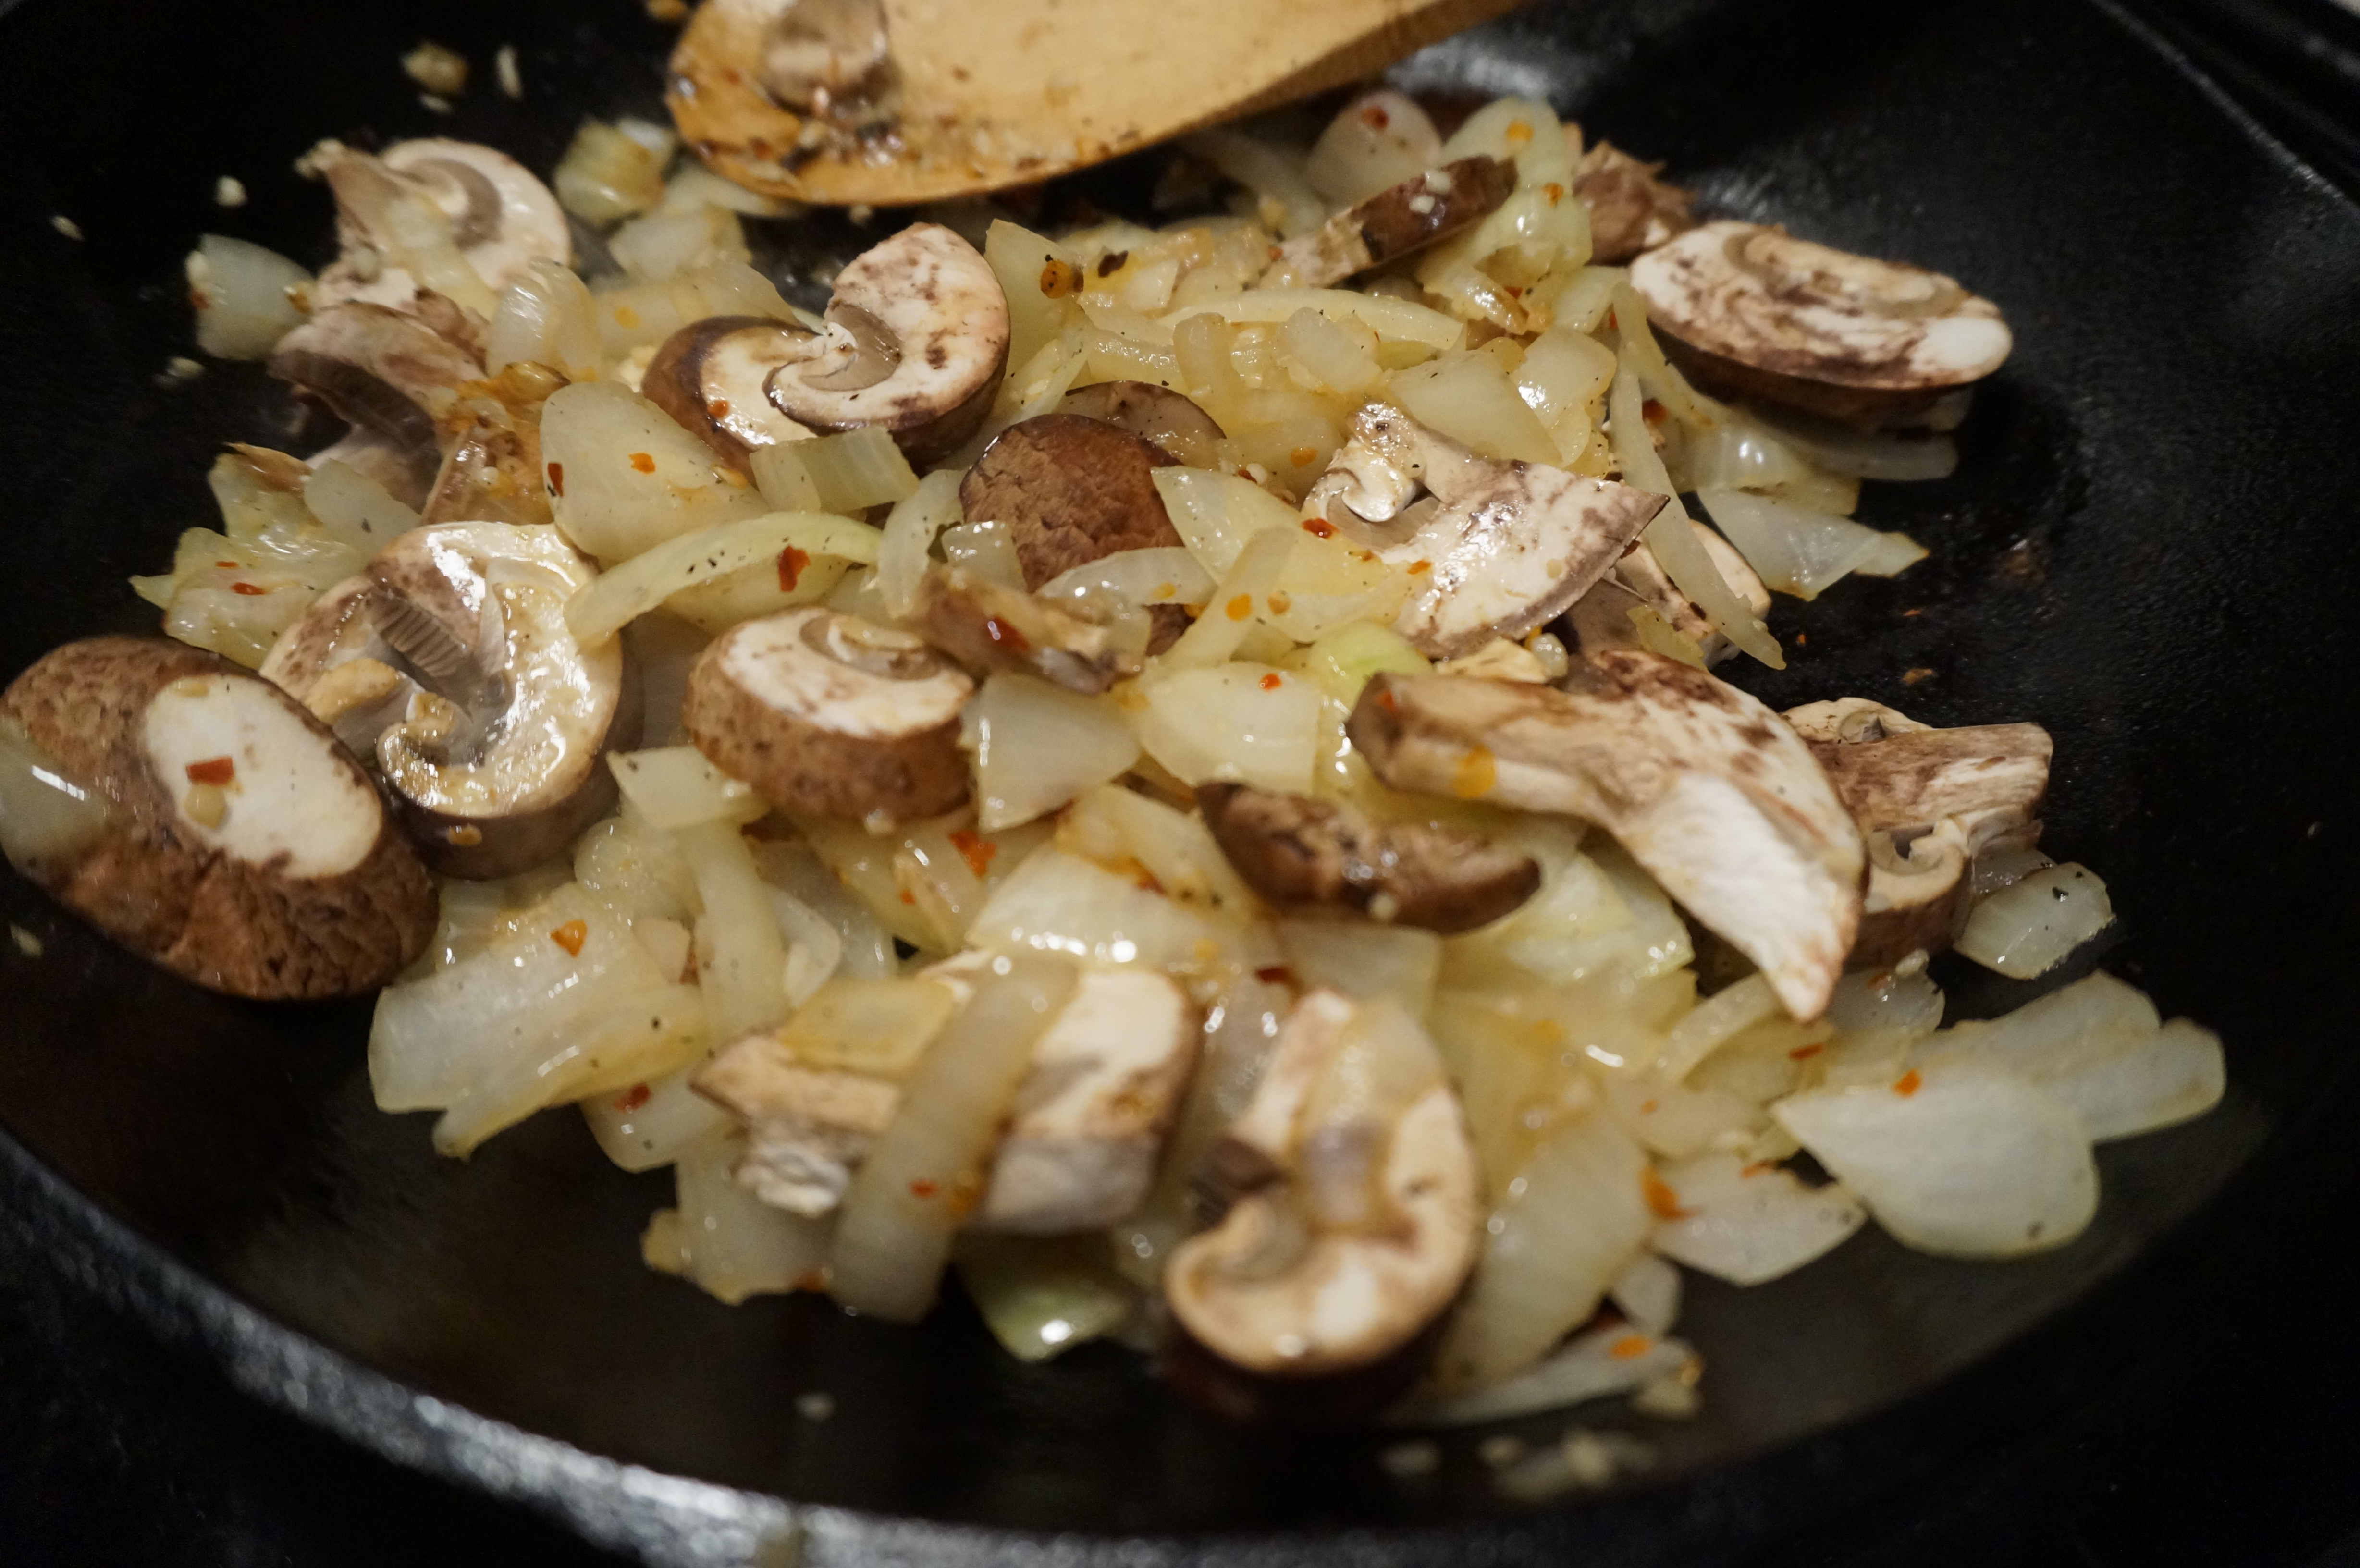
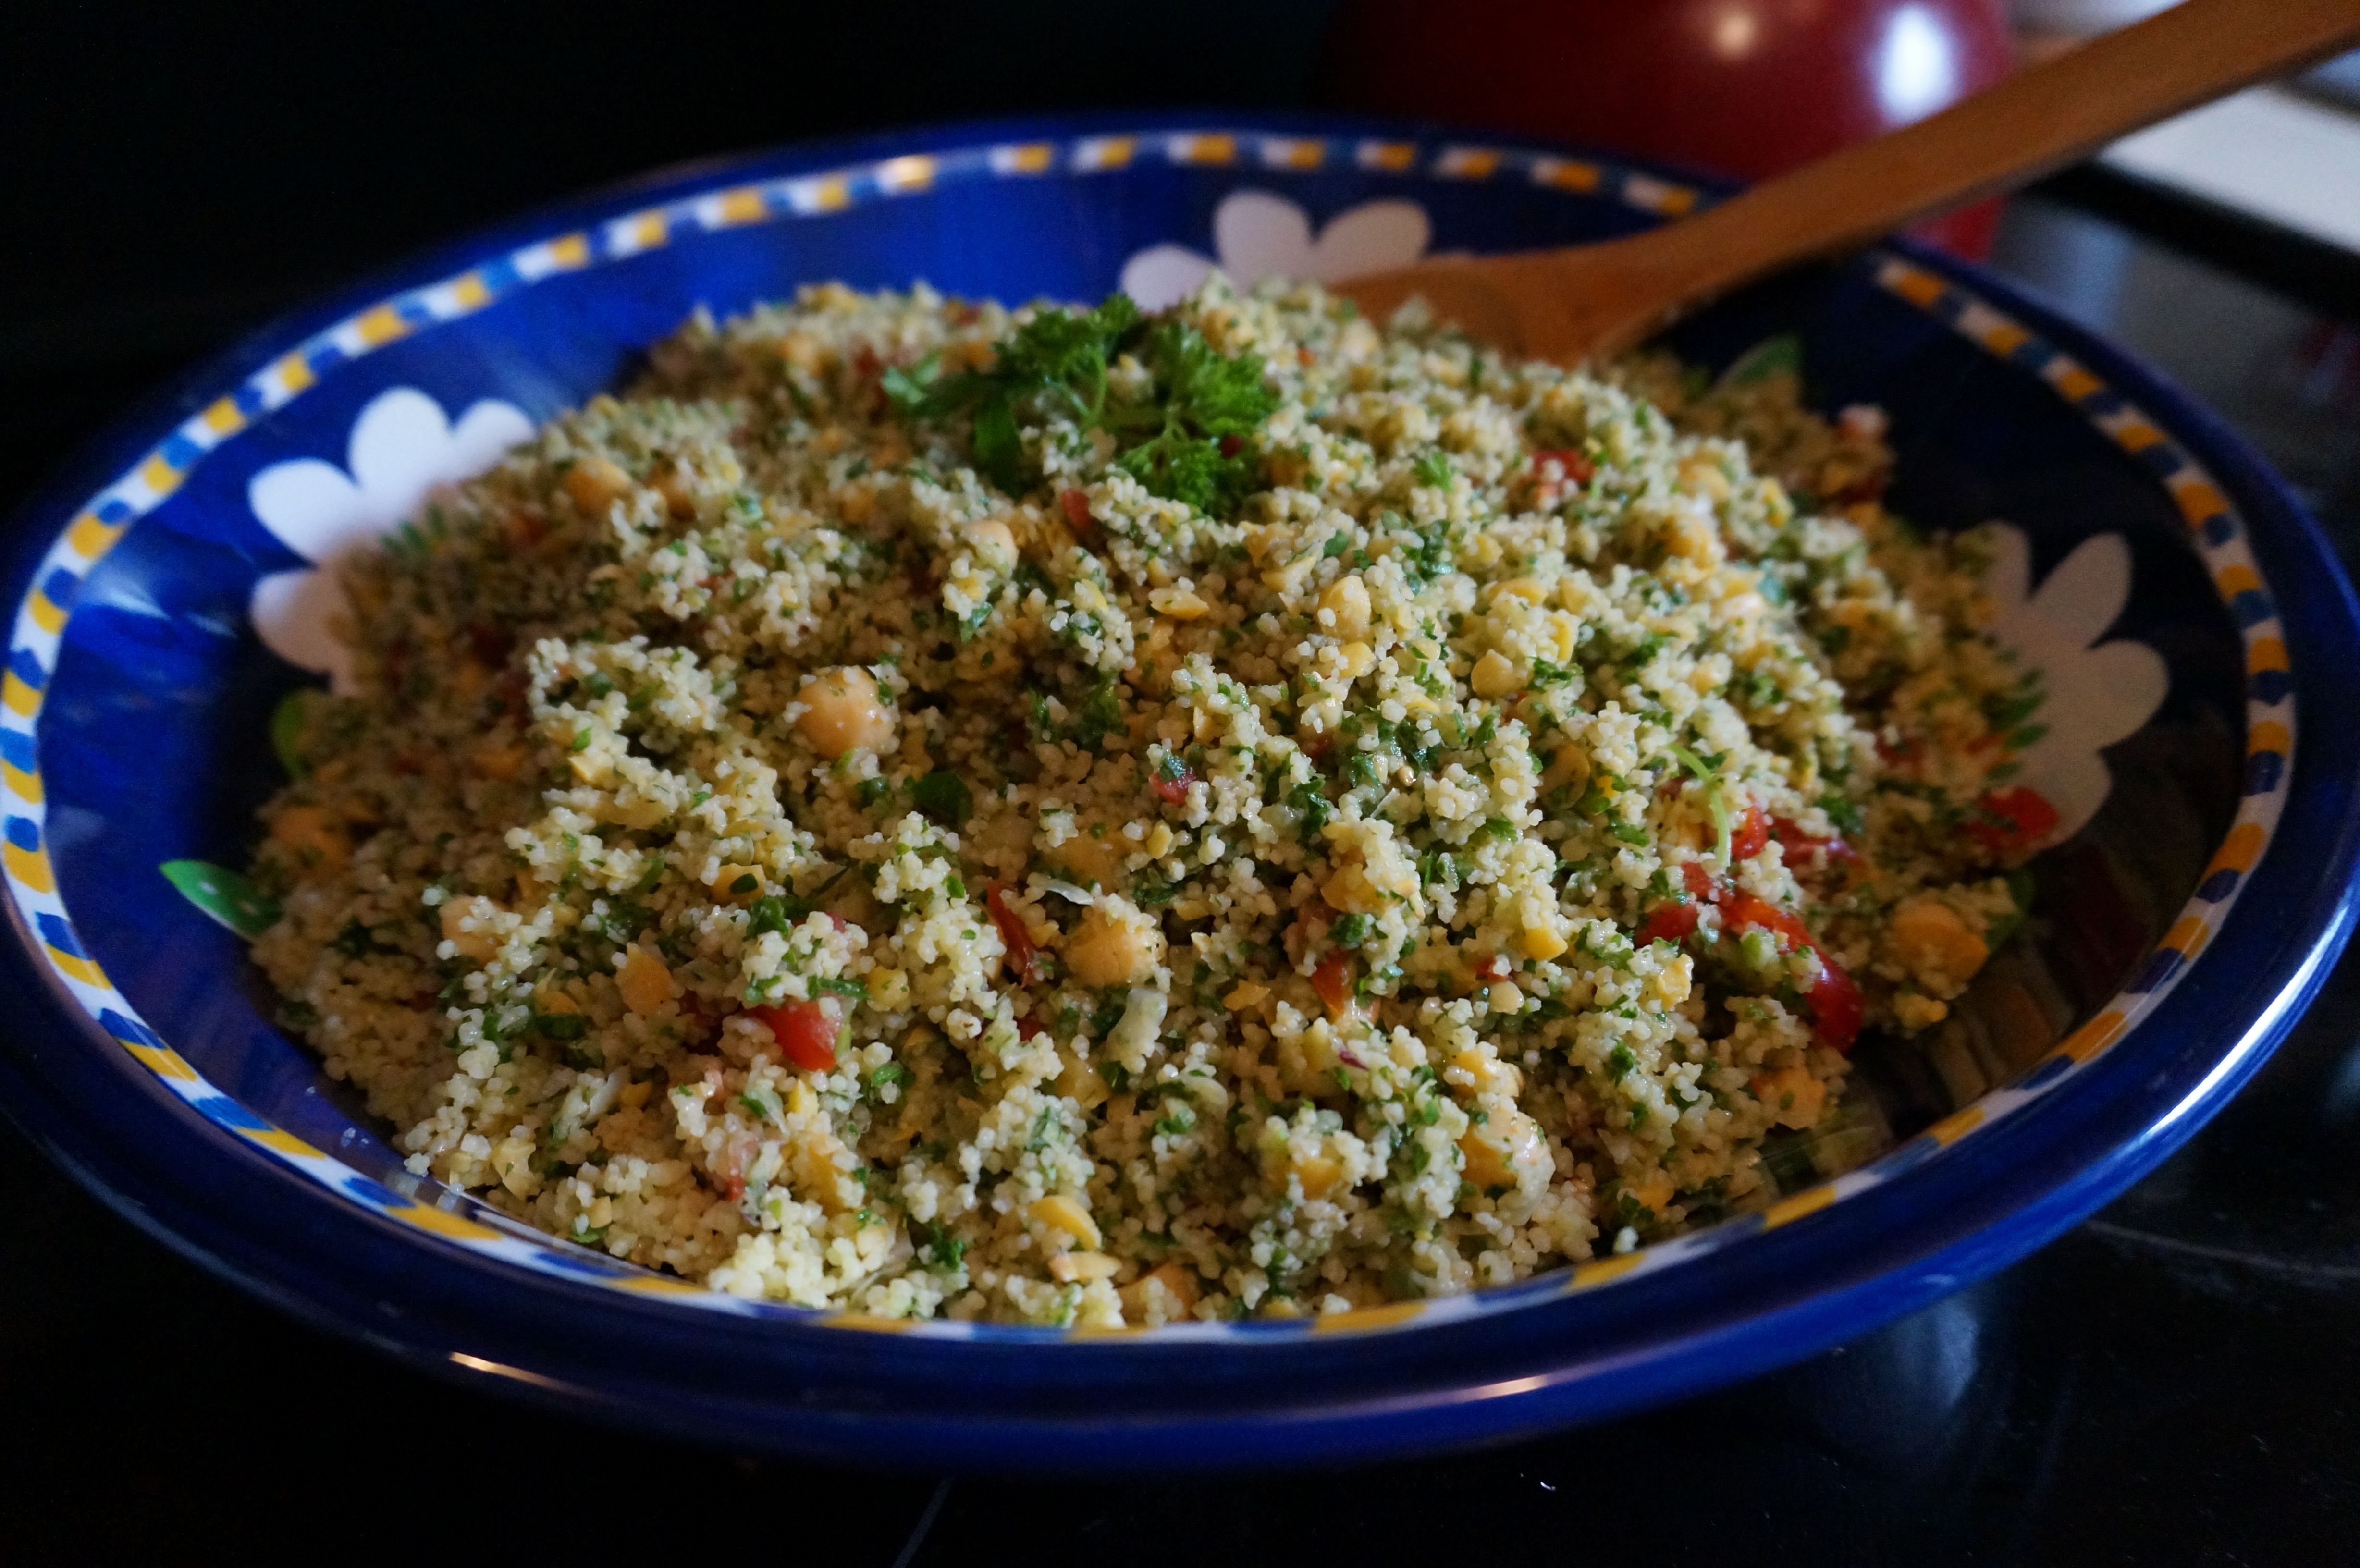
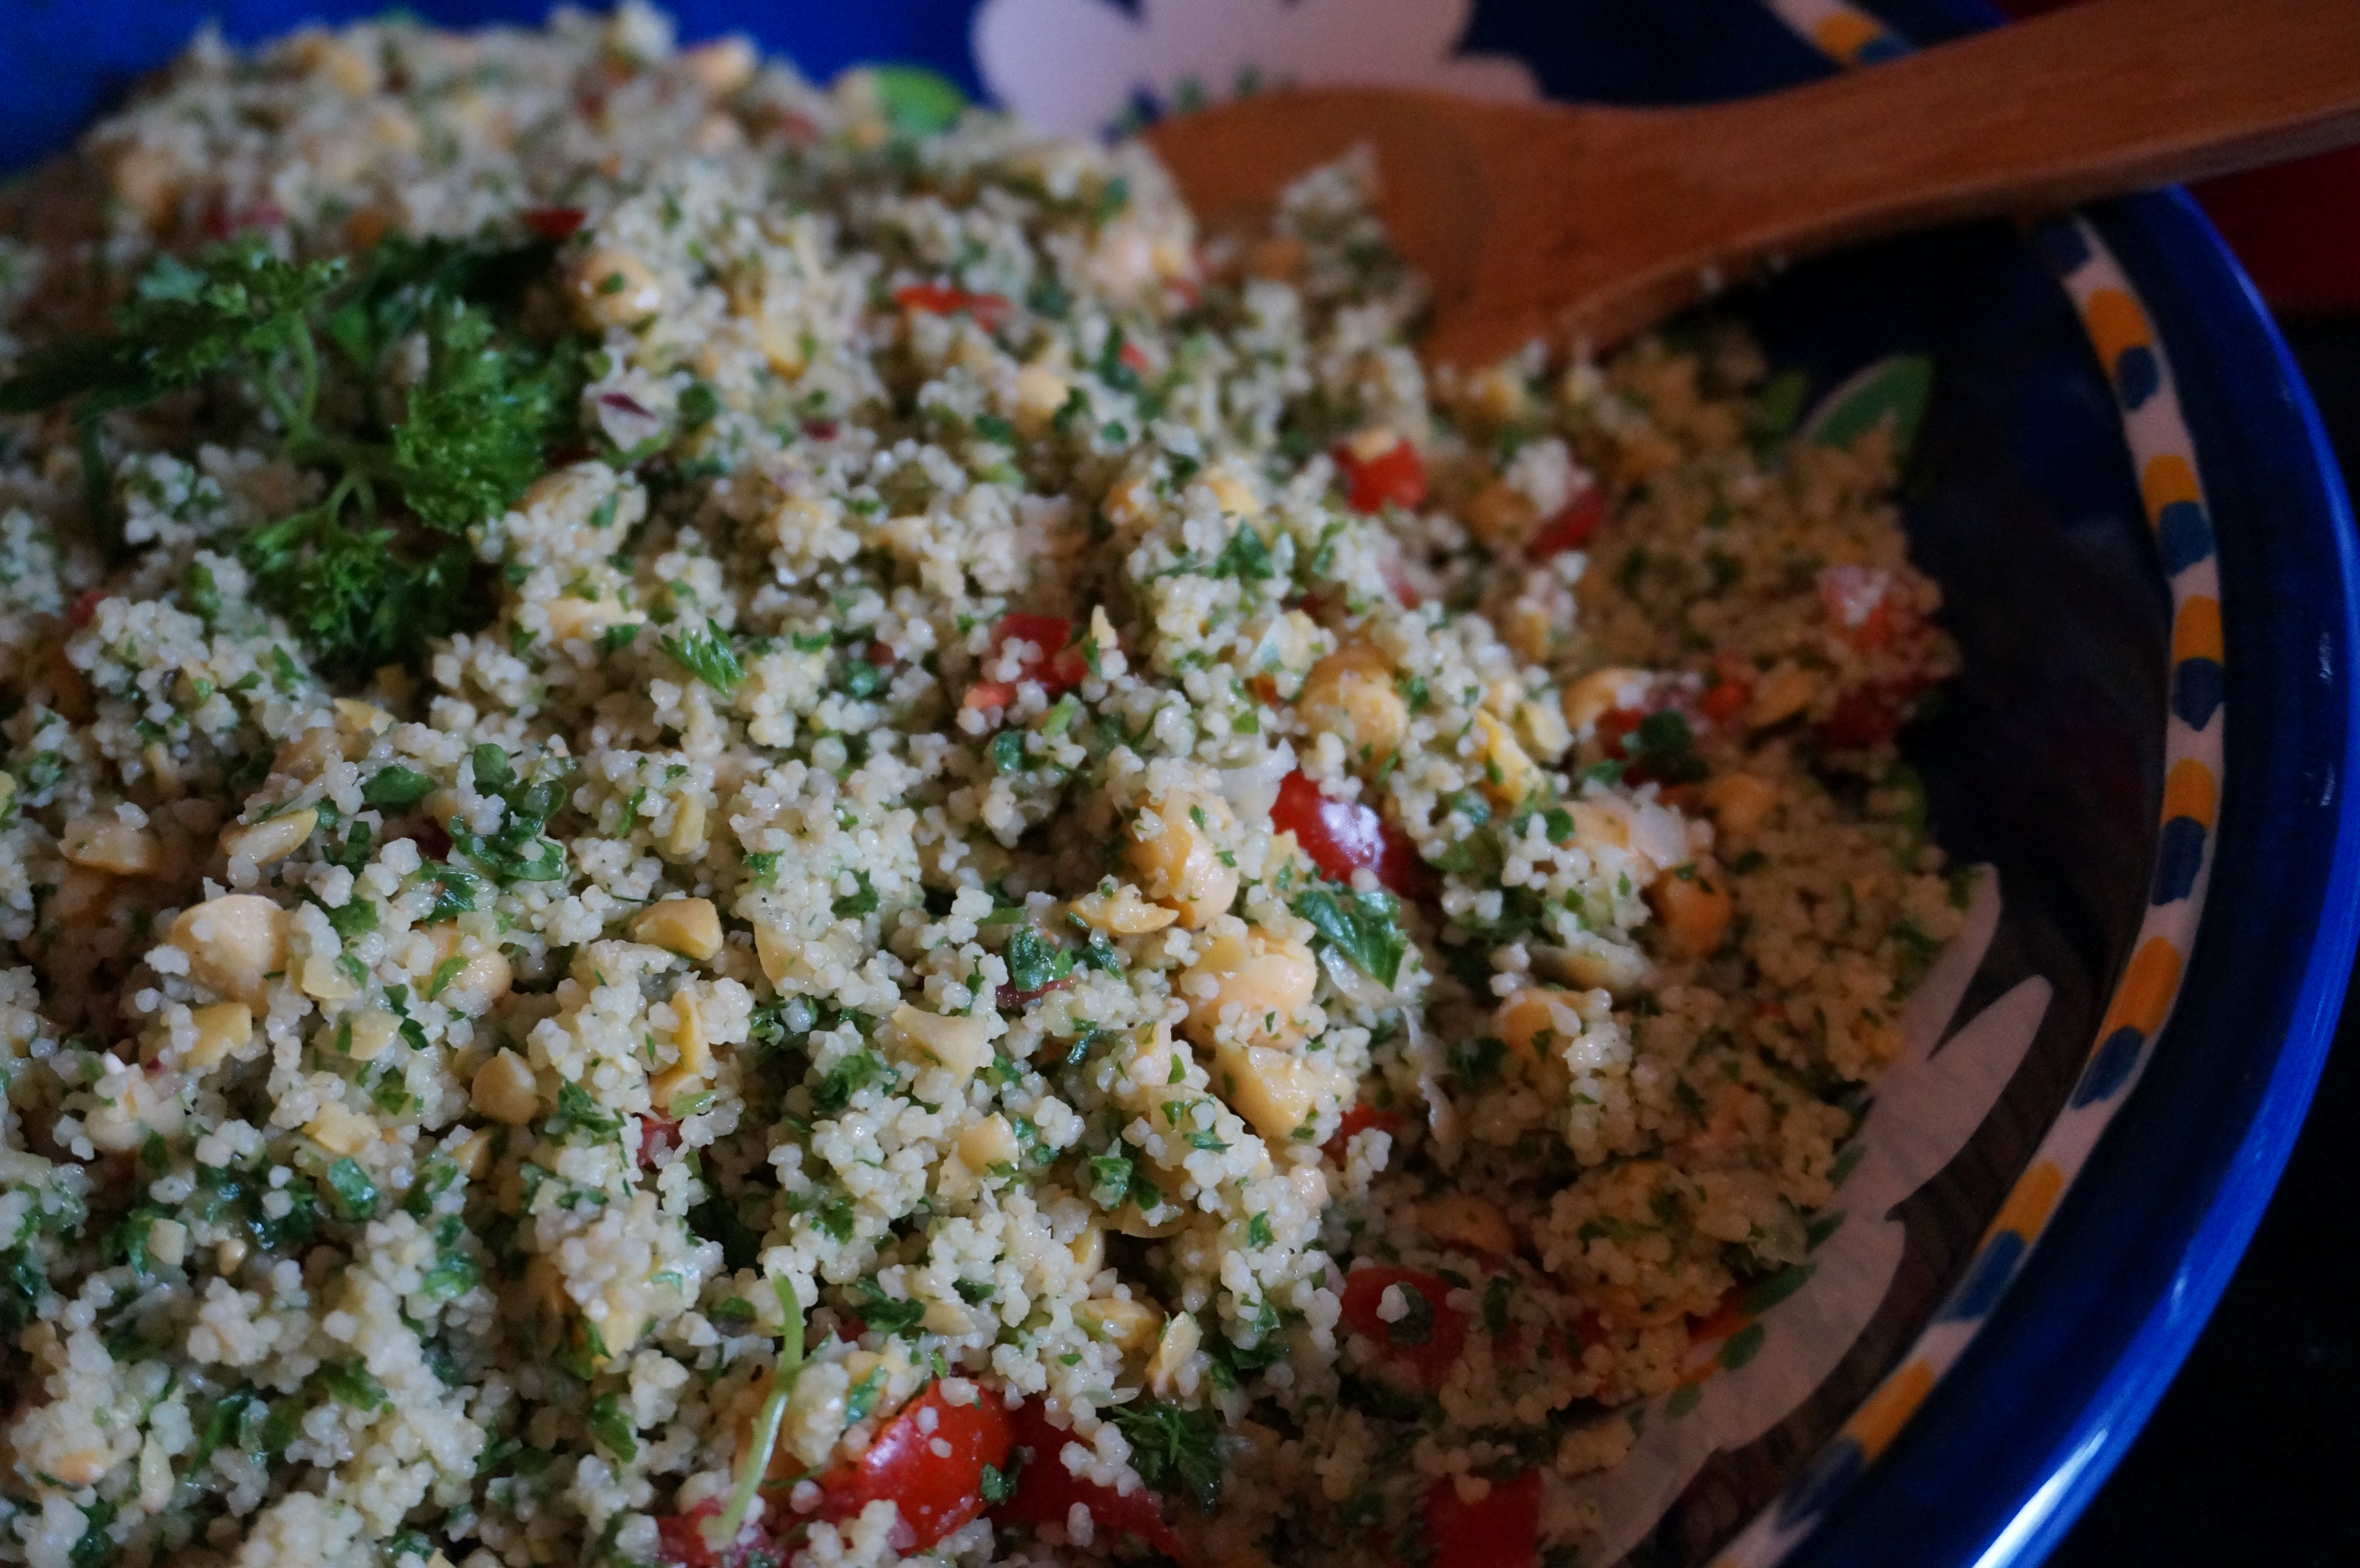
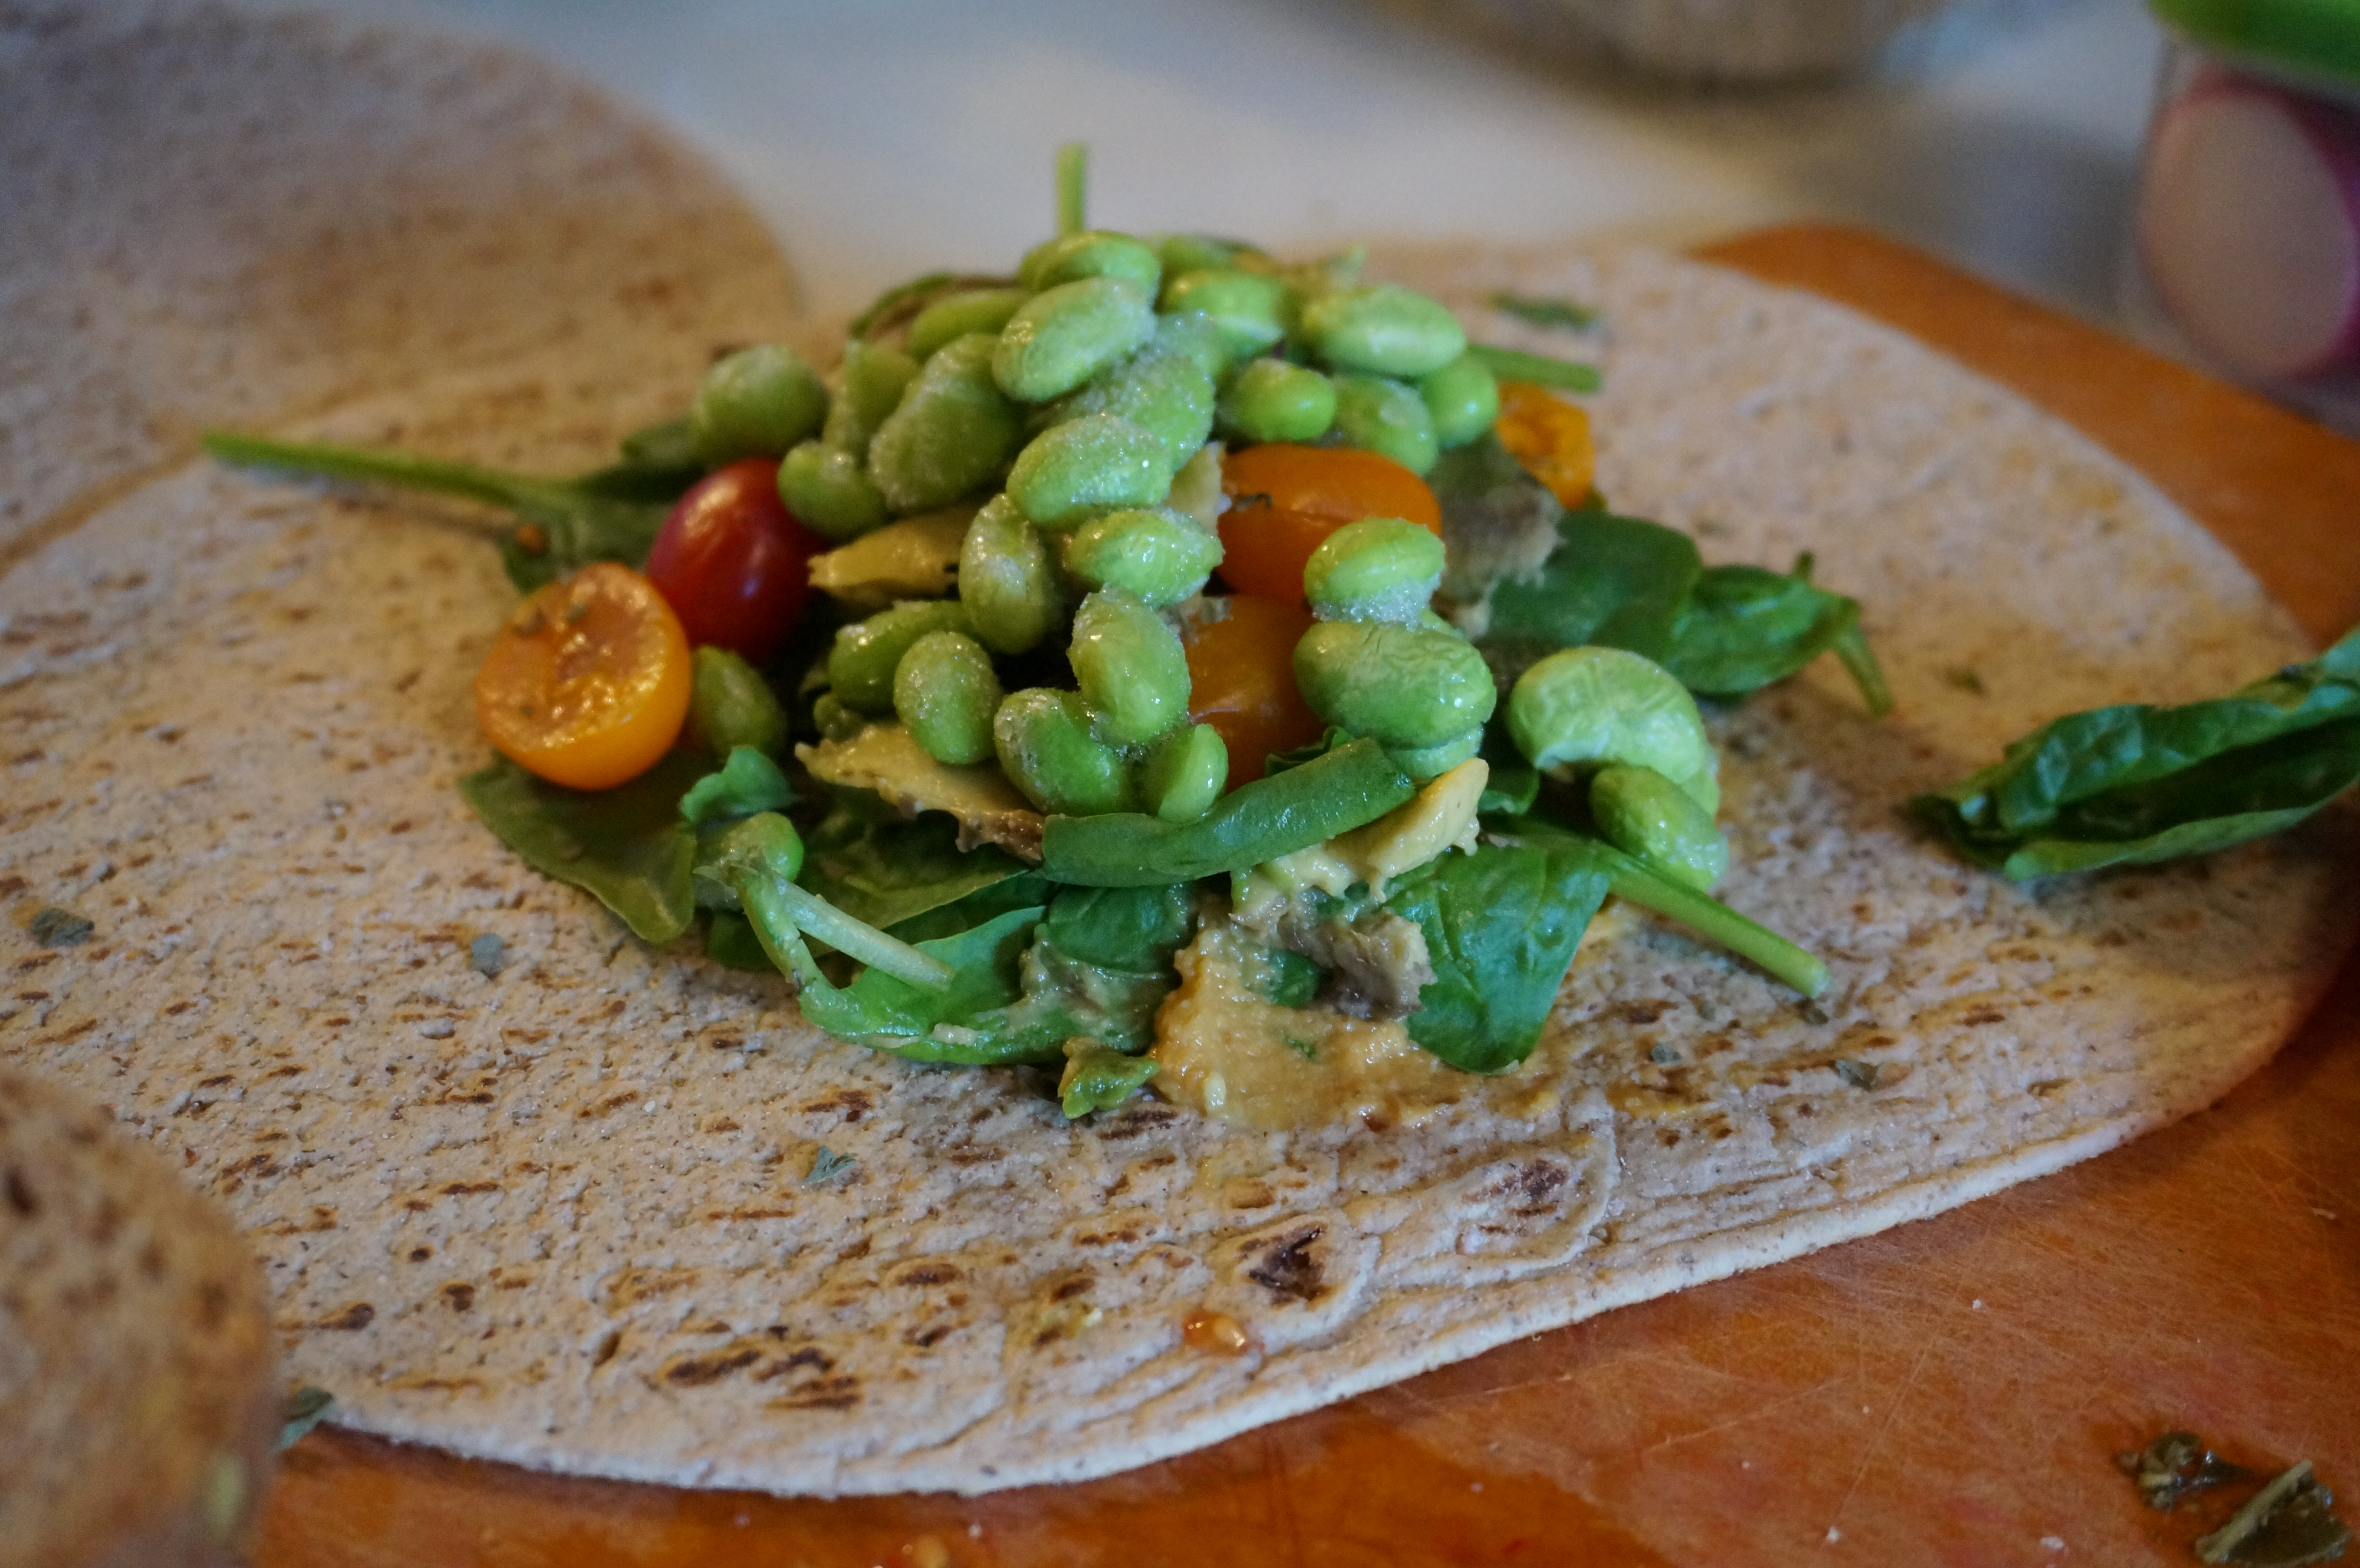
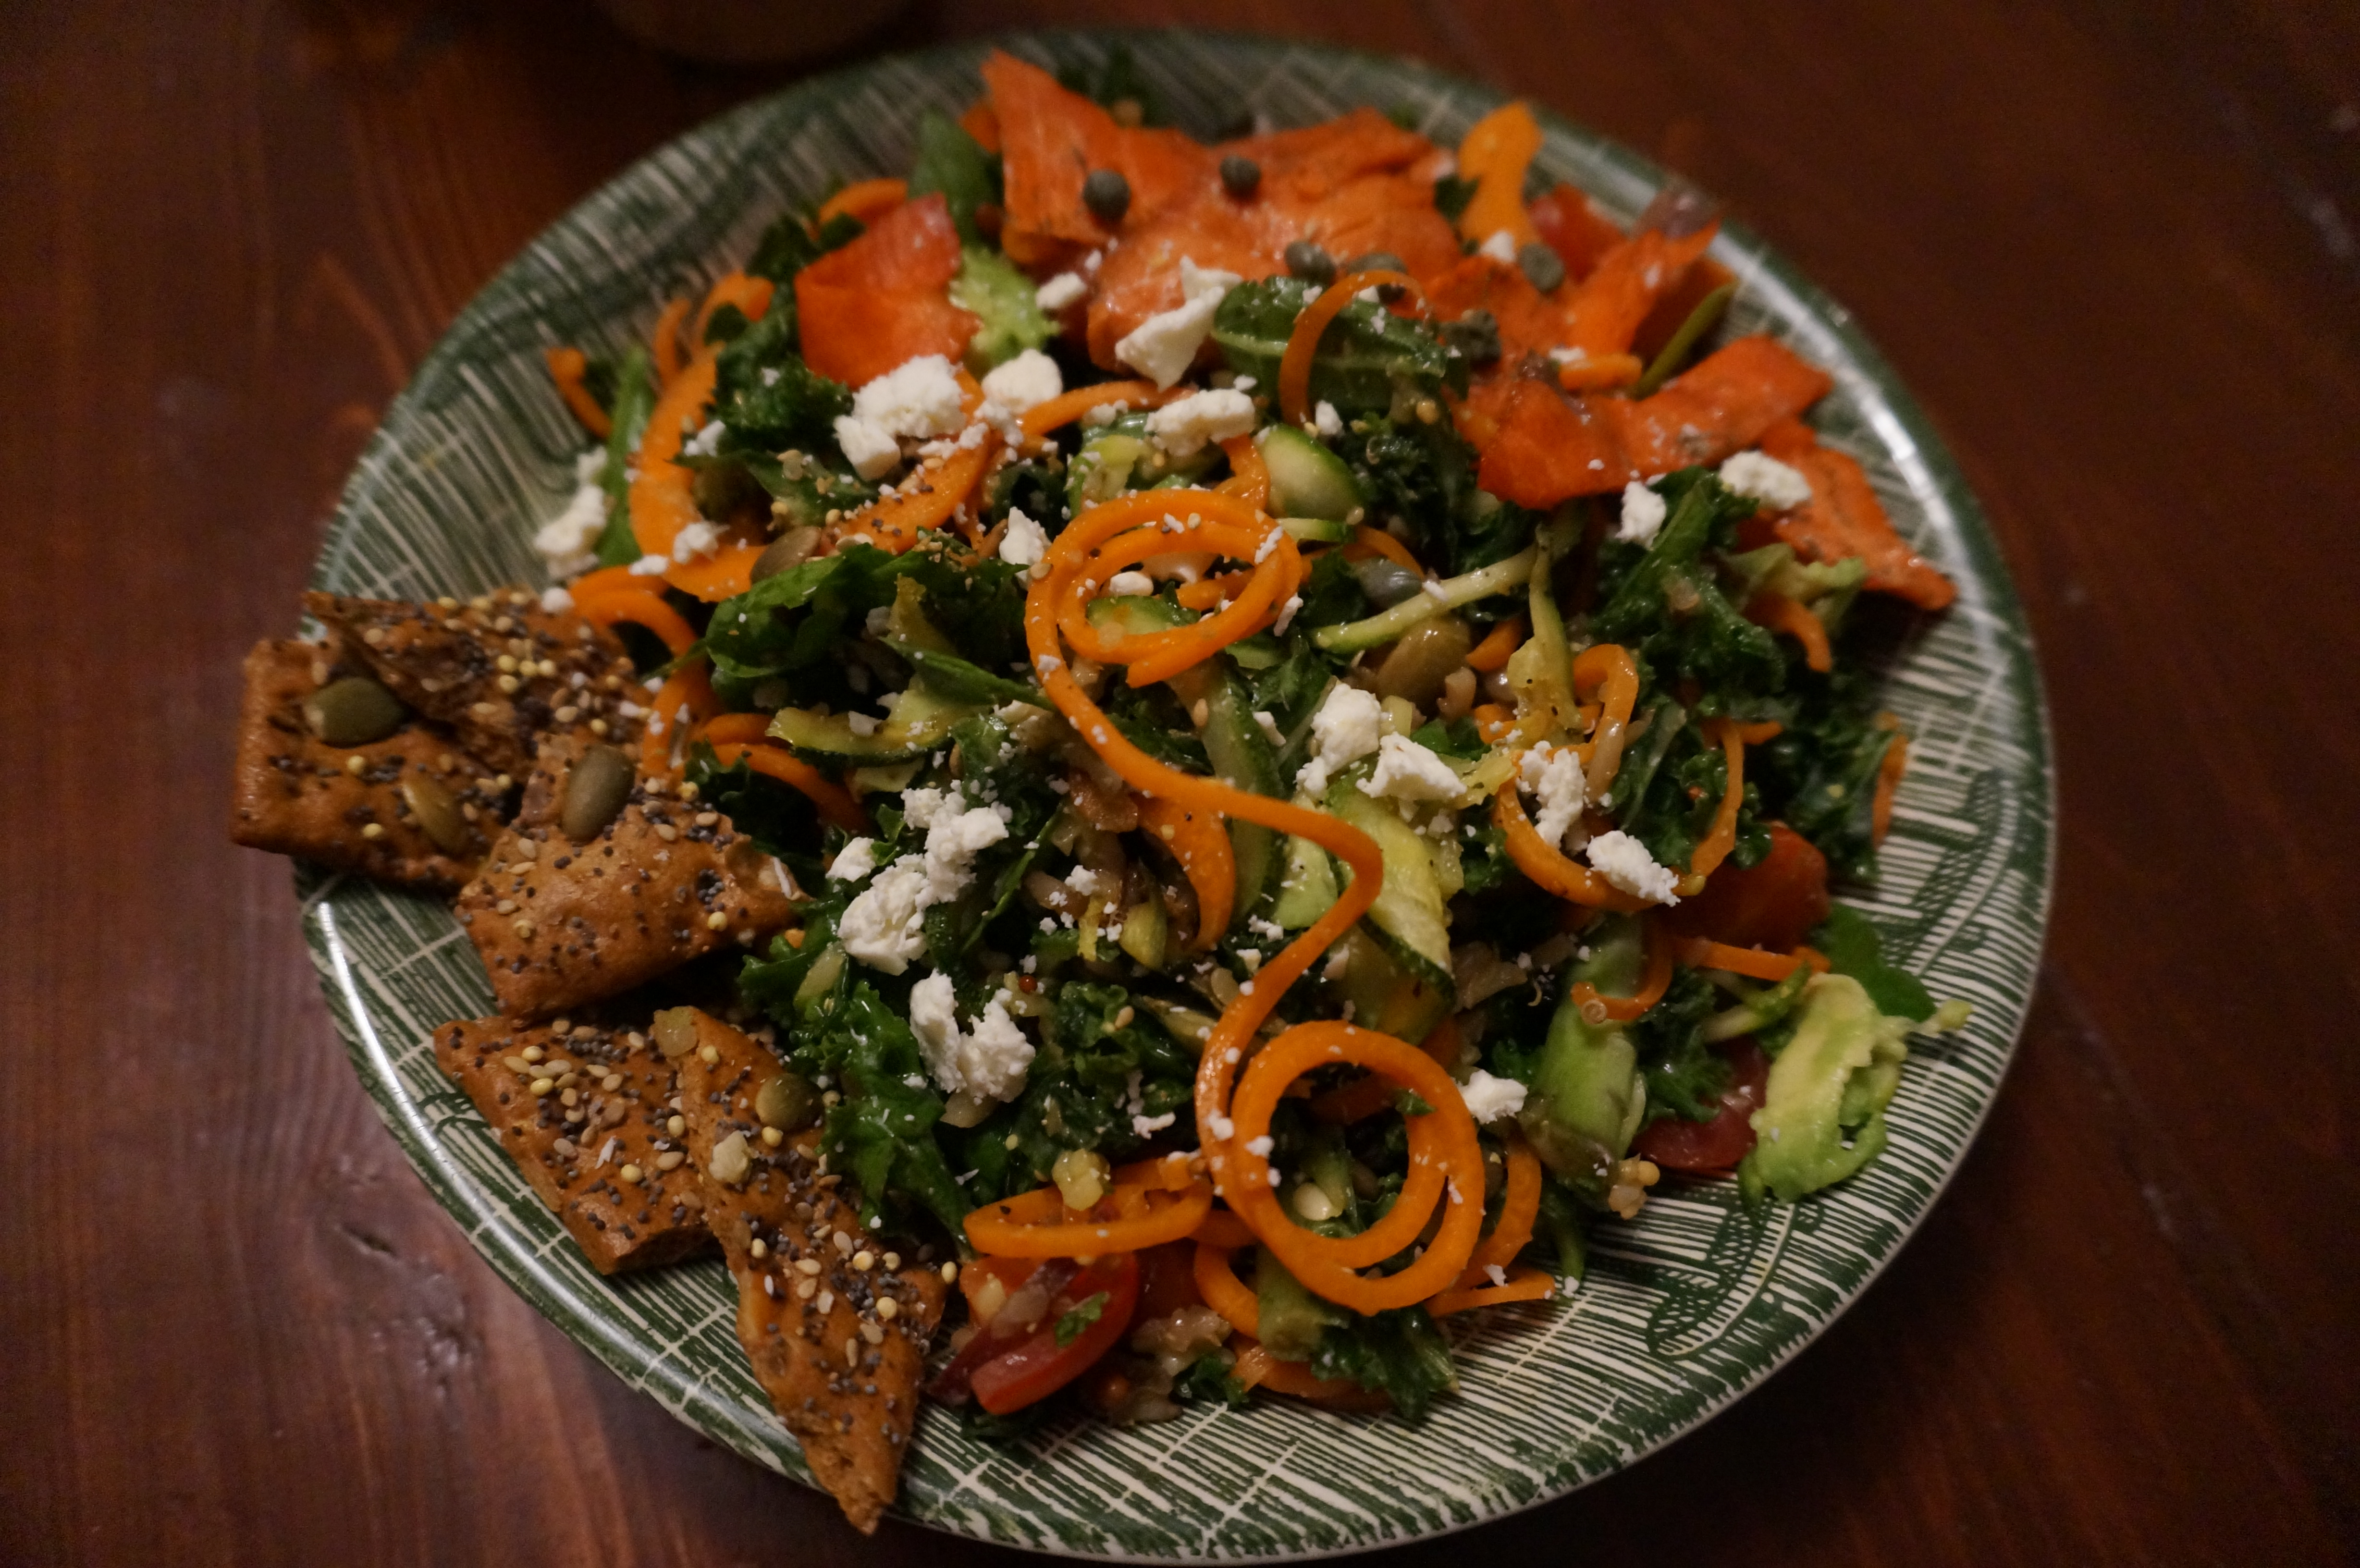
Tonight, when Ben told me he was craving salmon for dinner, I thought to myself, Self! Why not make some spiralized veggies and a smoked salmon salad!? Because I never make salads, so this would be so unusual for me!

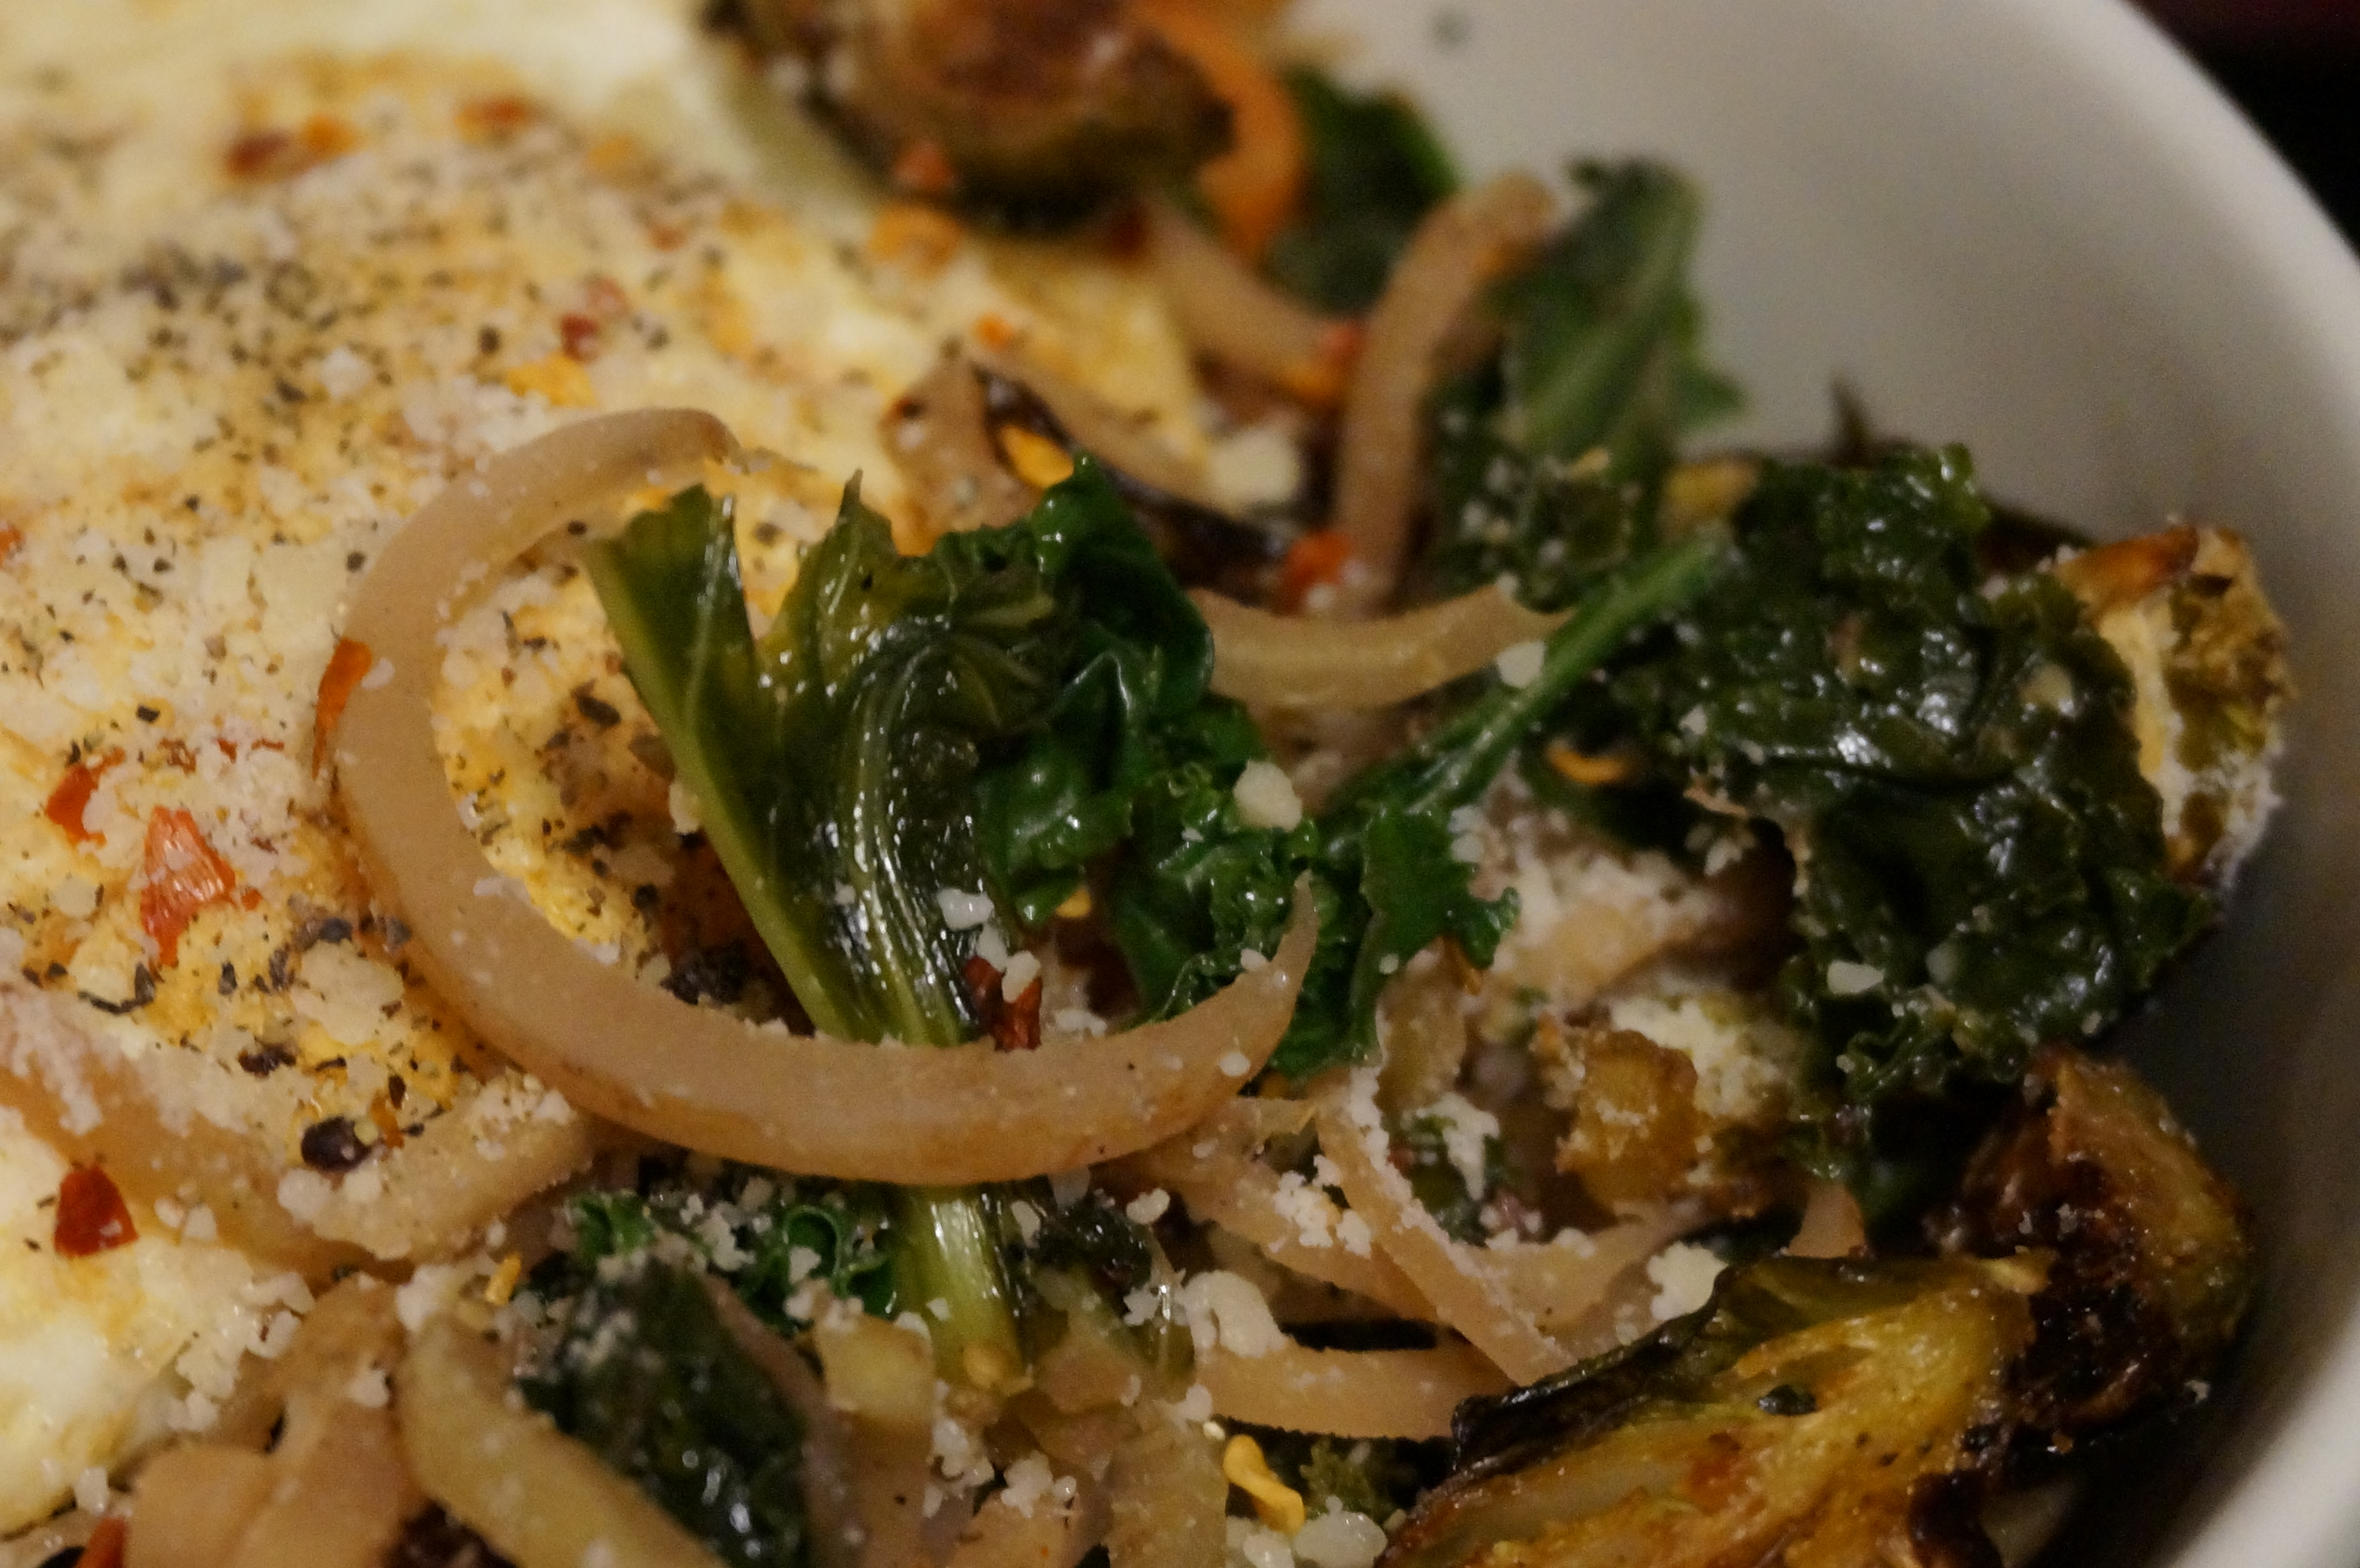
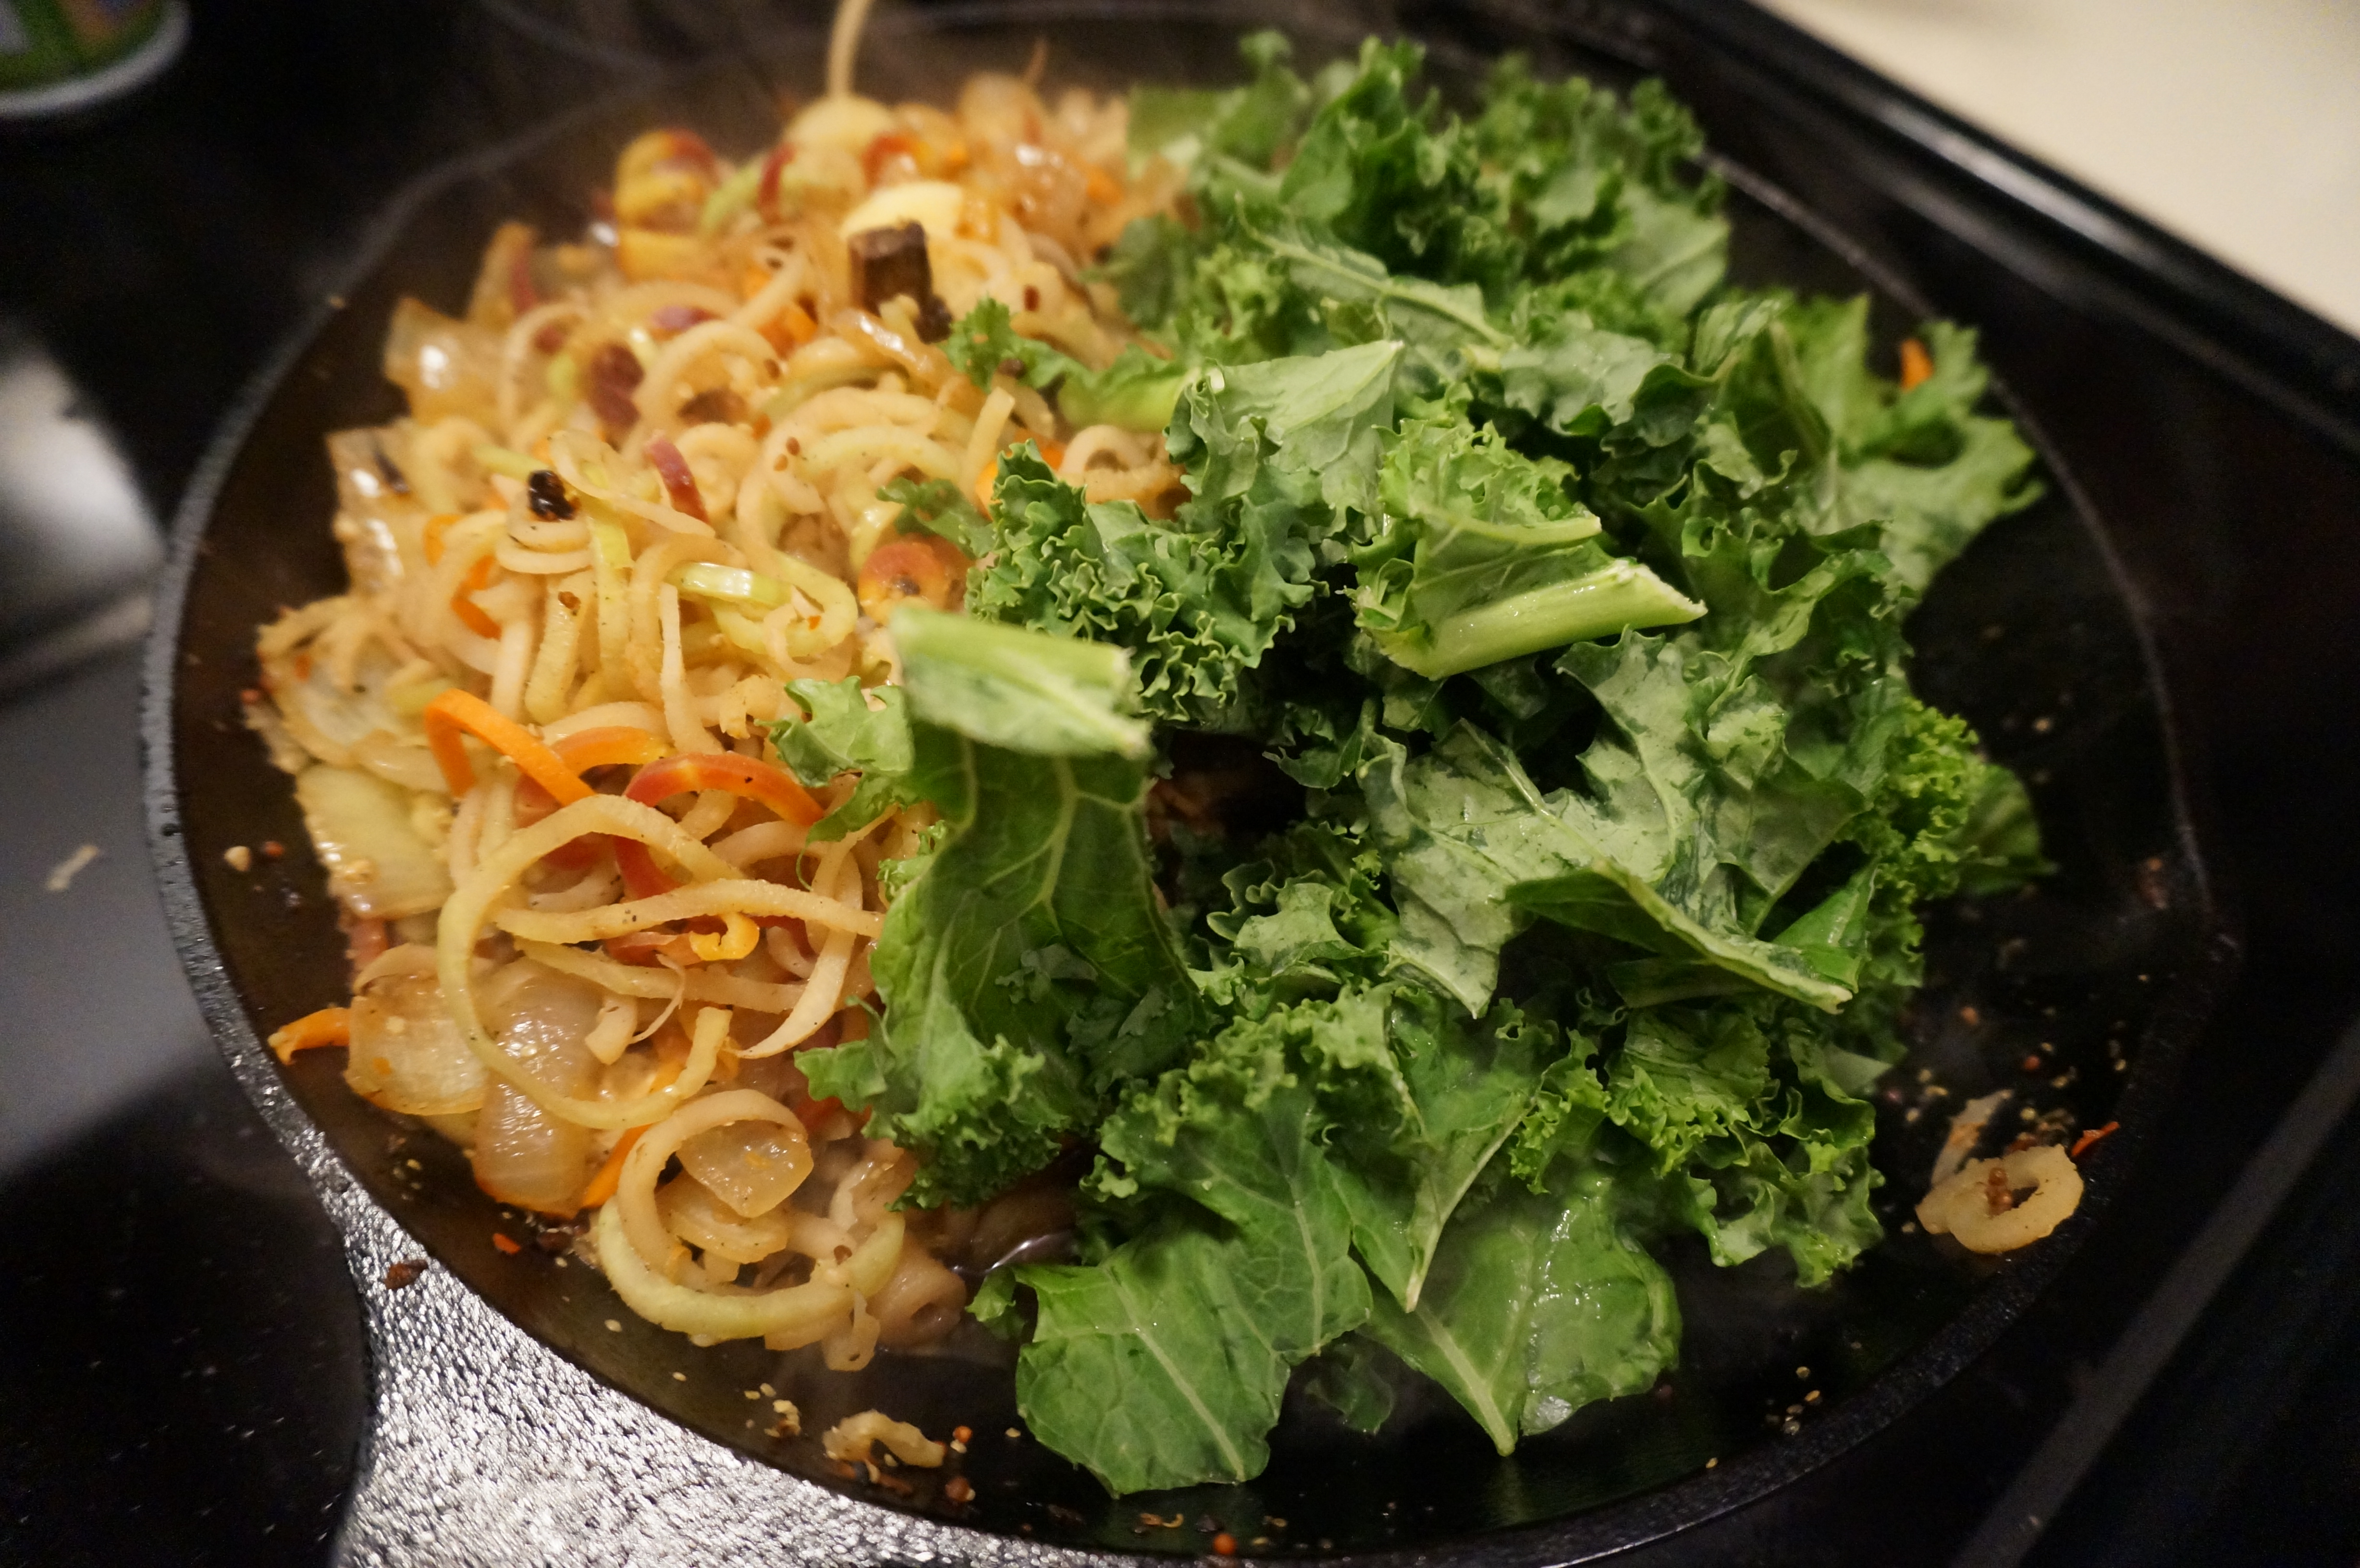
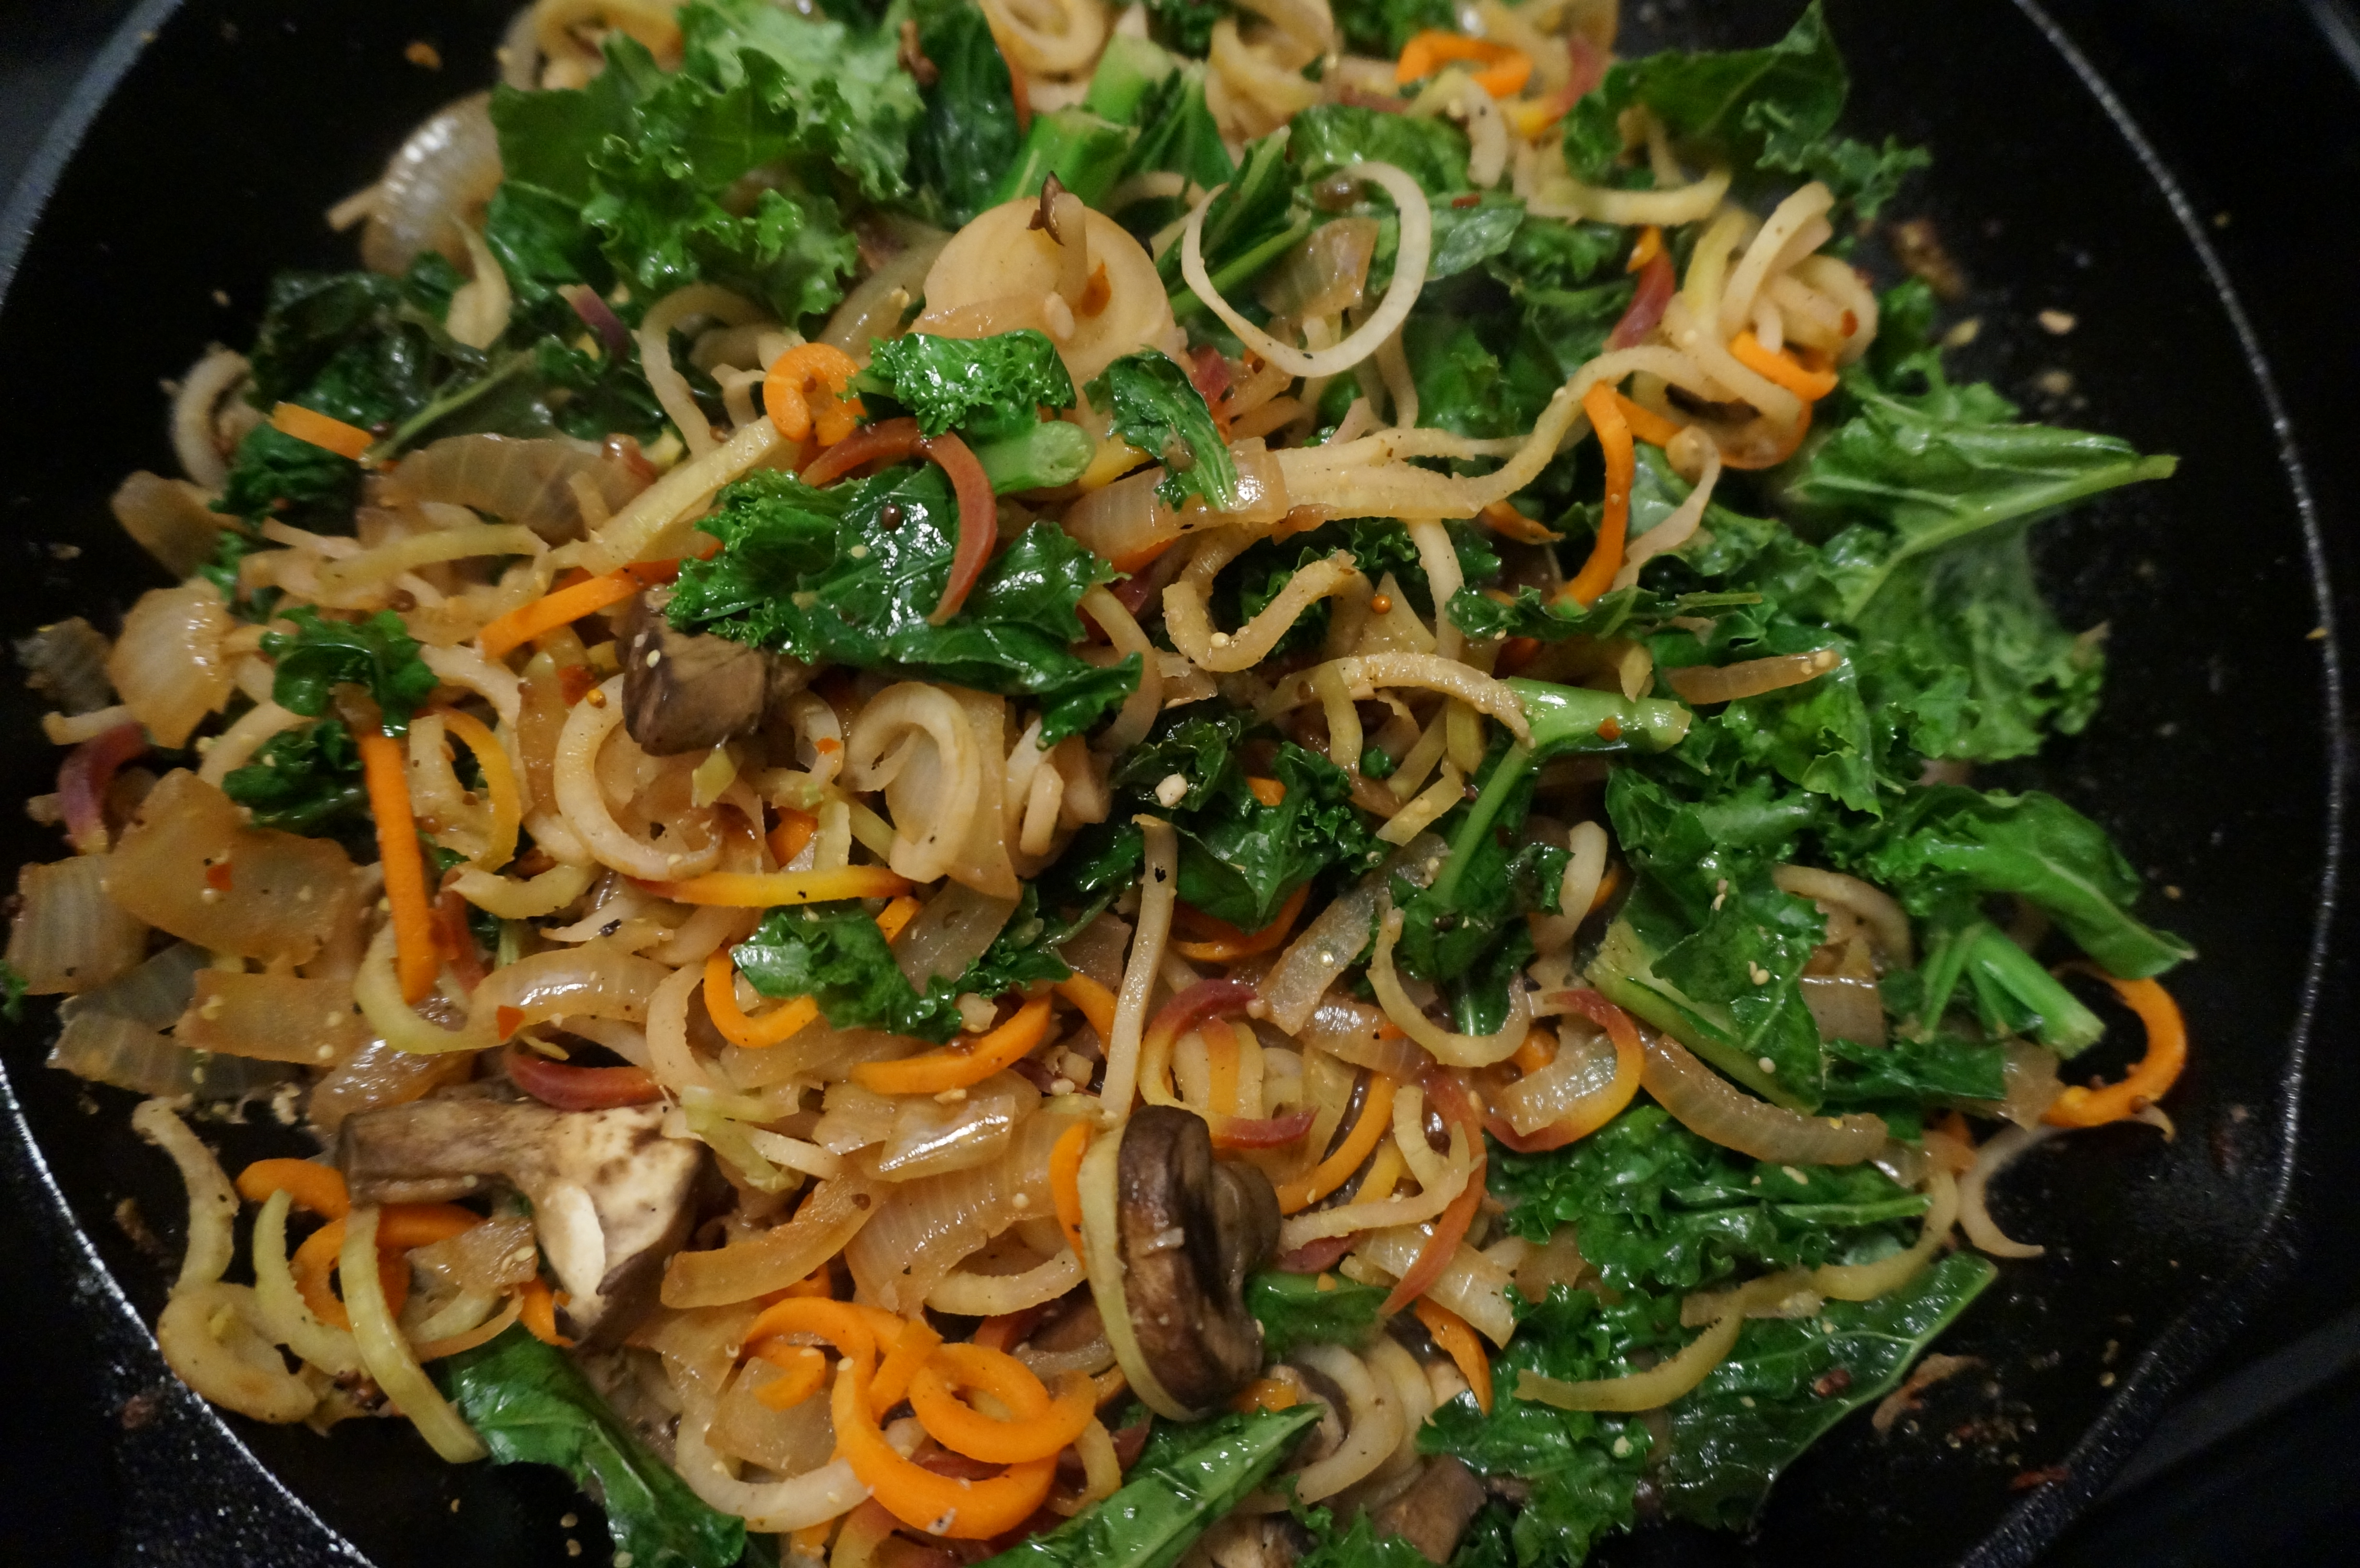
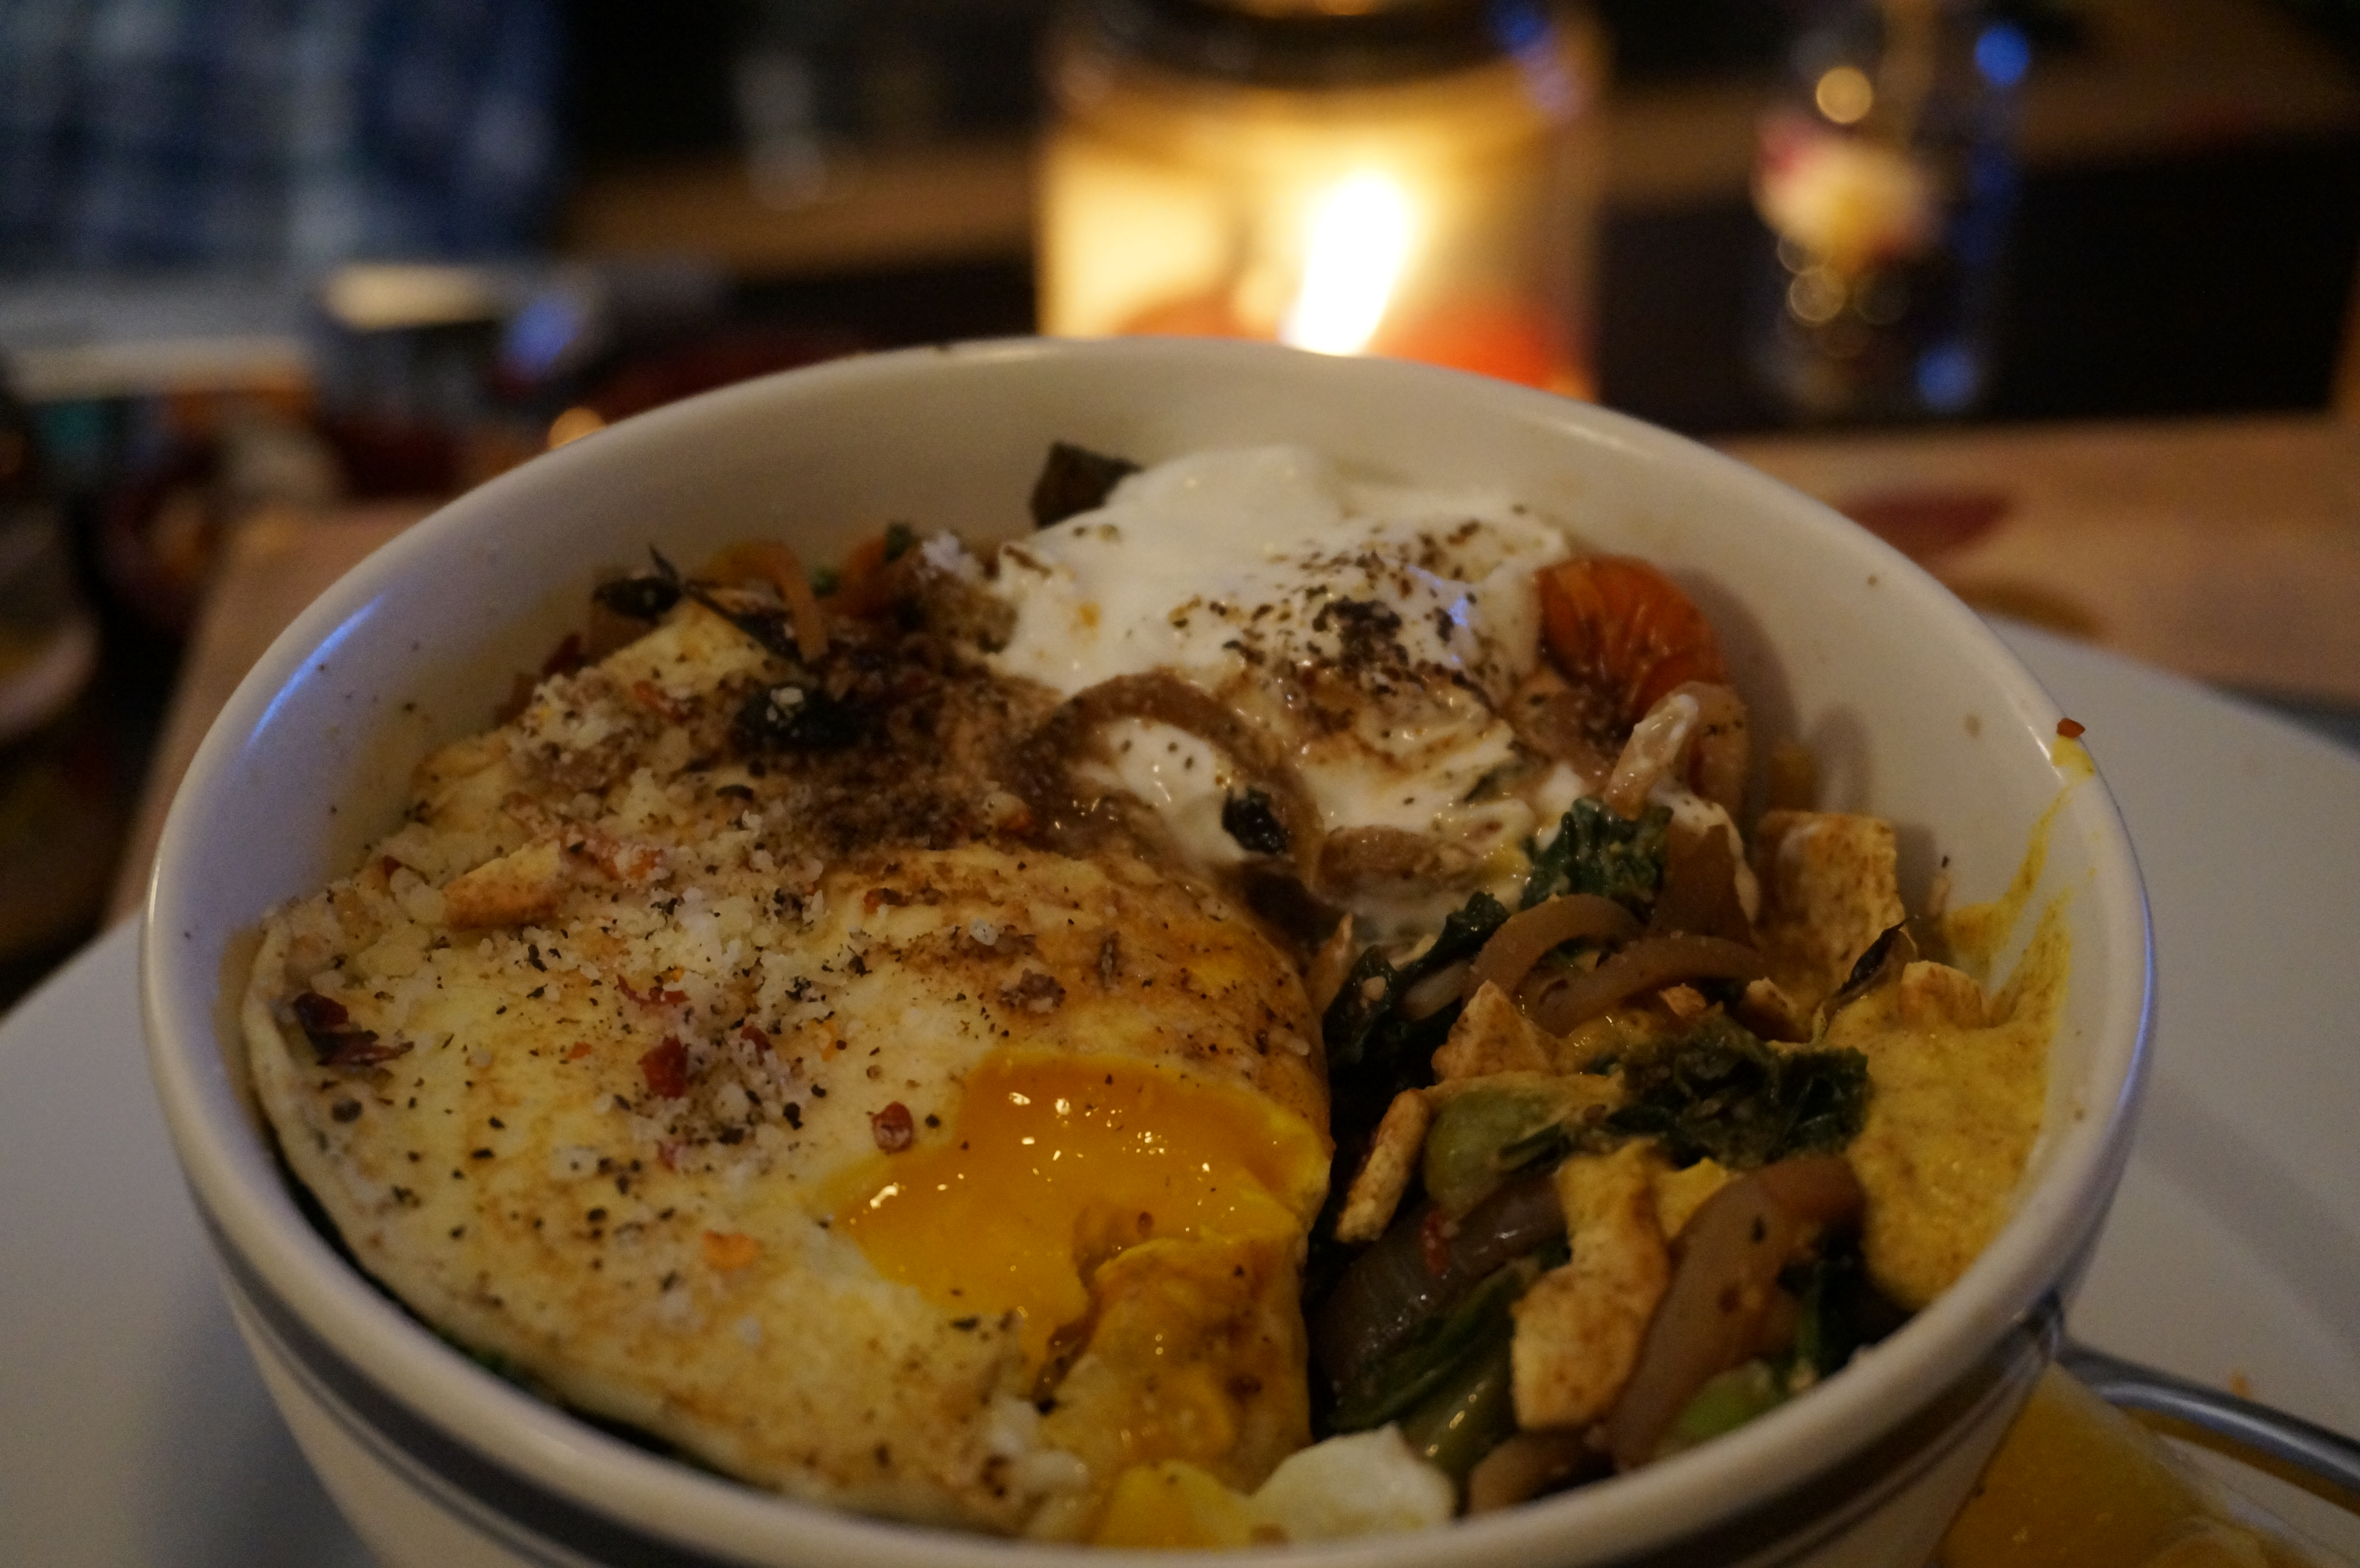
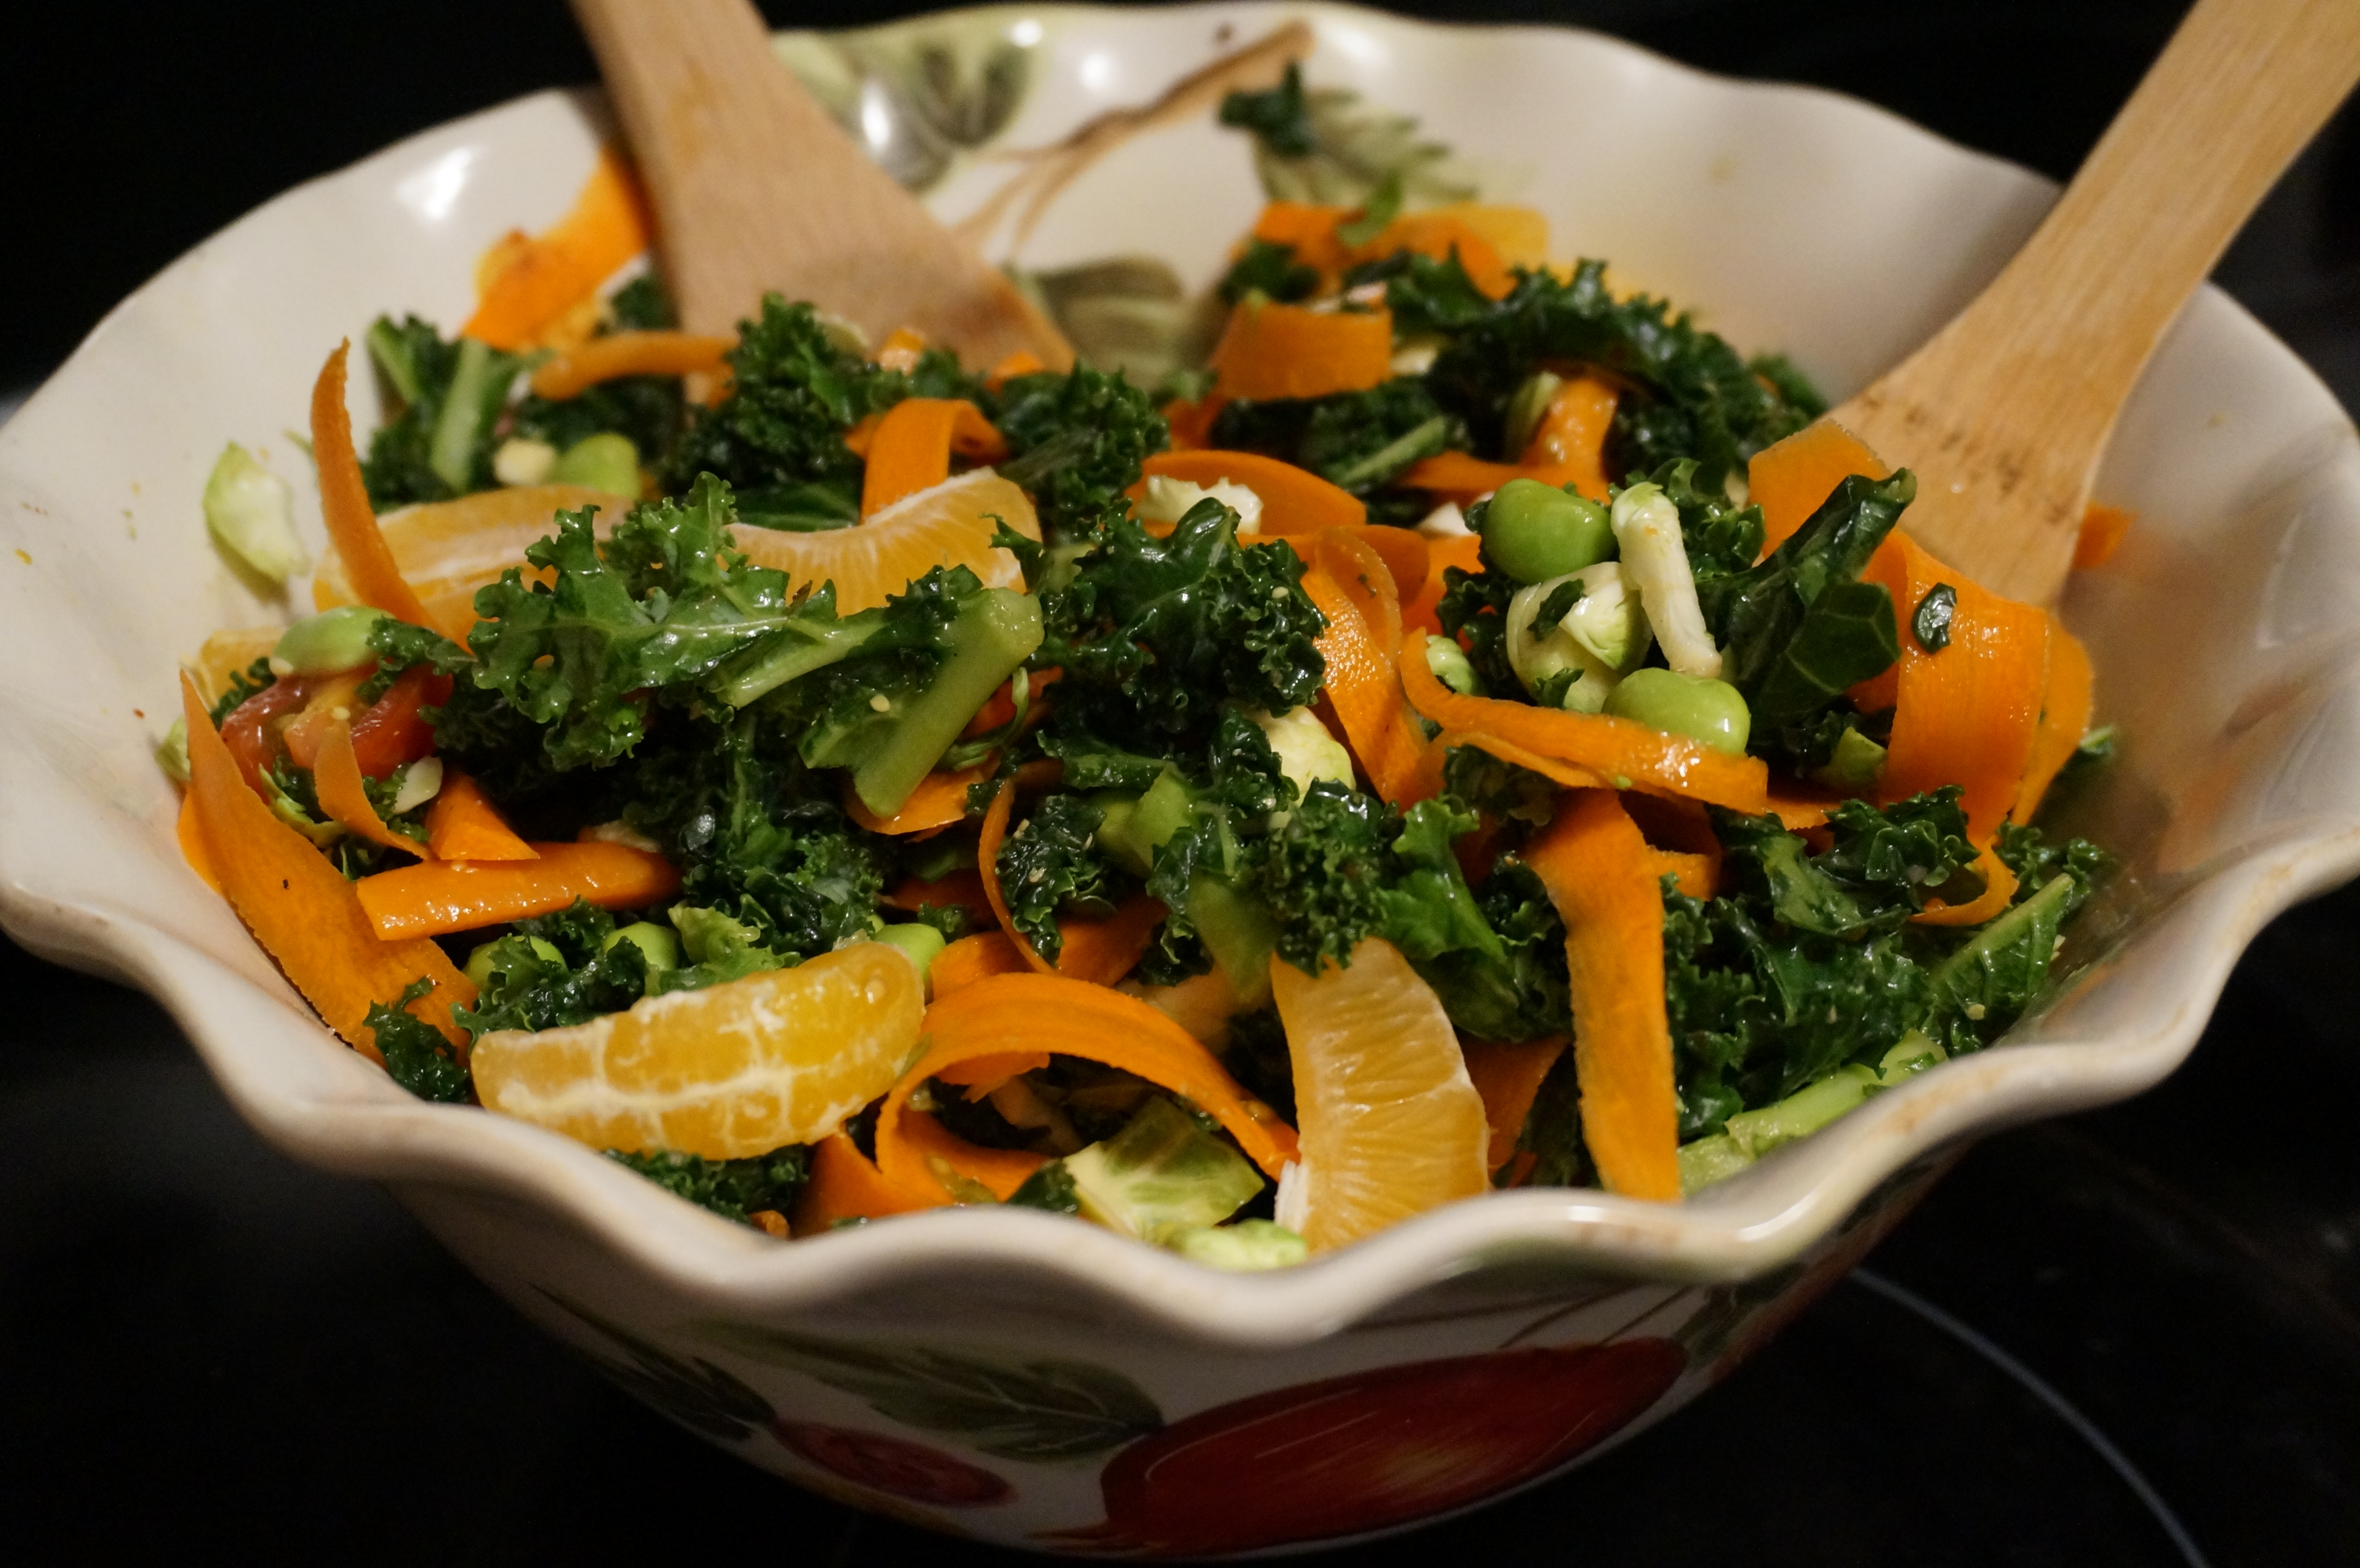
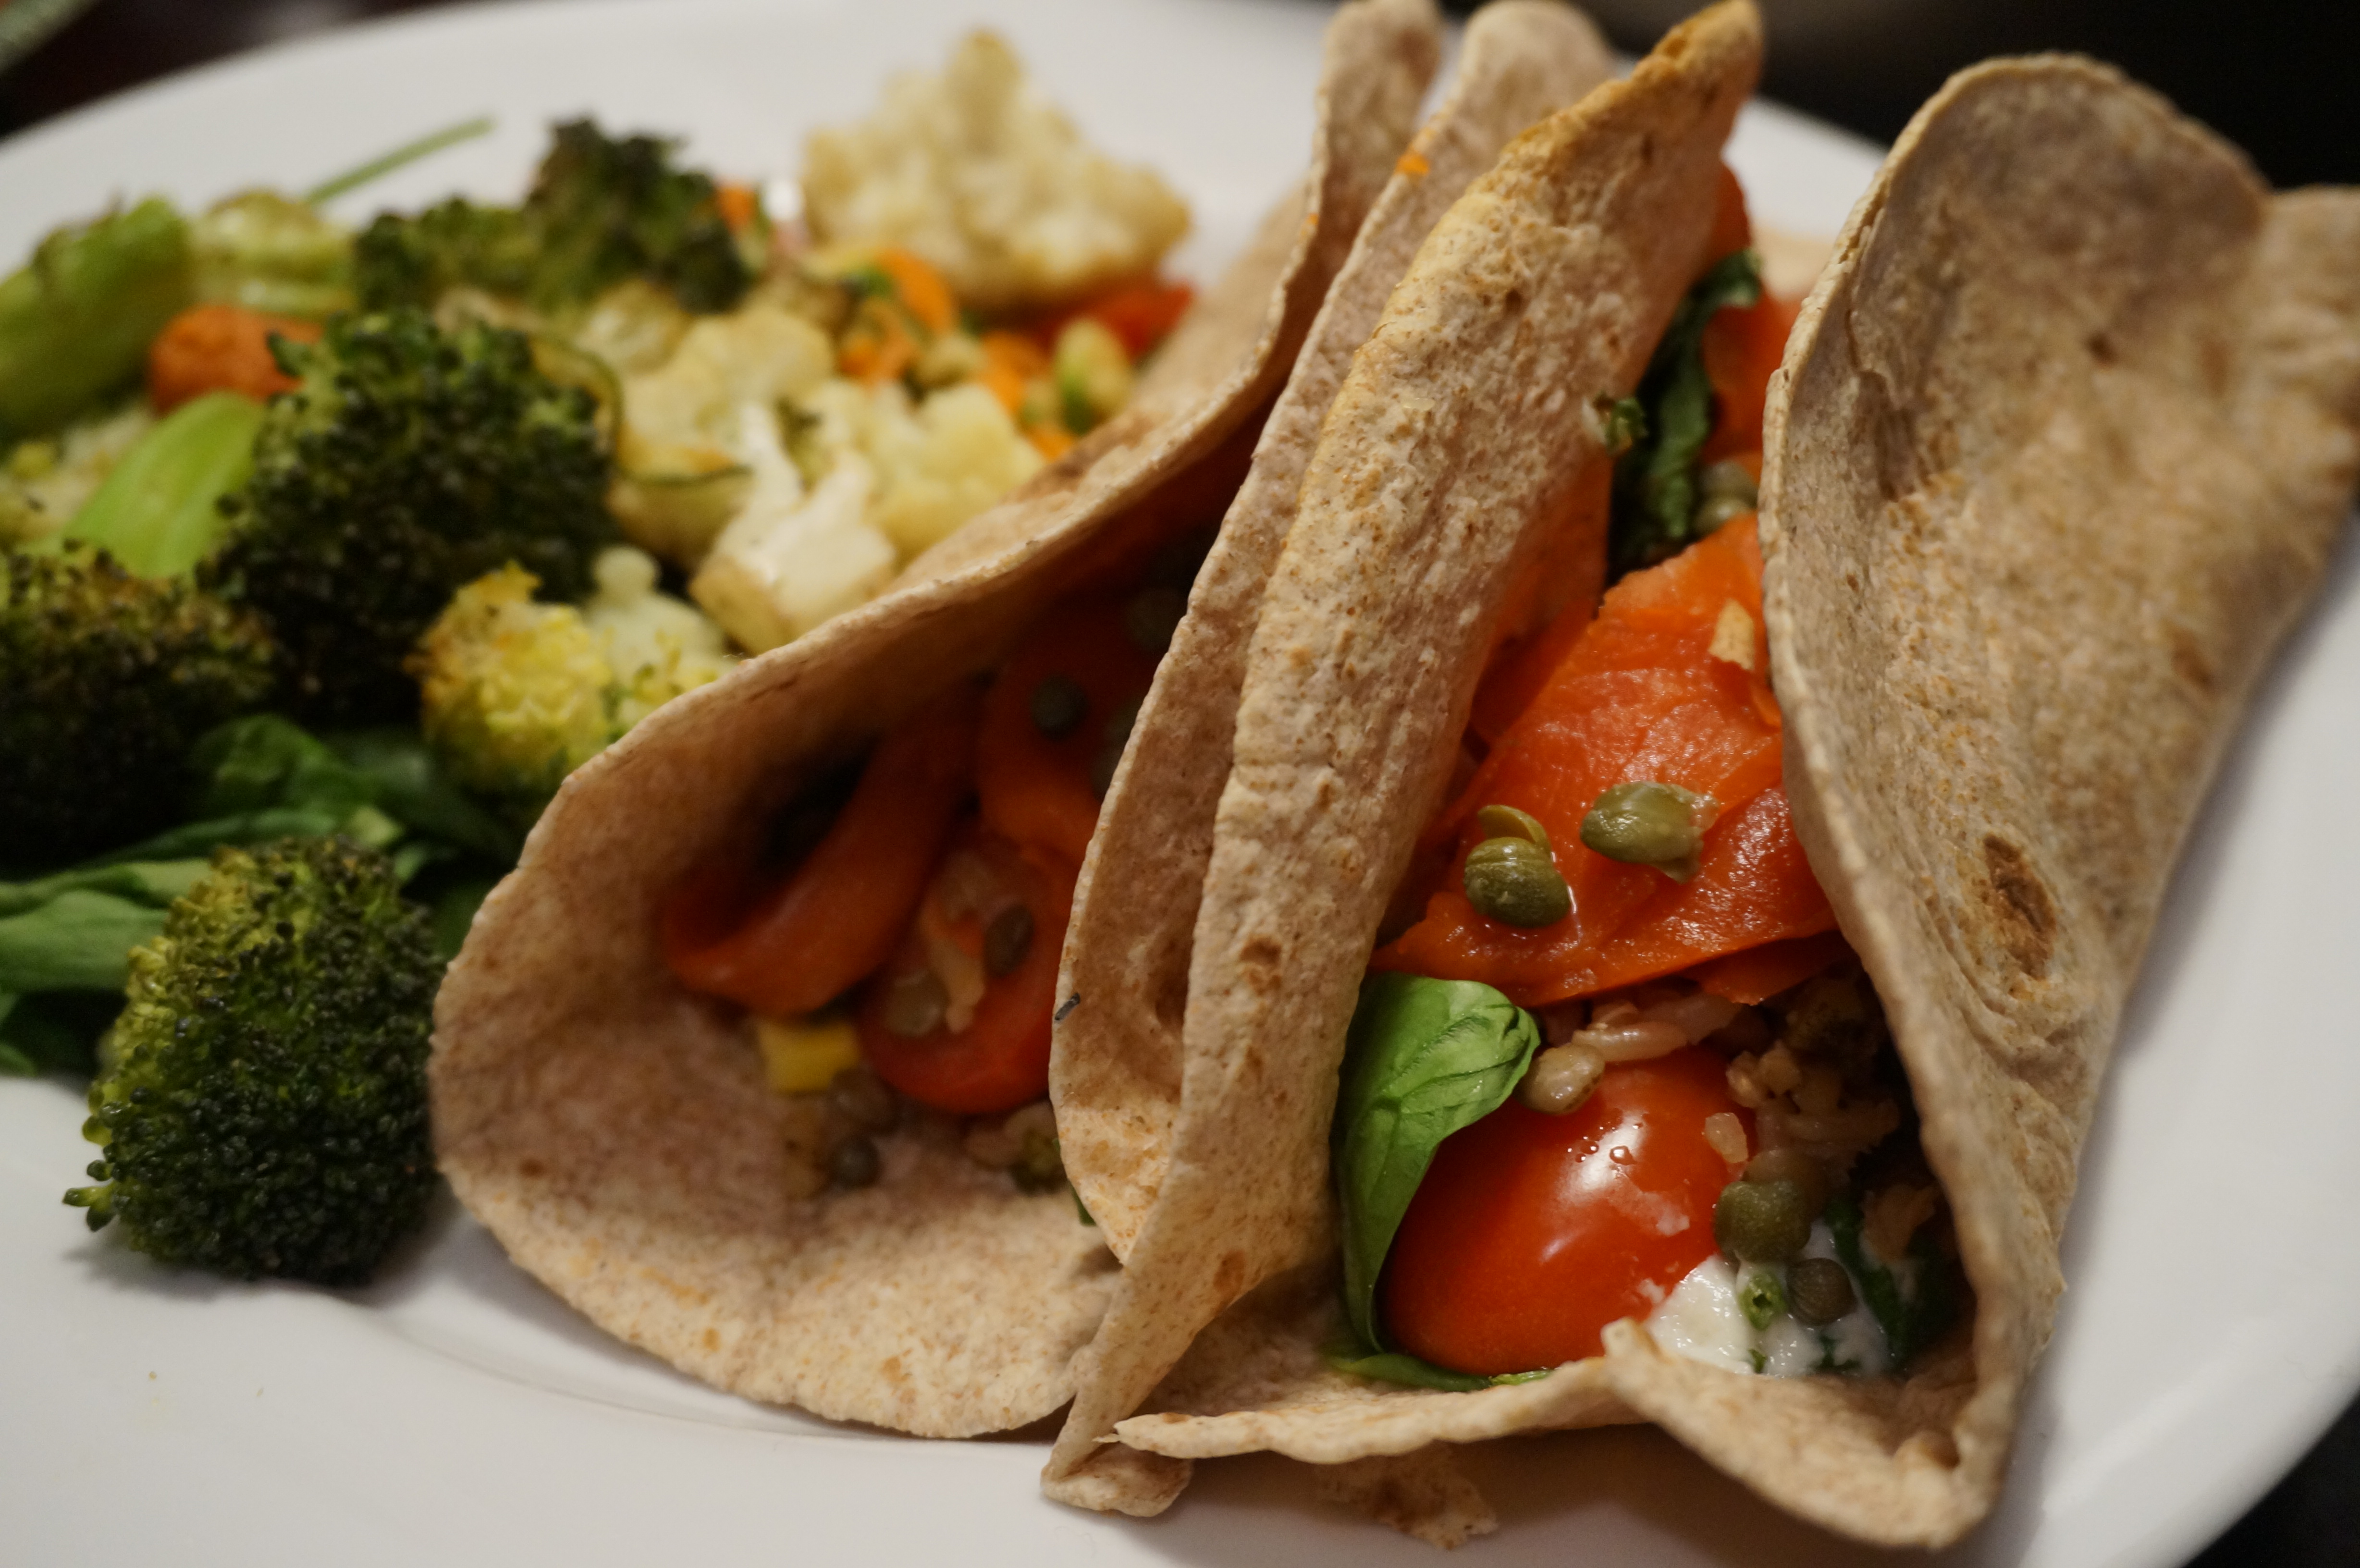
I whipped up a quick Dijon vinaigrette using the quick and dirty technique outlined in the book I’m currently reading, Bread and Wine (which by the way is amazing- I highly recommend!), and massaged a few kale greens with the freshly-spiralized veggie noodles. [side-note: why does spellcheck not yet know the word “spiralize”!?] Top it with some smoked salmon and savory capers and feta, and by golly, we have a delicious, power-packed salad fit for both you AND your salmon-craving, 150-pushups-a-day-performing man! (I actually turned these into tacos for him… he’s not as keen on the kale and zucchini mix, but don’t worry- I still snuck a few in there :P).

Hope you enjoy it!

DSC02418
Smoked Salmon and Kale Salad with Orange-Dijon Vinaigrette
DSC02411
Smoked Salmon Tacos
Smoked Salmon and Kale Salad with Orange-Dijon Vinaigrette
Recipe Type: Salad, Healthy, Seafood
Cuisine: Mediterranean
Author: Claire McCormick of “Claire Tastes”
Prep time:
Total time:
Serves: 2
A perfect way to practice your spiralizing skills while whipping up a quick and power-packed salad! Experiment with your own veggies, vinaigrette ingredients, and toppings to your heart’s desire.
Ingredients
  • 1 tbsp olive oil
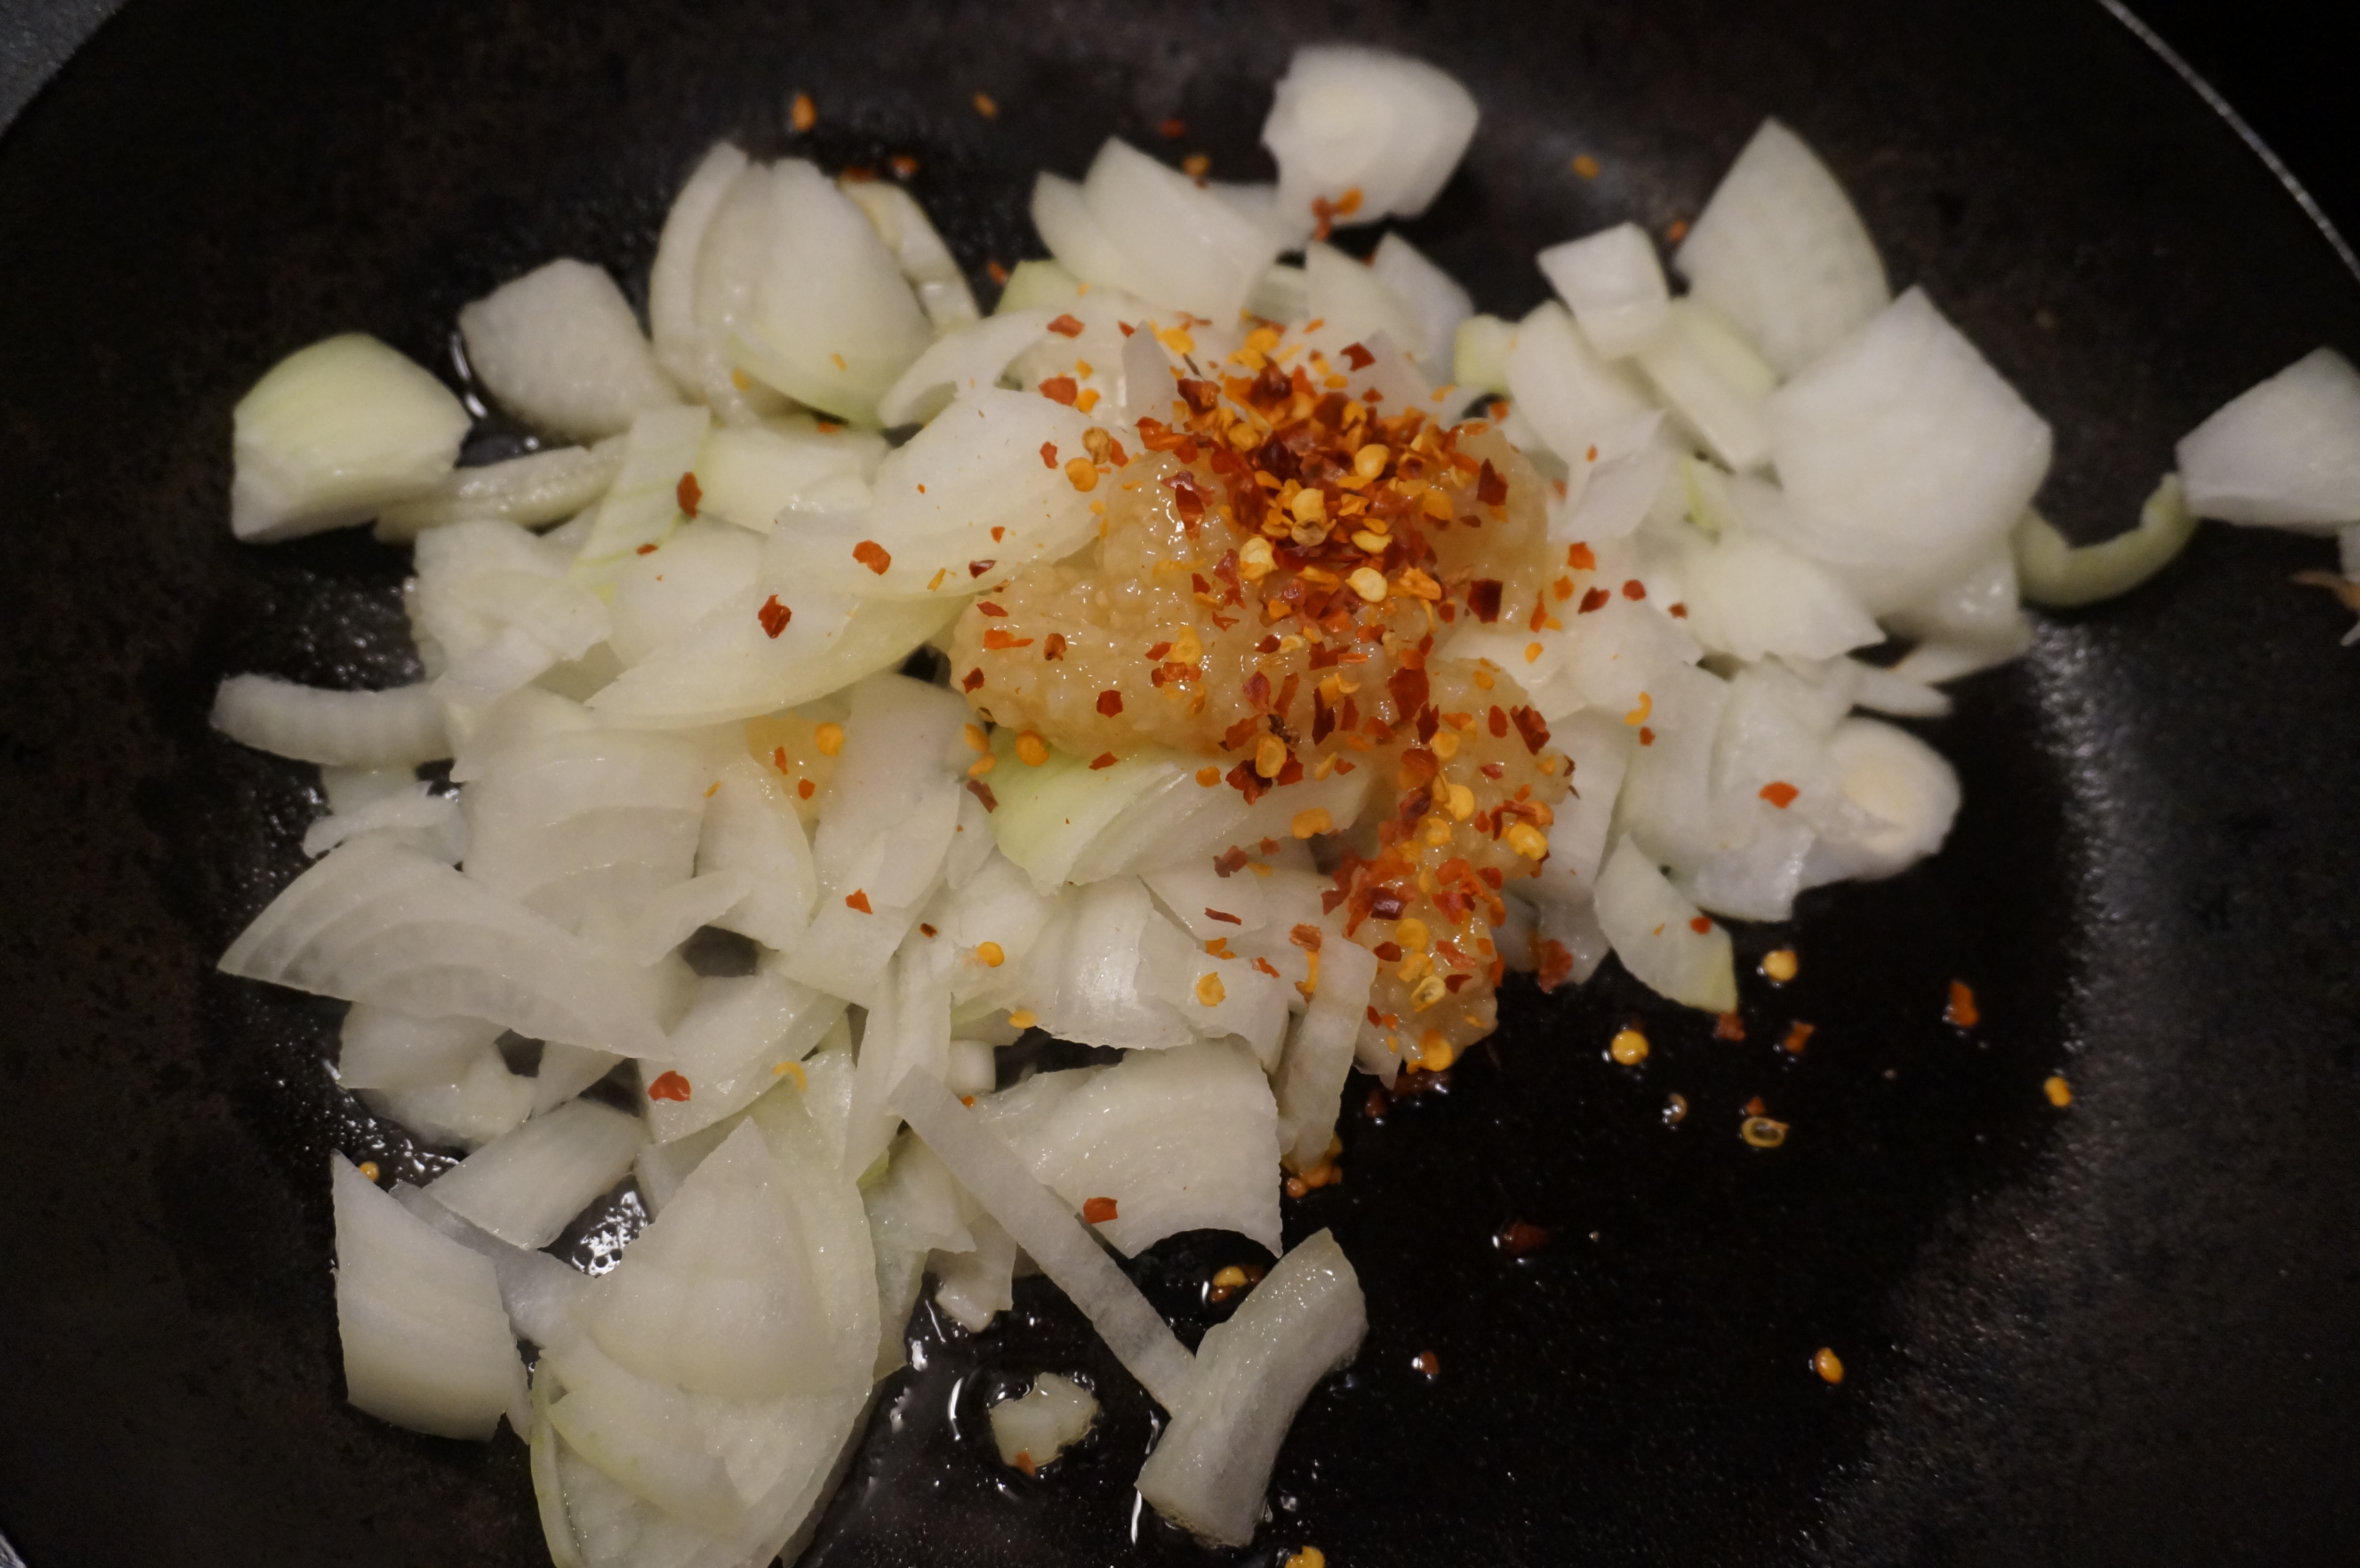
  • 1/2 tsp garlic, minced
  • 2 tbsp dijon mustard
  • 1/4 cup apple cider vinegar
  • 3 tbsp orange juice
  • 1 tbsp lime juice
  • 1/2 tsp pepper
  • pinch of salt
  • 3 cups shredded kale
  • 1/2 cup grape tomatoes, sliced
  • 2 small zucchinis, spiralized (using smallest blade for extra-thin “zoodles”)
  • 2 carrots, spiralized
  • 1 cup cooked grains (I used a medley of brown rice, quinoa, and lentils)
  • 4 oz smoked salmon, shredded or sliced into thin strips
  • 1 tsp capers
  • 1/4 tsp dried dill weed
  • feta cheese, for topping
Instructions
  1. In a small jar or bowl, whisk together dressing ingredients (oil through salt). I like using a jar so I can put the lid on and shake it up, then reuse it later in the week!
  2. Combine kale, tomatoes, spiralized veggies, and grains in a large bowl.
  3. Drizzle vinaigrette over top, little by little, tasting as you go to avoid drenching the salad!
  4. Massage veggies with your hands until kale is wilted and dressing is distributed evenly.
  5. Top salad with salmon (I threw mine under the broiler for 2 min but smoked salmon is meant to be served raw!), a few capers, and a pinch of dried dill weed.
  6. Serve with feta crumbles or a dollop of plain Greek yogurt (or both!) and some good crackers or crusty bread.
  7. *You can also make salmon tacos! Simply combine about 1/4 cup yogurt or sour cream with some ranch dressing seasoning and stir, stir, stir. Spread it on the bottom of a tortilla and top with salad from above (making sure not too much dressing is on it to avoid making them too soggy). Bake at 350 for 6-7 min or until tortillas are just “set.” Top tortillas with rice, salmon, capers/dill, and feta.

DSC02418

DSC02416

Skillet Kale Carbonara over “Broodles and Coodles”

Have you ever Spiralized? (Yes, I just used “spiralize” as a verb). It will literally change your life forever. I got a Spiralizer for Christmas from my mother-in-law and I could not be happier! For those of you who don’t know, a Spiralizer is this really cool contraption that you can use to make “noodles” out of regular vegetables and fruits. Zucchini is the classic “beginner’s” veggie to use (have you seen meatballs over zucchini spaghetti?) but you can also use carrots, broccoli, beets, radishes, sweet potatoes, apples, etc. The options are limitless! And all those colors? I can’t even. They don’t lie when they saw we eat with our eyes!

I decided to try out my new gadget tonight for a healthy, veggie-packed carbonara (read: fried egg on top) and a spicy mustard sauce. It was a hit!

DSC02389
Broodles and Coodles of Noodles (Oh, My!)
DSC02388
Skillet Carbonara over Broodles and Coodles
Skillet Kale Carbonara over “Broodles and Coodles”
Recipe Type: Vegetarian, Healthy
Author: Claire McCormick of “Claire Tastes”
Prep time:
Cook time:
Total time:
Serves: 4
A great way to try out your new Spiralizer! The options are endless! I used carrots and broccoli, but you could also experiment with any other veggies (go by color- beets, radishes, zucchini, etc.)
Ingredients
  • 4 carrots
  • 2-3 stalks broccoli (from one head)
  • 2 tbsp olive oil, divided
  • 1 onion, sliced
  • 1 tbsp garlic, minced
  • 1/2 tsp red pepper flakes
  • 1/2 cup mushrooms, sliced
  • 1 tbsp whole grain dijon mustard
  • 1/2 tsp pepper
  • 3/4 cup low sodium chicken broth
  • 2 tbsp apple cider vinegar
  • 1 tbsp water
  • 3 cups packed kale, torn into pieces (I leave the stems in!)
  • 2 eggs (1 per serving)
  • Parmesan cheese, optional (for topping)
Instructions
  1. Spiralize carrots and broccoli stalks using blade C (the shredder), tearing apart the spirals every few turns (otherwise you’ll get a never-ending broodle/coodle!). Set aside.
  2. In a large cast iron skillet, heat 1 tbsp oil on medium-high heat. Add onions, garlic, red pepper flakes. Cook 3 minutes or until soft. Add mushrooms and stir continuously for 1 more minute, making sure to scrape up all the browned bits on the bottom of the skillet.
  3. Remove the onion mixture from the skillet and set aside.
  4. Whisk together mustard, pepper, broth, vinegar, and water.
  5. Add remaining oil to skillet.
  6. Pour the sauce in the skillet and wait until it bubbles. Reduce heat to low and add the carrots and broccoli spirals.
  7. Cook 3-4 minutes or until veggies are soft.
  8. Reduce heat to low and add kale. Cook until wilted.
  9. Meanwhile, cook eggs on low heat until set (I like my yolks a bit runny, but feel free to cook as you like!)
  10. Serve kale and veggie spirals with fried egg and parmesan cheese on top, if desired. Drizzle a bit of the extra sauce in the bottom of the skillet, too!

DSC02349

DSC02357

DSC02362DSC02363

DSC02367

DSC02369


DSC02389

DSC02400


Massaged Kale & Edamame Salad with Honey Ginger-Lime Vinaigrette

MASSAGED KALE SALAD W/ HONEY GINGER-LIME VINAIGRETTE
Massaged Kale & Edamame Salad with Honey Ginger-Lime Vinaigrette
Recipe Type: Salad
Cuisine: Vegetarian
Author: Claire McCormick of “Claire Tastes”
Prep time:
Total time:
Serves: 12
A slightly sweet and tangy vinaigrette complements the chewiness of the kale in this simple, throw-together salad that will be perfect as a side for your next pizza party!
Ingredients
  • 1/3 cup apple cider vinegar
  • 3 tbsp extra virgin olive oil
  • 2 tbsp honey (more or less to taste)
  • 1/4 cup lime juice
  • 1 tbsp dijon mustard
  • 1 tsp minced garlic
  • 1 tbsp minced ginger
  • 1/2 tsp each salt and pepper
  • 1/4 tsp red pepper flakes
  • 1 bag chopped kale, rinsed
  • 1/2 cup frozen edamame
  • 1/2 cup grape tomatoes, halved
  • 1/2 cup brussels sprouts, sliced or shredded
  • 2 large carrots, peeled into long strips
  • 2 clementines, peeled and wedged
Instructions
  1. Combine all ingredients for dressing (up to kale) in the bottom of a large bowl.
  2. Add kale and massage with both hands, working the dressing into the kale until it gets soft and slightly wilted.
  3. Add remaining ingredients and toss.
  4. Serve with extra vinegar or dressing if desired.


Roasted Butternut Squash, Pear, and Cranberry Pizza w/ Pumpkin Sauce & Fontina

Roasted Butternut Squash, Pear, and Cranberry Pizza w/ Pumpkin Sauce & Fontina Cheese
Roasted Butternut Squash, Pear, and Cranberry Pizza w/ Pumpkin Sauce & Fontina

I do love me a good gourmet pizza. Especially when it’s packed with the flavors of fall. No way your doctor will tell you you’re low on Vitamin A with this one! Packed with vitamin-rich pumpkin and butternut squash, and topped with sweet pears and tart cranberries, this is one Thanksgiving pie that you won’t need to feel guilty about! This pizza would be perfect as an appetizer, main dish, or side. The pumpkin sauce is just sweet enough to even be enjoyed as a dessert!

The best part is that you can make this in advance, freeze it uncooked, and then just bake it when you’re ready! Much better than Digiorno.

Roasted Butternut Squash, Pear, and Cranberry Pizza w/ Pumpkin Sauce & Fontina Cheese
Recipe Type: Entree, Appetizer
Cuisine: Fall, Vegetarian
Author: Claire McCormick of “Claire Tastes”
Prep time:
Cook time:
Total time:
Serves: 8-12
I do love me a good gourmet pizza. Especially when it’s packed with the flavors of fall. No way your doctor will tell you you’re low on Vitamin A with this one! Packed with vitamin-rich pumpkin and butternut squash, and topped with sweet pears and tart cranberries, this is one Thanksgiving pie that you won’t need to feel guilty about!
Ingredients
  • 1 store-bought pizza crust (I used Trader Joe’s whole wheat)
  • EVOO (about 1 tsp)
  • 1 cup pumpkin puree
  • 1/2 tsp cinnamon
  • 1/4 tsp nutmeg
  • 1 tbsp brown sugar
  • 1 tsp honey
  • 1/2 cup shredded fontina cheese (or blend)
  • 1/2 cup spinach, shredded
  • 1 cup butternut squash, cubed
  • 1/2 pear, sliced thinly
  • 1/2 cup cranberries, halved
  • S&P, to taste
Instructions
  1. Preheat oven to 400 deg. Spread squash cubes on a large baking pan sprayed with oil or lined with Silpat, and bake 30 min. Add cranberries and bake 10 more minutes or until squash is golden brown and cranberries are soft.
  2. Remove from oven and set aside to cool.
  3. Meanwhile, spread pizza dough out on a large pizza pan or baking sheet sprayed with cooking oil. Press out to edges with fingertips (if the dough springs back, put it on top of the hot oven and allow the warmth from the oven “de-springify” it, then try again.
  4. Drizzle dough with olive oil.
  5. In a medium bowl, stir pumpkin puree, cinnamon, nutmeg, brown sugar, and honey. Spread over top of pizza crust. Add the cheese, reserving a bit for the very top!
  6. Layer spinach, squash, pear, and cranberries. Top with remaining cheese, salt and pepper to taste.
  7. Increase oven temp to 450 deg and allow to preheat for at least 30 minutes. Cook pizza 15 minutes, or until crust is browned and cheese is melted.*
  8. *Note: I froze my pizza a day in advance, wrapping it tightly in foil and saran wrap, and then baked at 375 (like a store-bought frozen pizza!) for 18 minutes, followed by 400 deg for 6 more minutes, or until the crust was browned. (This way you can make it in advance and cook when you’re ready!)
Serving size: 1/10 pizza Calories: 232 cals Fat: 5 g Carbohydrates: 43 g Fiber: 6 g Protein: 8 g

DSC02212

DSC02210

Couscous Tabbouleh

DSC01737This recipe for tabbouleh could NOT be easier. I didn’t have to heat up a pot on the stove, chop any veggies, or deal with mushy, overcooked grains. With whole wheat couscous, all you have to do is add boiling water and let them sit for a few minutes before fluffing with a fork (anyone wonder why it’s called “fluffing” btw? A fork doesn’t exactly seem like a good “fluffer”).

I added a TON of lemon juice, both fresh and from the bottle, for max tang factor . I also cut down on the amount of olive oil typically used in tabbouleh (aka ‘tabouleh’ or ‘tabouli’… I just chose the one with the most letters), as I didn’t want a salad to sit in my fridge dredged in oil for a week. Yes, that is how long I plan on keeping this stuff around. I’m gonna be a working woman now, people! I may add more oil and juice later if it gets too dry- we’ll see. Free free to do more or less of the oil/lemon to your liking.

I also added 2 cans of garbanzo beans to help increase the protein in the salad- it seemed like it was missing something “meaty.” As I plan to eat this as a main course most days, I wanted a bean in there to help keep me fuller for longer.

One more thing. Make sure not to skimp on the parsley. I used curly parsley because it’s a bit chewier and also easier to pluck from the stems (which is a super annoying task). Other than that, this salad takes less than 30 minutes and will only get better over time! With a food processor, you don’t need to chop any veggies or onions into perfect little slices- just pulse and add to the couscous!

This would be incredible over more greens with a fried egg on top and/or a little dollop of greek yogurt or crumbled feta (or both!). You could also serve it stuffed in a pita pocket or with some whole grain crackers on the side. Enjoy!
DSC01737

DSC01738

Couscous Tabbouleh
Recipe Type: Salad, Vegetarian
Cuisine: Middle Eastern
Author: Claire McCormick of “Claire Tastes”
Prep time:
Cook time:
Total time:
Serves: 12-20
Here is another easy and extremely versatile salad recipe, made with whole wheat couscous and packed with protein and fiber! I added garbanzo beans to bulk it up a bit and only used a bit of olive oil because I didn’t want it “overdressed.” Lots of lemon juice in this recipe, but feel free to add more or less oil/lemon if you prefer! This salad is great over greens, stuffed inside a pita, or served on whole grain crackers. It’d probably be excellent with a dollop of plain Greek yogurt on top as well. As always 🙂
Ingredients
  • 2 cups whole wheat couscous (TJ’s)
  • 1 cup boiling water
  • 1/4 cup extra virgin olive oil
  • 1 lemon, halved
  • 8 tbsp lemon juice, divided
  • 2 bunches parsley, rinsed and stems cut off
  • 1 cucumber, rinsed and peeled
  • 1/2 red onion
  • 2 cans garbanzo beans, rinsed and drained
  • 1 carton cherry tomatoes, rinsed
  • 1/2 tsp black pepper
  • 1 tsp salt
  • 1 tsp garlic powder
Instructions
  1. Pour couscous into a large bowl. Add boiling water and stir. Add olive oil and juice from 1/2 of lemon, plus 4 tbsp regular lemon juice.
  2. In a food processor, add parsley, cucumber, red onion, and juice from the other half of the lemon, plus remaining 4 tbsp lemon juice. Pulse until roughly chopped. (It helps to give it a quick stir after each pulse to avoid getting one big parsley “paste” with big chunks of red onion at the top of the bowl!)
  3. Using a spatula, add processed mixture to the bowl with the couscous.
  4. In food processor, add garbanzo beans and tomatoes. Pulse until just roughly chopped- two or three times for about 2-3 seconds is all you need!
  5. Add to the bowl with the other ingredients and toss to combine. Add pepper, salt, and garlic powder and stir.
  6. Serve with additional greens like spinach or kale and a dollop of plain yogurt on top, or stuffed in a pita pocket for a hearty sandwich!


Saturday Food Prep!

DSC01709Hey ya’ll! This week is a big week for me, as I’ll be heading out on my nine month clinical rotations (all local, thank goodness) for PT school. Just over nine months from now I will (God-willing) be able to call myself a Doctor of Physical Therapy! Woohoo! Pending passing boards and graduation, of course. Technicalities.

Anyway, I’ve been a bit nervous about the change in pace. Coming off of two years of a schedule that pretty much changes from week to week (some days I’d be in class 8 hours, other days I’d get a morning off for a split-lab, some Fridays I had completely off). Now I’ll be working 40 hour weeks with a half hour lunch and probably a bit more time on top of that for patient documentation. It’s an exciting change (real world alert!) but I’m nervous about being able to manage all the other things I’d like to be able to do: make tasty dinners, pack lunches, find time to work out, take the dog for a walk/bike ride, clean the house, do laundry, spend time with friends, etc. etc. I think about how I’m going to handle it and I’m stressed about 3 seconds later. Which isn’t good for anyone.

With that, I’ve decided to control what I can control now instead of worrying about the “what if’s.” I decided to start prepping lunches for the week ahead in advance (either Saturday or Sunday), with the goal of streamlining the process. On one weekend evening I plan to make a big protein-packed salad that I can steal from all week long, to mix up lunches on days where I’m not really feeling the whole sandwich or yogurt thing. Then, my hope is that Monday night will roll around and I’ll just grab a bagged sandwich or some of the prepared salad, a bag of veggies, a bag of fruit, some pretzels and other pantry snack, perhaps a yogurt, and call it quits. I’ll do this for Ben and my own lunch (different sandwiches, yogurts and snacks).

I also came across these super cute Rubbermaid Lunch Blox, which can be purchased on Amazon for sandwiches and salads. (See the link at the bottom of this post, or visit my “Things I Like” page!) They were $12.99 at Kroger, but buy one get one free! So I got one of each. I was so pumped about the way that they snap together, lego-style, with one large bottom compartment for a sandwich or salad, and a top compartment with little individual boxes for sides and salad dressing. Best part is the ice pack that fits on the bottom to keep your lunch cold until noon! I packed one sandwich box right up with sides of veggies and fruit, and the salad one with some mixed greens and veggies. I plan on making a tabouli salad tomorrow which I’ll then add to the salad with some lemon vinaigrette (recipe to follow)!

For Ben’s sandwiches, I packed up about 8 or 9 different varieties on some leftover wheat buns we had from dinner last night. I made some with avocado, Smokey Cheddar Cheeze SPREAD, ham, and provolone, others with hummus, ham, pesto and provolone, and the remaining ones with PB, strawberry jam and raisins.

For my sandwiches, I made one with SPREAD, avocado, turkey, tomato, spinach, and a sprinkling of dried basil on Ezekiel bread, another with hummus, turkey, tomato, spinach and swiss, and the last on a multigrain FlatOut wrap with all of the ingredients from the first sandwich but edamame instead of turkey.

Fruit bags were strawberries and cherries (both of these are in abundance right now! I’ve been freezing a lot of the ones I get to save for the winter!)

Veggies included carrots, grape tomatoes, and radishes.

Gluten-free pretzel sticks (much crunchier and tastier in my opinion!) for snacks.

I’m hoping that this will help start off the next 9 months with as little stress as possible!

What tips and tricks do you use to streamline meals for the week ahead? I’d love to hear them!

DSC01695So cute! One Sandwich Kit and one Salad Kit.

DSC01697Sandwich Kit deconstructed…

DSC01699Salad Kit deconstructed… genius!

DSC01701The beginning of prep.

DSC01703Ben’s sandwiches on leftover wheat buns. A mixture of hummus or cheddar SPREAD, with ham, spinach and provolone.

DSC01704One of mine on Ezekiel… SPREAD, smashed avocado, tomato, turkey, spinach and basil sprinkle.

DSC01707Same thing on FlatOut wrap, with edamame instead of turkey as the protein of choice.

DSC01709All packed up! From L to R, some of my sandwiches, pretzel sticks, veggie bags, Ben’s sandwiches, fruit bags, and Monday and Tuesday packed lunches (sandwich and salad) in the LunchBlox in back!

DSC01711Another angle of all this delicious food.

DSC01712I’ve designated this drawer in our fridge as “the lunch drawer.” Easy for pulling open, grabbing a sandwich/veggie bag/fruit bag and calling it a night!

DSC01714Packed lunches ready-to-go for Monday and Tuesday! 

DSC01733How exhausting! #obligatoryselfie

DSC01717All done! It’s gonna be a great week!

//ws-na.amazon-adsystem.com/widgets/q?ServiceVersion=20070822&OneJS=1&Operation=GetAdHtml&MarketPlace=US&source=ss&ref=ss_til&ad_type=product_link&tracking_id=clairetastesblog-20&marketplace=amazon&region=US&placement=B0078K416Y&asins=B0078K416Y&linkId=GHX2XLBEXU6XA2JL&show_border=true&link_opens_in_new_window=true