Guinness Cheddar Dip

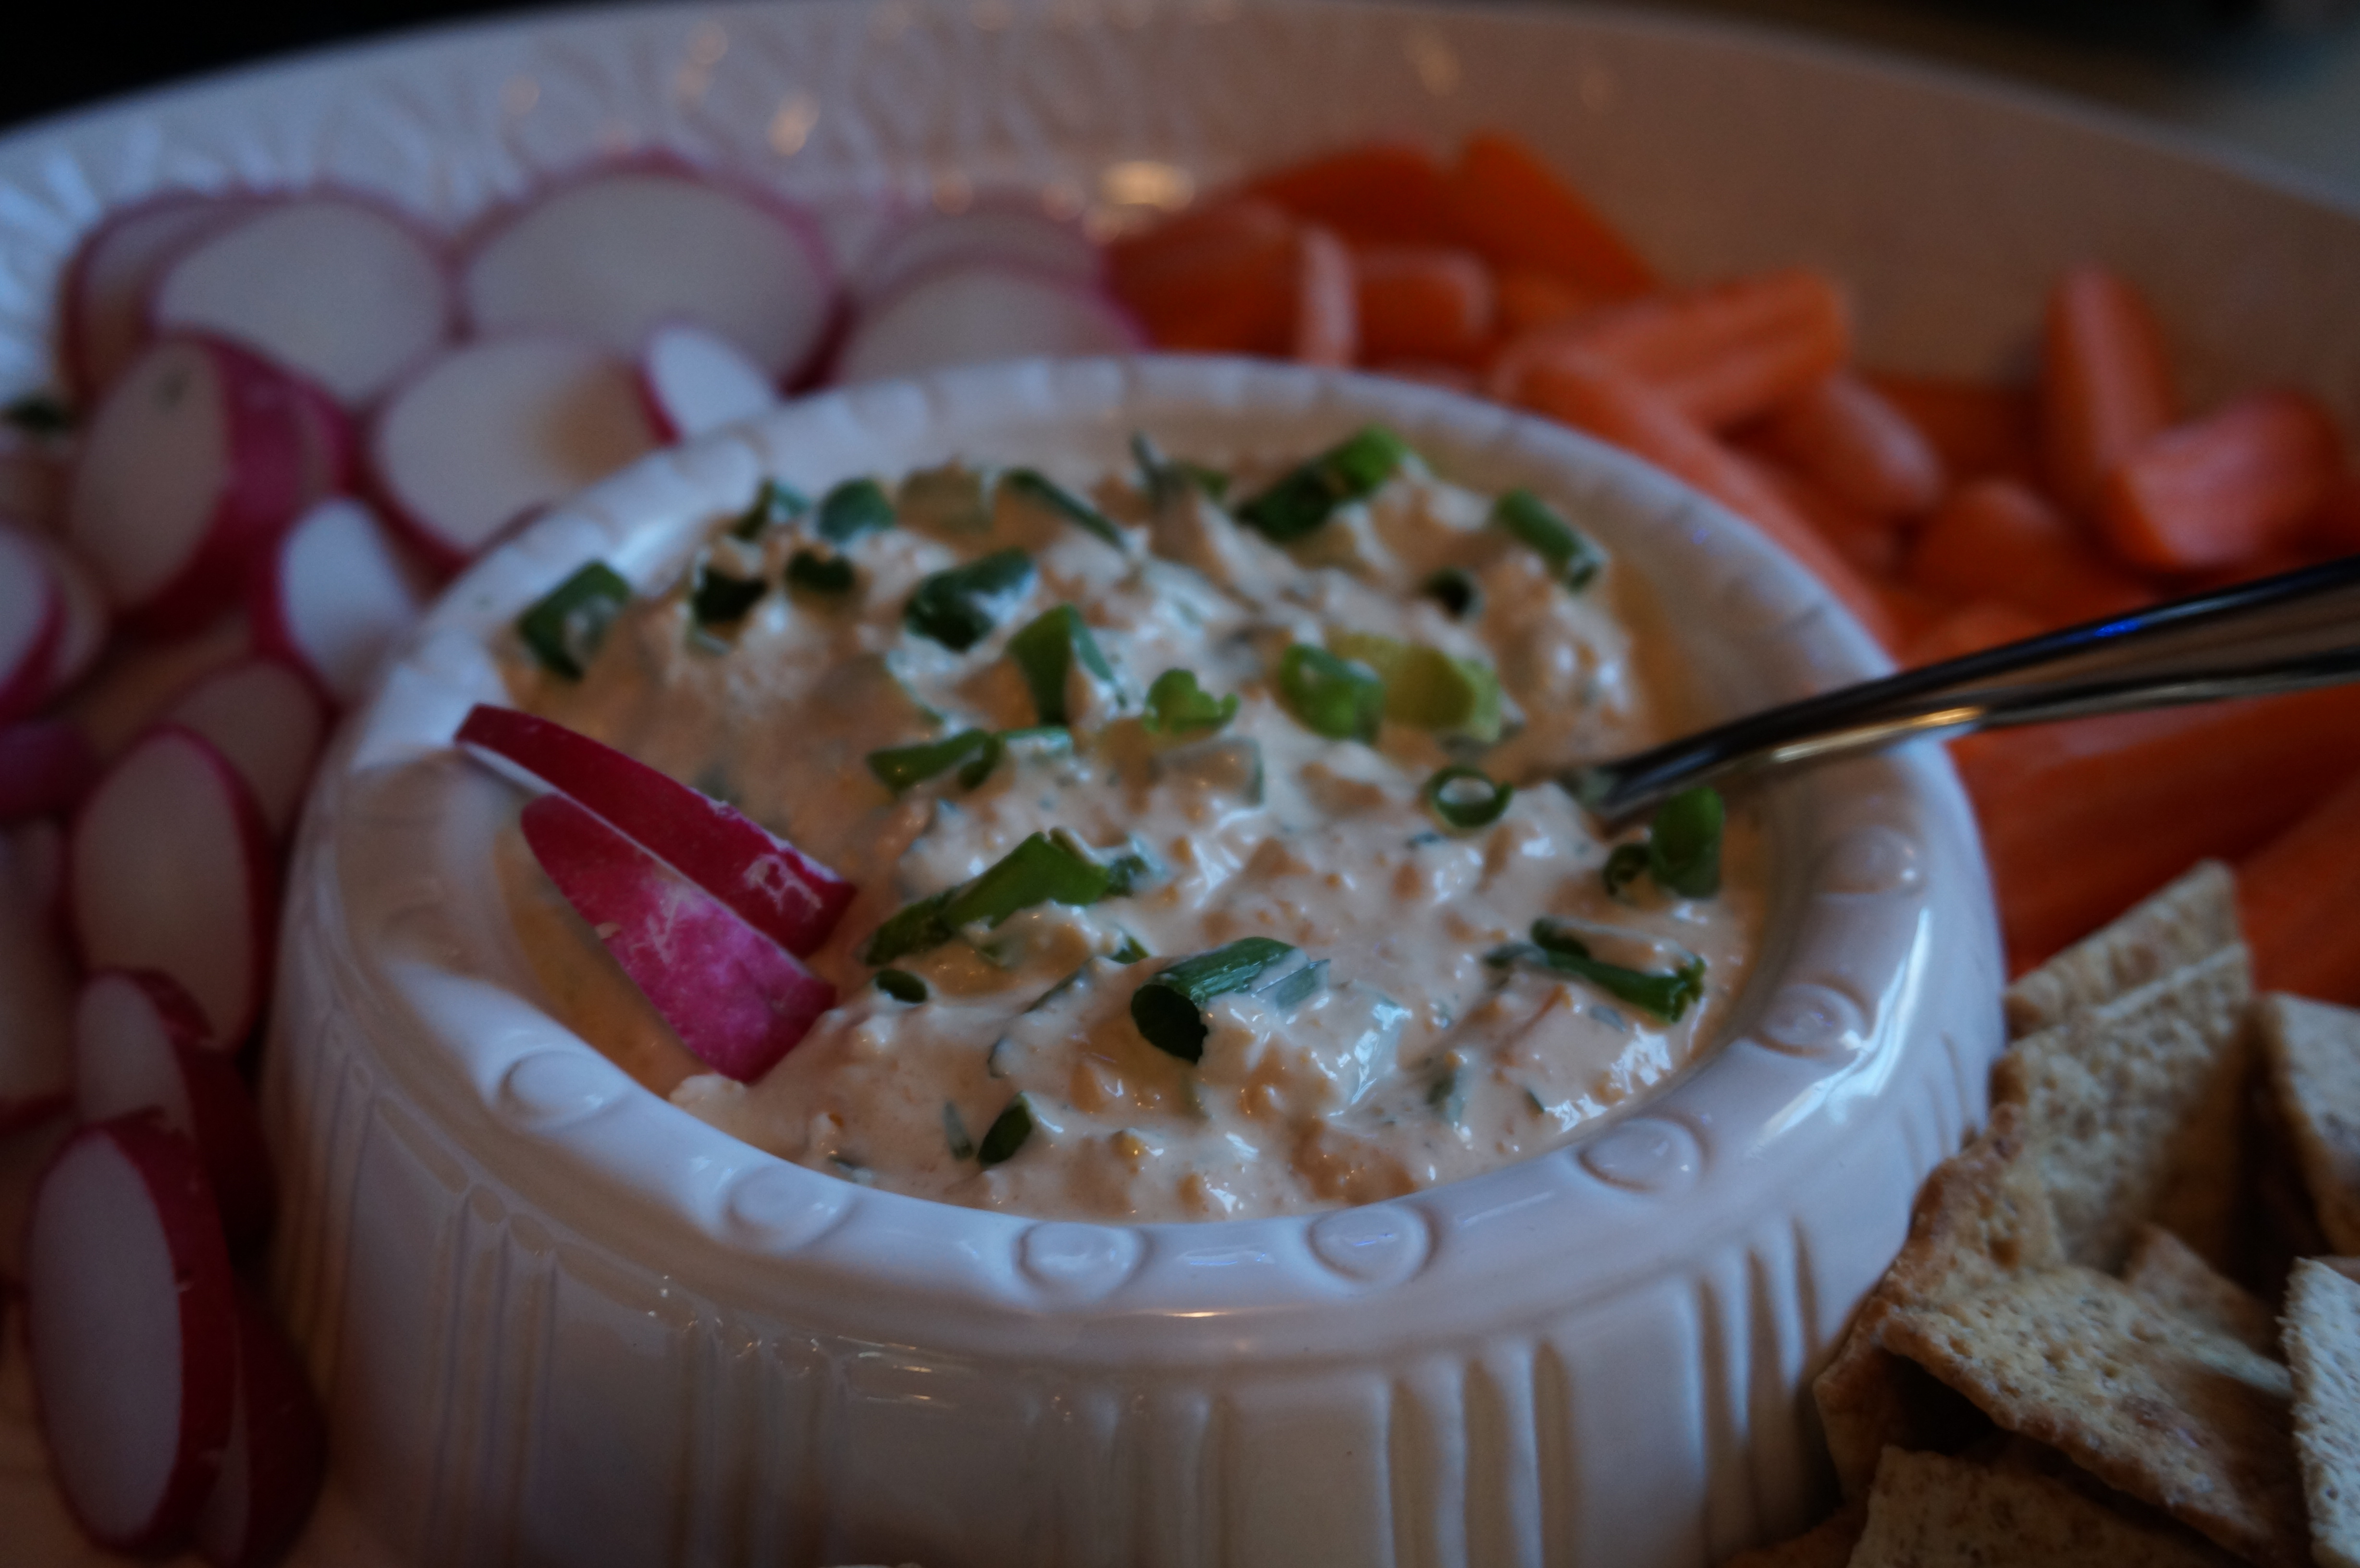
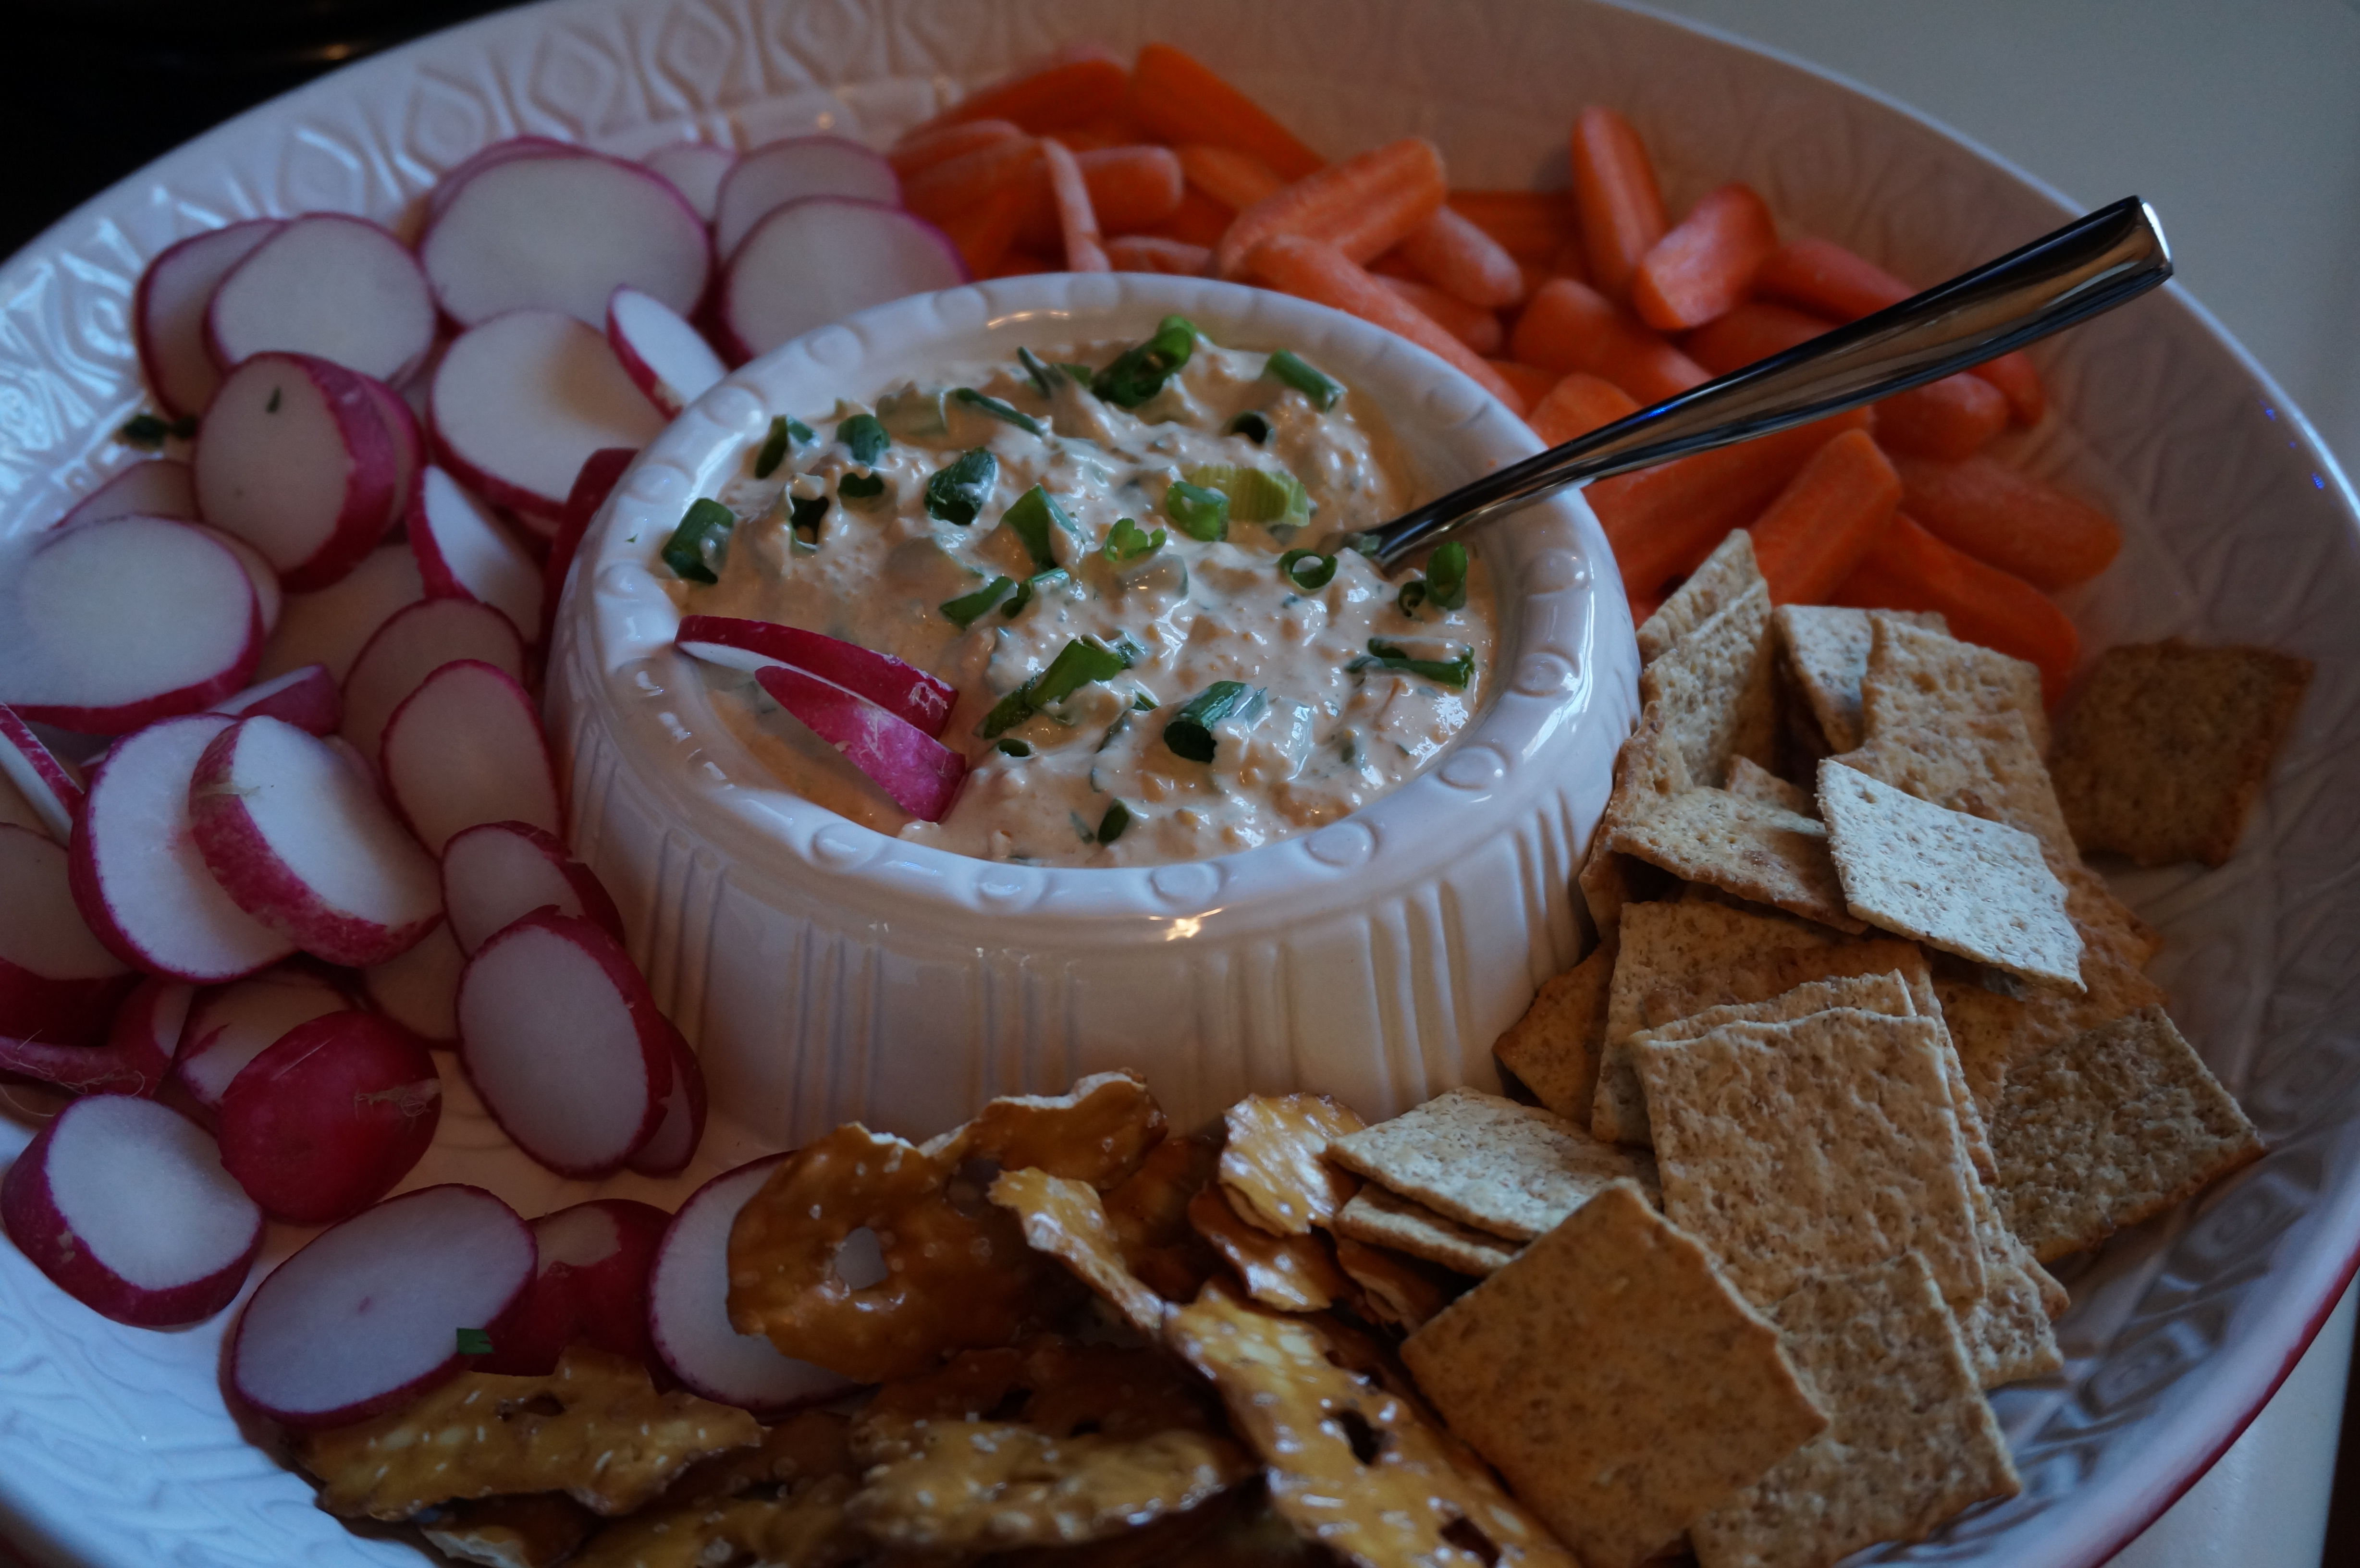
Happy St. Patrick’s Day week! My dear friend Sarah had a few of us over this afternoon for a little early St. Patty’s feast. While researching something tasty to bring, I stumbled upon this recipe from The Parsley Thief and couldn’t resist! While I’m not a huge Guinness beer fan in general, I love the tang of the draught when combined with some sharp cheddar and cream cheese. Serve with you favorite crudités like sliced veggies or some hearty crackers! (I considered spreading it on Irish Soda Bread, but I’m not sure how well that would work…)

Anyhoo, wherever you are, have a very merry St. Patrick’s Day! May you discover many rainbows with pots of gold at the end!

DSC02775
GUINNESS CHEDDAR DIP
Guinness Cheddar Dip
Recipe Type: Appetizer
Cuisine: Irish
Author: Claire McCormick of “Claire Tastes”
Prep time:
Total time:
Serves: 16
Happy St. Patty’s Day! Here’s a fun spin on the usual cheddar and cream cheese dip, using Guinness draft beer for a little extra tang. Hope you enjoy!
Ingredients
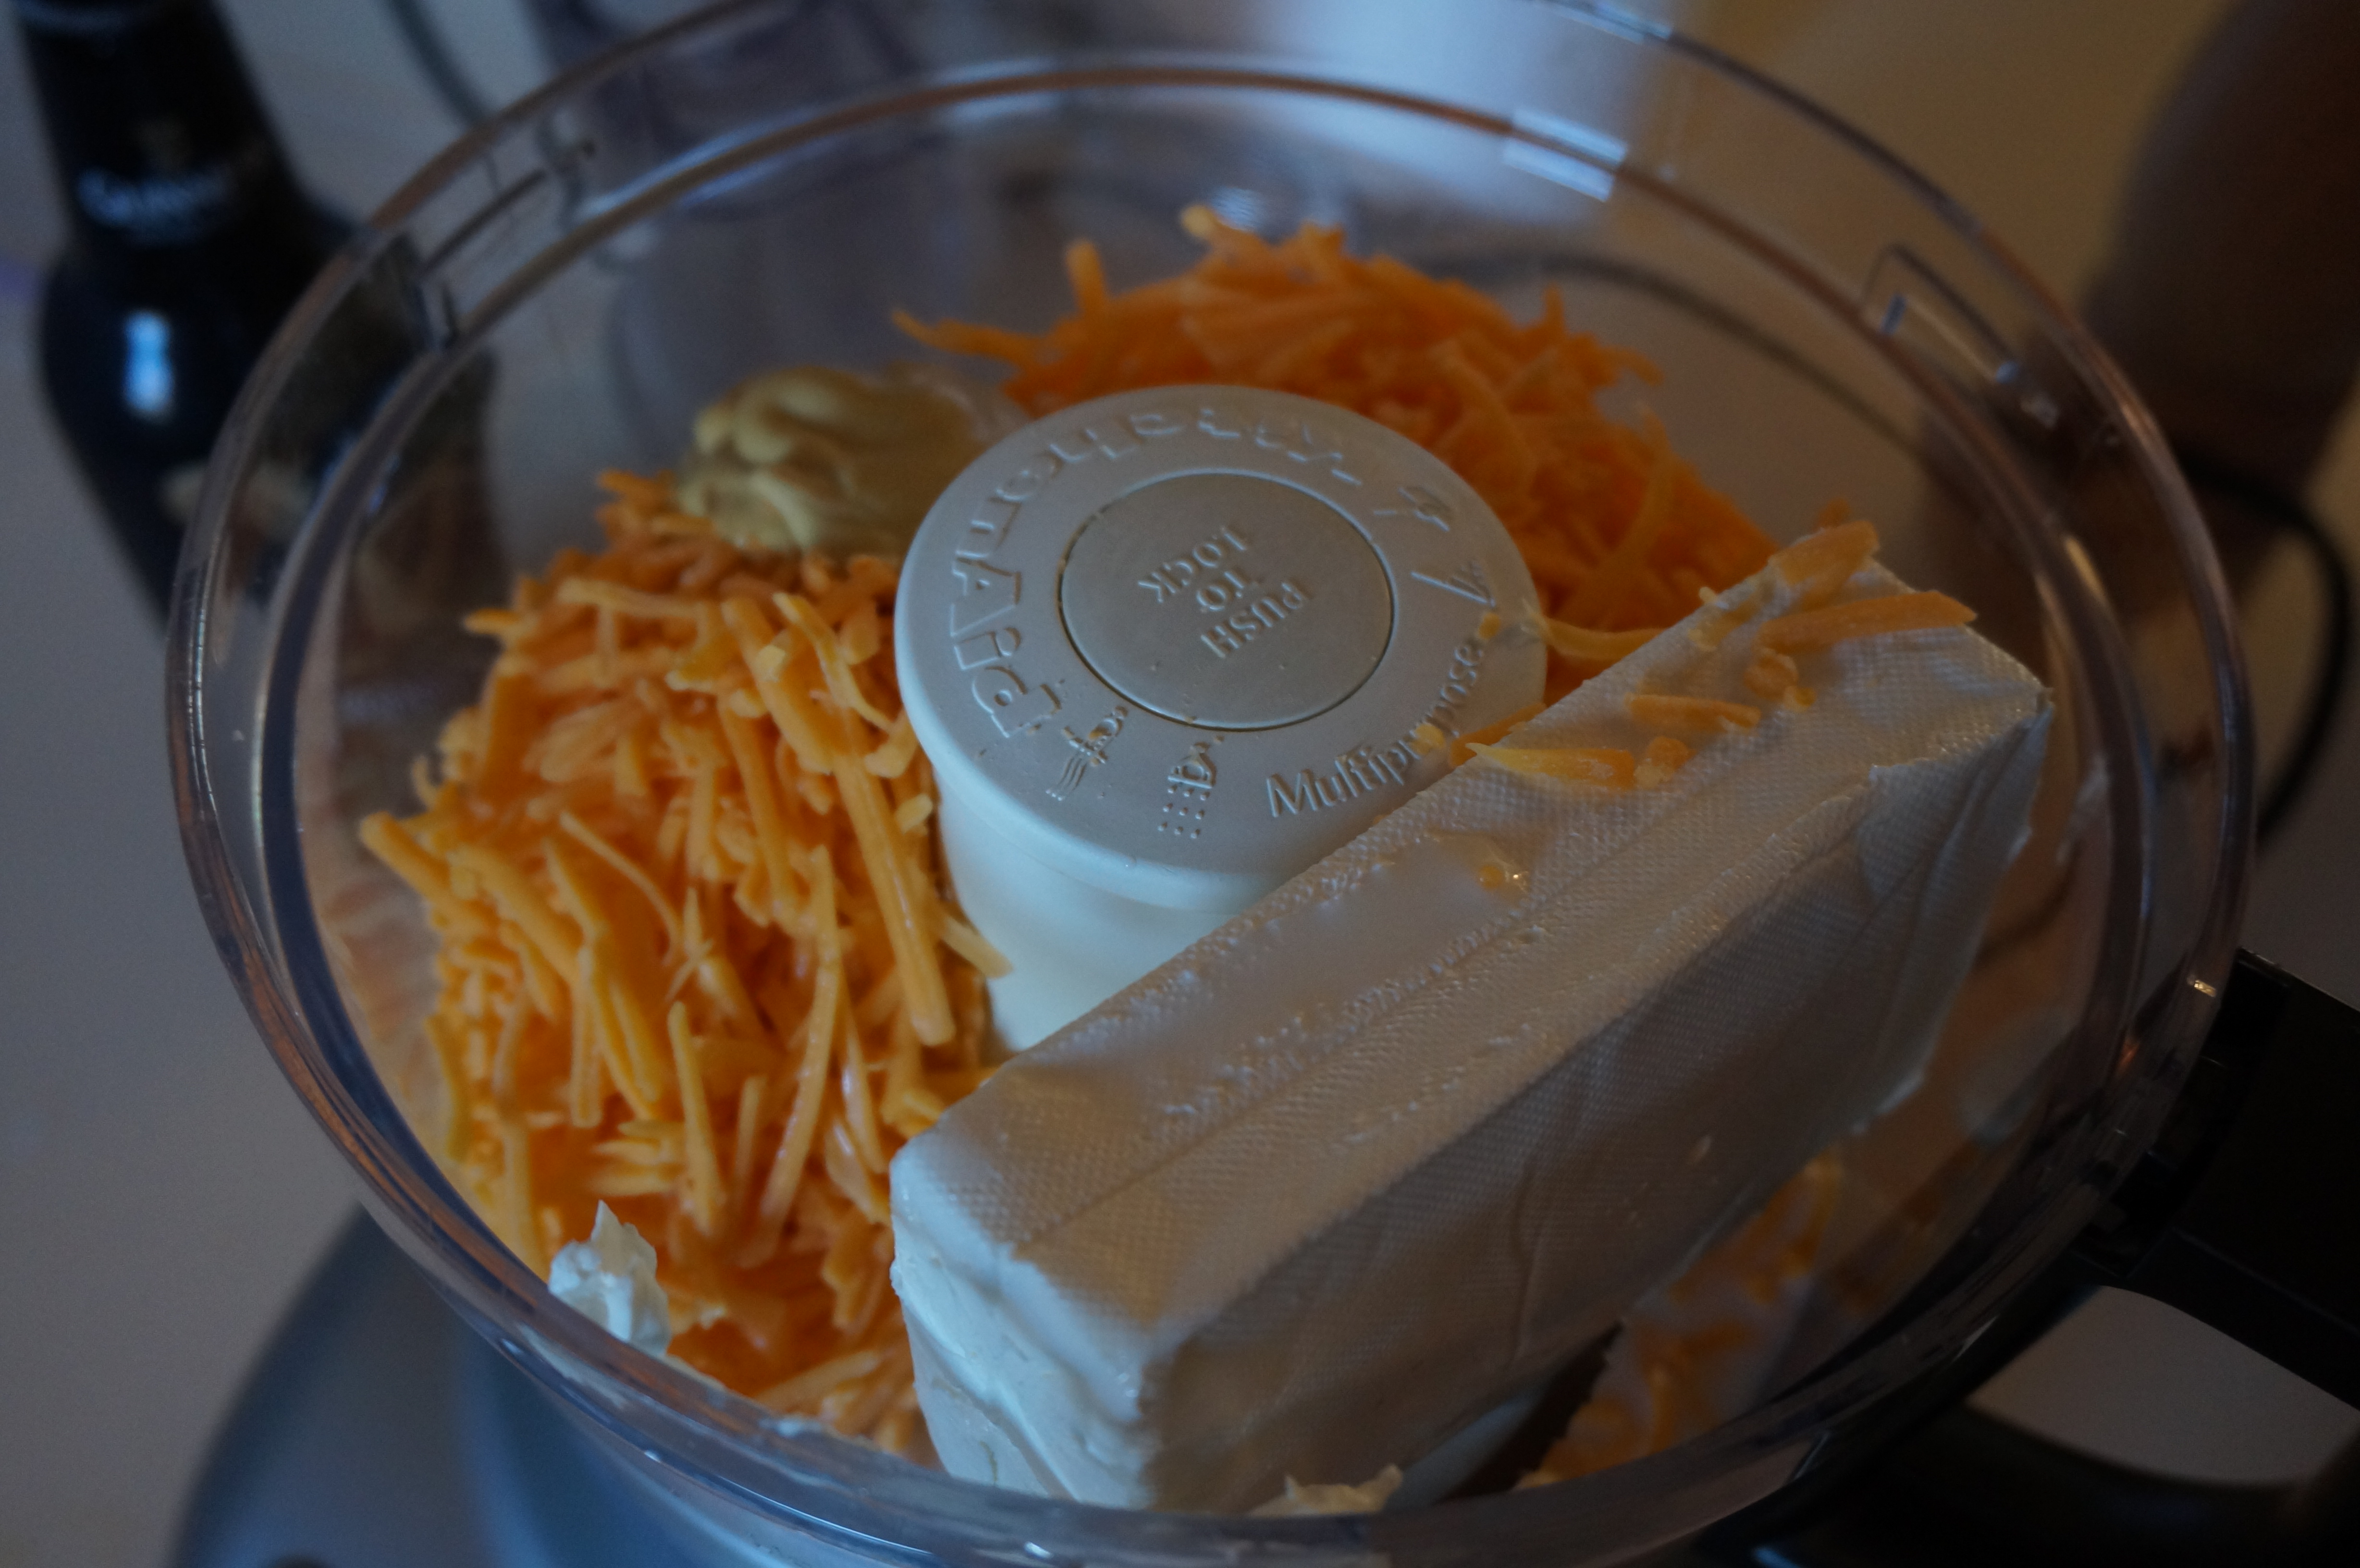
  • 1 8 oz. package cream cheese, softened (I used Kroger’s Greek Yogurt Cream Cheese which is lower in calories and half the fat!)
  • 2 cups sharp shredded cheddar cheese
  • 3 tbsp dijon mustard
  • 2 tbsp milk
  • pinch of salt, to taste
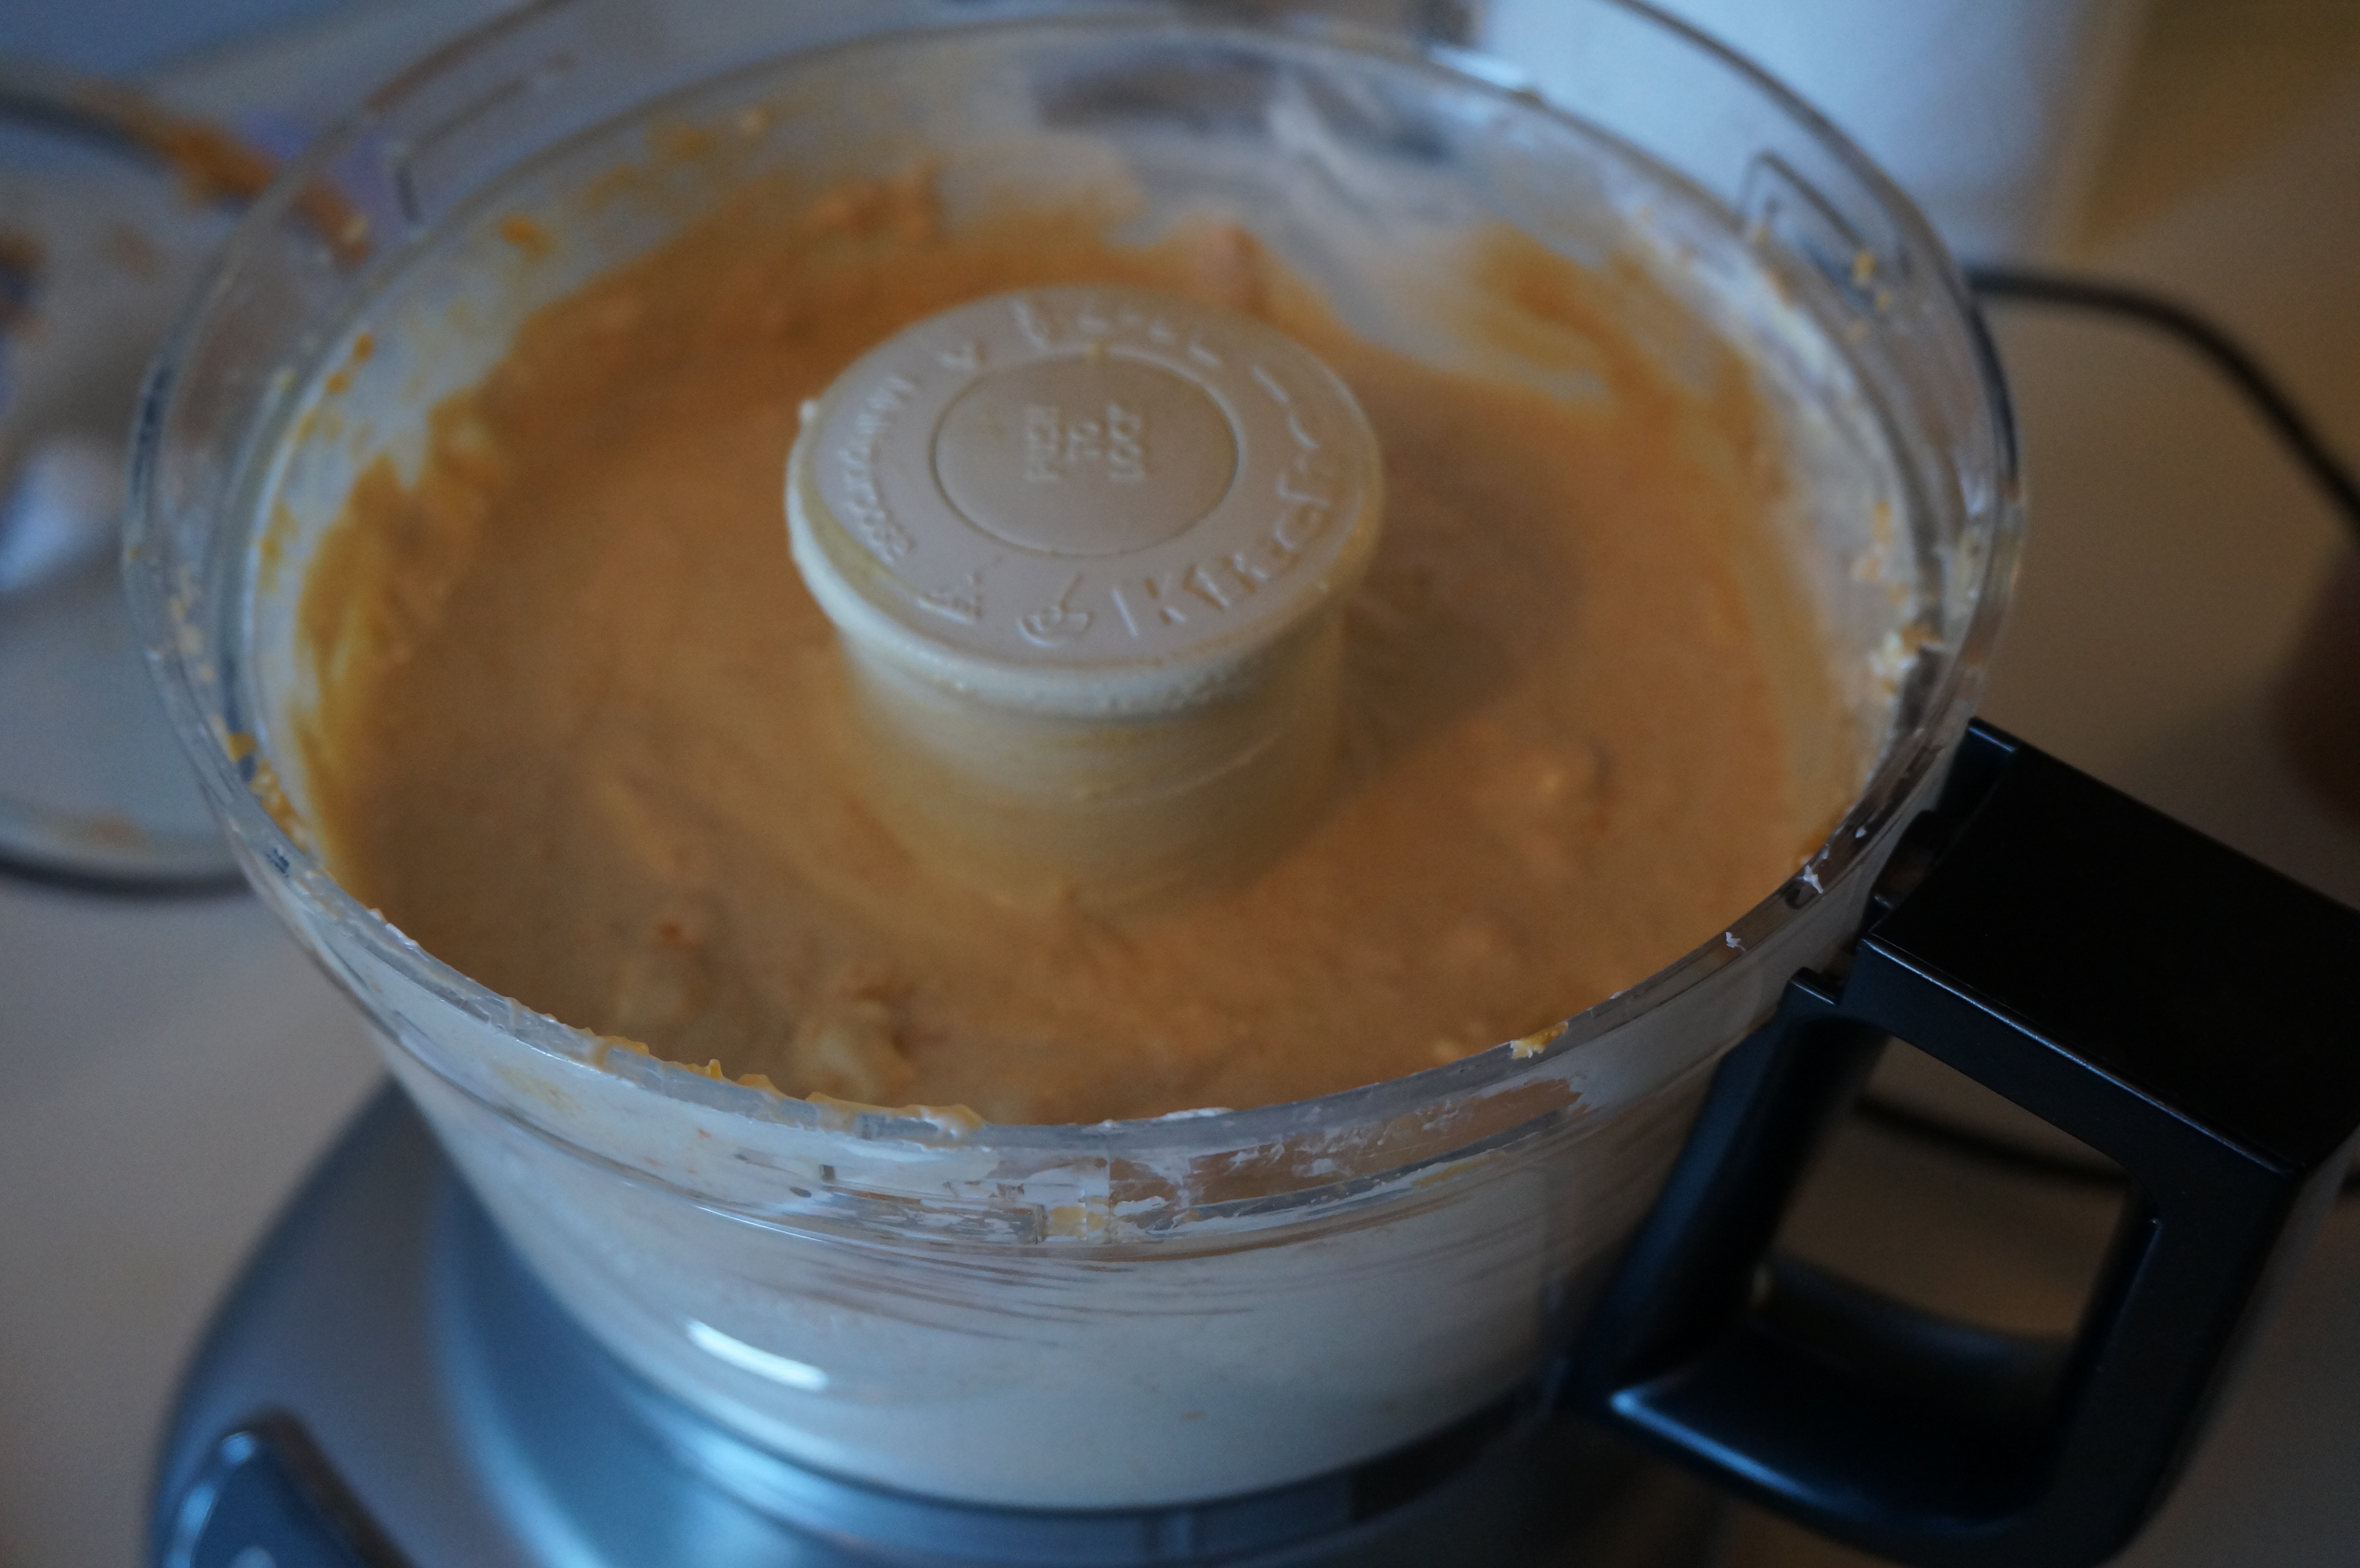
  • 1/3 cup Guinness beer
  • dash of hot sauce
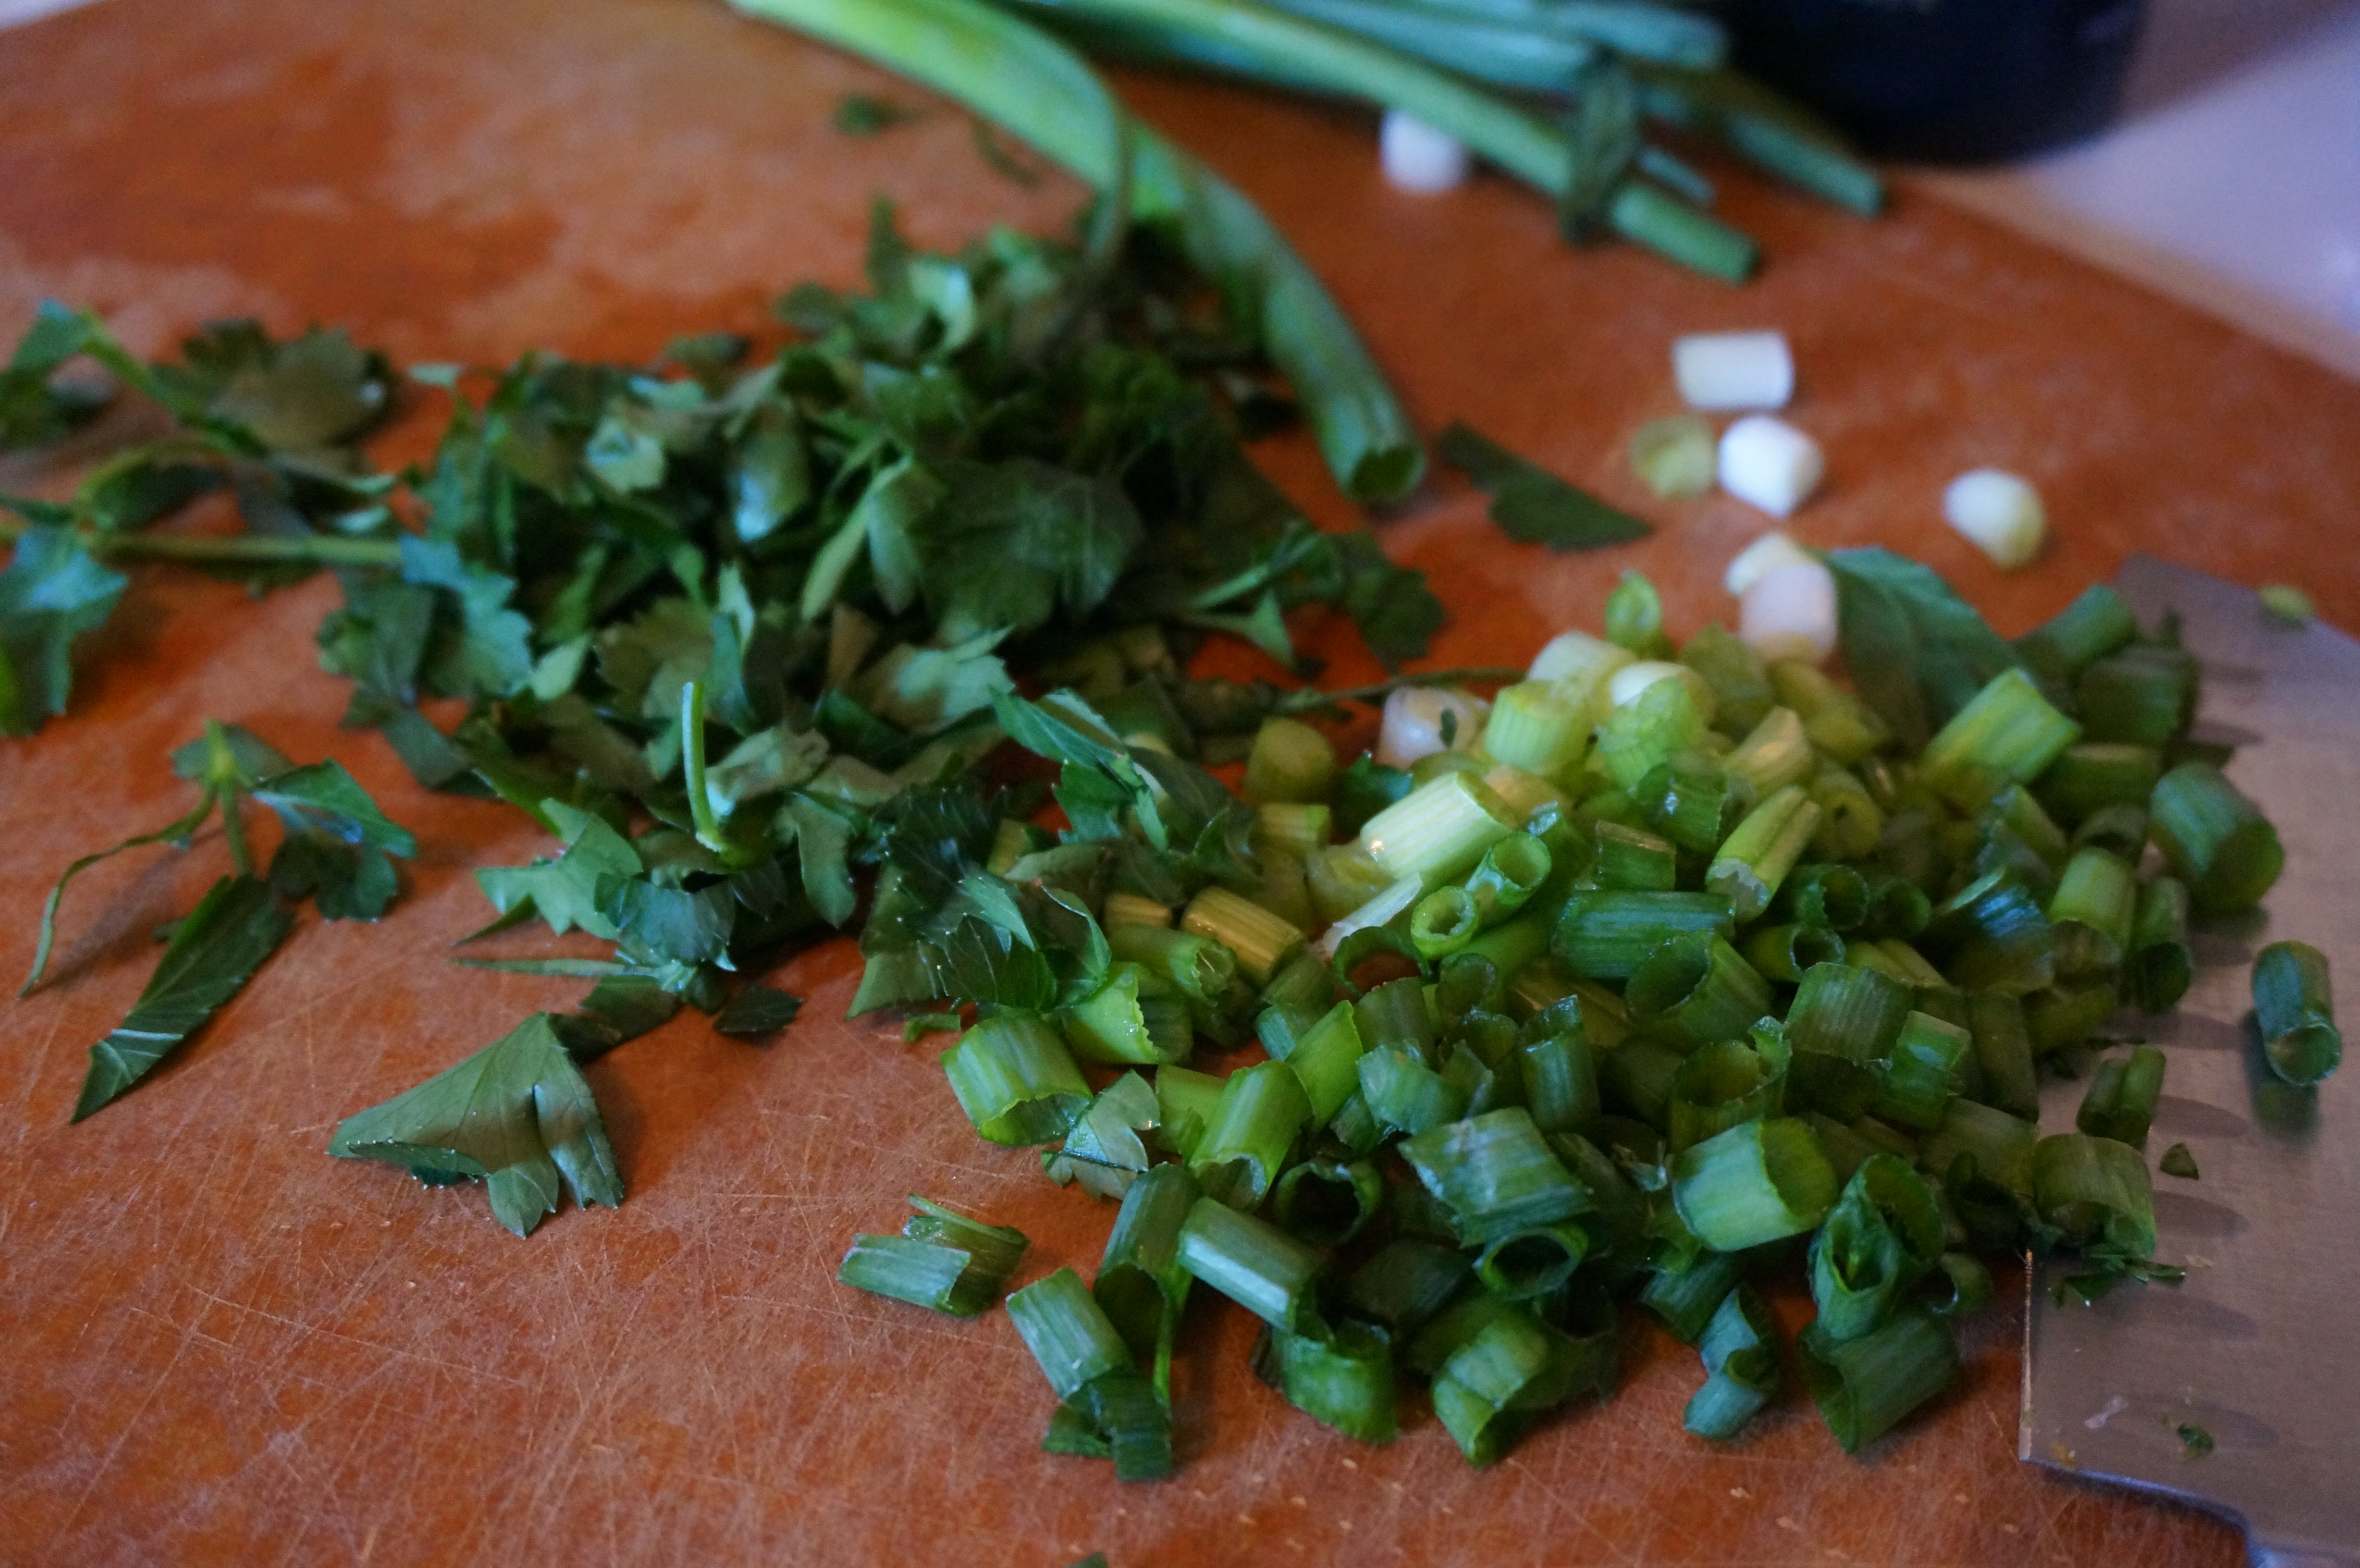
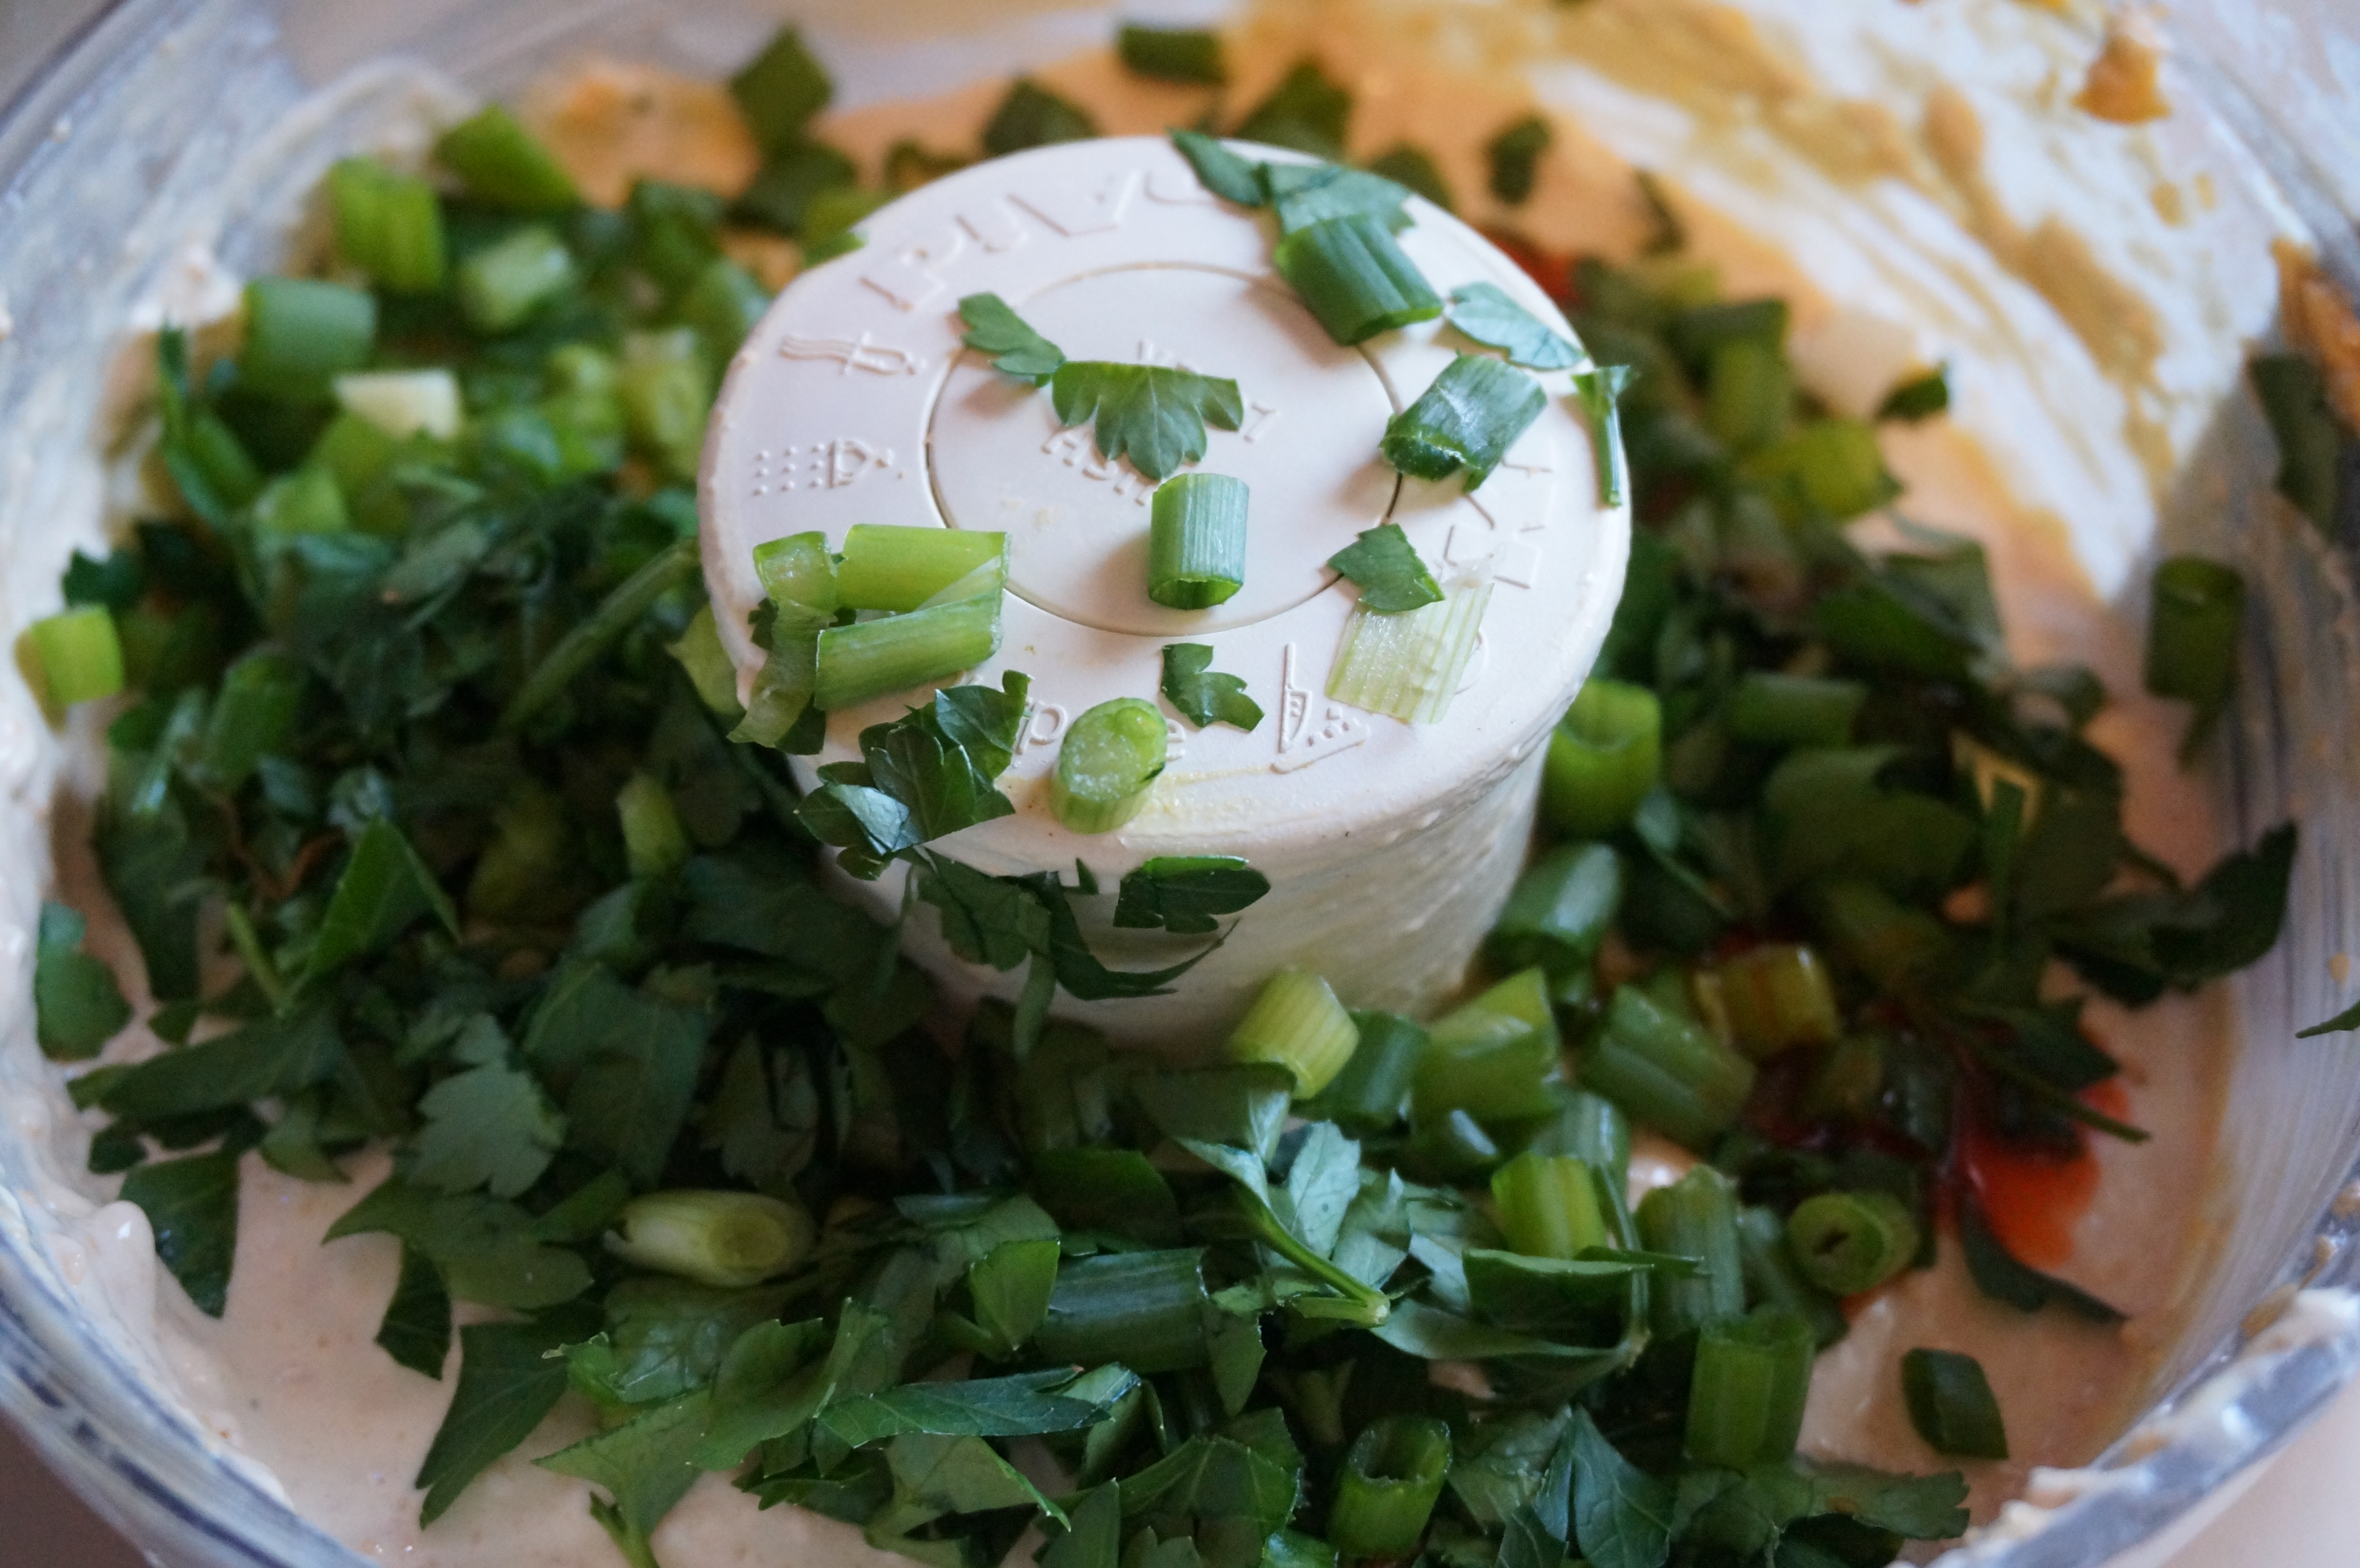
  • 1 tbsp fresh minced parsley
  • 4 green onions, chopped, plus more for garnish
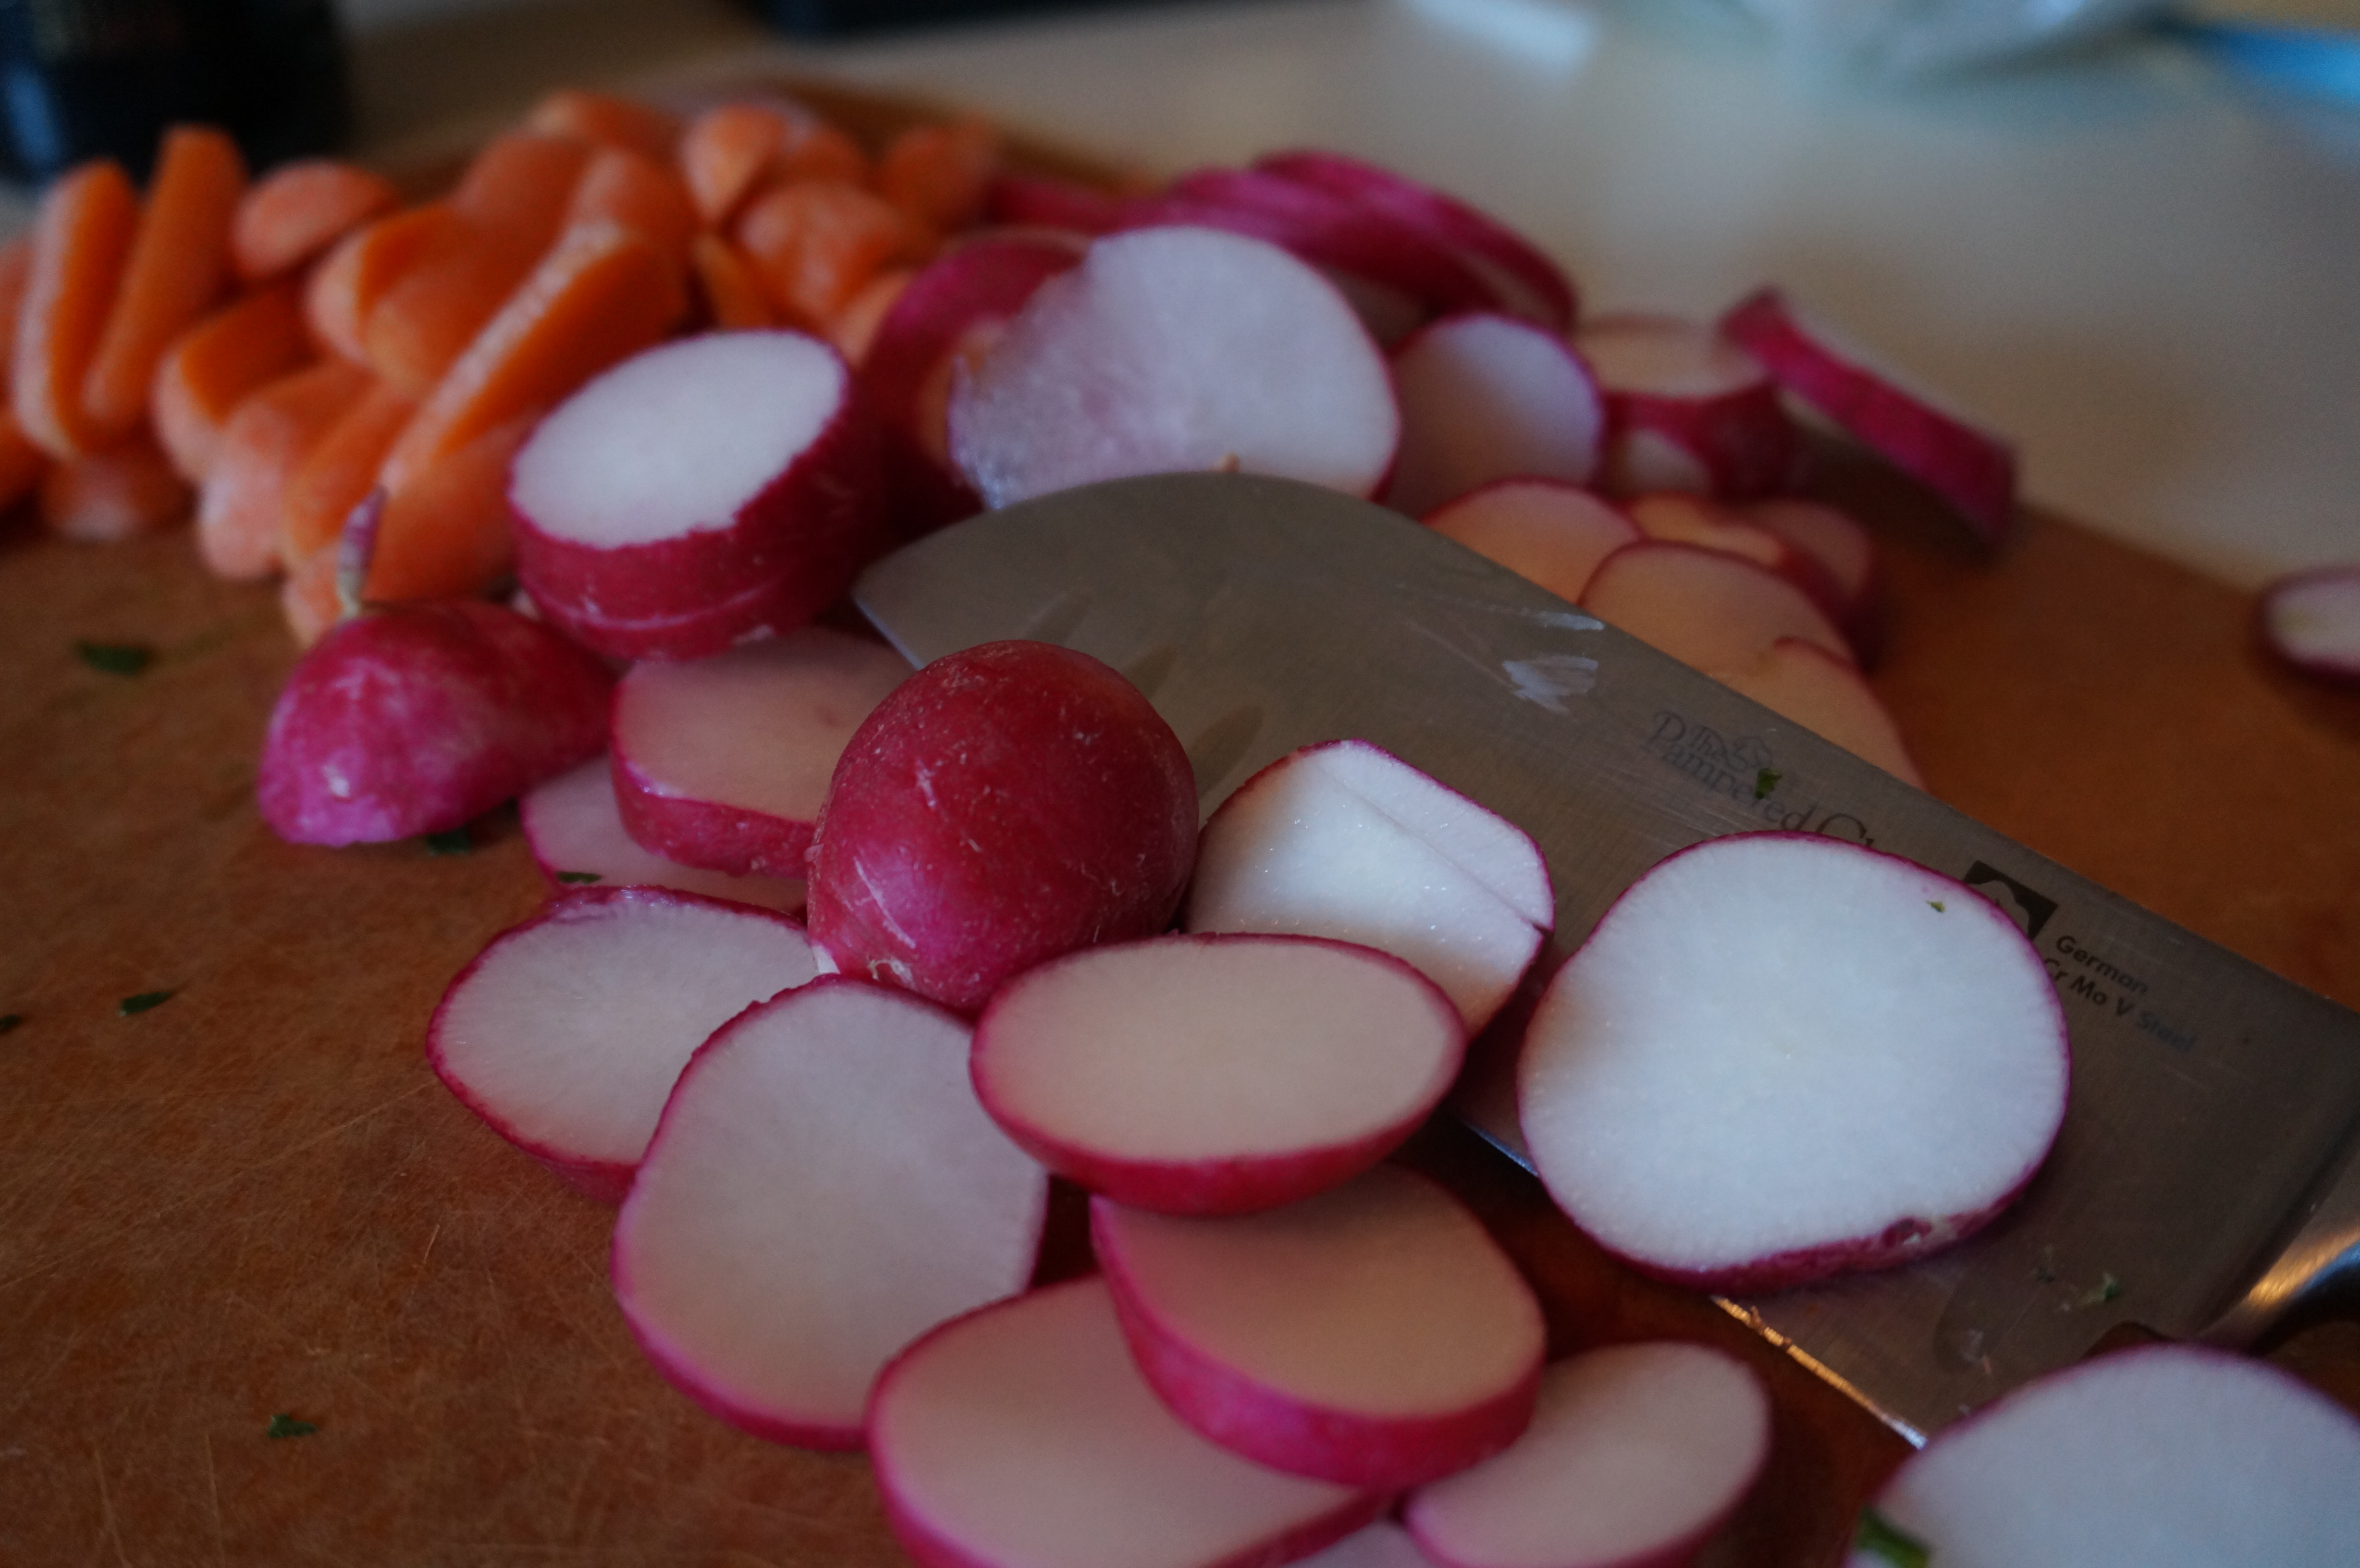
  • crudités: sliced radishes, carrots, pretzels and crackers
Instructions
  1. Combine cheeses, mustard, milk, and salt in a food processor and pulse until blended.
  2. Add beer and hot sauce and pulse a few more times until smooth.
  3. Stir in parsley and green onions.
  4. Chill for at least 1 hour and serve with crudités!

DSC02763

DSC02764

DSC02765

DSC02769

DSC02771

GUINNESS CHEDDAR DIP

Kissing Acorns

KISSING ACORNS
KISSING ACORNS

This weekend I helped throw a baby shower for one of my dearest friends, who is due on April Fools’ Day! 🙂 Her baby’s nursery is going to be a “woodland creatures” theme, so we decided that so should be the theme of the shower! There were pine cones and fir tree branches in every corner, woodland creatures snuggled together on the mantel, and cutouts of forest animals hanging from the chandelier. We placed all the food on tree trunk “slices” and placed cupcakes in butterfly and flower paper muffin cups. What a fun time we had planning!

One of my favorite parts of prepping for this party was browsing Pinterest for others’ ideas about what makes a good “woodland creatures” party. Who knew that there were so many ideas out there based around this theme? Forest birthday parties, woodland showers, fairy-themed extravaganzas… the list goes on and on! I found a ton of ideas for food, games, and gifts and used a few of them! Pinterest is a wonderful thing sometimes.

One of the recipes I found that I am absolutely in LOVE with was for these little candy acorns. How perfect! They have only four ingredients and are easy to assemble if you have a little bit of time! I got them all done on a snow day last week, and though they were a bit high maintenance to put together, SO worth it.

DSC02679

Basically, you just take mini Nutter Butter cookies and use a bit of chocolate frosting (which I was already planning on using for the cupcakes!) to stick a Hershey’s kiss on one end, then use a tiny bit more frosting for a chocolate chip on the other side. It’d be easiest if you have one of those little cookie decorating frosting tubes with a smaller opening… unfortunately I just had to use a knife, so it got a bit messy!

Stick them in the freezer to set for at least an hour, or for a few days until you’re ready to serve them!

Kissing Acorns
Recipe Type: Dessert, Appetizer, Snack
Cuisine: Finger Foods
Author: Claire McCormick of “Claire Tastes”
Prep time:
Total time:
Serves: 30
One of my new favorites! If you have the time to assemble them, they will be a HUGE hit at your next “forest-y” party (or just for fun!).
Ingredients
  • 1 bag Hershey’s kisses, unwrapped
  • 1 bag mini Nutter Butter cookies
  • 1/2 cup chocolate chips
  • Chocolate frosting, for assembling (ideally in a small tube)
Instructions
  1. Spread a bit of frosting (you don’t need much) on base of Hershey’s kiss and stick on one side of the Nutter Butter. Add a bit more frosting onto the base of the chocolate chip and stick it on the other side!
  2. Freeze at least 1 hour and as long as a month, until you’re ready to serve!

DSC02684

Homemade Honey Almond Pistachio Butter

Happy Snow Day! Again! Geez Louise, NC doesn’t know what to do with itself with all this snow! Just when the snow from Tuesday had melted away, we were hit with another good 6 inches of wet snow. Read: enough to close down the entire state for like, a week, and to cancel school for the eight day in the past two weeks.

With the extra time this morning, I decided to do a little recipe development. Honey Almond Pistachio Butter! I love the combo of almonds and pistachios, and I’ve been on a big almond butter kick lately. I like how it’s not too sweet (I’ve been buying the little packages of Justin’s Classic Almond Butter and adding it to oatmeal, plain yogurt, and cereal) but still nutty and creamy. I’ve also been meaning to make my own nut butter for months now. I keep hearing how easy it is, so why keep spending money on something I can make just as well at home? Plus, when you make it yourself you can really get creative and add lots of fun different types of spices and add-ins.

Here we go!

Homemade Honey Almond Pistachio Butter
Honey Almond Pistachio Butter
Recipe Type: Nut Butter
Author: Claire McCormick of “Claire Tastes”
Prep time:
Cook time:
Total time:
Serves: 24
Making your own nut butter could NOT be easier! Feel free to experiment with your own add-ins and other types of nuts!
Ingredients
  • 1 cup raw almonds
  • 1/3 cup roasted pistachios, shelled
  • 2 tbsp honey
  • 1 tbsp canola oil (coconut would work too!)
  • 2 tbsp milk or water
  • dash of cinnamon
  • dash of salt
Instructions
  1. Preheat oven to 375. Spread almonds and pistachios in an even layer on a baking sheet. Toast for 8 minutes, sifting halfway through. Nuts will be fragrant!
  2. Pour nuts into a food processor with blade attachment. Process on low for 2 minutes until the nuts form a gritty mixture.
  3. Scrape down the sides with a spatula and continue processing 8 more minutes, scraping down the sides every 2 minutes.
  4. Add honey, oil (optional), milk/water, and a dash each of cinnamon and salt. You can also experiment here with other add-ins!
  5. Process on low until smooth. It will take at least 5 minutes for the nuts to release their oils and become creamy!
  6. Store in mason jars in the refrigerator for up to a month.
DSC02699
After two minutes of processing on low, your nuts will look like this- a fine crumb mixture!
DSC02702
Keep on processing… the nut butter might form a big pasty ball! This is how you know it’s time to add in your liquids and spices.
DSC02707
After a little bit more patience, your butter will start to look like this. Make sure to keep scraping down the sides!
DSC02714
Store in mason jars in the fridge for up to a month!

Tuesday Night Redux: Healthified Tuna Noodle Casserole

Happy Snow Day (again) everybody! I had no excuse not to make a big heaping batch of this casserole that I’ve been wanting to try out, adapted from Anne’s Healthy Tuna Noodle Casserole recipe. I love the concept of “healthifying” classic comfort foods by substituting things like cream of mushroom soup with Greek yogurt, heavy cream with low-fat milk, and adding lots of vegetables to bulk up the casserole without also bulking up the calories. I changed up the original recipe a bit- I used an entire box of pasta (tri-color bowties because they are absolutely adorable), two small cans of tuna, and a frozen veggie mix of peppers, carrots, sugar snap peas and mushrooms. I also used chopped spinach instead of baby spinach, because I was trying to use up the rest of the bag I had in the freezer already, and because I always get depressed when my precious baby spinach wilts down to nothing. My plan is to serve the cooked casserole over a bed of spinach instead and let it wilt a bit (but not too much!) so that it still has some volume to it.

We’re supposed to get more snow tomorrow night. Yikes! What is this- Connecticut?

Stay warm, safe, and dry tonight!

DSC02691

Tuesday Night Redux: Healthified Tuna Noodle Casserole
Recipe Type: Casserole, Pasta
Cuisine: Comfort Food, Healthy
Author: Claire McCormick of “Claire Tastes”
Prep time:
Cook time:
Total time:
Serves: 8
A healthy take on an old-time favorite! Keep all the flavor and creaminess without the cream of mushroom soup and mayo 🙂
Ingredients
  • 1 box (12 oz.) dry bow-tie pasta (rigatoni or bow ties would also work well!)
  • 2 tbsp olive oil
  • 1 onion, sliced
  • 1 tbsp garlic, minced
  • 1/2 bag frozen chopped spinach, thawed
  • 2 cups frozen peas
  • 2 cups frozen bell peppers (or frozen vegetable mix- mine had peppers, mushrooms, and carrots)
  • 1 cup low-sodium chicken broth
  • 1/2 cup low-fat milk
  • 1/2 cup plain greek yogurt
  • 1 tbsp good quality Dijon mustard
  • 1/4 tsp red pepper flakes
  • 1 tsp garlic powder
  • freshly ground pepper, to taste
  • 6-10 oz. canned tuna, drained (use more or less depending on your preference!)
  • 1/2 cup (or more if you like) shredded or chopped sharp cheddar cheese
  • fresh baby spinach, for serving (optional)
Instructions
  1. Cook pasta until al dente, according to package instructions. Drain.
  2. In a large skillet, heat oil on medium heat. Add garlic and onion and cook until soft, about 3 minutes. Add spinach, peas, and other veggies and stir until warmed through. Add the chicken broth to deglaze the pan.
  3. In a large bowl, whisk together milk, yogurt, mustard, and spices. Stir in the veggies and pasta until well coated with sauce.
  4. Stir in tuna and cheese.
  5. Preheat oven to 375. In a casserole dish sprayed with cooking spray, spread casserole in an even layer. Top with more cheese if desired.
  6. Cover with foil and bake at 375 for 40 minutes, then uncover and cook 10 more minutes.
  7. Cool slightly and serve over more spinach or veggies.

DSC02696

Snow Day Pumpkin Raisin Bread

Happy Snow Day, my friends! Did everyone have a nice Valentine’s Day?

Since our parking lot is a giant sheet of ice, and the clinic is closed today due to Snowmageddon 2015, I decided it was a great day to use up that leftover 1/2 can of pumpkin that’s been sitting in my fridge for about a month. Originally I used it for my “Everything But the Kitchen Sink” Weeknight Stew, but that was only half the can, and there are only so many bowls of oatmeal and yogurt that you can add a dollop.

I felt so cozy last year after making my Savory Snowmageddon Crepes, so naturally I had to bake something else to feel all warm and fuzzy inside (and to procrastinate from studying for the NCPTE). I hope that wherever you are on this chilly day, you can enjoy a thick slice of this pumpkin bread with a big mug of tea and a good book nestled in your lap!

Thankful for this day to relax and enjoy the snow from inside my warm house!

SNOW DAY PUMPKIN RAISIN BREAD
Snow Day Pumpkin Raisin Bread
Recipe Type: Bread, Pumpkin
Cuisine: Brunch, Breakfast
Author: Claire McCormick of “Claire Tastes”
Prep time:
Cook time:
Total time:
Serves: 8
Warm up to a big mug of tea and a thick slice of this Pumpkin Raisin Bread on this snowy Tuesday! Adapted from popsugar.com and pauladeenmagazine.com.
Ingredients
  • 1/2 can pumpkin puree
  • 2 eggs
  • 1/3 cup vegetable oil
  • 1/2 cup unsweetened applesauce (or one small carton)
  • 1/4 cup water
  • 1/3 cup low-fat milk
  • 1 cup + 2 tbsp whole wheat flour
  • 1/2 cup oats, plus more for topping
  • 1/2 cup brown sugar
  • 1 tsp baking soda
  • 1/2 tsp cinnamon
  • 1/4 tsp nutmeg
  • handful of raisins and/or chocolate chips
Instructions
  1. Preheat oven to 350 deg.
  2. In a medium bowl, whisk together all the wet ingredients.
  3. In a smaller bowl, whisk the dry ingredients and spices.
  4. Add dry ingredients to the wet ingredients and stir with a spatula until combined.
  5. Stir in raisins and/or chocolate chips.
  6. Pour into a loaf pan sprayed with cooking spray. Even out with the spatula and sprinkle a few more oats on top.
  7. Bake at 350 deg for 45 minutes or until toothpick comes out cleanly.
  8. Allow to cool at least 10 minutes before slicing.

DSC02667

Slice and Serve Brunch Subs

I was cooking for a church event this weekend, and I really didn’t feel like going “all out.” So here’s what I came up with: 2 loaves of French Bread (no, I’m not about to go all “5 loaves and 2 fish” on you), sliced in half and layered with either pimiento cheese or hummus (I found this really great hummus at Wal-Mart that has some sort of Indian spice in it- vair vair good!). Layer some ham or turkey on top, and don’t skimp. Then in a separate bowl, whisk together 7 or 8 eggs, add about a quarter cup of milk, a cup of cottage cheese, and some salt and pepper. Throw some veggies and sliced red onion into an oiled pan and top with the egg mixture, then shred some cheese on top before baking. When the egg “casserole” is done, let it cool and slice it up to place on the sandwiches! Finish it off with another slice of cheese.

For me, this was much easier than putting all of the individual ingredients on the bread separately. Plus, it made it feel a little fancier to have an egg filling inside the bread. These are ideal for making ahead of time, especially when you need to cook for a big group! Just slice up the long loaf after you let it cool a bit, and you’ve got cute little brunch subs to share!

DSC02664
SLICE AND SERVE BRUNCH SUBS

DSC02651

Slice and Serve Brunch Subs
Recipe Type: Brunch, Sandwich
Cuisine: American
Author: Claire McCormick of “Claire Tastes”
Prep time:
Cook time:
Total time:
Serves: 16
An easy way to cook for a big group, with minimal ingredients and minimal time!
Ingredients
  • 2 loaves French bread, sliced lengthwise
  • 1/2 cup pimiento cheese
  • 1/2 cup hummus of your choice
  • 1 package turkey
  • 1 package ham
  • 8 eggs
  • 1/4 cup milk
  • 1 cup cottage cheese
  • salt and pepper
  • 1/4 cup red onion
  • handful of shredded spinach
  • broccoli and cauliflower florets
  • sliced tomatoes
  • 8 slices cheddar
  • 8 slices provolone
Instructions
  1. Preheat oven to 350 deg.
  2. Spread one loaf with an even layer of hummus, and the other loaf with an even layer of pimiento.
  3. Layer ham and turkey on top of each loaf.
  4. In a separate bowl, whisk together eggs, milk, cottage cheese, and S+P.
  5. In an oiled casserole dish, layer veggies and pour egg mixture on top. Layer cheddar slices on top. Bake at 350 deg for 30-40 minutes or until cheese is golden brown and eggs have browned around the sides. Allow to cool at least 15 minutes, then slice into long strips.
  6. Place each strip on top of bread, then top with a few more layers of provolone.
  7. Close with other half of the loaf and secure every few inches with a toothpick.
  8. Slice into even sandwich slices.

DSC02637DSC02639

DSC02641

DSC02647

DSC02651

DSC02657