Chicken and Bacon Mac n’ Cheese

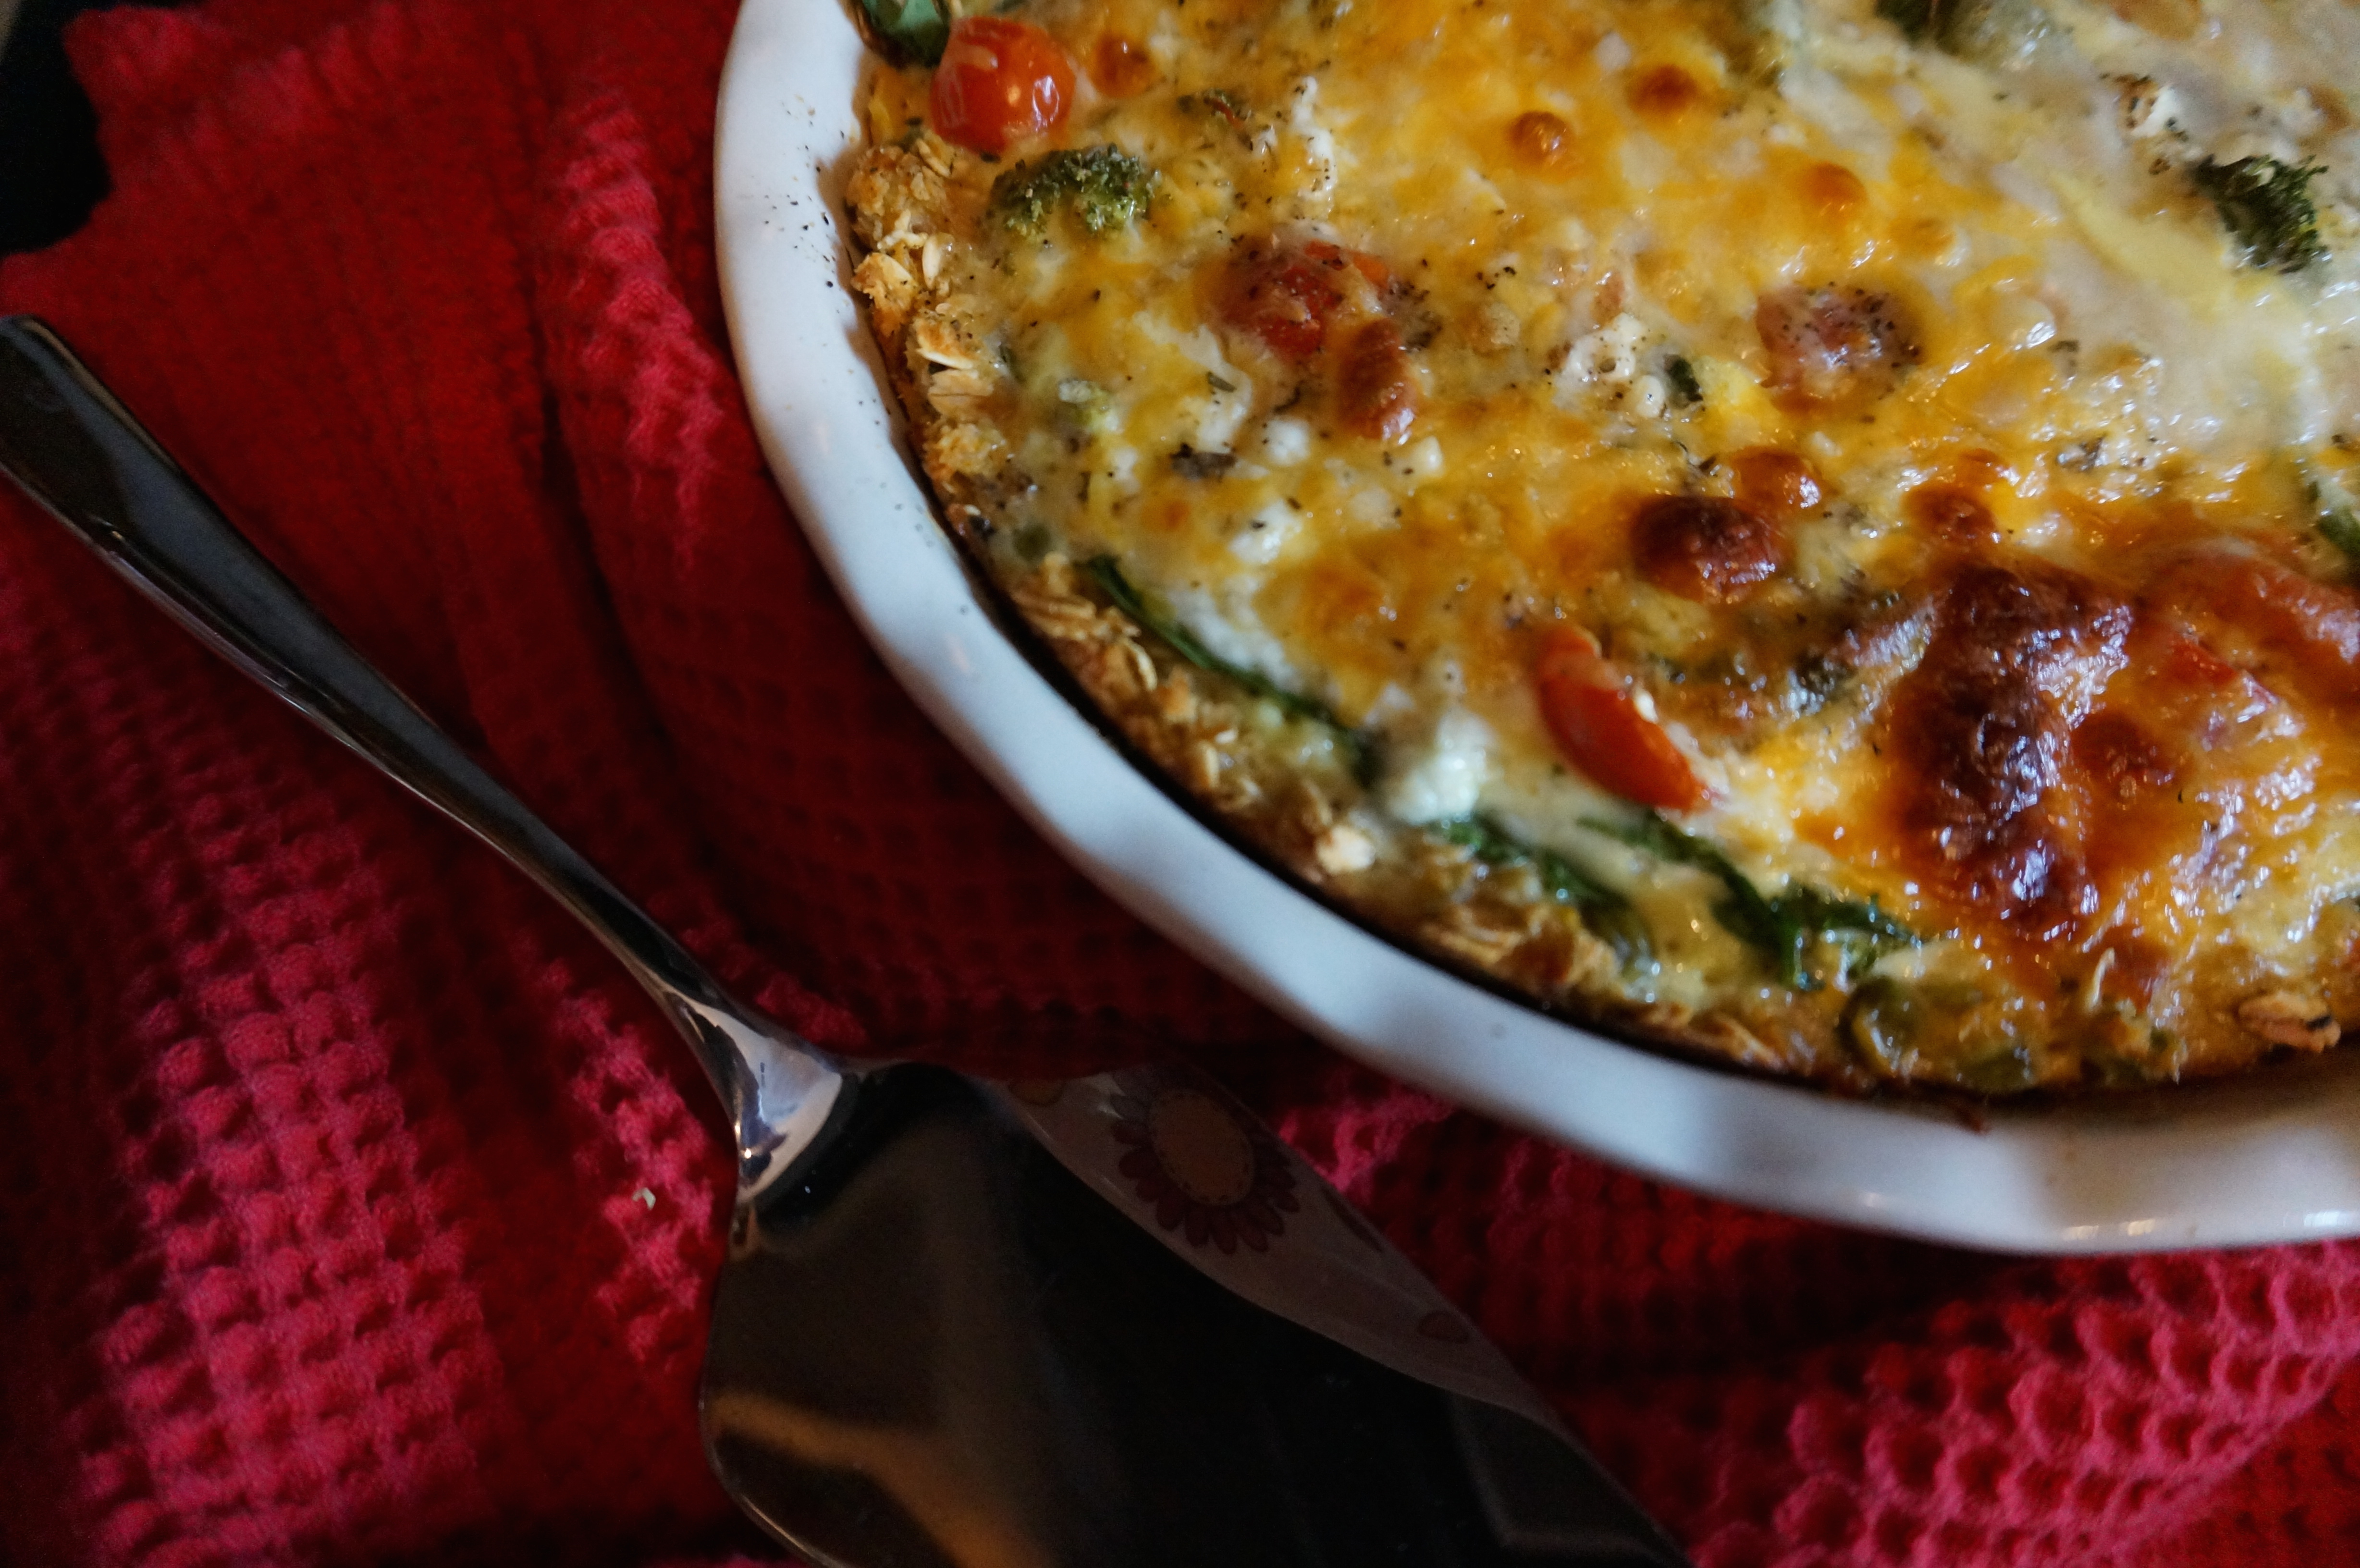
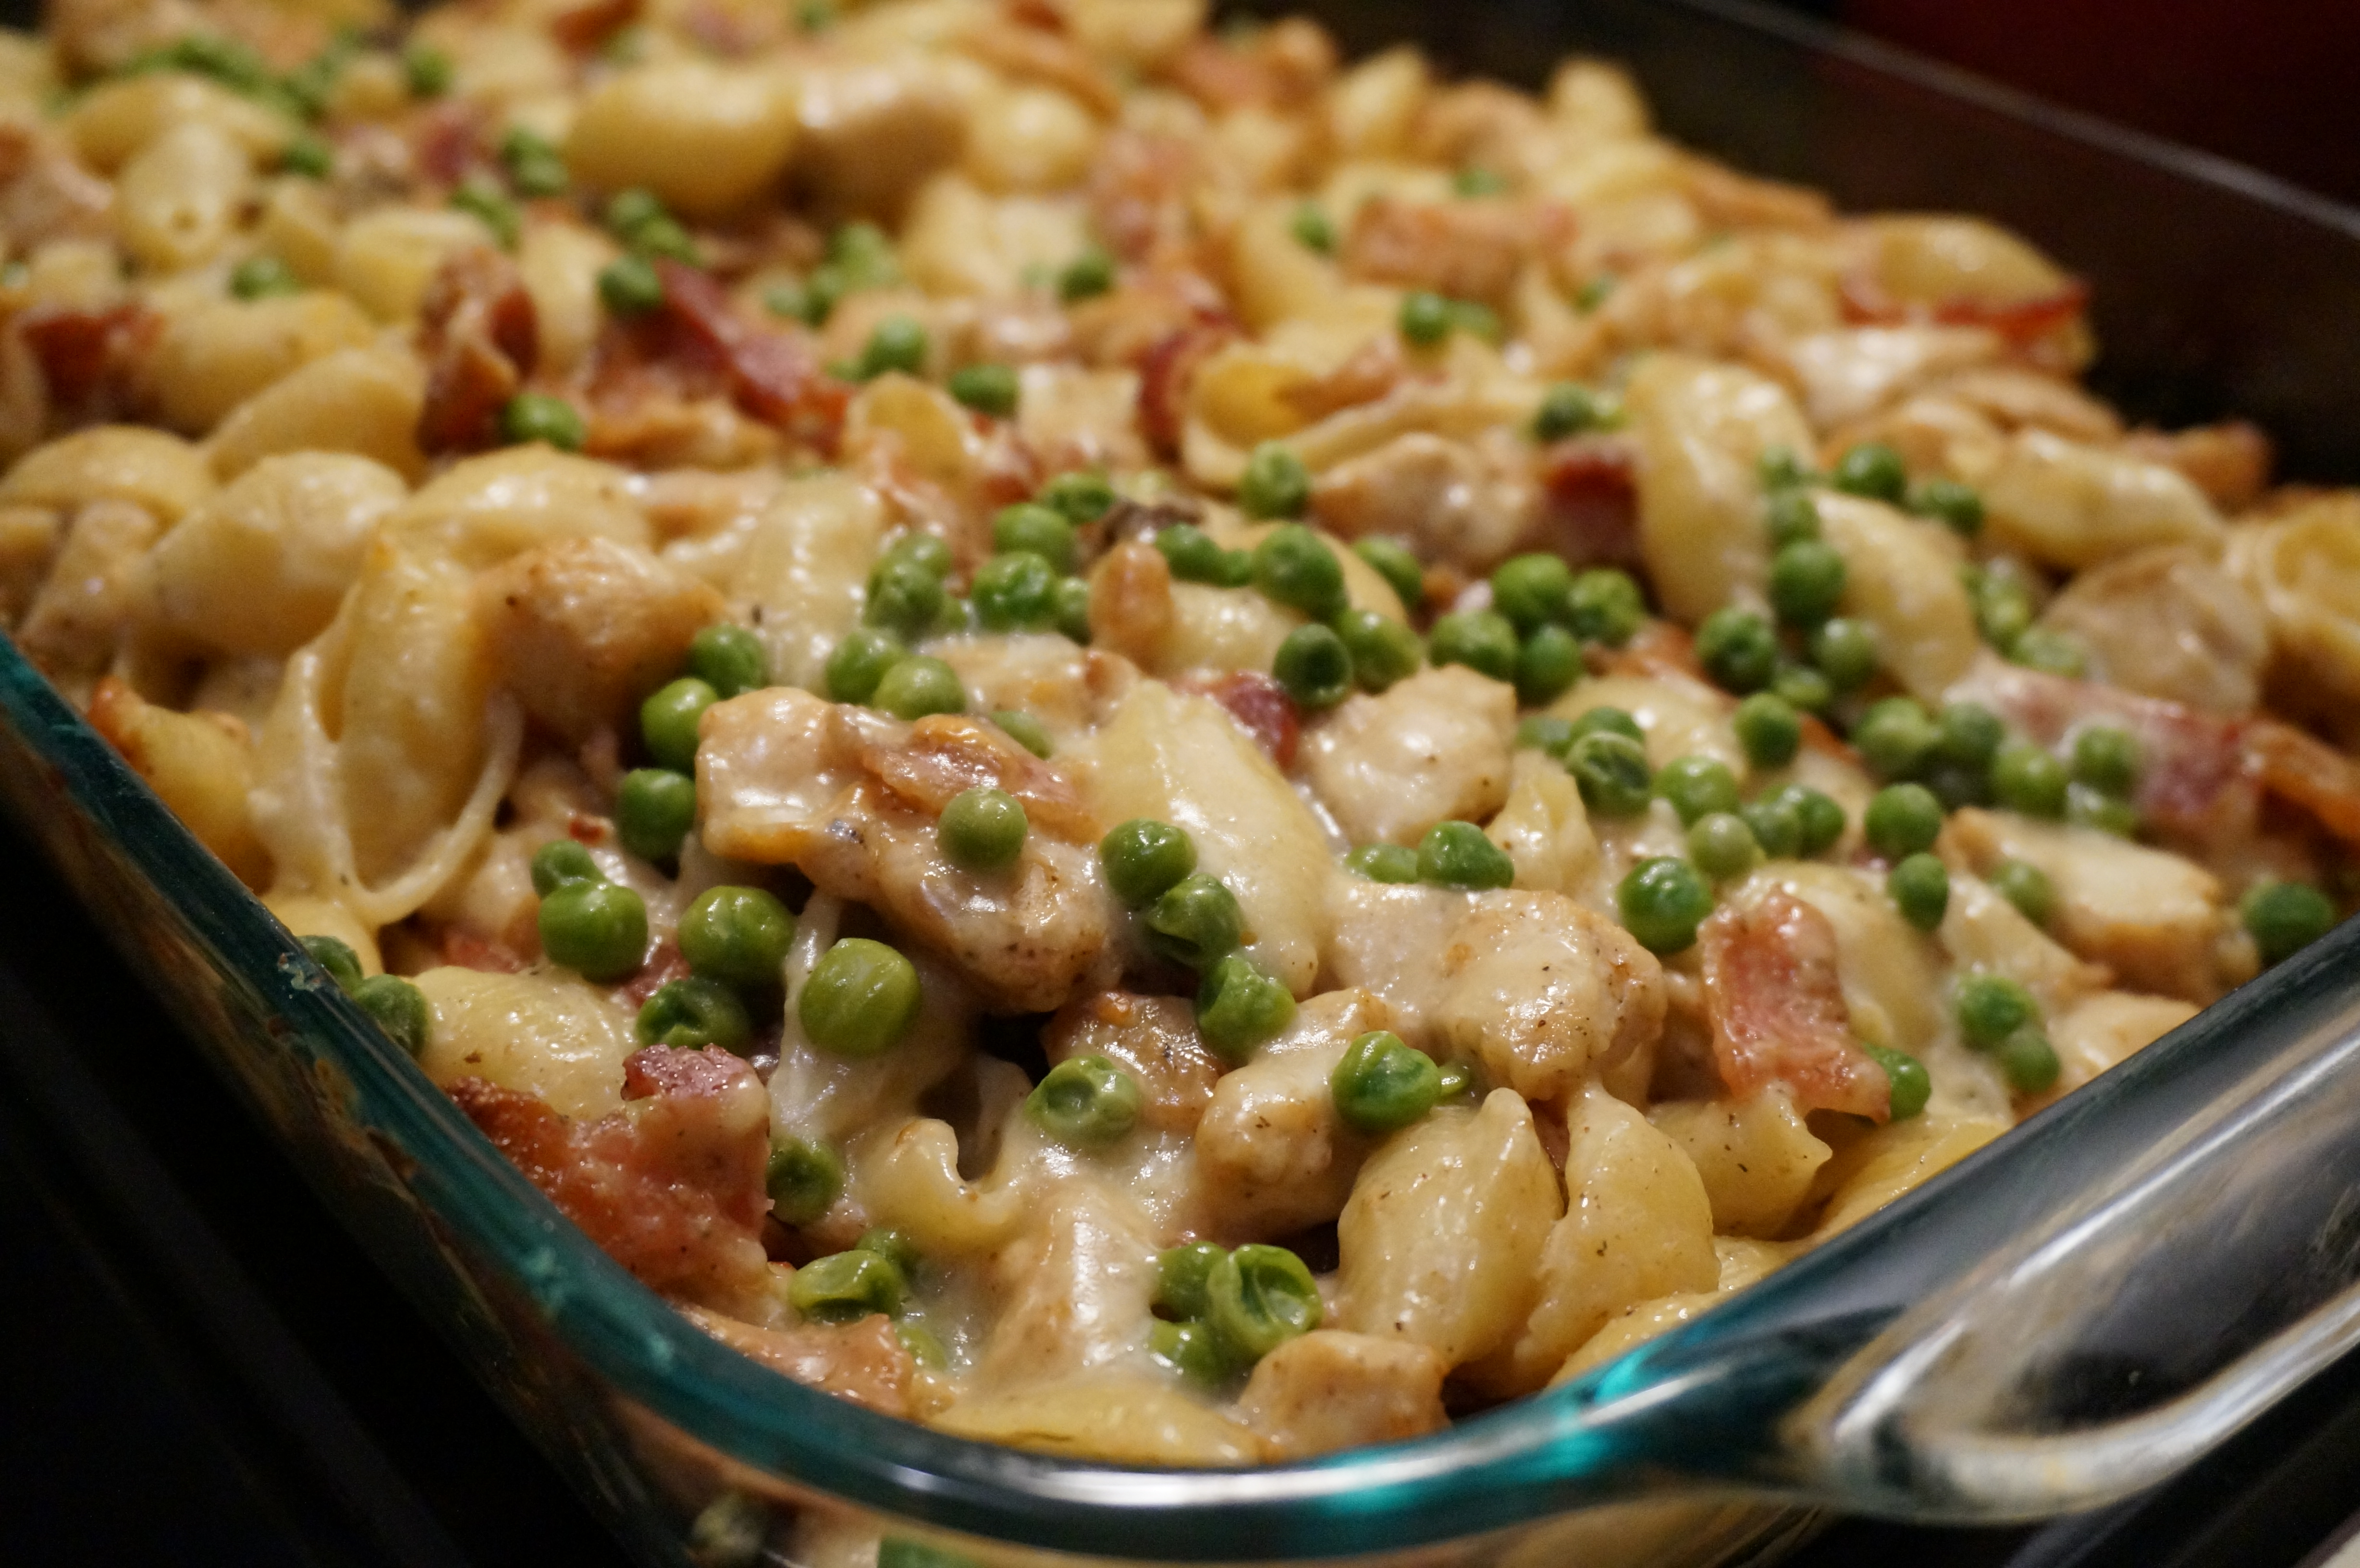
For all you cheese-loving, bacon-craving, mac n’ cheese worshiping picnic-goers out there, here’s a perfect dish that you can bring along to your next potluck! Perfect as a side, but also hearty enough to stand on its own! I chose shells for their sauce-soaking-up abilities, but you could also use any other type of pasta! (Isn’t it crazy how you SWEAR that different shapes taste differently?). Feel free to play with the cheese, too- I chose a mix of soft swiss and shredded “fancy blend,” but you could go with cheddar, cream cheese, gruyere, etc. to your little heart’s content! Originally this recipe used cubed ham instead of bacon (Chicken Cordon Bleu style), but I decided on the bacon to please the man in my life. 🙂 I had to throw a few peas on top (there had to be SOME sort of green in there!), inspired by the Cheesy Smashed Potatoes I made for Easter.

Chicken and Bacon Mac n’ Cheese
Recipe Type: Main Dish, Casserole
Cuisine: Comfort Food, Pasta
Author: Claire McCormick of “Claire Tastes”
Prep time:
Cook time:
Total time:
Serves: 12
A hearty and decadent comfort food meal for all the mac n’ cheese (and bacon!) lovers out there!
Ingredients
  • 3 large chicken breasts, cut into 1″ pieces and seasoned with salt & pepper
  • 1 package center-cut bacon (about 12 strips)
  • 1 package pasta shells
  • 
2 Tablespoons flour
  • 
1 cup milk, divided
  • 1 14 oz can chicken broth
  • 
salt & pepper
  • 2 cups shredded cheese
  • 1 package laughing cow soft swiss cheese (about 6 wedges, unwrapped and at room temperature)
  • 1 cup frozen peas
Instructions
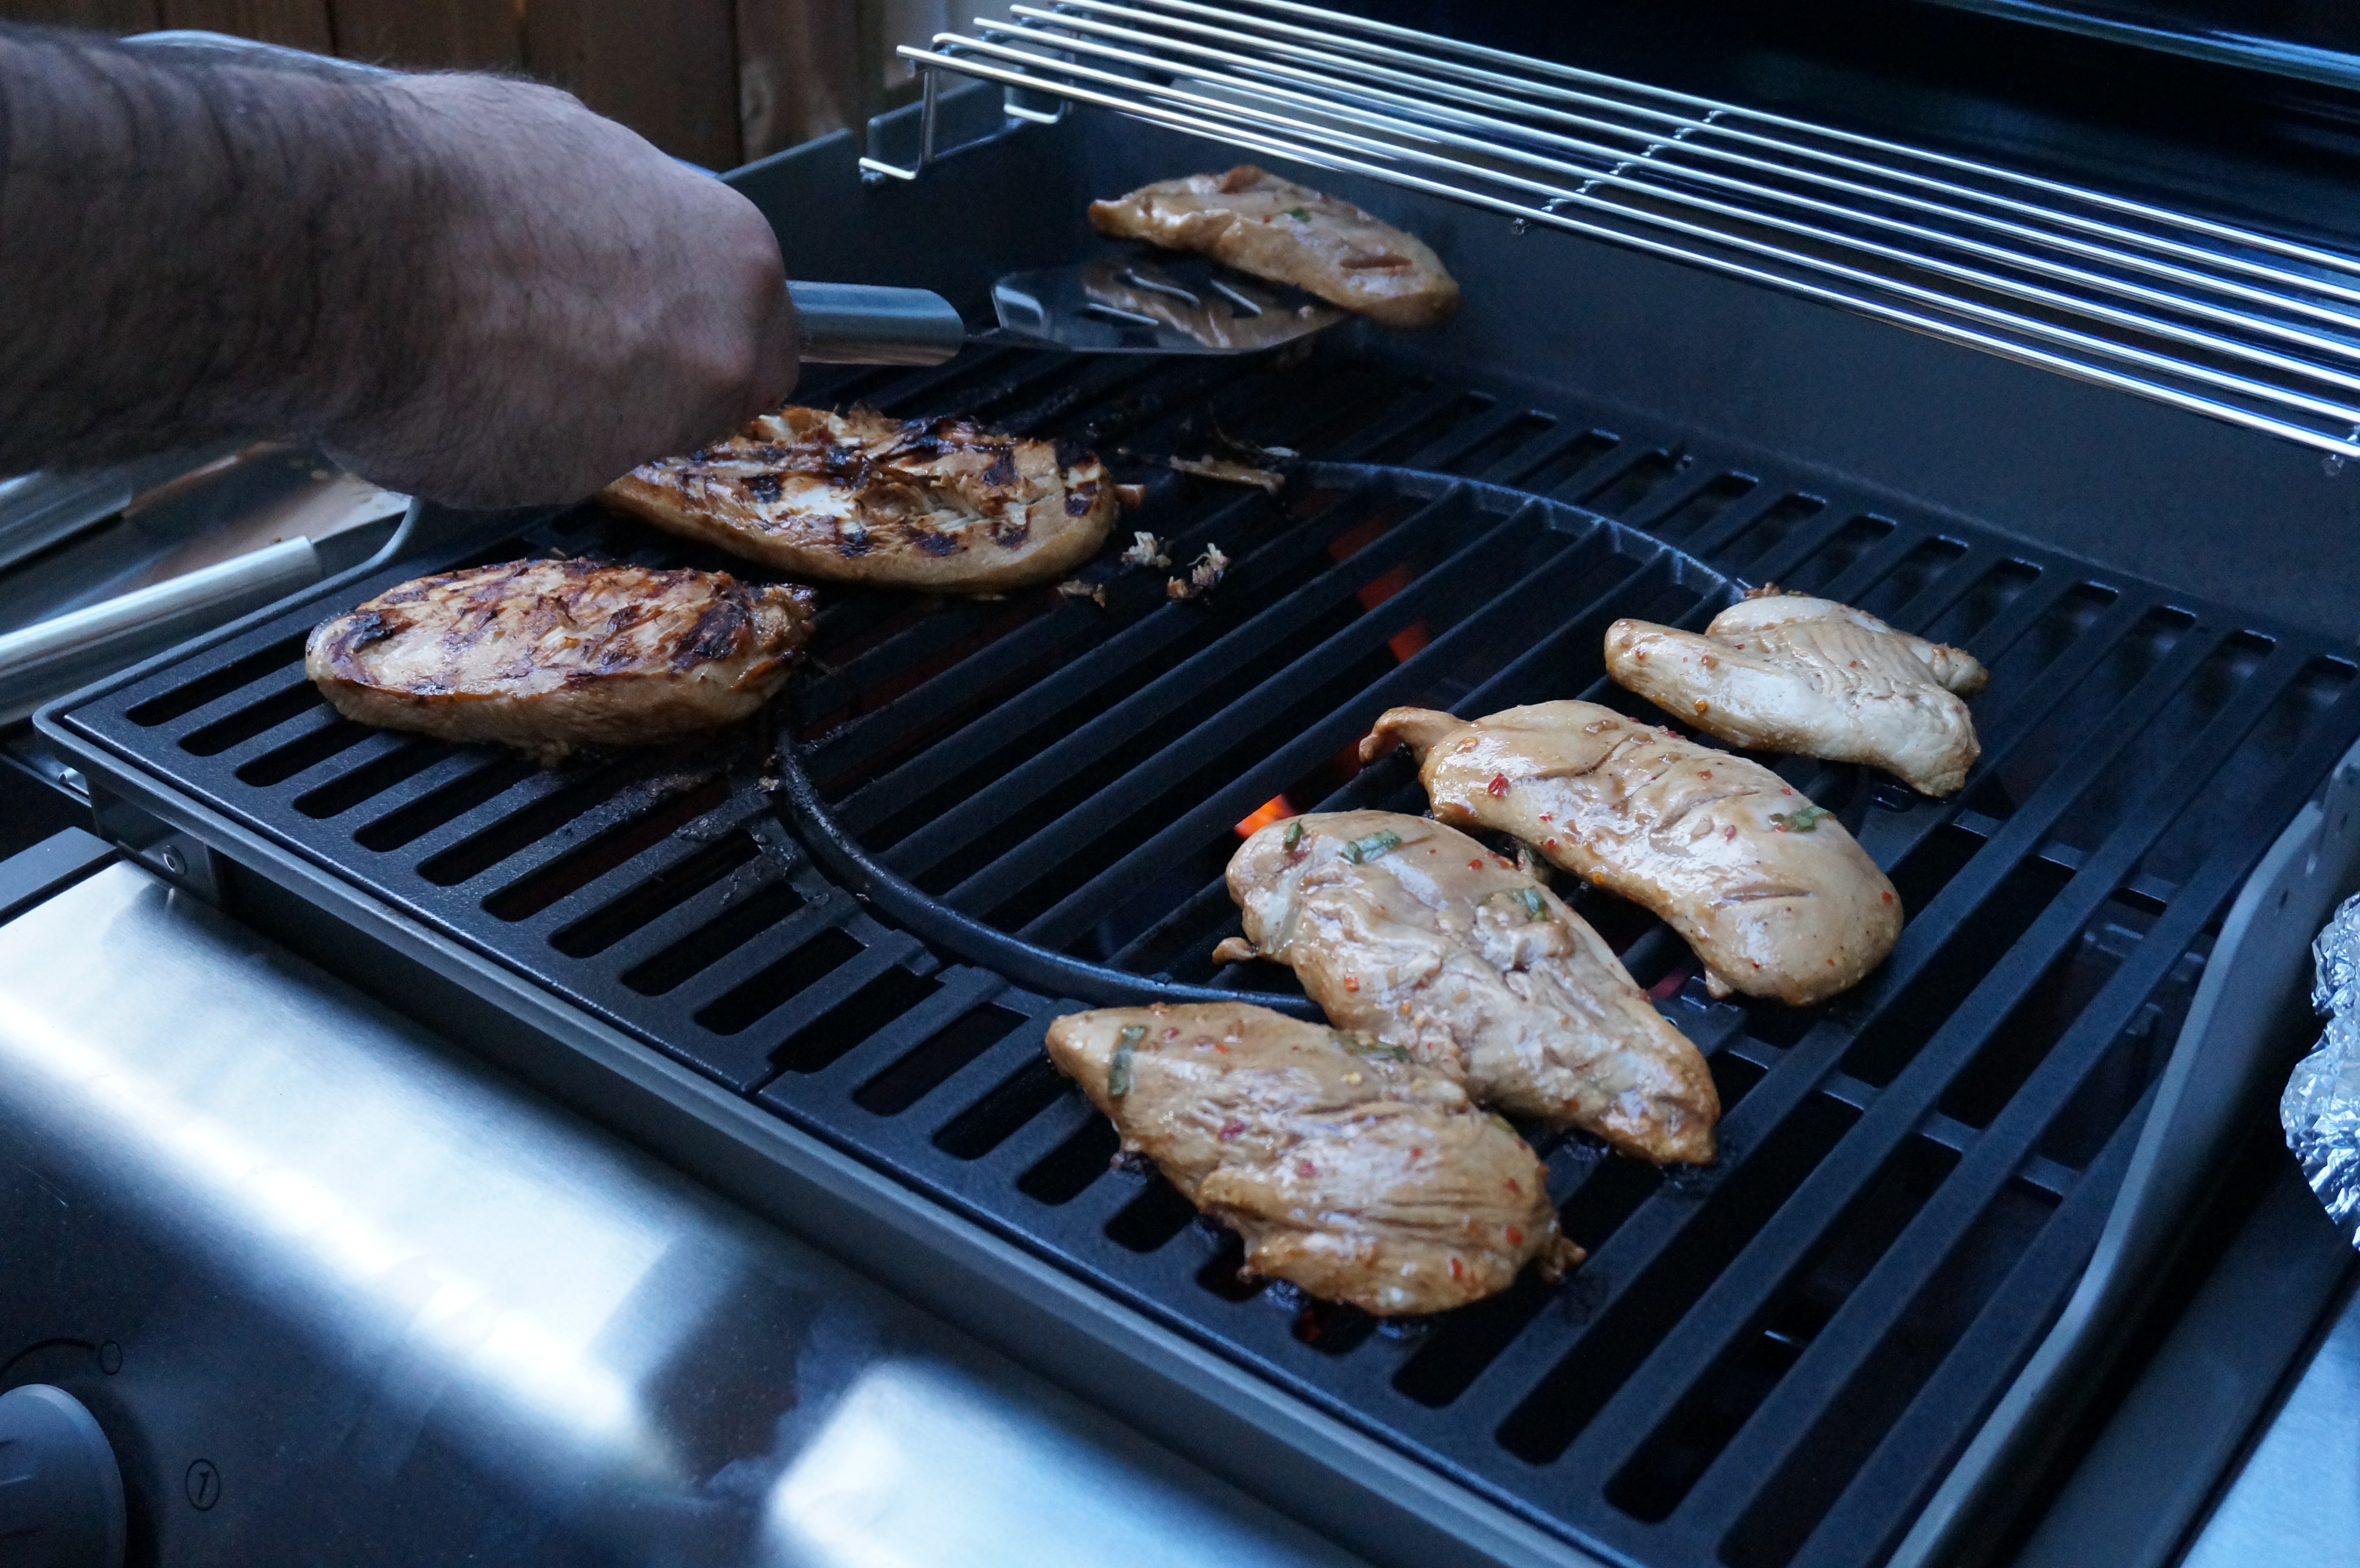
  1. Preheat oven to 350 degrees. Cook bacon in a medium skillet on medium-high heat until crispy. Reserve grease from bacon and set aside. Drain chicken on a paper towel.
  2. Saute seasoned chicken pieces in the same skillet over medium-high heat, tossing occasionally, for about 3 minutes. Add a bit of the reserved bacon grease and continue to cook until cooked through, about 4 more minutes. Set chicken aside.
  3. Add pasta shells to a large pot of salted, boiling water then cook until al dente (about 10 minutes). Drain and set aside.
  4. Whisk flour and 1/2 cup milk together in a small dish then add to the skillet over medium heat. Slowly add remaining milk, swiss cheese, and chicken broth, whisking constantly to prevent lumps. Season with salt and pepper. Continue stirring continuously until thick, about 8 minutes. Remove from heat.
  5. Add the rest of the cheese into the skillet and stir until smooth. Add cooked chicken, bacon, and pasta shells.
  6. Pour into a non-stick sprayed 9×12 casserole dish and top with any remaining cheese. Top with frozen peas. Cook, covered, in oven until golden-brown, about 15 minutes.

DSC01481

Happy Fourth, and Happy Picnicking!

Southwestern Quinoa Salad

DSC01442

Southwestern Quinoa Salad
Recipe Type: Salad, Vegetarian, Healthy
Cuisine: Southwestern
Author: Claire McCormick of “Claire Tastes”
Prep time:
Cook time:
Total time:
Serves: 12
Here’s a fuel-’em-up lunch salad that’s perfect on its own or wrapped up in a tortilla or spread on a few tortilla chips! Pack in the protein and veggies, and it only takes a few minutes to make!
Ingredients
  • 1 cup quinoa, uncooked
  • 1 can diced green chiles, drained
  • 1 16 oz jar mild chunky salsa, drained of excess liquid
  • 2 cans black beans, rinsed and drained
  • 2 cups frozen corn
  • 1/2 red onion, diced
  • 1 cup cilantro, chopped or torn into smaller pieces
  • 1/4 cup lime juice
  • 2 tbsp cumin
  • 1 tsp garlic powder
  • salt and pepper, to taste
Instructions
  1. Cook quinoa according to package directions. Remove from heat and allow to cool while preparing the rest of the salad.
  2. Combine rest of ingredients in a large bowl and stir.
  3. Stir in quinoa. Add additional lime juice, salt and pepper to taste.
  4. Can be made in advance and stuck in the fridge!
  5. Serve with a dollop of plain greek yogurt, sour cream, or cheddar cheese! Can be used as a filling in wraps or as a dip for some crunchy tortilla chips.

DSC01434

DSC01485

I love serving this salad over a bed of greens, with a poached egg and some sliced avocado on top! Garnished with a dollop of plain greek yogurt 🙂

Lemon Curry Tofu with Orange Honey Yogurt Sauce

Here’s a fun update to my Chickpea Lentil Power Salad! I decided that instead of my normal fried egg to go on top as my “meatless protein,” I’d experiment with a curry marinade and drizzle it with some orange yogurt sauce! A delicious variation to this power salad!

DSC01432

Curry Tofu with Orange Honey Yogurt Sauce
Recipe Type: Dinner, Salad
Cuisine: Vegetarian, Indian, Healthy
Author: Claire McCormick
Prep time:
Cook time:
Total time:
Serves: 8
Here’s a healthy baked tofu recipe that’ll satisfy the curry-lover in you! I served it on top of my chickpea lentil power salad from a few weeks ago, with a honey lemon yogurt sauce. Delish!
Ingredients
  • 1 14 oz packet firm tofu
  • 3 tbsp olive oil
  • 1 tbsp curry powder
  • 1/2 tsp chili powder
  • 1/2 tsp garlic powder
  • 1/2 tsp salt
  • 3 tbsp lemon juice (or juice of 1/2 squeezed lemon)
  • 1 tsp honey
  • 1/2 cup plain greek yogurt
  • Squirt of orange juice (about 1 tbsp)
Instructions
  1. Open tofu packet and drain water out.
  2. Slice tofu into 1/2″ slices lengthwise, then place between a few paper towels and set a heavy book or brick on top of the tofu to drain. Drain for 30 minutes.
  3. Preheat oven to 425 degrees.
  4. Add all marinade contents (up to honey) to a quart-sized ziplock bag and shake vigorously to combine.
  5. Cut tofu into squares of about 1/2″. Add to bag with marinade ingredients. Shake vigorously until completely coated. Marinate in fridge for at least 20 minutes.
  6. Empty the tofu onto a large, well-oiled cookie sheet.
  7. Bake at 425 degrees for 25-30 minutes, turning once halfway through.
  8. Broil an addition 4-5 minutes for a nice crisp on the outside!
  9. **Optional: Toss some broccoli and cauliflower into the remaining marinade in the bag, then add to the pan with the tofu. Remove from oven before broiling.
  10. For the dressing, whisk together honey, yogurt, and orange juice. Drizzle over tofu.


His and Her “Crustless” Quiche

I never really liked quiche before… and I think that’s because of the icky store bought refrigerated pie crust that it gets baked in. For some reason, the sides of the pie always crumbled on my fork, and it never tasted like much anyway. I’ve realized since that I would really enjoy quiche (I mean, who DOESN’T like a baked mixture of eggs, veggies, and about three types of cheese?) if it didn’t have a crust. At the same time, there is something comforting about having some sort of shape to the slice- some kind of “crunch” at the bottom that makes it a bit more satiating.

The other night I was preparing two quiches for an event at church, but I also wanted to make one for home. The problem is that pie crust comes in packs of two at the store. Hmmmm… wheels went spinning. Why not use the leftover barley soup I had made the night before (which had sort of already sucked up all the liquid from the cooked barley I’d added!) and somehow beef it up a bit to turn it into a crust of sorts? After all, I’d heard of other people using quinoa as a base- why not barley?

The soup was still a bit too runny to serve as a sturdy crust, so I added some random dry ingredients I had on hand- I didn’t want to mess with clumps of flour in my dinner, so I decided on some good ol’ fashioned, wholesome oats, and Panko bread crumbs. I also added an egg together before pressing it down into the dish to help the crust set a bit better.

Then, layered in the rest of the quiche ingredients as per usual! Since Ben and I would both be eating this, I used diced ham and shredded cheddar on “his” side, and turkey and swiss on “mine.”

The result was exactly what I was hoping for- a lighter pie with a chewy crust on the bottom and crisped sides. Plus, with every bite you get a forkful of veggies from the original soup! Served over a spinach salad, this was the perfect addition to our regular “staples.” In fact, Ben even said it was the “best quiche I’d ever made!” Well, that seals the deal- definitely making this one again!

DSC01420

His and Her “Crustless” Quiche
Recipe Type: Breakfast, Lunch, Dinner
Cuisine: Healthy, Savory
Author: Claire McCormick of “Claire Tastes”
Prep time:
Cook time:
Total time:
Serves: 8
A crustless quiche recipe light enough to satisfy the lady’s mind and hearty enough to satisfy the man’s stomach! Read on to find out the secret ingredient!
Ingredients
  • 4 eggs
  • 1/2 cup leftover vegetable soup (I used an organic “rustic bean and vegetable” boxed soup from the “simply balanced” line at Target- link in the intro above!)
  • 1/2 cup cooked pearl barley
  • 1/3 cup milk
  • 1/2 cup low fat cottage cheese
  • 1/3 cup Panko bread crumbs
  • 1/2 cup raw old-fashioned oats
  • 1/2 tsp dried basil
  • 1/2 tsp dried oregano
  • 1/4 tsp parsley
  • salt and pepper to taste
  • raw spinach
  • handful of chopped broccoli or cauliflower (or both)
  • handful of sliced grape or cherry tomatoes
  • diced ham
  • shredded deli turkey
  • shredded cheese (any kind, but I used a “casserole” blend)
  • sliced Swiss cheese, torn into smaller pieces
Instructions
  1. Preheat oven to 350 degrees.
  2. In a large bowl, whisk together soup, barley, and 1 of the eggs.
  3. Add bread crumbs and oats. Stir to combine.
  4. Using fingers or back of a spoon, press the crust mixture into the bottom and up the sides of a lightly oiled pie plate.
  5. Layer spinach (I torn mine into smaller pieces first) into dish, followed by broccoli and tomatoes. In half the dish, sprinkle ham. In other half, add the shredded turkey.
  6. In the mixing bowl, beat the remaining 3 eggs, milk, cottage cheese, spices, salt and pepper. Pour into the dish.
  7. On ham side of the quiche, sprinkle a handful of shredded cheese. On other half (turkey side), place the Swiss cheese slices.
  8. Bake uncovered at 350 for 40-50 minutes, or until eggs have set and cheese is bubbling.
  9. Allow to cool for at least 5 minutes before serving

DSC01423

DSC01426

Mediterranean Barley Power Salad with Cucumber Lemon Marinade

DSC01416

DSC01413

Mediterranean Barley Power Salad with Cucumber Lemon Marinade
Recipe Type: Salad, Healthy
Cuisine: Mediterranean, Vegetarian
Author: Claire McCormick of “Claire Tastes”
Prep time:
Total time:
Serves: 12
Perfect for Meatless Monday! And vegan, too!
Ingredients
  • 2 cups cooked pearl barley, cooled
  • 1 can garbanzo beans, drained
  • 1/2 cucumber, chopped roughly
  • 1 green bell pepper, chopped roughly
  • 1 red bell pepper, chopped roughly
  • 3 plum tomatoes, chopped
  • 1/2 red onion, chopped roughly
  • 3 stalks green onion, chopped
  • 1 bunch cilantro, minced
  • 1 tsp minced garlic
  • juice of one lemon
  • 3 tbsp extra virgin olive oil
  • 1/2 tsp garlic powder
  • 1/2 tsp dried dill (or 1 bunch fresh! I didn’t have fresh on hand, unfortunately)
  • 1/2 tsp dried parsley (or 1 bunch fresh)
  • 1/2 tsp red pepper flakes
  • 1 tsp black pepper
  • 1 1/2 tsp salt
  • spinach, for serving
  • fried egg, for topping
  • Plain Greek yogurt, for topping
  • frozen pomegranate seeds, for topping
  • parmesan or feta cheese, for topping
Instructions
  1. Prepare bulgur according to package directions (I used my rice cooker!) and cool.
  2. Chop up the red onion and green onion and add to a bowl of ice water (this helps take out the “bite” from the onion!).
  3. Chop the veggies, herbs, and all spices and add to a large mixing bowl. Stir to combine.
  4. Add the garbanzo beans.
  5. Mix in cooled bulgur.
  6. Add lemon juice and olive oil and stir until well coated.
  7. Drain onions and add to mixture.
  8. Sprinkle in salt and pepper.
  9. Chill in refrigerator for at least 30 minutes before serving.
  10. Serve over spinach and top with a fried egg, plain Greek yogurt, parmesan or feta cheese, and a handful of pomegranate seeds!

DSC01407

DSC01417

Grilled Teriyaki Chicken Burgers with Pineapple Salsa

Happy weekend! Ben and I were finally fortunate enough to have a B-E-A-utiful day to get our grill up and running! If you remember, we got money for a new grill from Ben’s parents for Christmas this year. Every time we tried to go get it, though, we either didn’t have the right car, or it was monsooning (or snowing!) outside. But thanks to my incredible husband, it is now fully assembled! After one of the most stressful days in a while in terms of house-projects and life events (more on that later), we sat down to a romantic candlelight dinner outside on our patio.

The menu for tonight? Grilled chicken teriyaki burgers with pineapple salsa. YUM. Adapted from this Iowa Girl Eats recipe, we decided to test out our newest toy with some fresh chicken and pineapple (thank you, Harris Teeter!). And let me tell you, this meal did NOT disappoint. The chicken was tender and juicy, and if you’re like me and love anything teriyaki-flavored, the orange juice was a really nice addition to give the meat a little extra tang.

As far as the salsa, I chose to do a pineapple salsa with a few peaches thrown in (instead of the watermelon-cucumber salsa in the original recipe). It seemed like a perfect addition to the teriyaki, and I knew how much Ben likes pineapple on his burgers. The colors were magnificent and reminded me of how lucky we are to have access to so much fresh, seasonal produce! And for the warm summer weather 🙂

I hope you enjoy your own variations on this perfect Memorial Day supper!

DSC01398

DSC01403

Grilled Teriyaki Chicken Burgers with Pineapple Salsa
Recipe Type: Chicken, BBQ, Teriyaki, Grilling
Cuisine: BBQ, Chicken
Author: Claire McCormick of “Claire Tastes”
Prep time:
Cook time:
Total time:
Serves: 6-8
Dust off that grill and try this perfect Memorial Day meal! Fresh and filling, this recipe for teriyaki chicken burgers is sure to get your patriotic juices going 🙂
Ingredients
  • For the Teriyaki Marinade:
  • 1/3 cup low sodium soy sauce
  • 1/4 cup orange juice
  • 2 tbsp lime juice
  • 2 tbsp vegetable oil
  • 2 tbsp honey
  • 1 green onion, chopped
  • 2 tsp minced garlic
  • 1/2 tsp garlic powder
  • 1/4 tsp ground ginger
  • 1/2 tsp crushed red pepper
  • 1/2 tsp salt
  • 1/4 tsp pepper
  • For the Pineapple Salsa:
  • 2 cups fresh pineapple chunks
  • 1 squirt lime juice
  • 1/4 red onion, chopped
  • 1 bunch fresh cilantro, rinsed and minced (about 3 tbsp total)
  • 1/4 cup chopped peaches (I just used some frozen ones)
  • 1 green onion, chopped
  • 1 pinch salt
  • 2 lbs chicken breasts (about six large breasts) pounded to an even thickness
  • 2 large hamburger buns
  • 1 cup cooked pearl barley (I made mine in the rice cooker- it only took about 15 minutes vs. the 1 1/2 hours the package suggests!)
  • 2 cups broccoli florets
Instructions
  1. Mix together all ingredients for marinade in a large tupperware container. Wedge the chicken breasts into container and marinate in refrigerator for two to three hours.
  2. Meanwhile, prepare salsa by chopping up pineapple, onion, cilantro, peaches, and green onion. Mix together in a bowl and add the lime juice and salt. Cover and refrigerate until ready to serve.
  3. Prepare barley according to container directions.
  4. Preheat grill to medium heat.
  5. Grill chicken breasts on medium, 5 minutes per side or until no longer pink in the center. Remove from grill and keep warm in tin foil.
  6. Steam or grill broccoli.
  7. When you’re just about ready to eat, place halved buns on top of grill rack and grill 1-2 minutes until lightly toasted.
  8. Serve chicken on buns or over barley with a nice big spoonful of pineapple salsa on top!
Serving size: 1 burger (with 1 large bun) Calories: 450 cal Fat: 9 g Carbohydrates: 51 g Fiber: 5 g Protein: 43 g

DSC01371

Prepare the marinade.

DSC01373

Wedge in the chicken breasts and marinate 2-3 hours in the fridge. It helped me a bit to also slice a few slits in the breasts so that the marinade could really seep into the meat (as Iowa Girl suggested!)

DSC01376

Prepare barley in rice cooker!

DSC01377

Get your pineapple salsa ingredients ready…

DSC01381

I probably could have eaten this entire bowl.

DSC01386

It was just so pretty that I had to take about a gazillion pictures. I mean, really? Those COLORS!

DSC01388

Barley’s all done!

DSC01390

Light up that grill!

Wait a minute… whose hairy hands are those?!?

DSC01389

Ohhh that’s right… that handsome husband of mine! (Slash why is he always wearing that shirt when I take pictures of him for the blog?) 😛

DSC01391

We were so excited to try out our new grill! Ben’s territory, I’m told.

DSC01394

Yummmmmm… juicy and tender and smelling like teriyaki!

DSC01401

Top with pineapple salsa and serve on a bun with broc on the side 🙂

DSC01403

Or over barley! I loved how the juice from the salsa seeped down deeply into the barley and gave it an extra tang!

Happy Memorial Day, everyone! Thank you to all who serve our nation with pride! We are so thankful. 🙂