Scottish Loch Duart Salmon w/ Honey-Soy Marinade (Compliments of Pittsburgh Seafoods!)

When Ben’s mom came to visit last week, she didn’t arrive empty-handed. She came bearing one of the best gifts an aspiring house-chef and hungry blogger could ask for… fresh, top-of-the-line seafood just begging to be cooked!

This is no ordinary salmon. This is Loch Duart Salmon, sent down straight from Pittsburgh Seafoods, which is the company Ben’s father manages in Pittsburgh. Loch Duart is one of the highest quality salmons. According to the Loch Duart Company website, this fish is  straight from the “cold, clear waters of northern Scotland” and is produced using safe, sustainable methods to ensure the highest quality and safety to consumers.

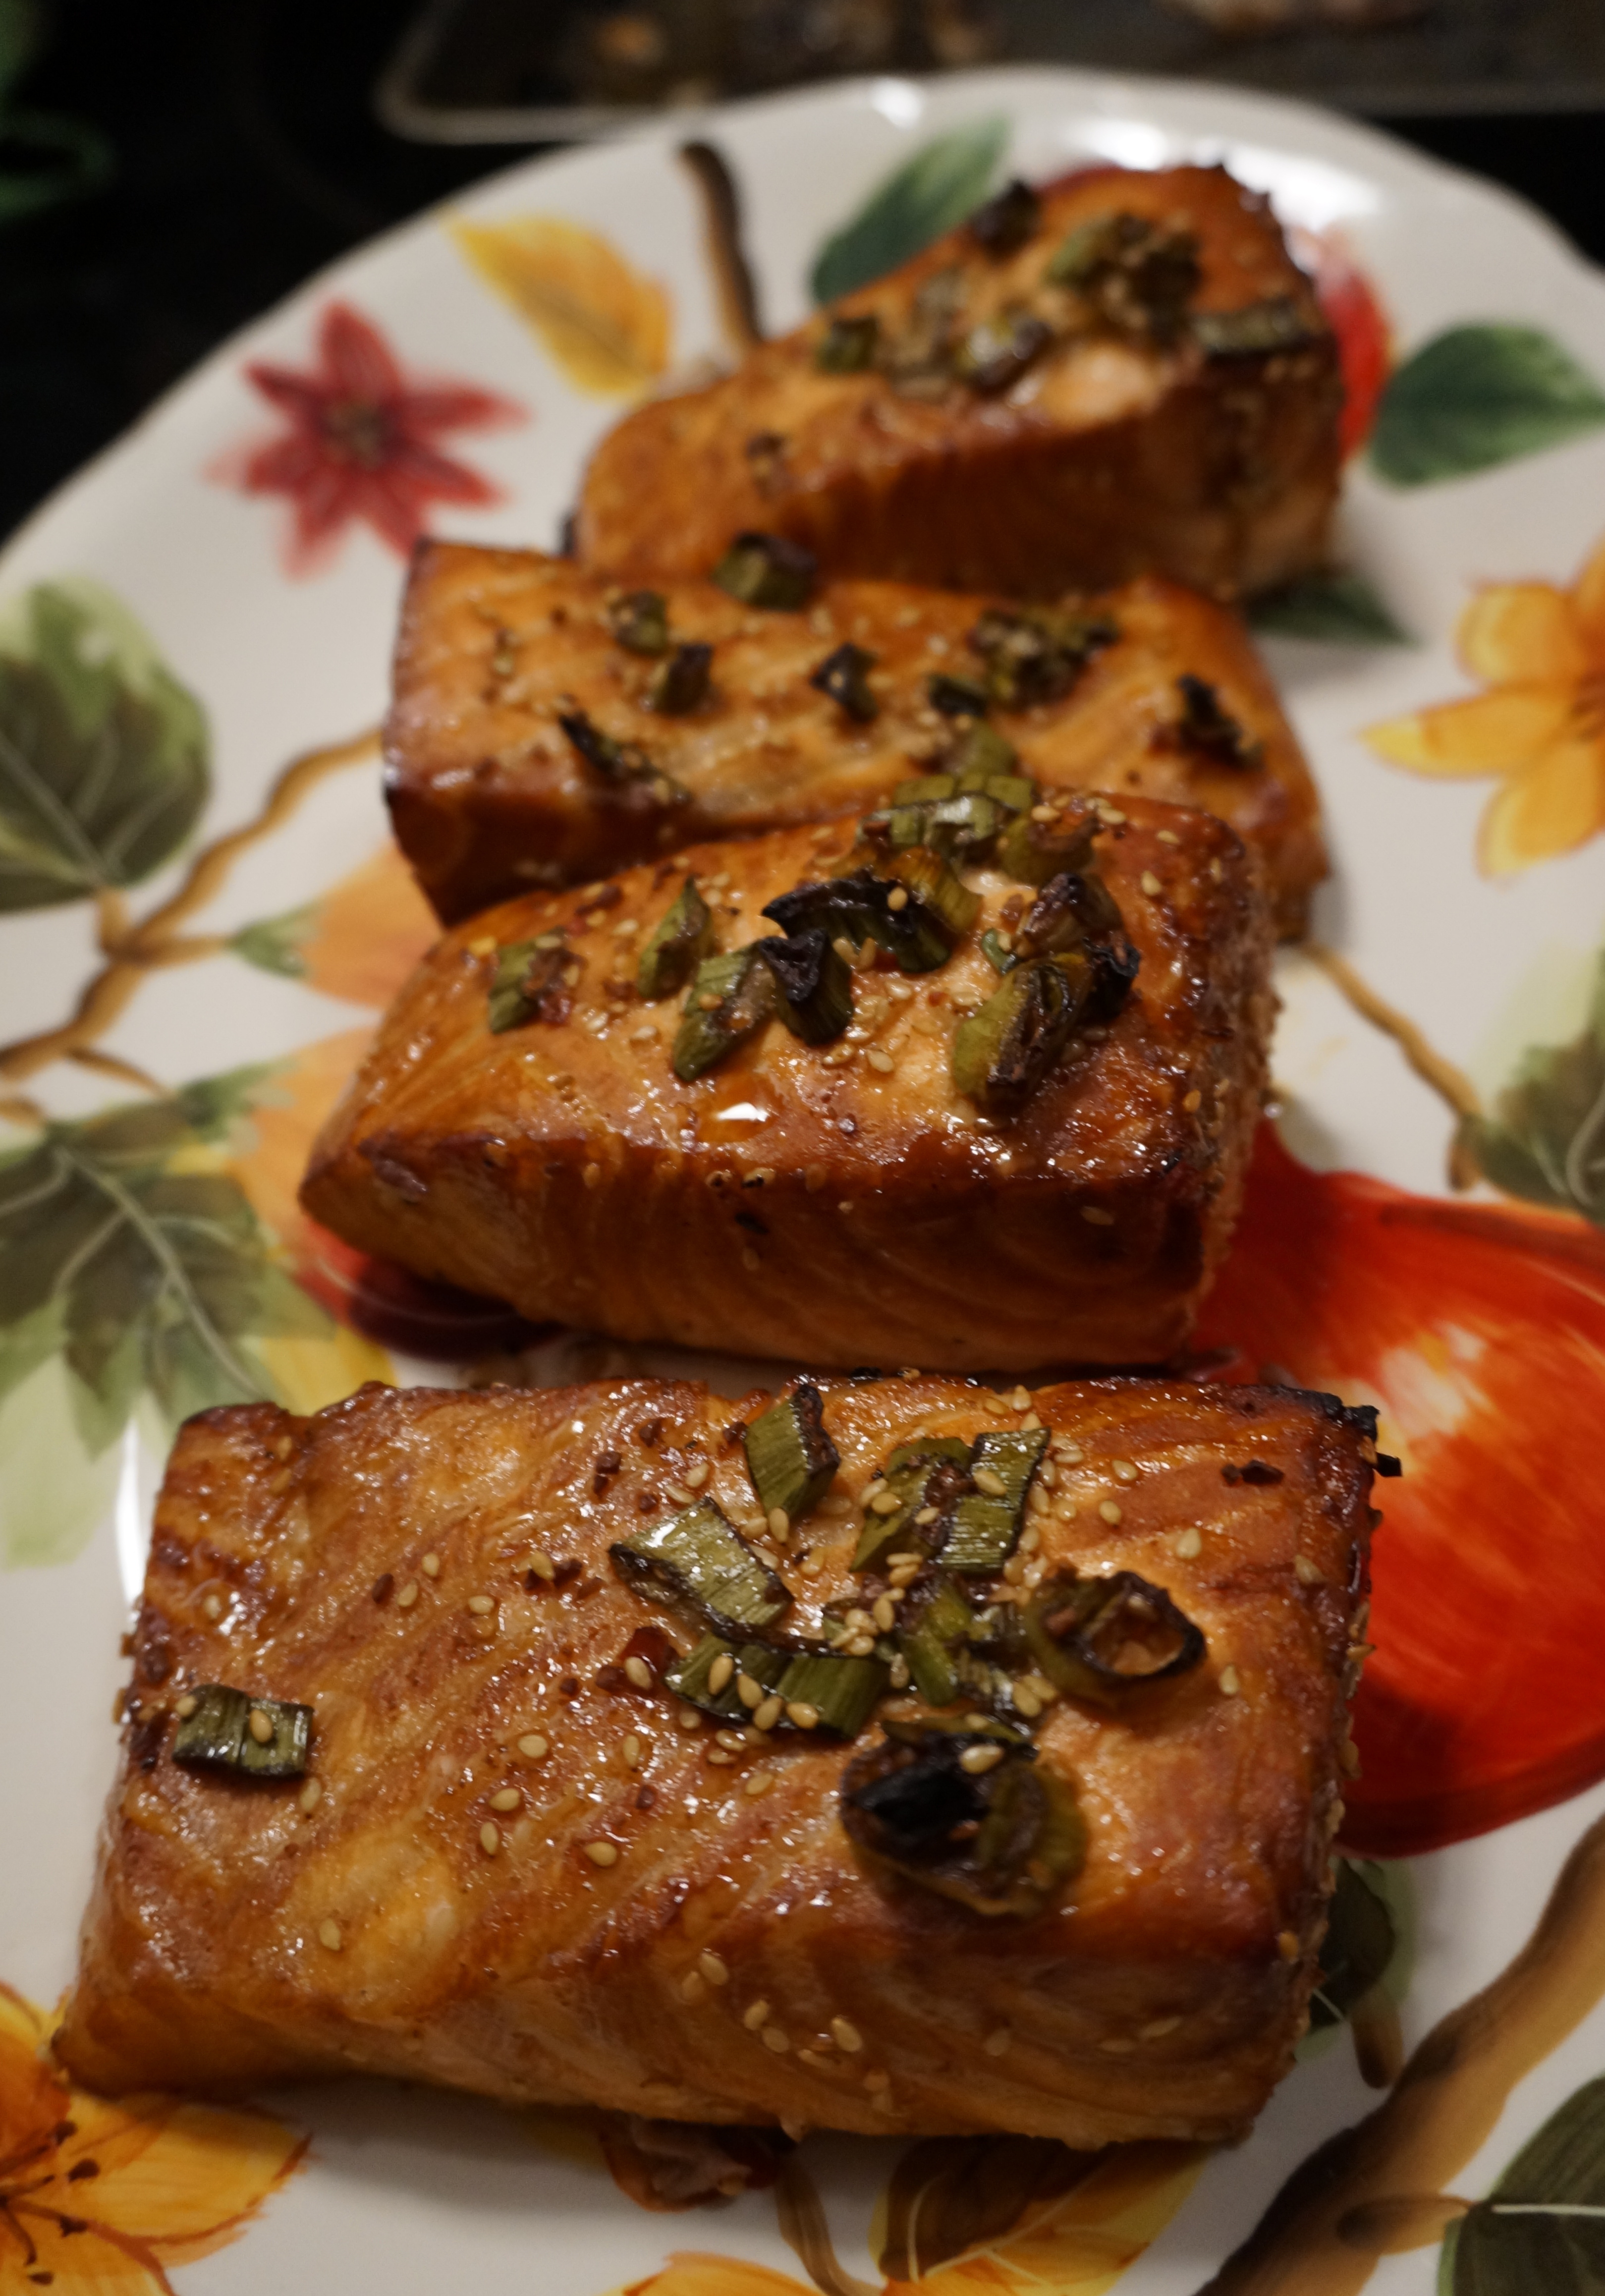
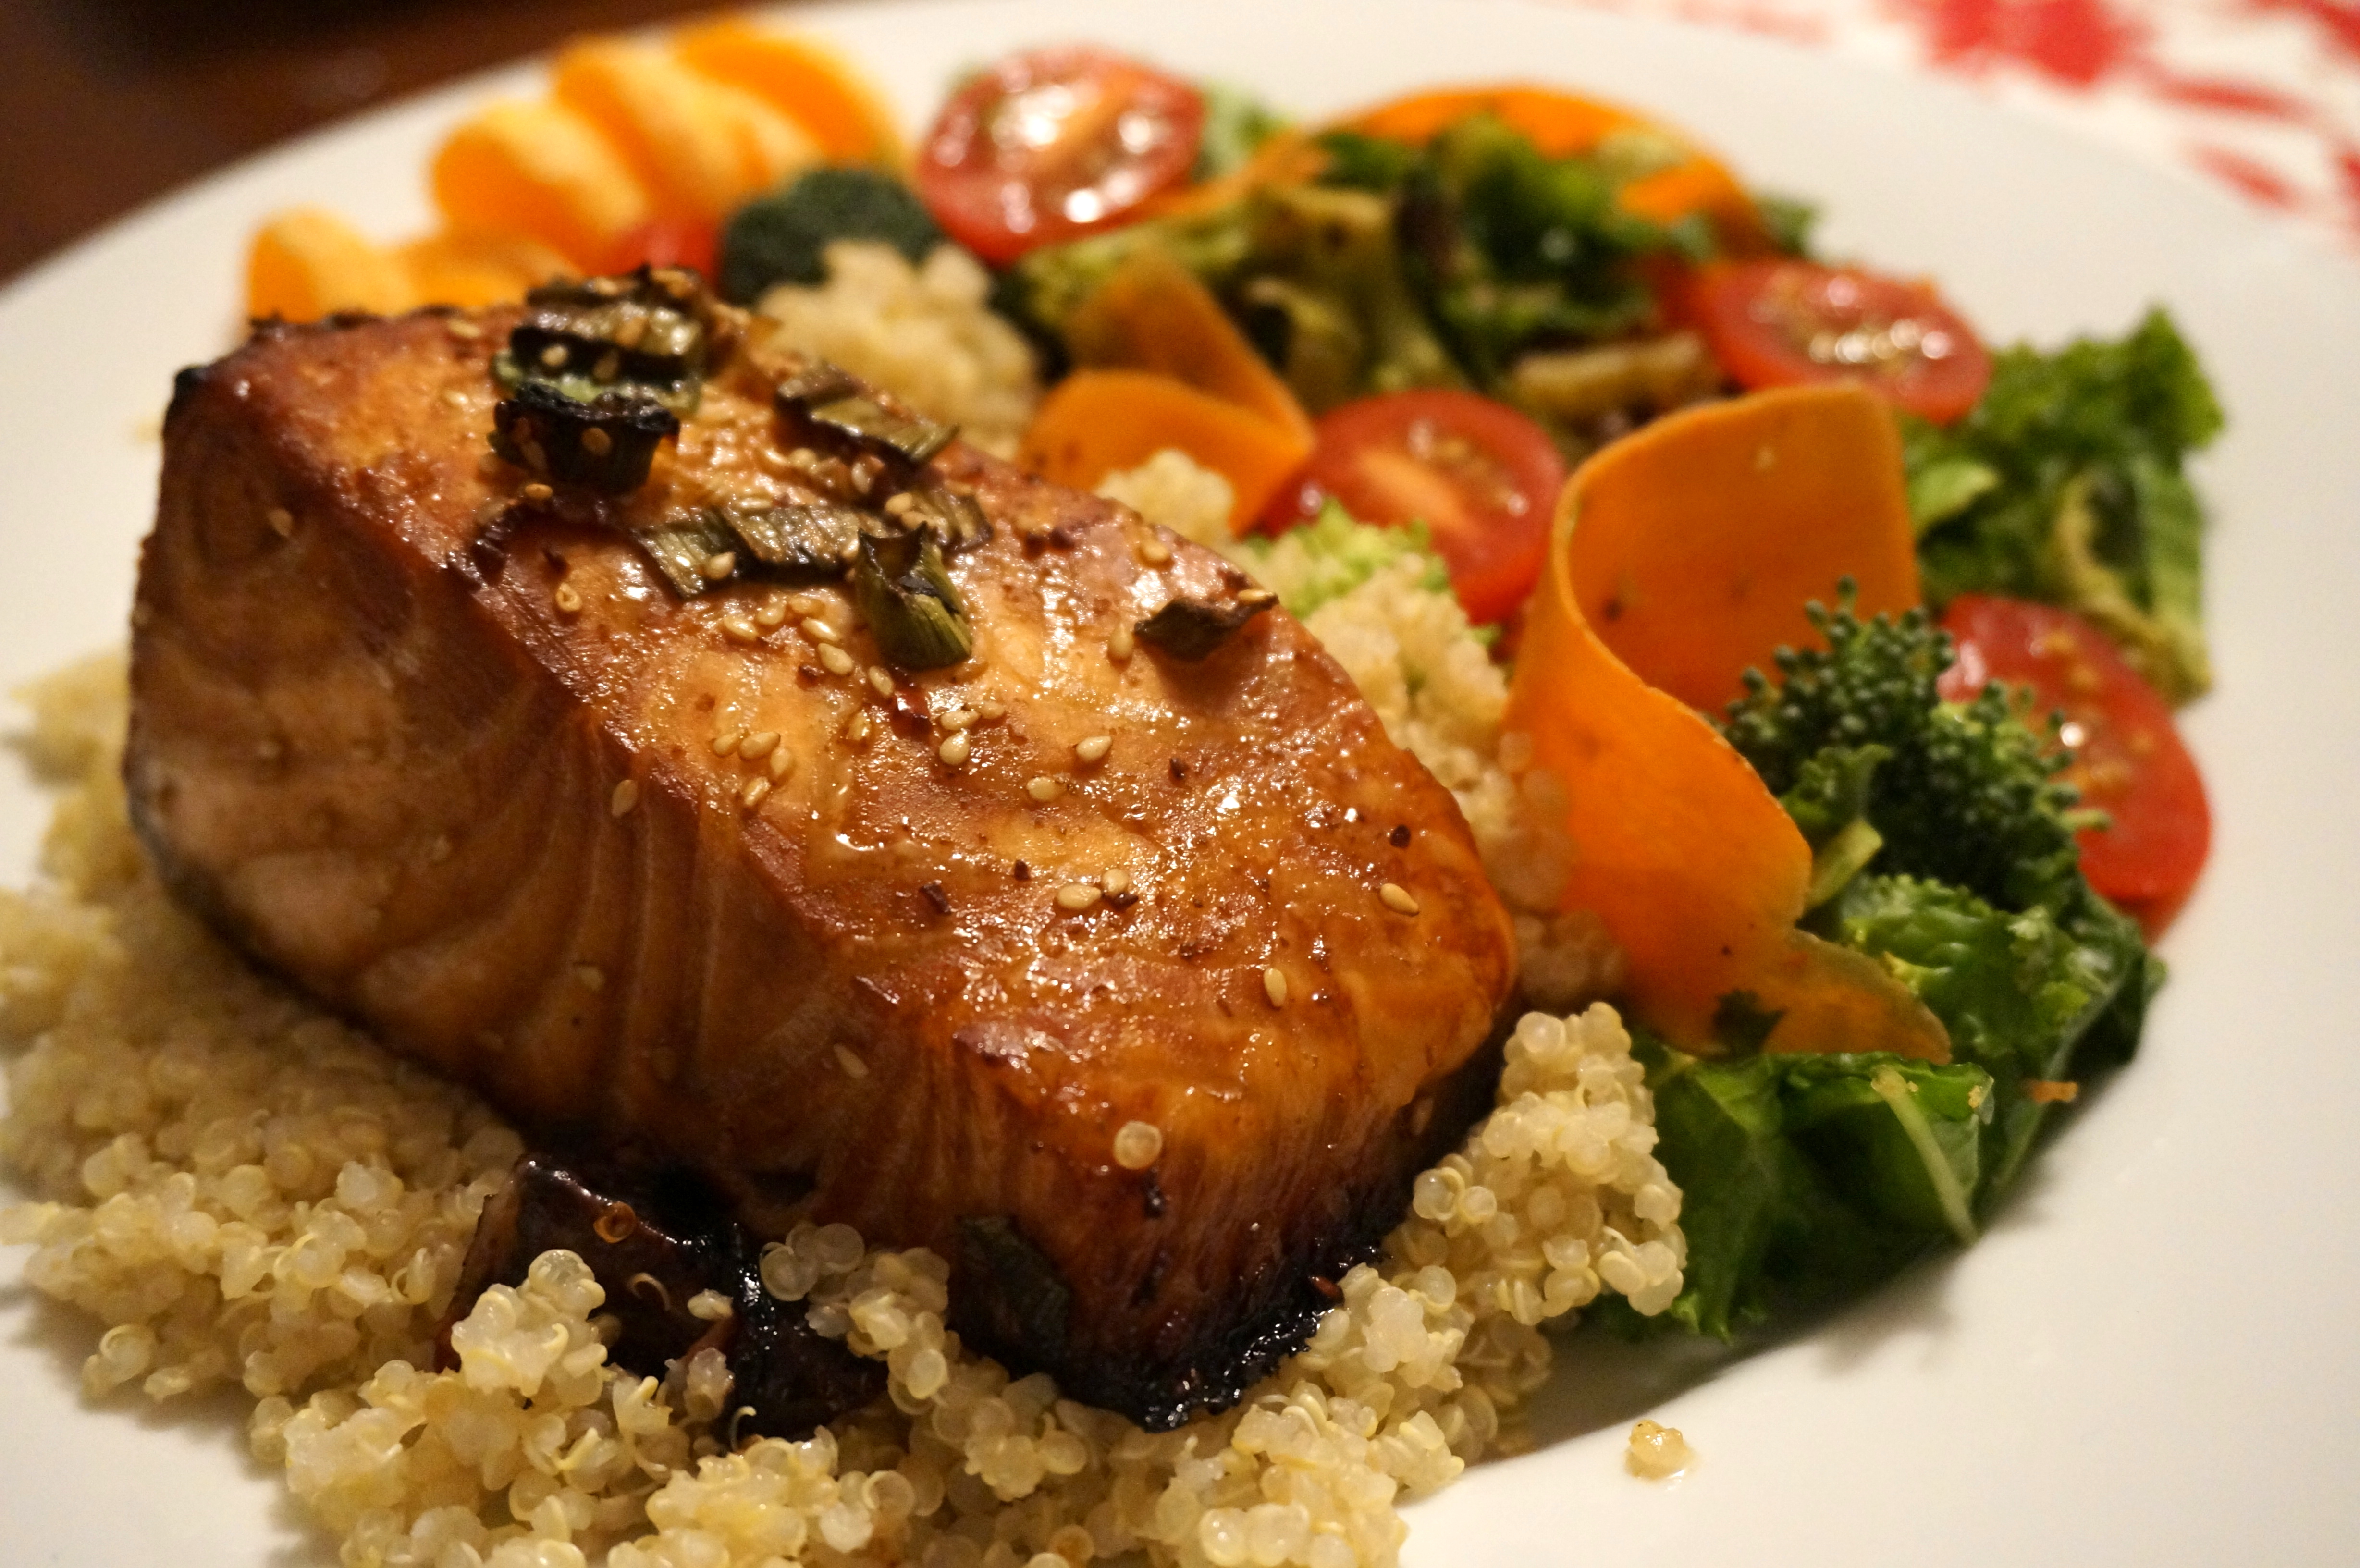
The fish itself? It’s thick as heck in the middle (probably 2 and a half inches at its thickest point!) and when it’s cooked, it is sweet, and savory all at the same time. The skin on the bottom only adds to that juicy, fatty-but-in-a-good-for-you-way flavor. I like to leave the skin on when I plate it up… I used to be grossed out by this, but I’ve come to really enjoy the umami taste of that skin (scales and all!). One bite and I was in heaven.

I chose to marinate and bake for our first try with this salmon, since to me, the slower process of baking leaves fewer things that can go wrong. I chose a honey-soy marinade with a bit of orange juice and some ginger and garlic (and lots of other spices I don’t even remember… just go look at the recipe for yourself!), and stuck the salmon in the fridge for a few hours to allow the fish to soak up the flavor.

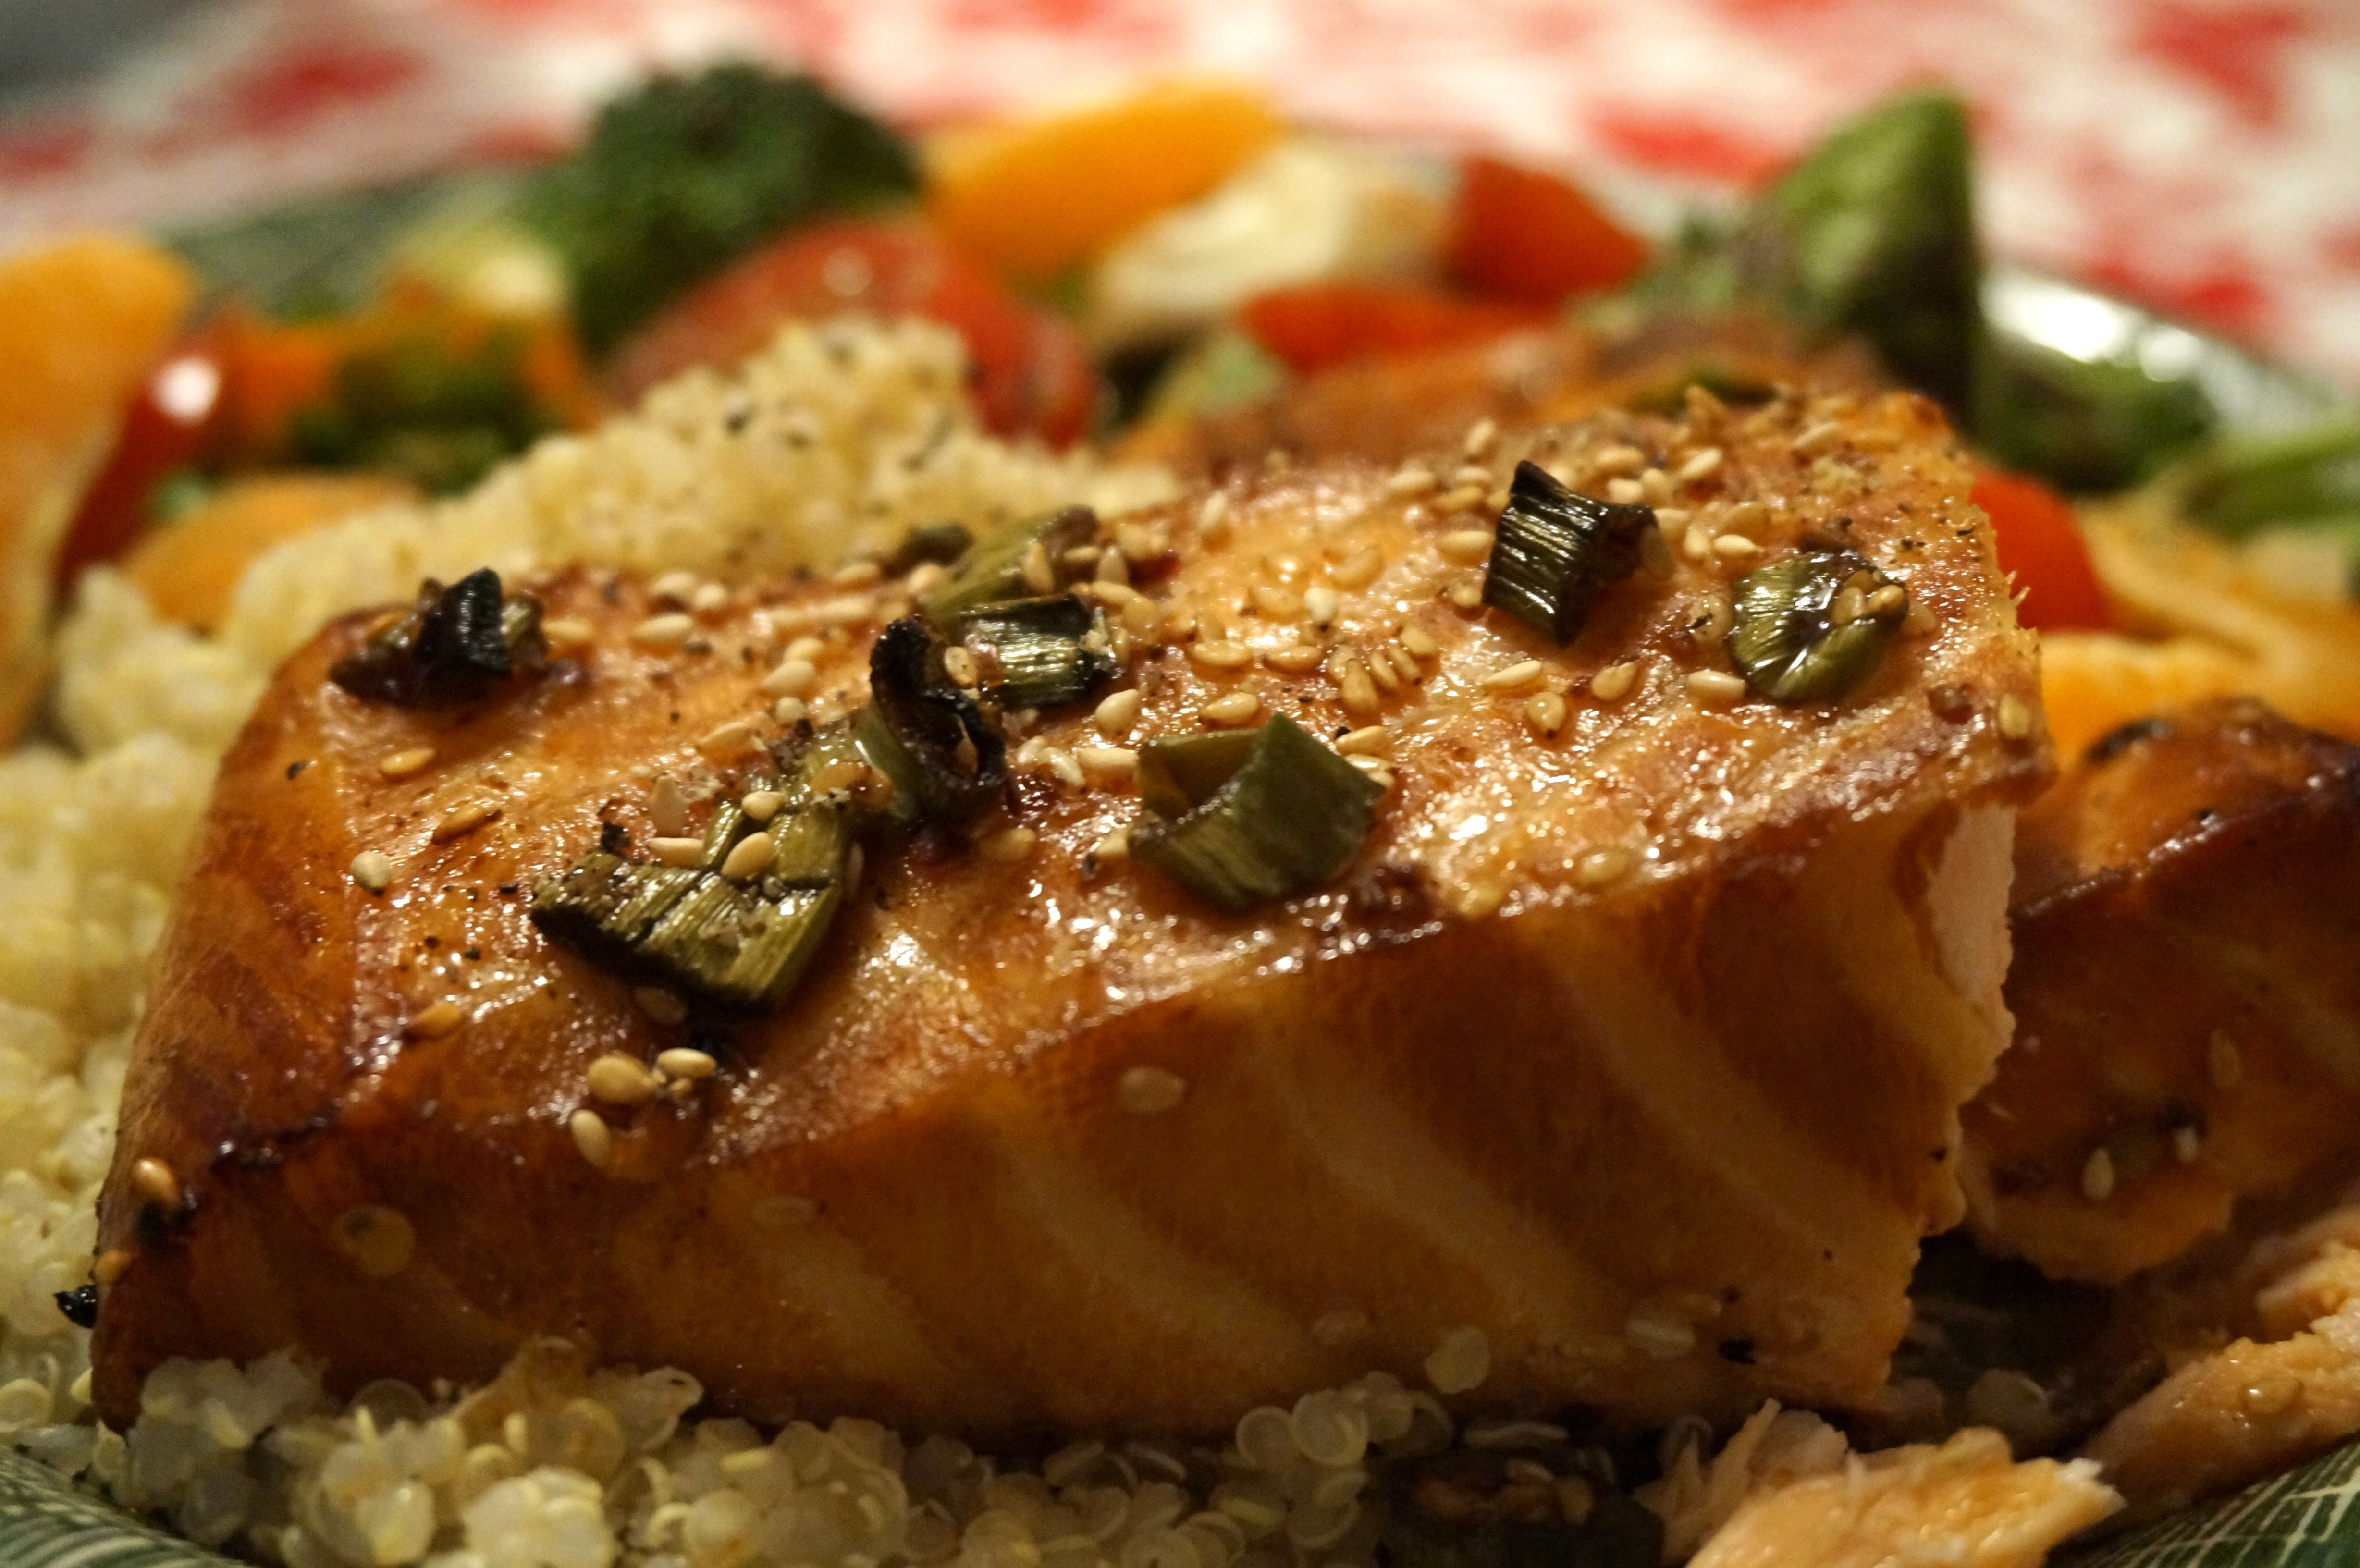
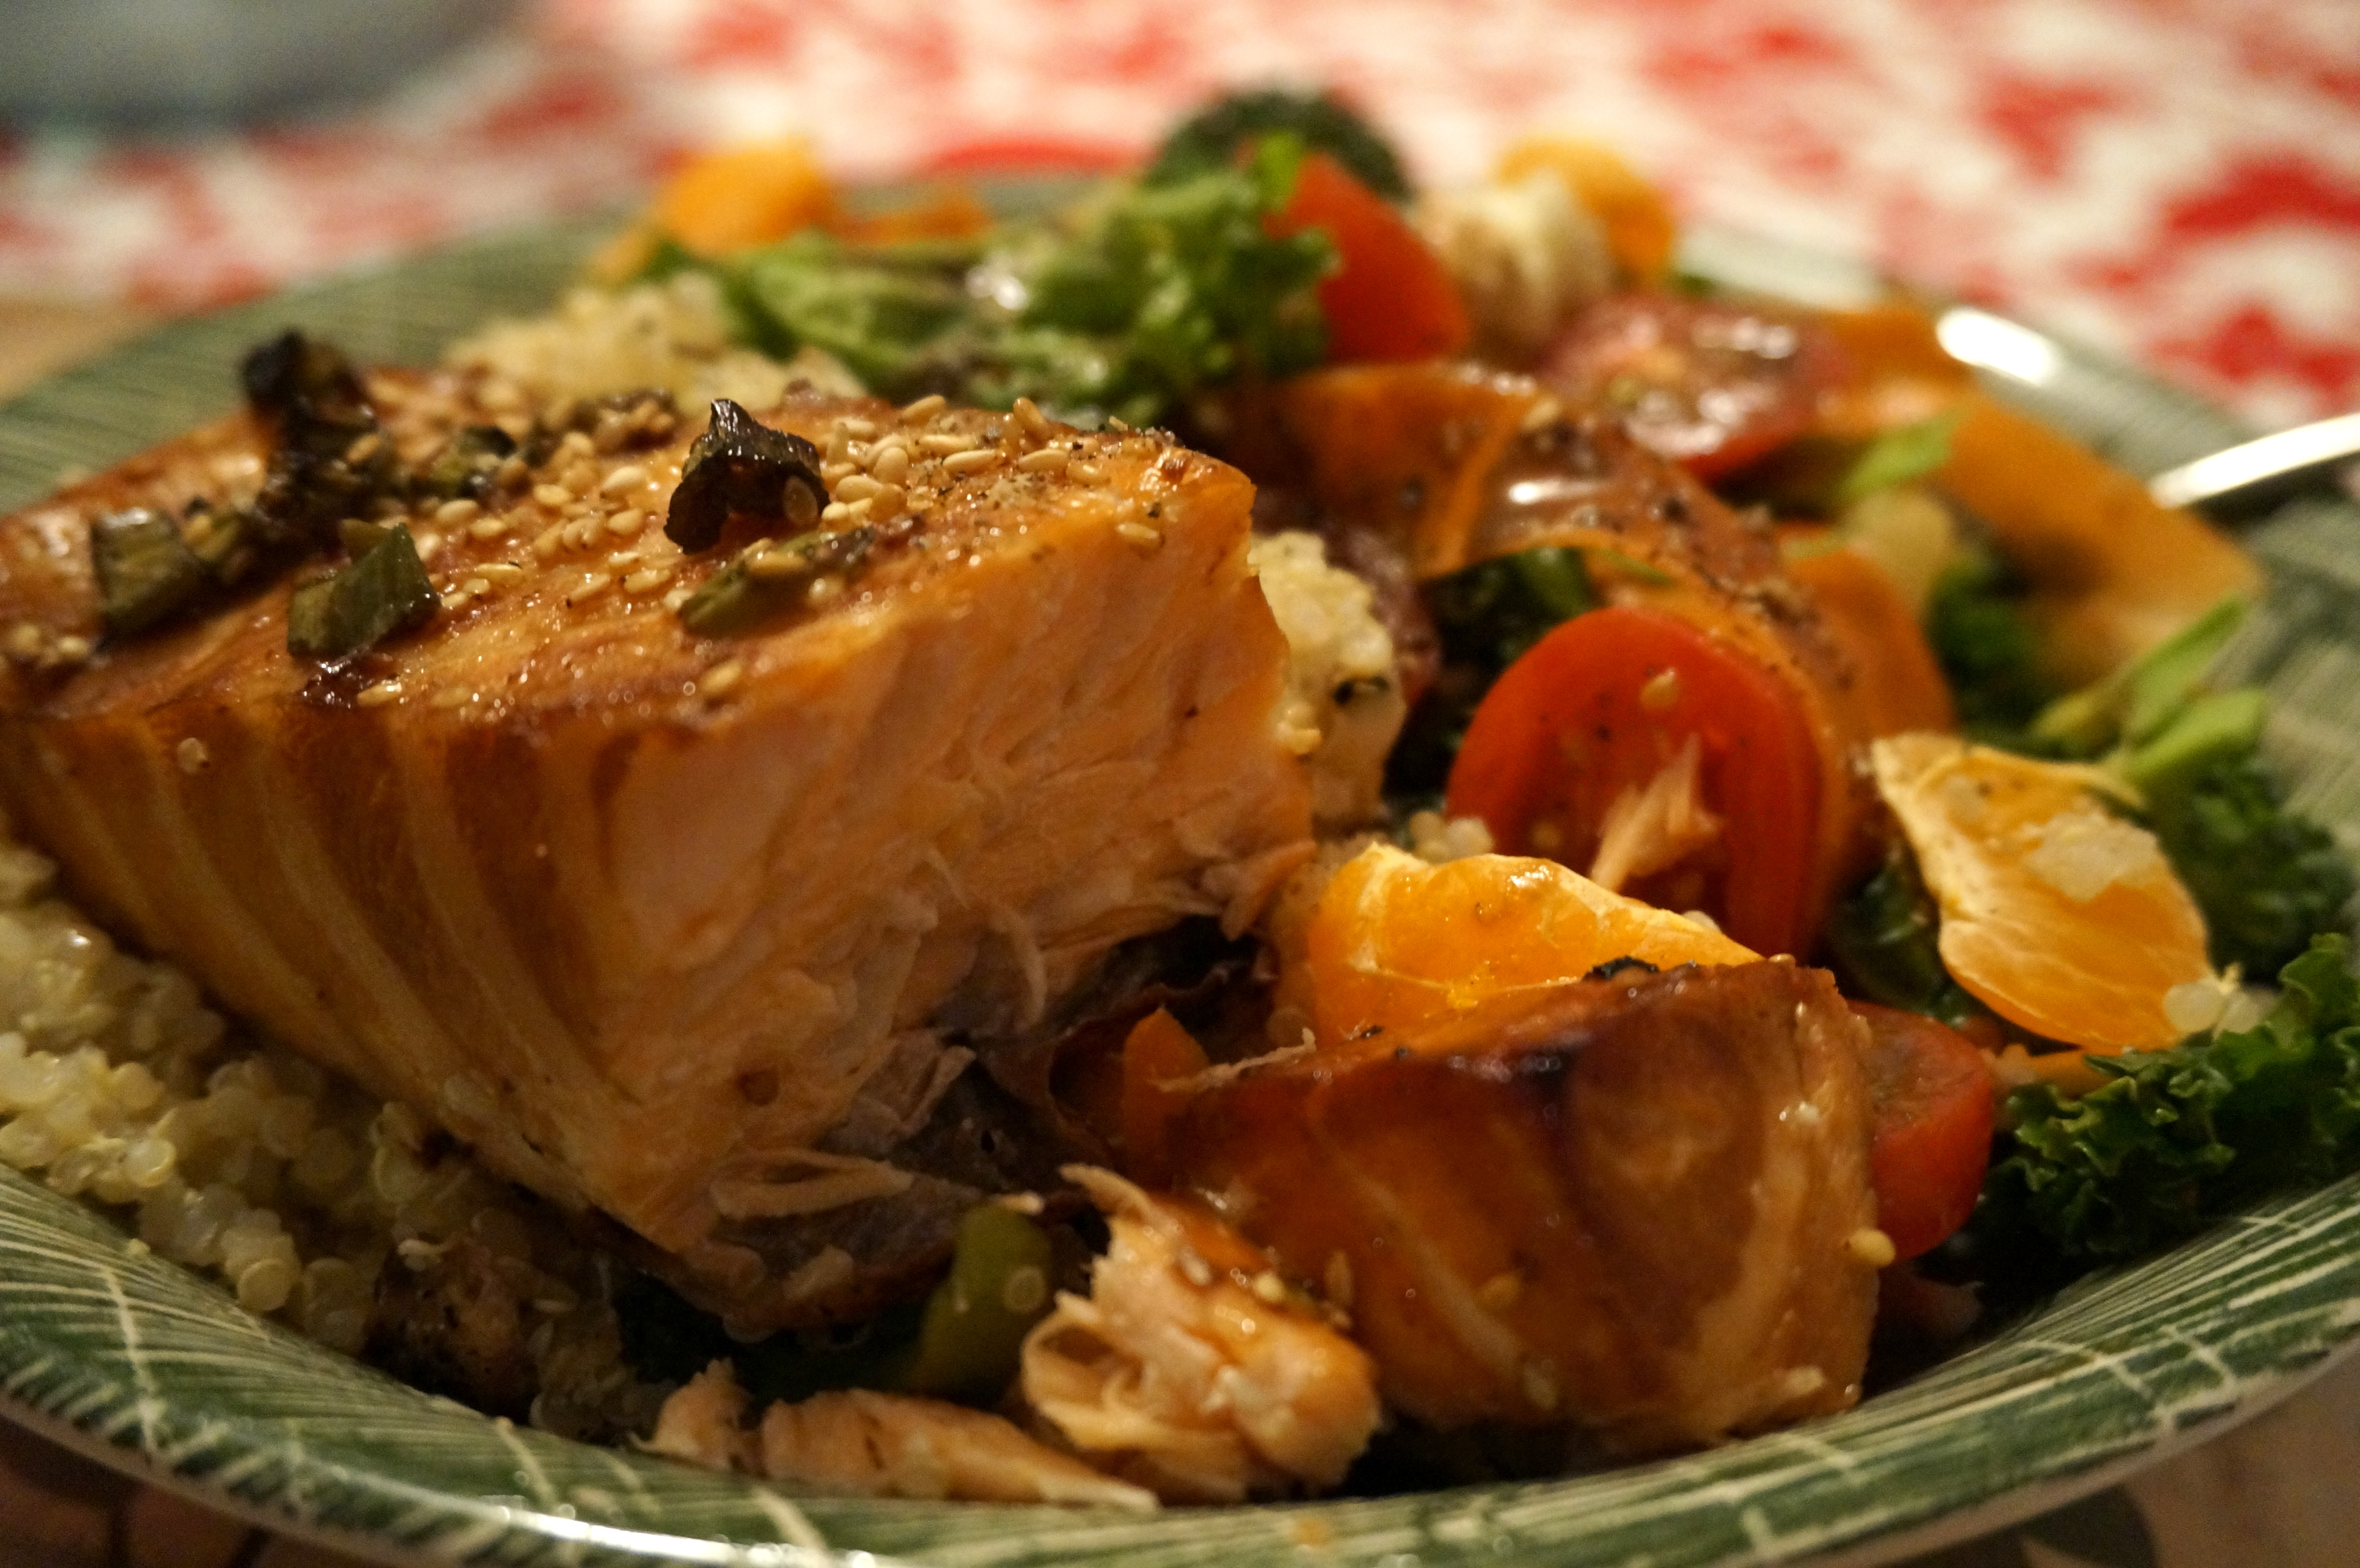
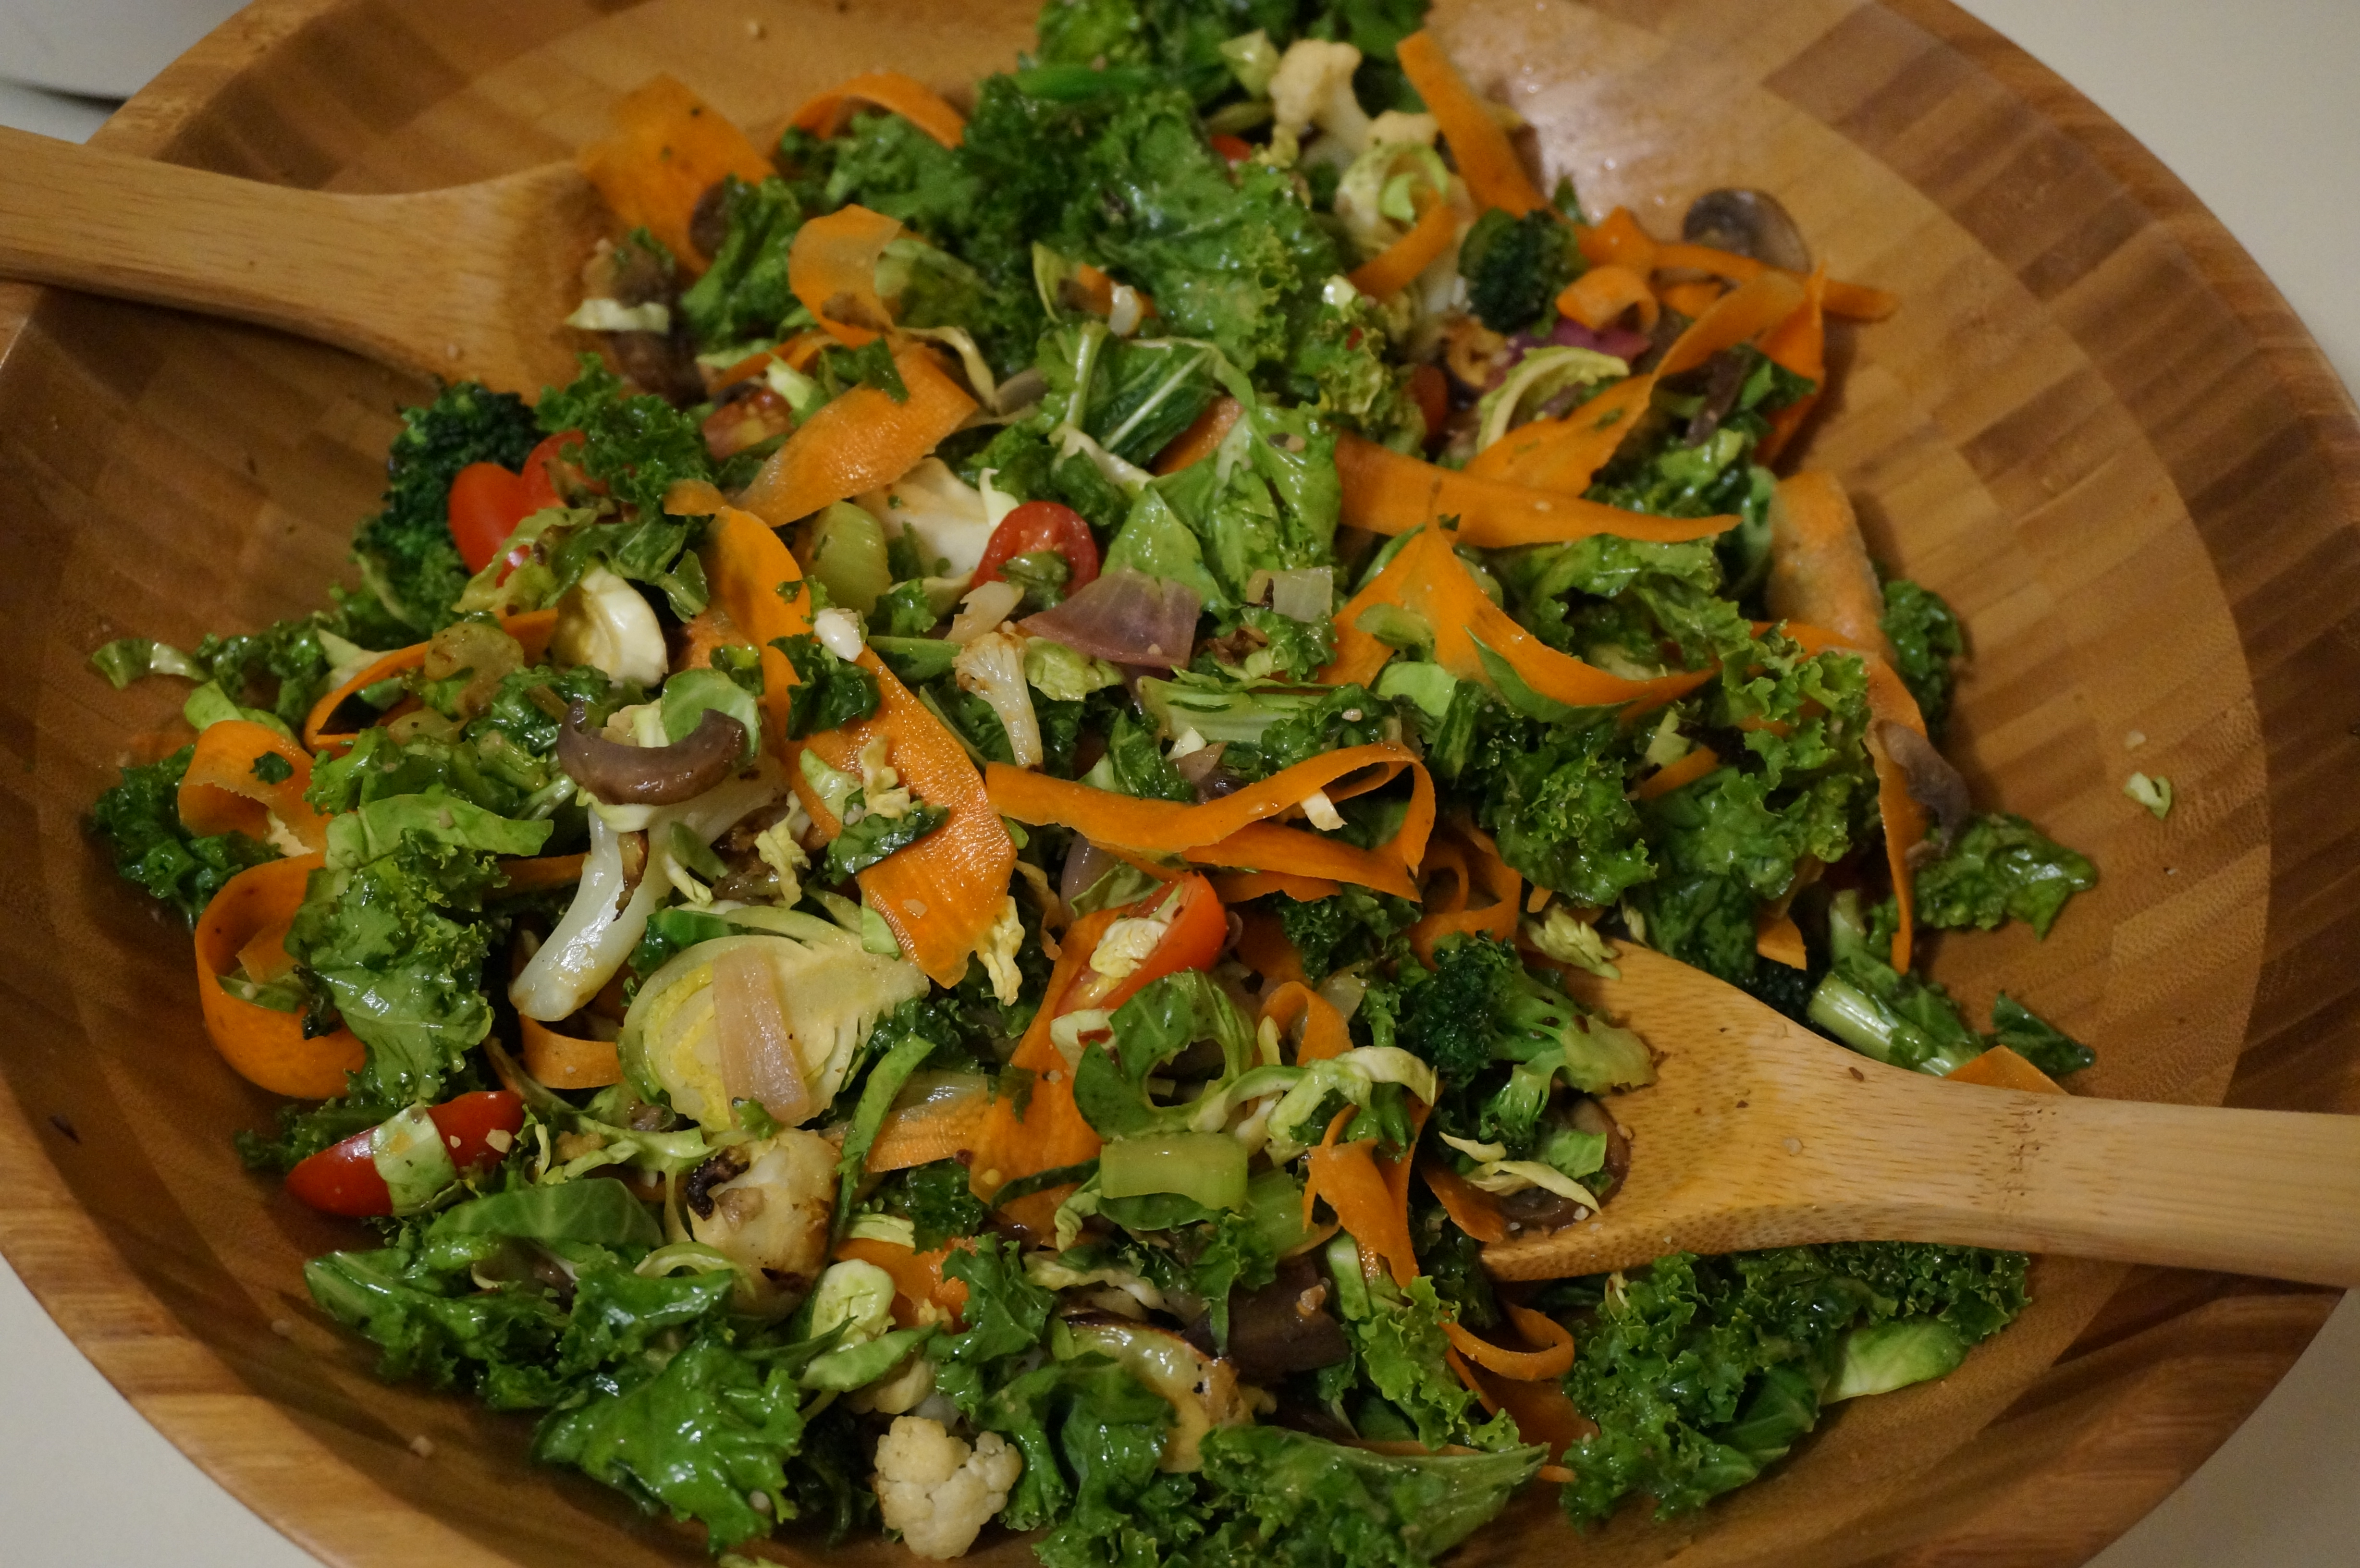
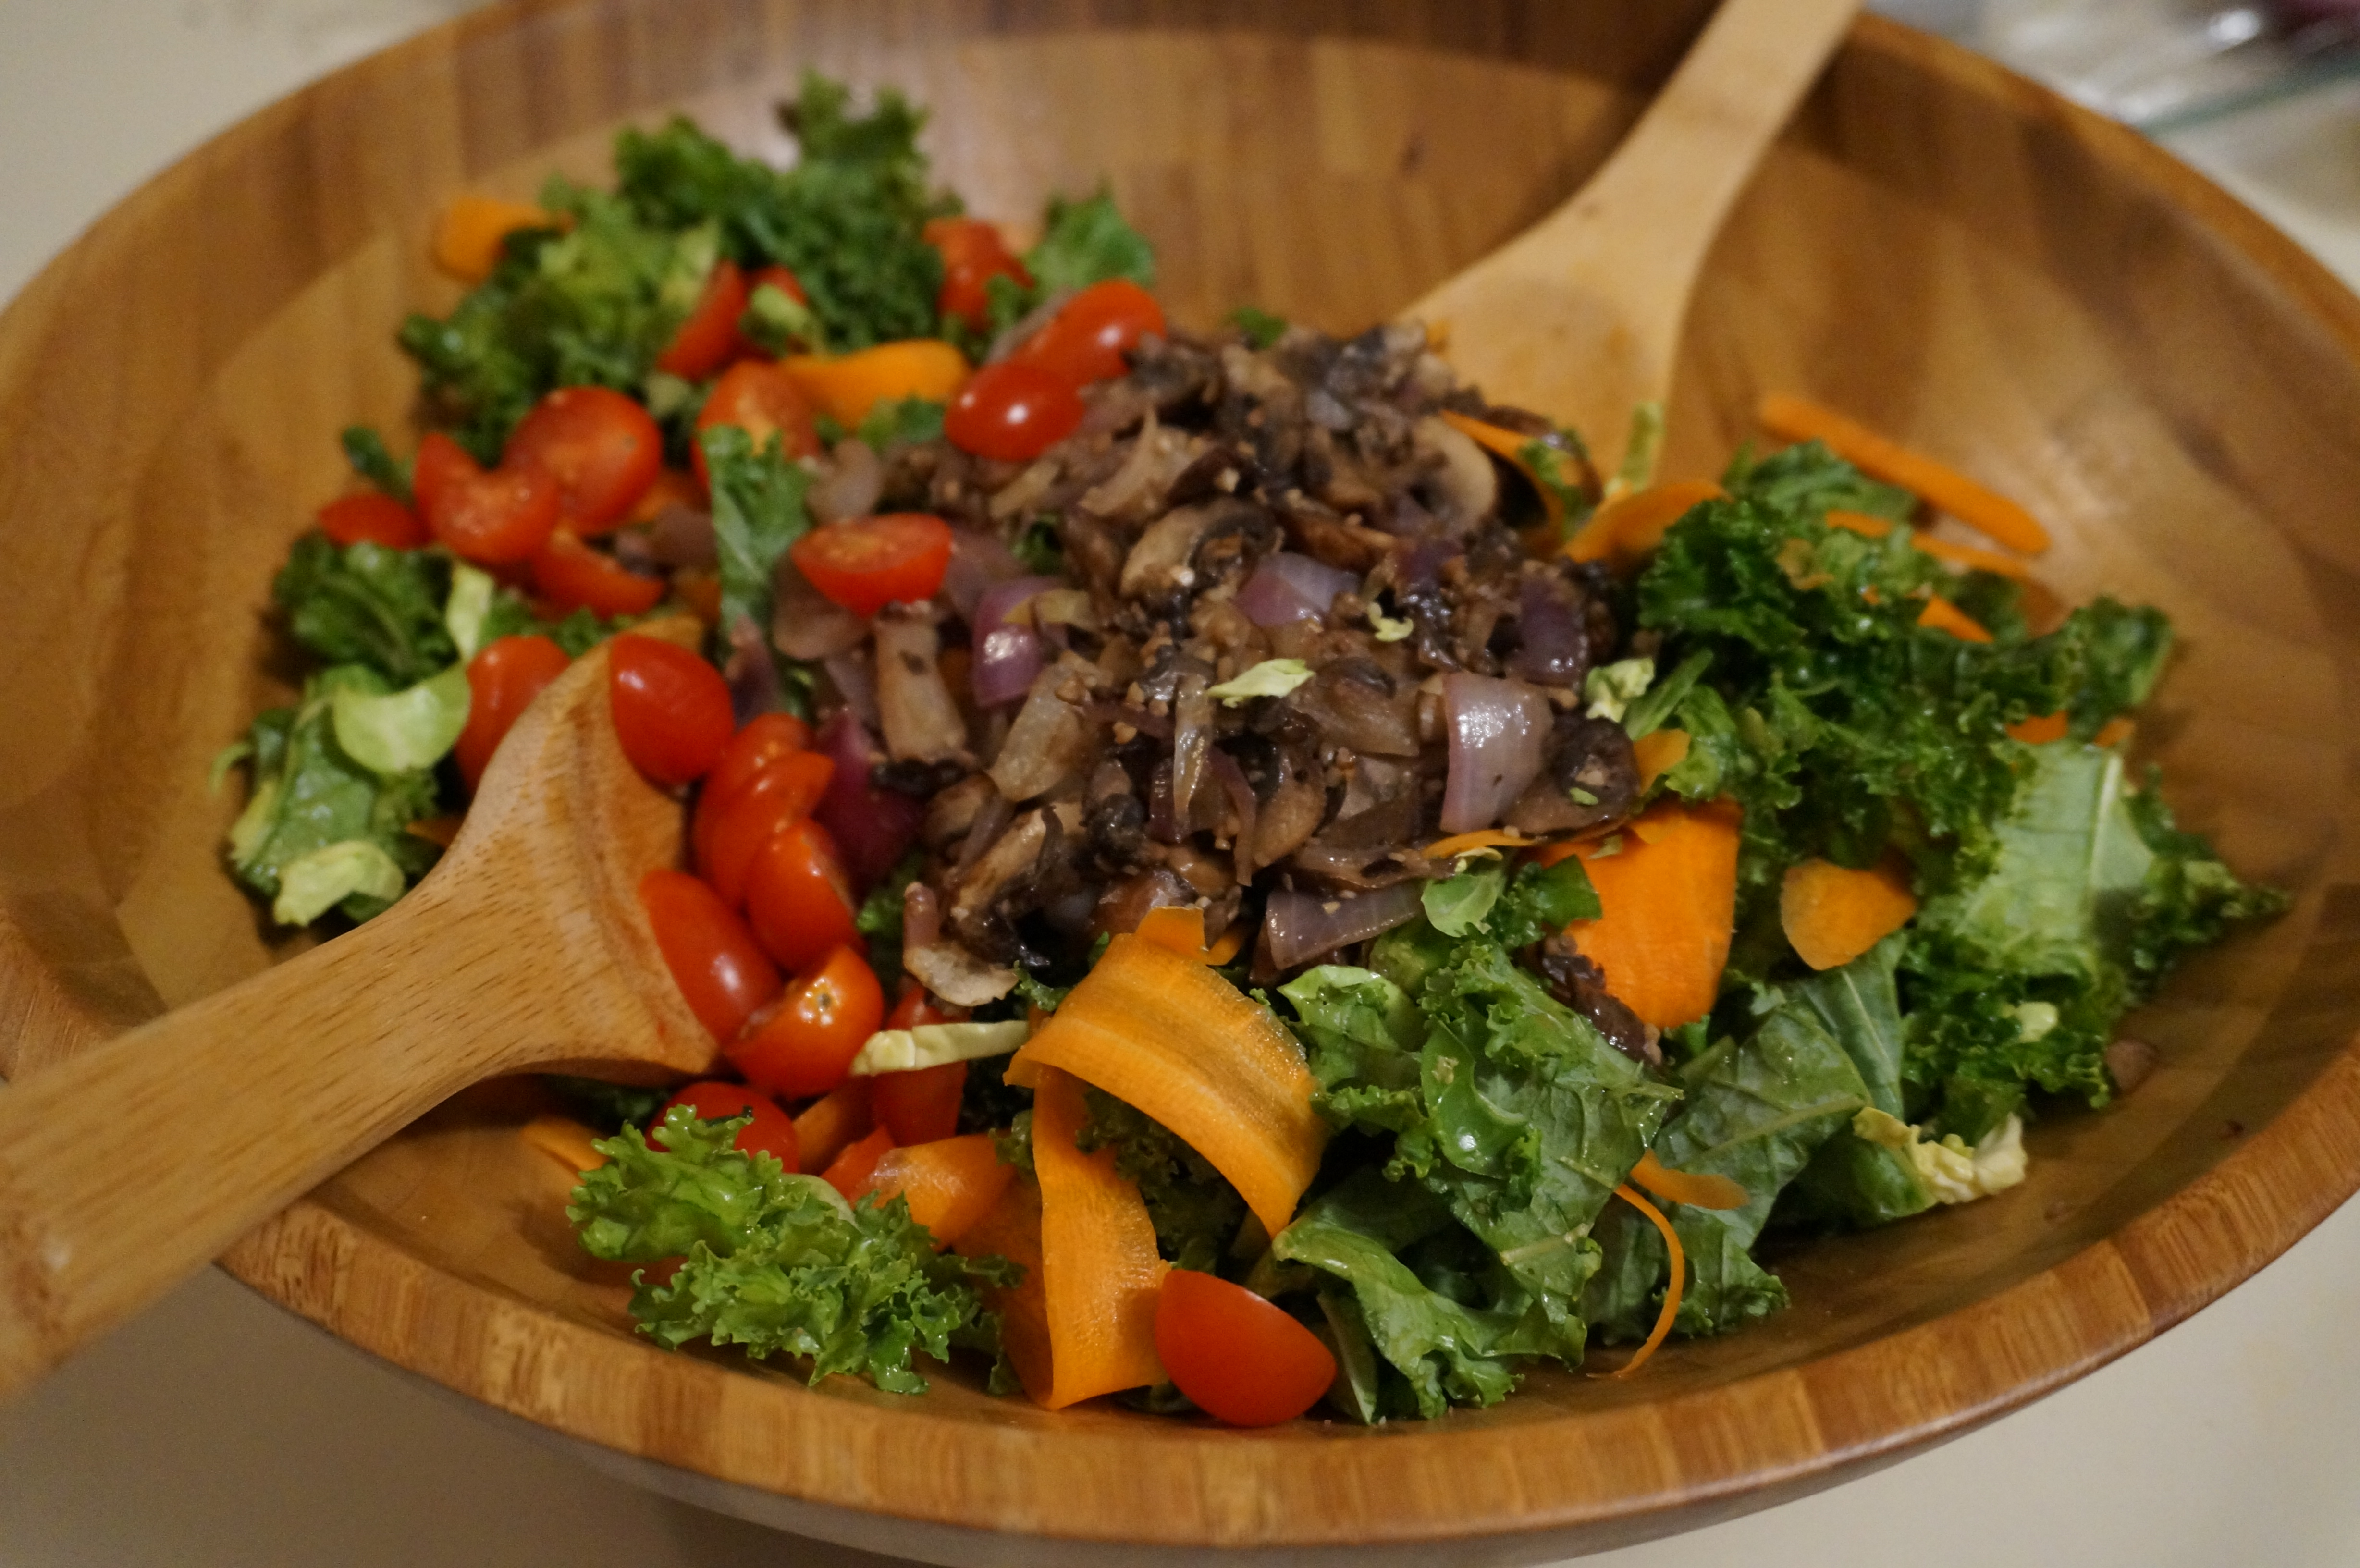
Served over quinoa with a nice big heap of my Rainbow Kale Salad on the side, and this meal is a definite winner- simple enough for a weeknight supper and elegant enough for date night!

Thanks, Ron and Julie, for sending down this delicious salmon all the way from Pittsburgh! 

DSC00738

Loch Duart Salmon w/ Honey-Soy Marinade
Recipe Type: Dinner
Cuisine: Fish, Asian, Seafood
Author: Claire McCormick of “Claire Tastes”
Prep time:
Cook time:
Total time:
Serves: 4
The best thing about salmon is how quickly it bakes- try this simple marinade or come up with your own to really spice up the flavor of this fresh fish!
Ingredients
  • 4 cut salmon filets, thickest part ~2″ thick
  • 1/2 cup soy sauce
  • 1/2 cup orange juice
  • 1 tbsp vegetable oil
  • 1 tbsp rice wine vinegar
  • 1 tbsp lime juice
  • 1 tbsp minced garlic
  • 1/8 tsp red pepper flakes
  • 1/2 tsp garlic powder
  • 1/8 tsp dry ginger
  • 2 tbsp honey
  • 1/4 cup green onions, chopped
  • 1 tbsp sesame seeds
  • fresh grated pepper
Instructions
  1. Cut salmon lengthwise into four equally-sized fillets.
  2. For marinade, combine all remaining ingredients and whisk thoroughly in a tupperware or shallow baking dish.
  3. Place salmon fillets, skin side up, in marinade and refrigerate at least 3 hours.
  4. When ready to bake, preheat oven to 450 degrees.
  5. Remove salmon from marinade and place skin side down on an oiled baking sheet.
  6. Bake at 450 degrees for 15 minutes, or until salmon flakes easily with a fork.
  7. Serve over a mound of cooked quinoa, with a salad on the side! (see my last post on “Rainbow Kale Salad” for inspiration :P)

DSC00705
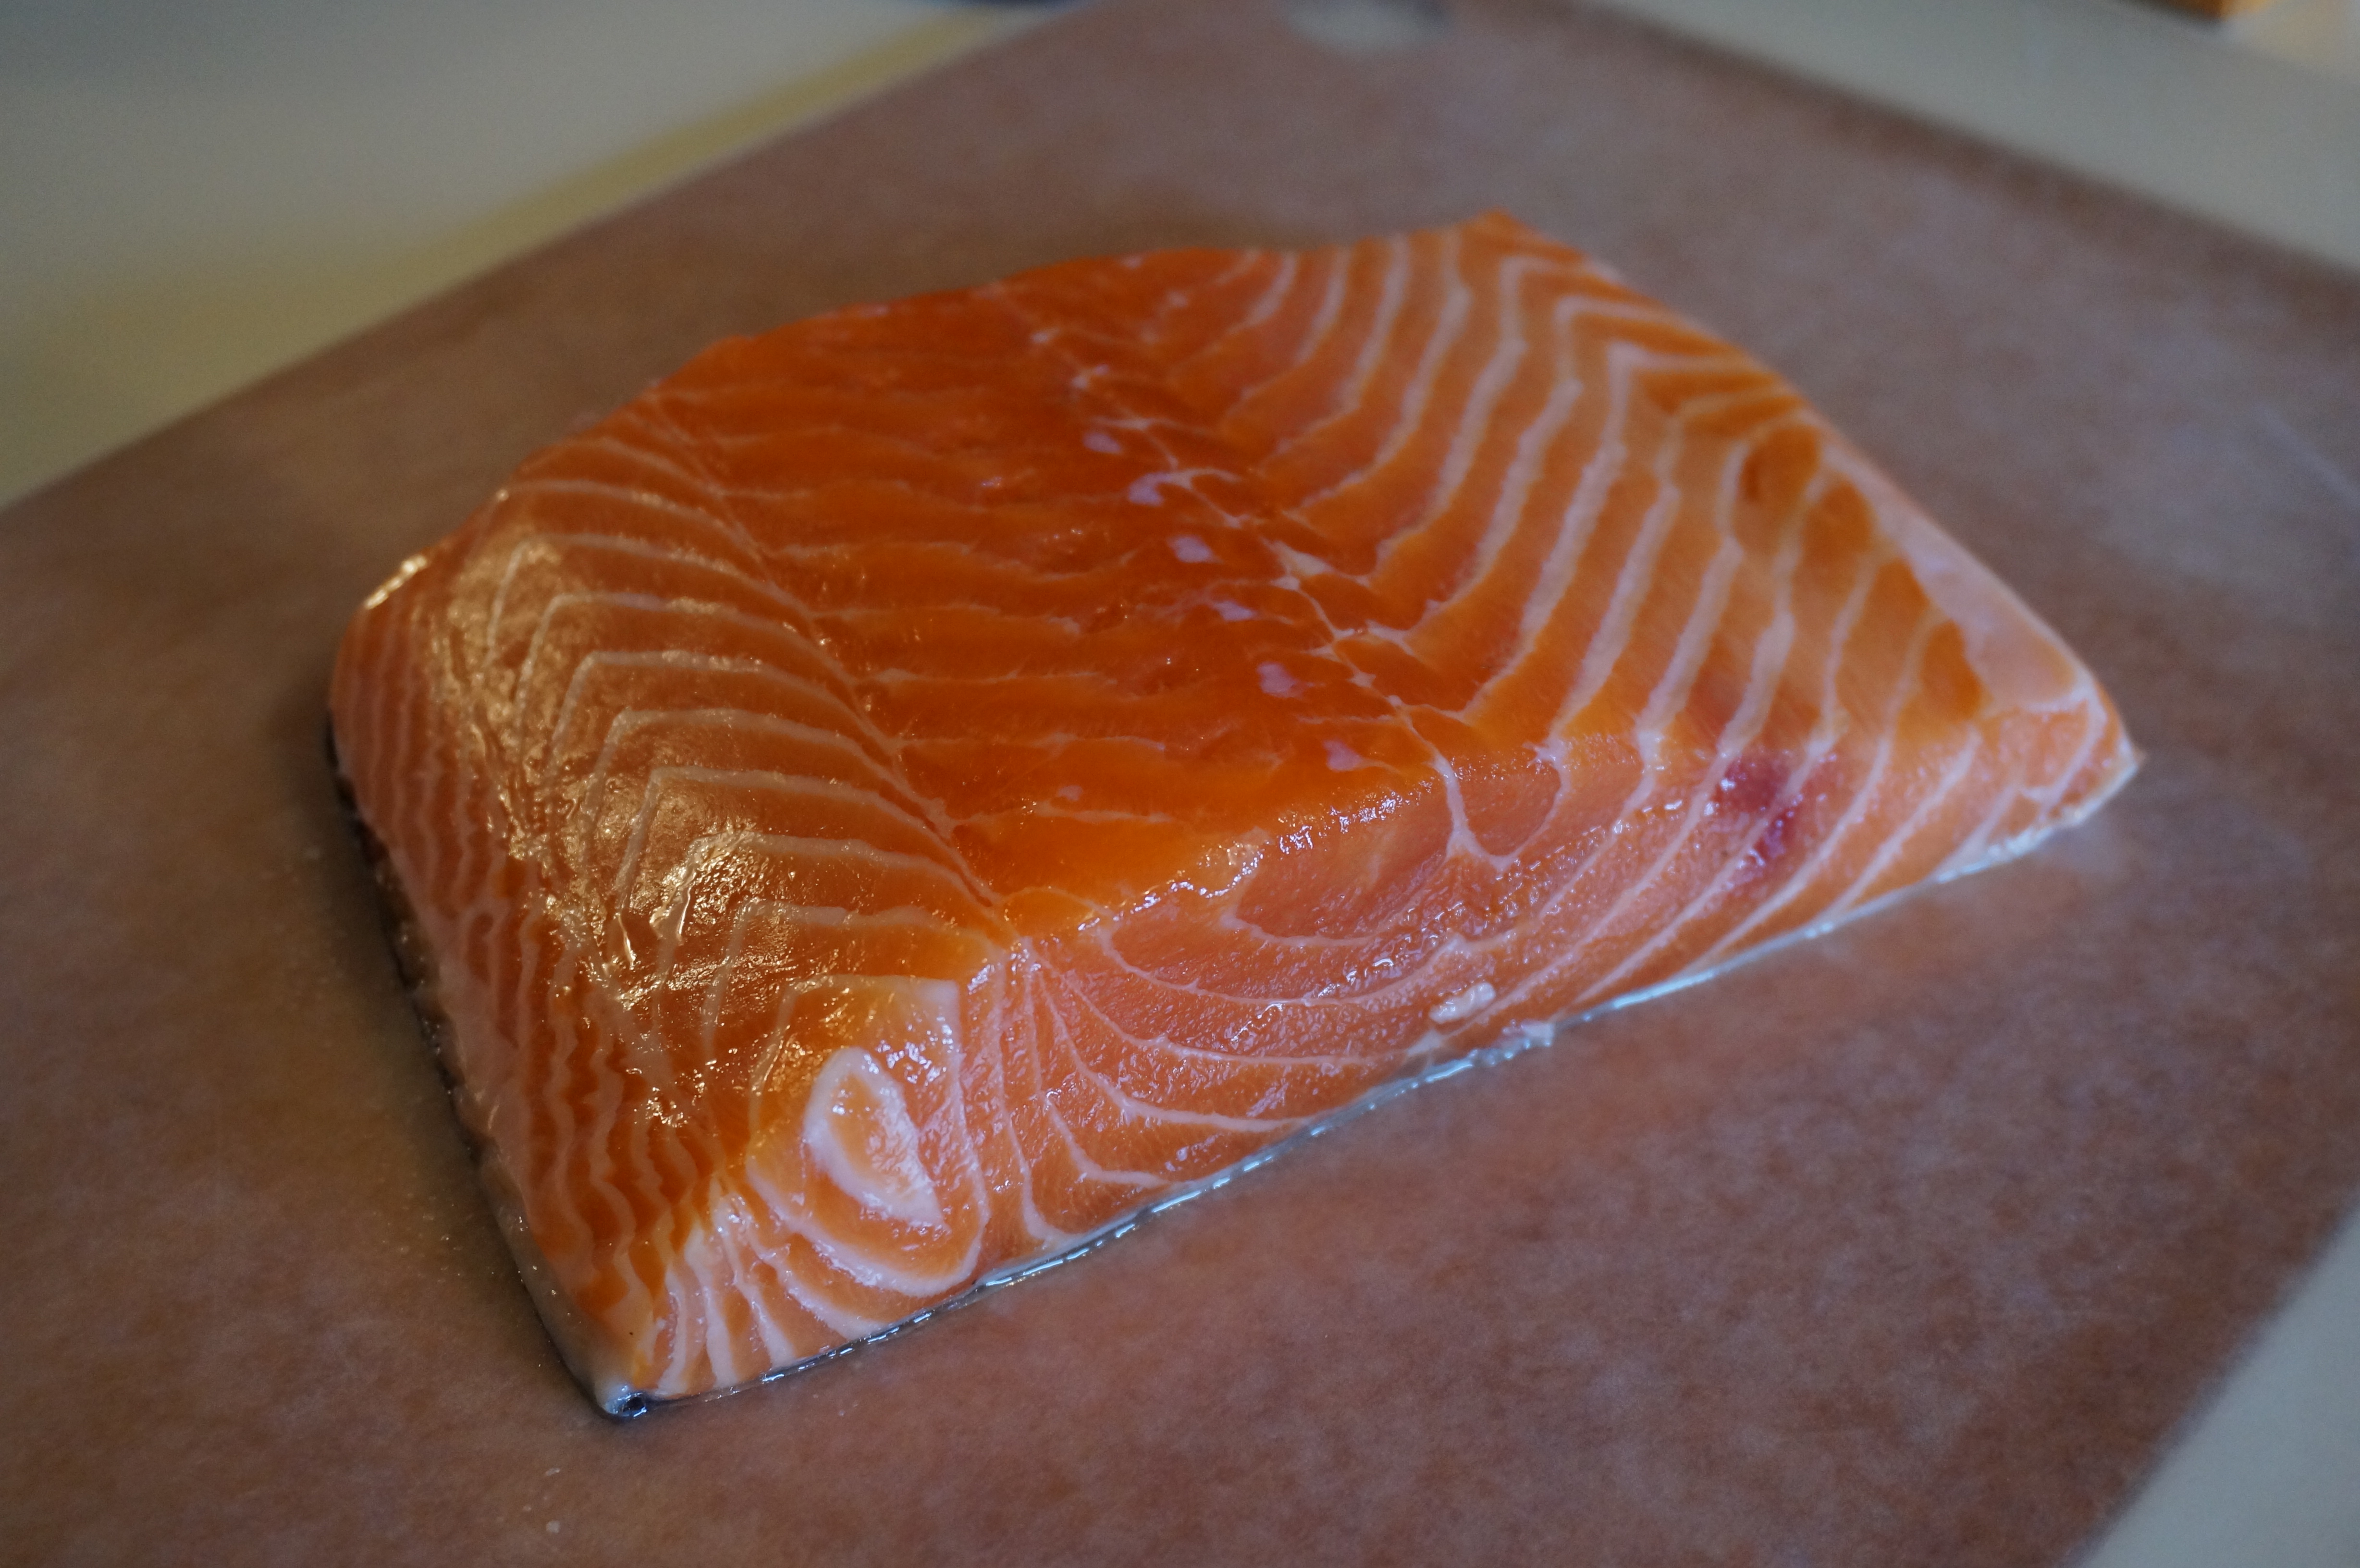
Start with a nice big hunk of fresh salmon. Isn’t she a beauty?

DSC00706
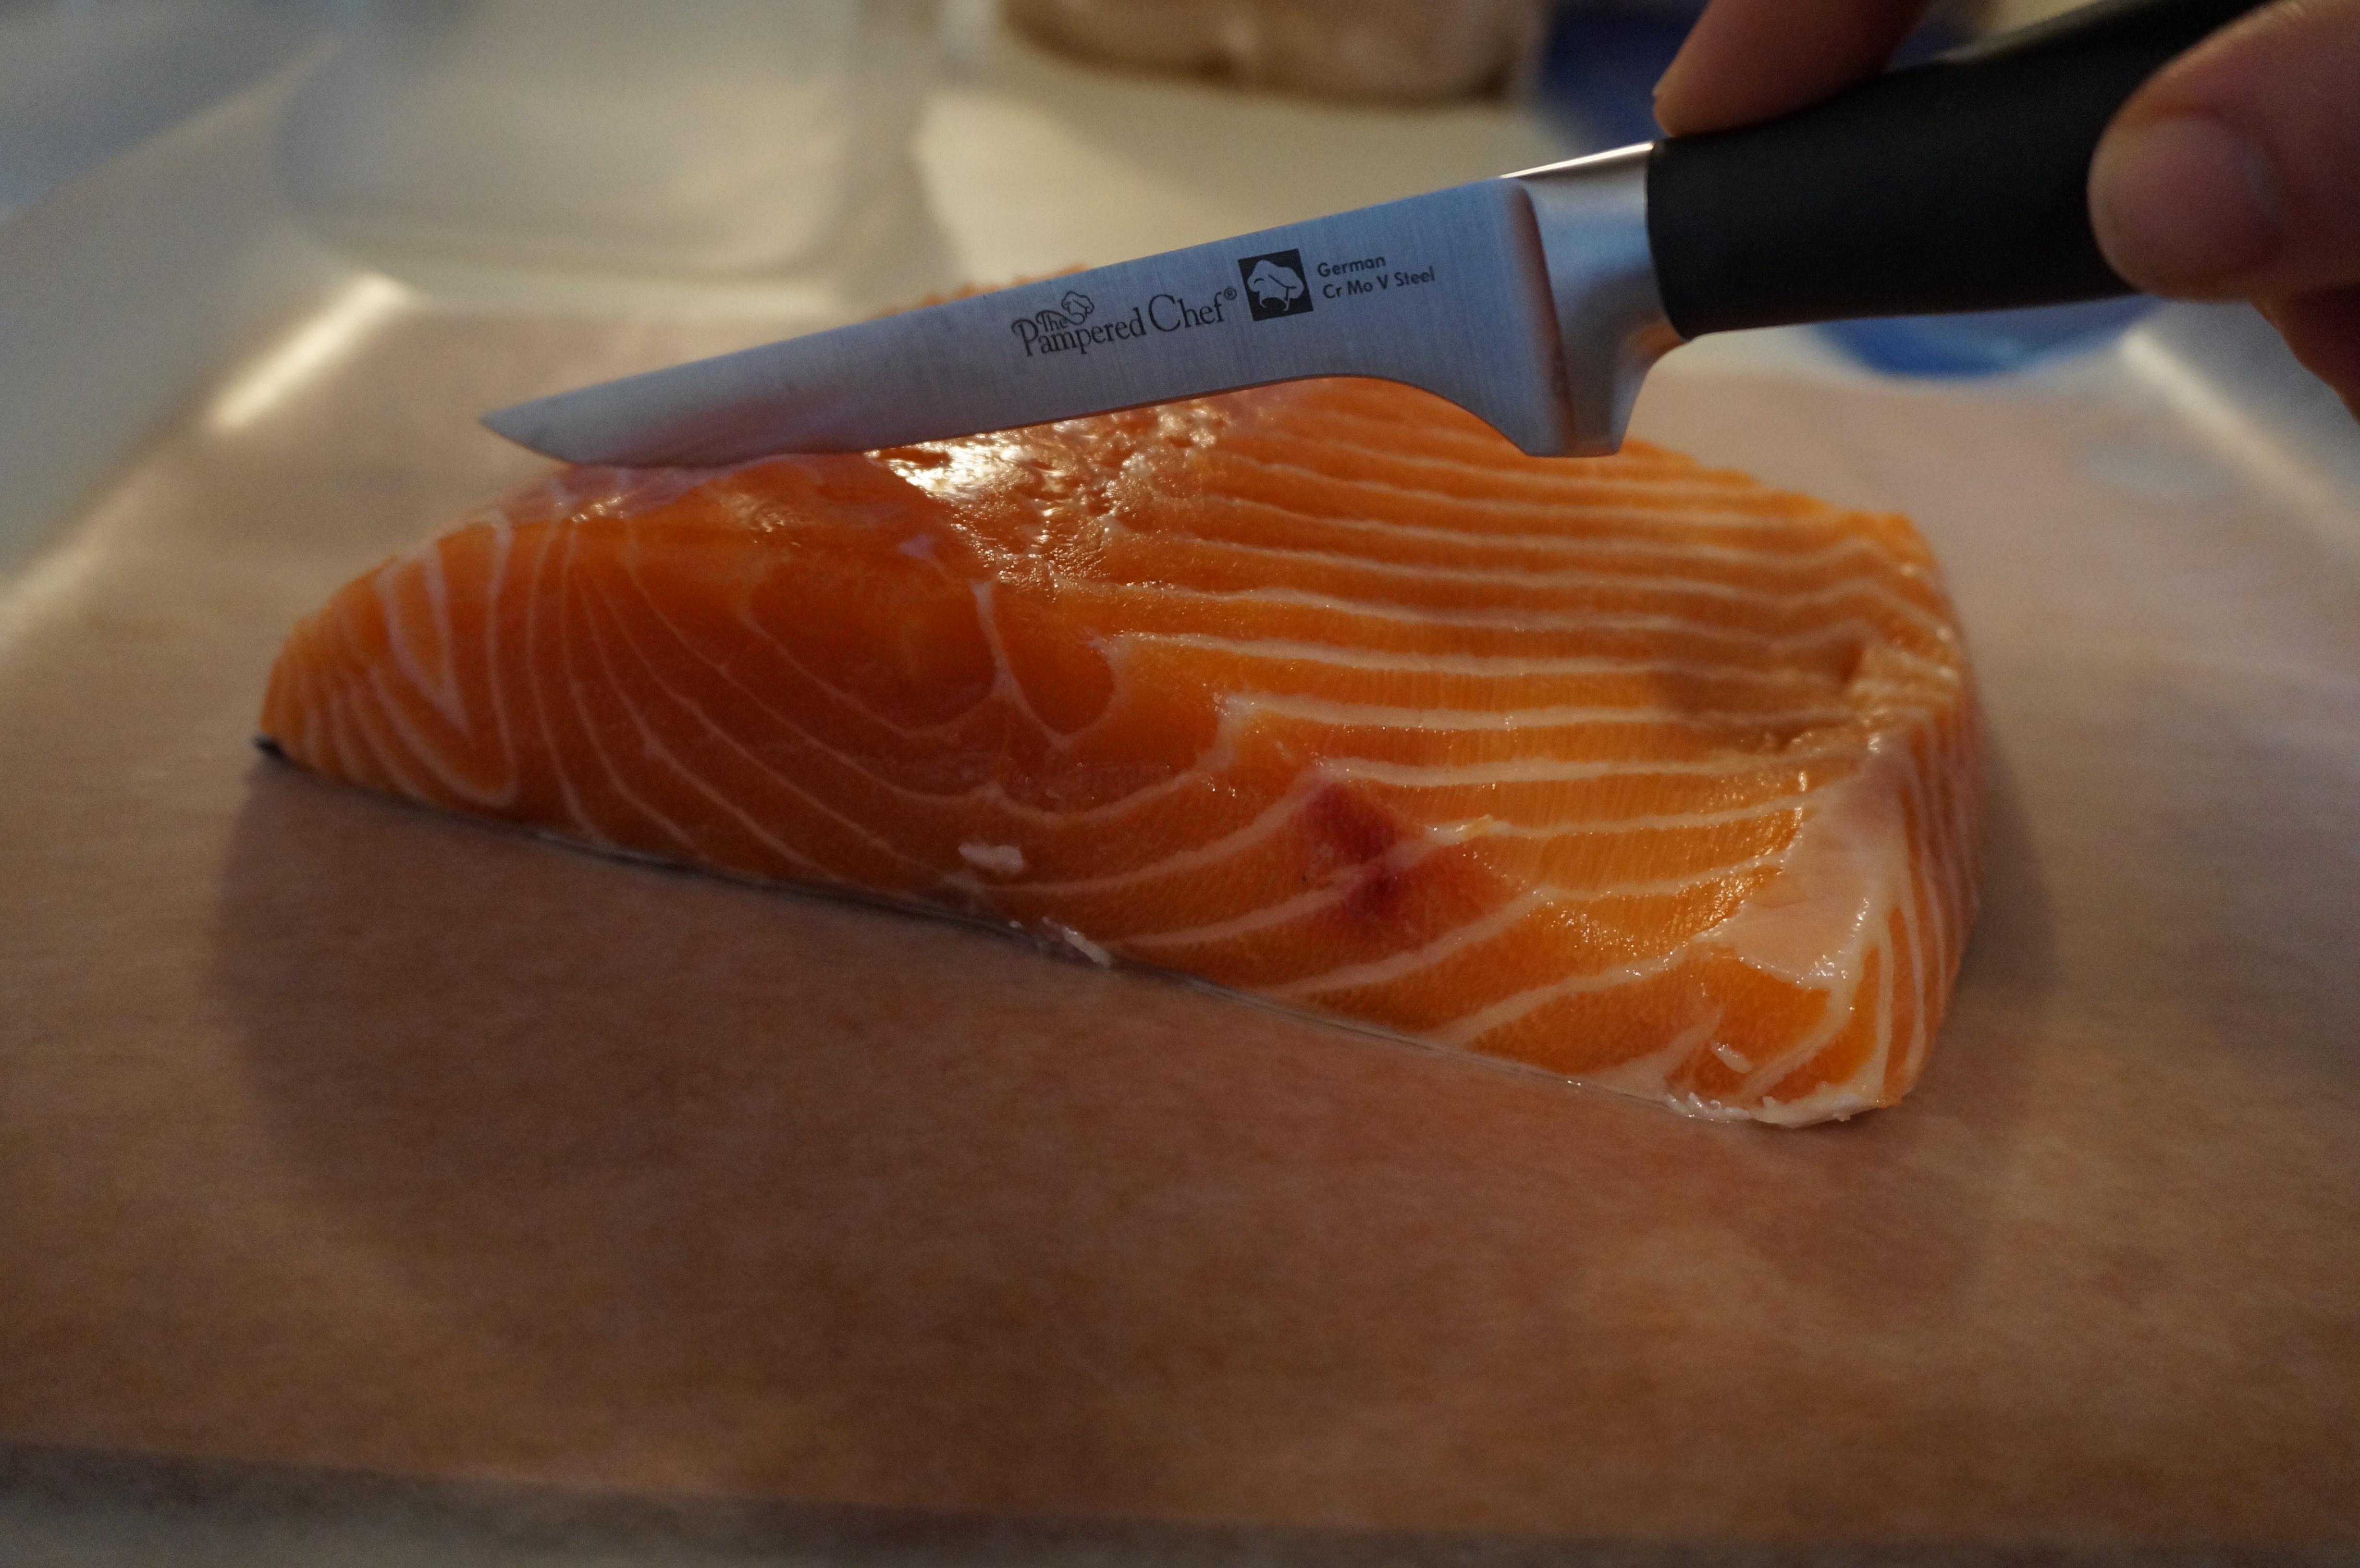
Slice into four even fillets.

DSC00710
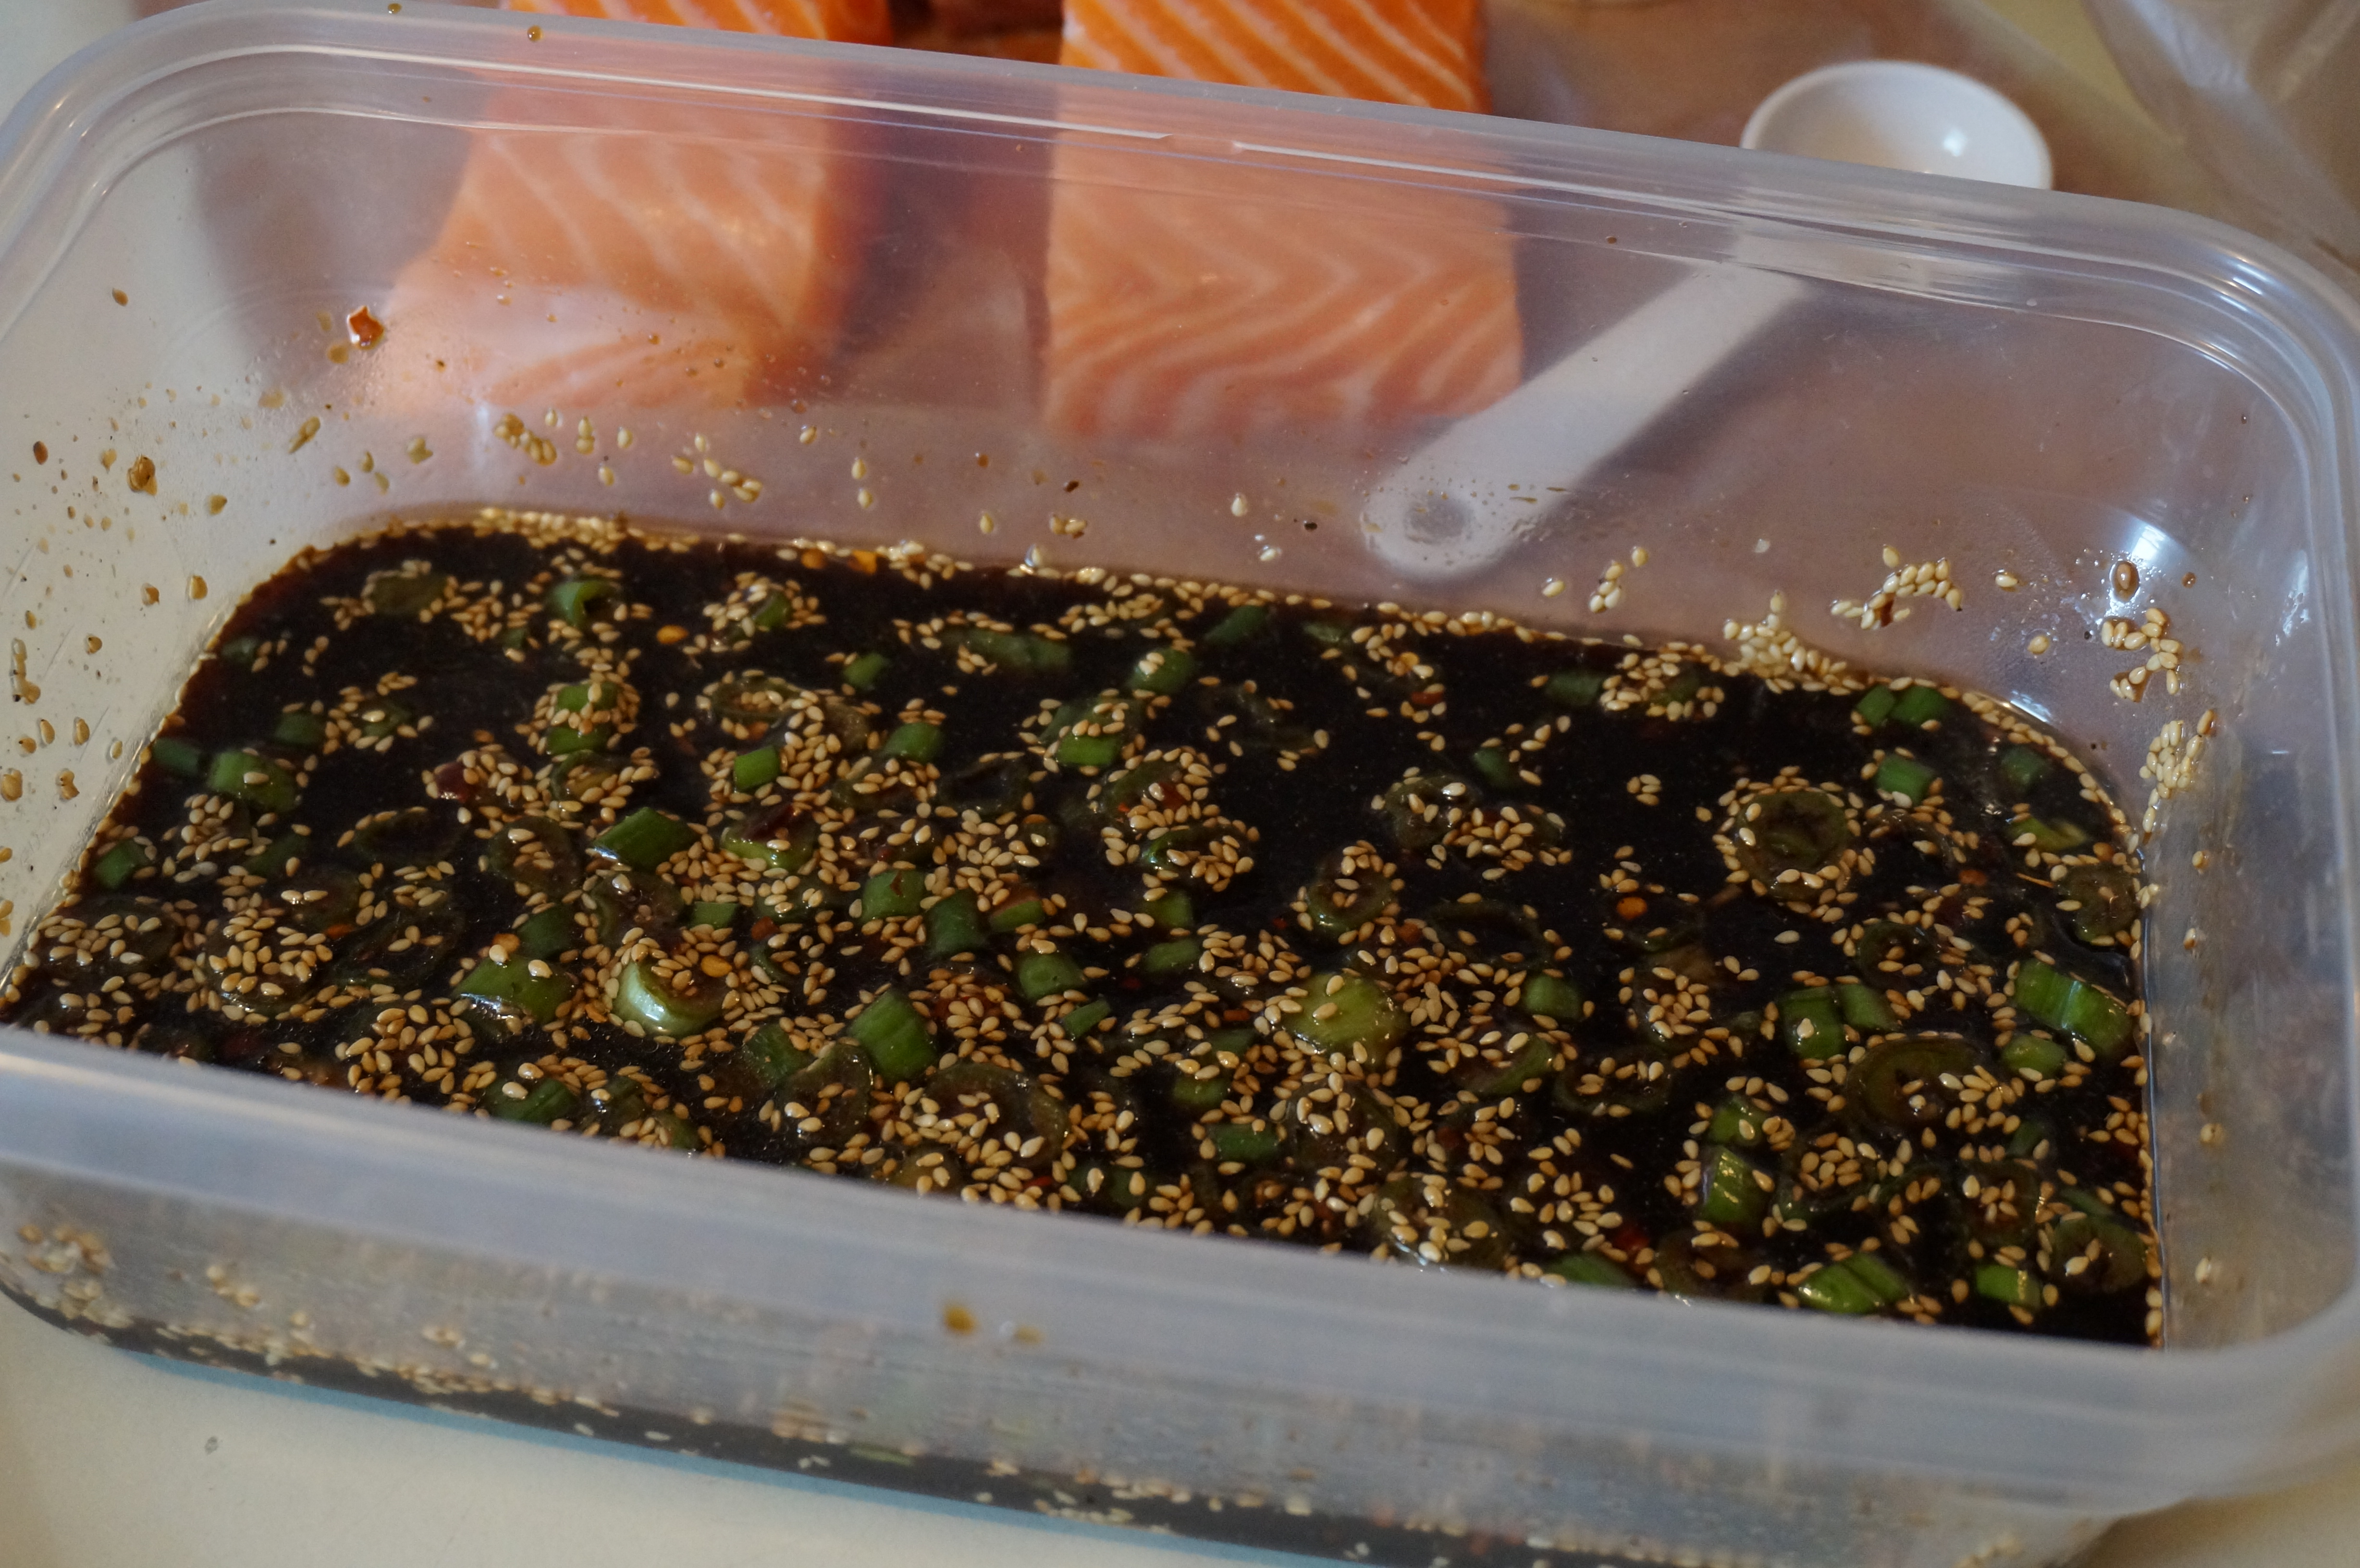
Make up your marinade… easy schmeazy.

DSC00711
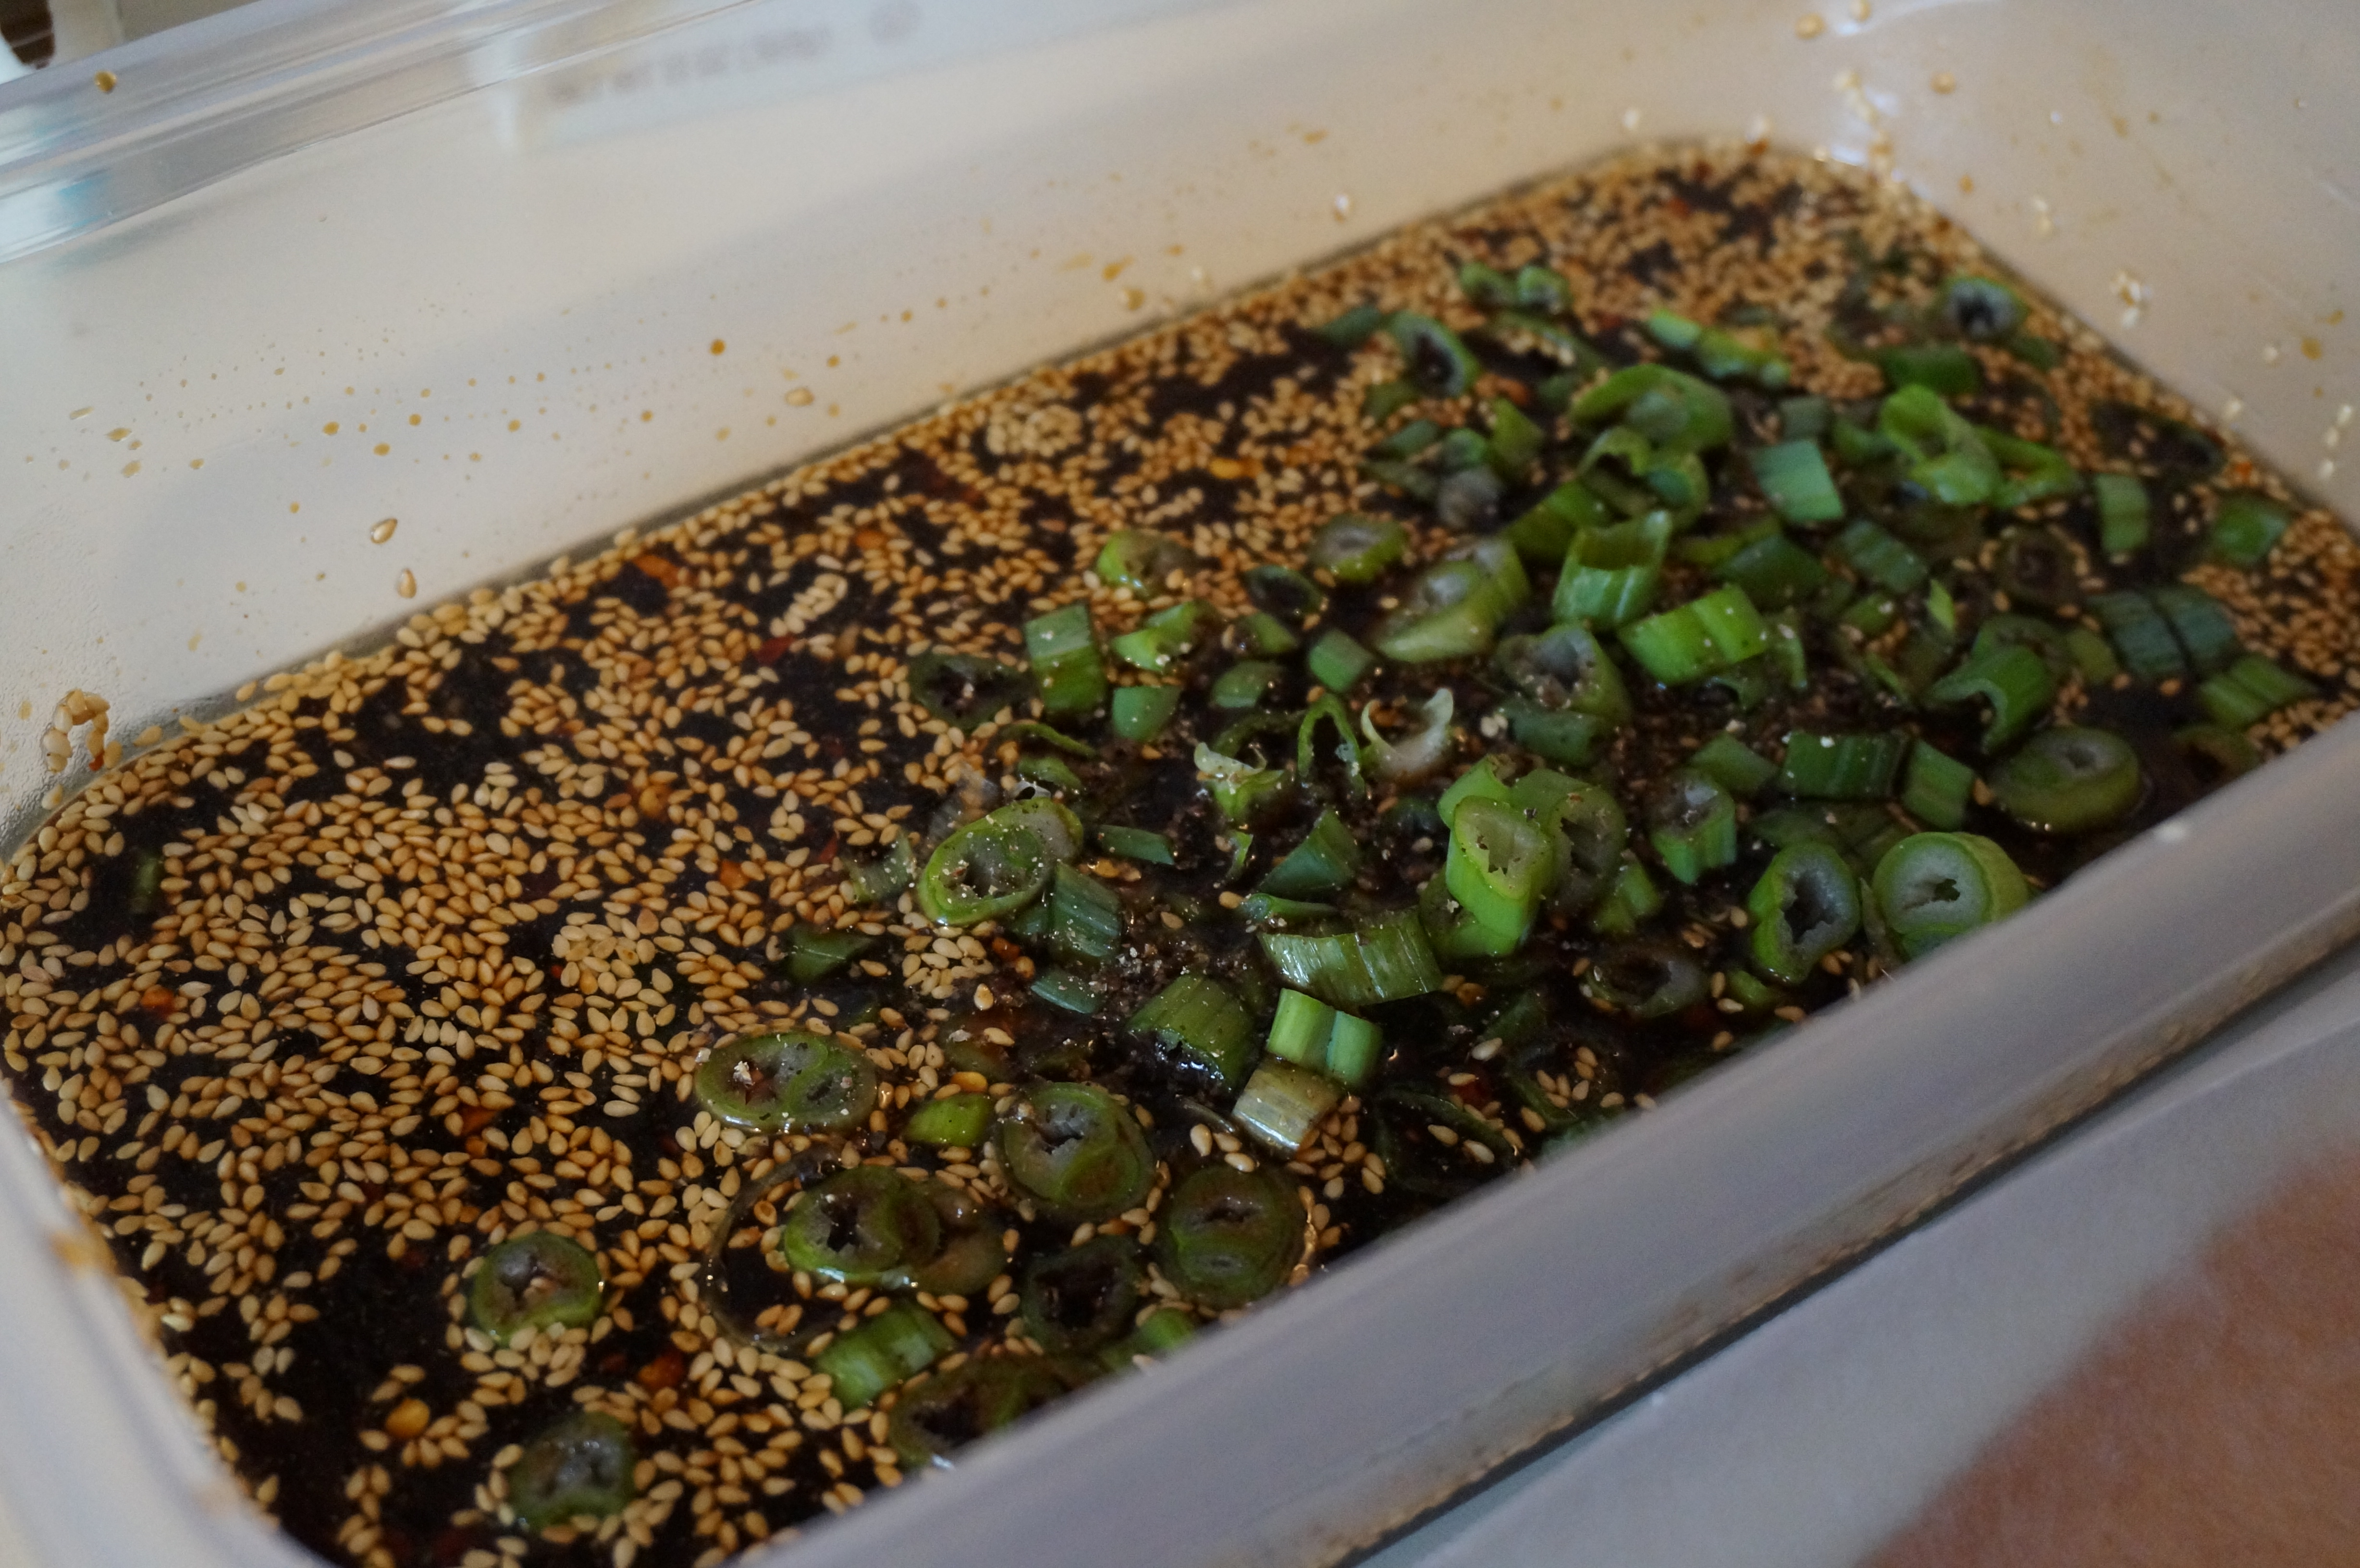
Whisk up the marinade ingredients!

DSC00712
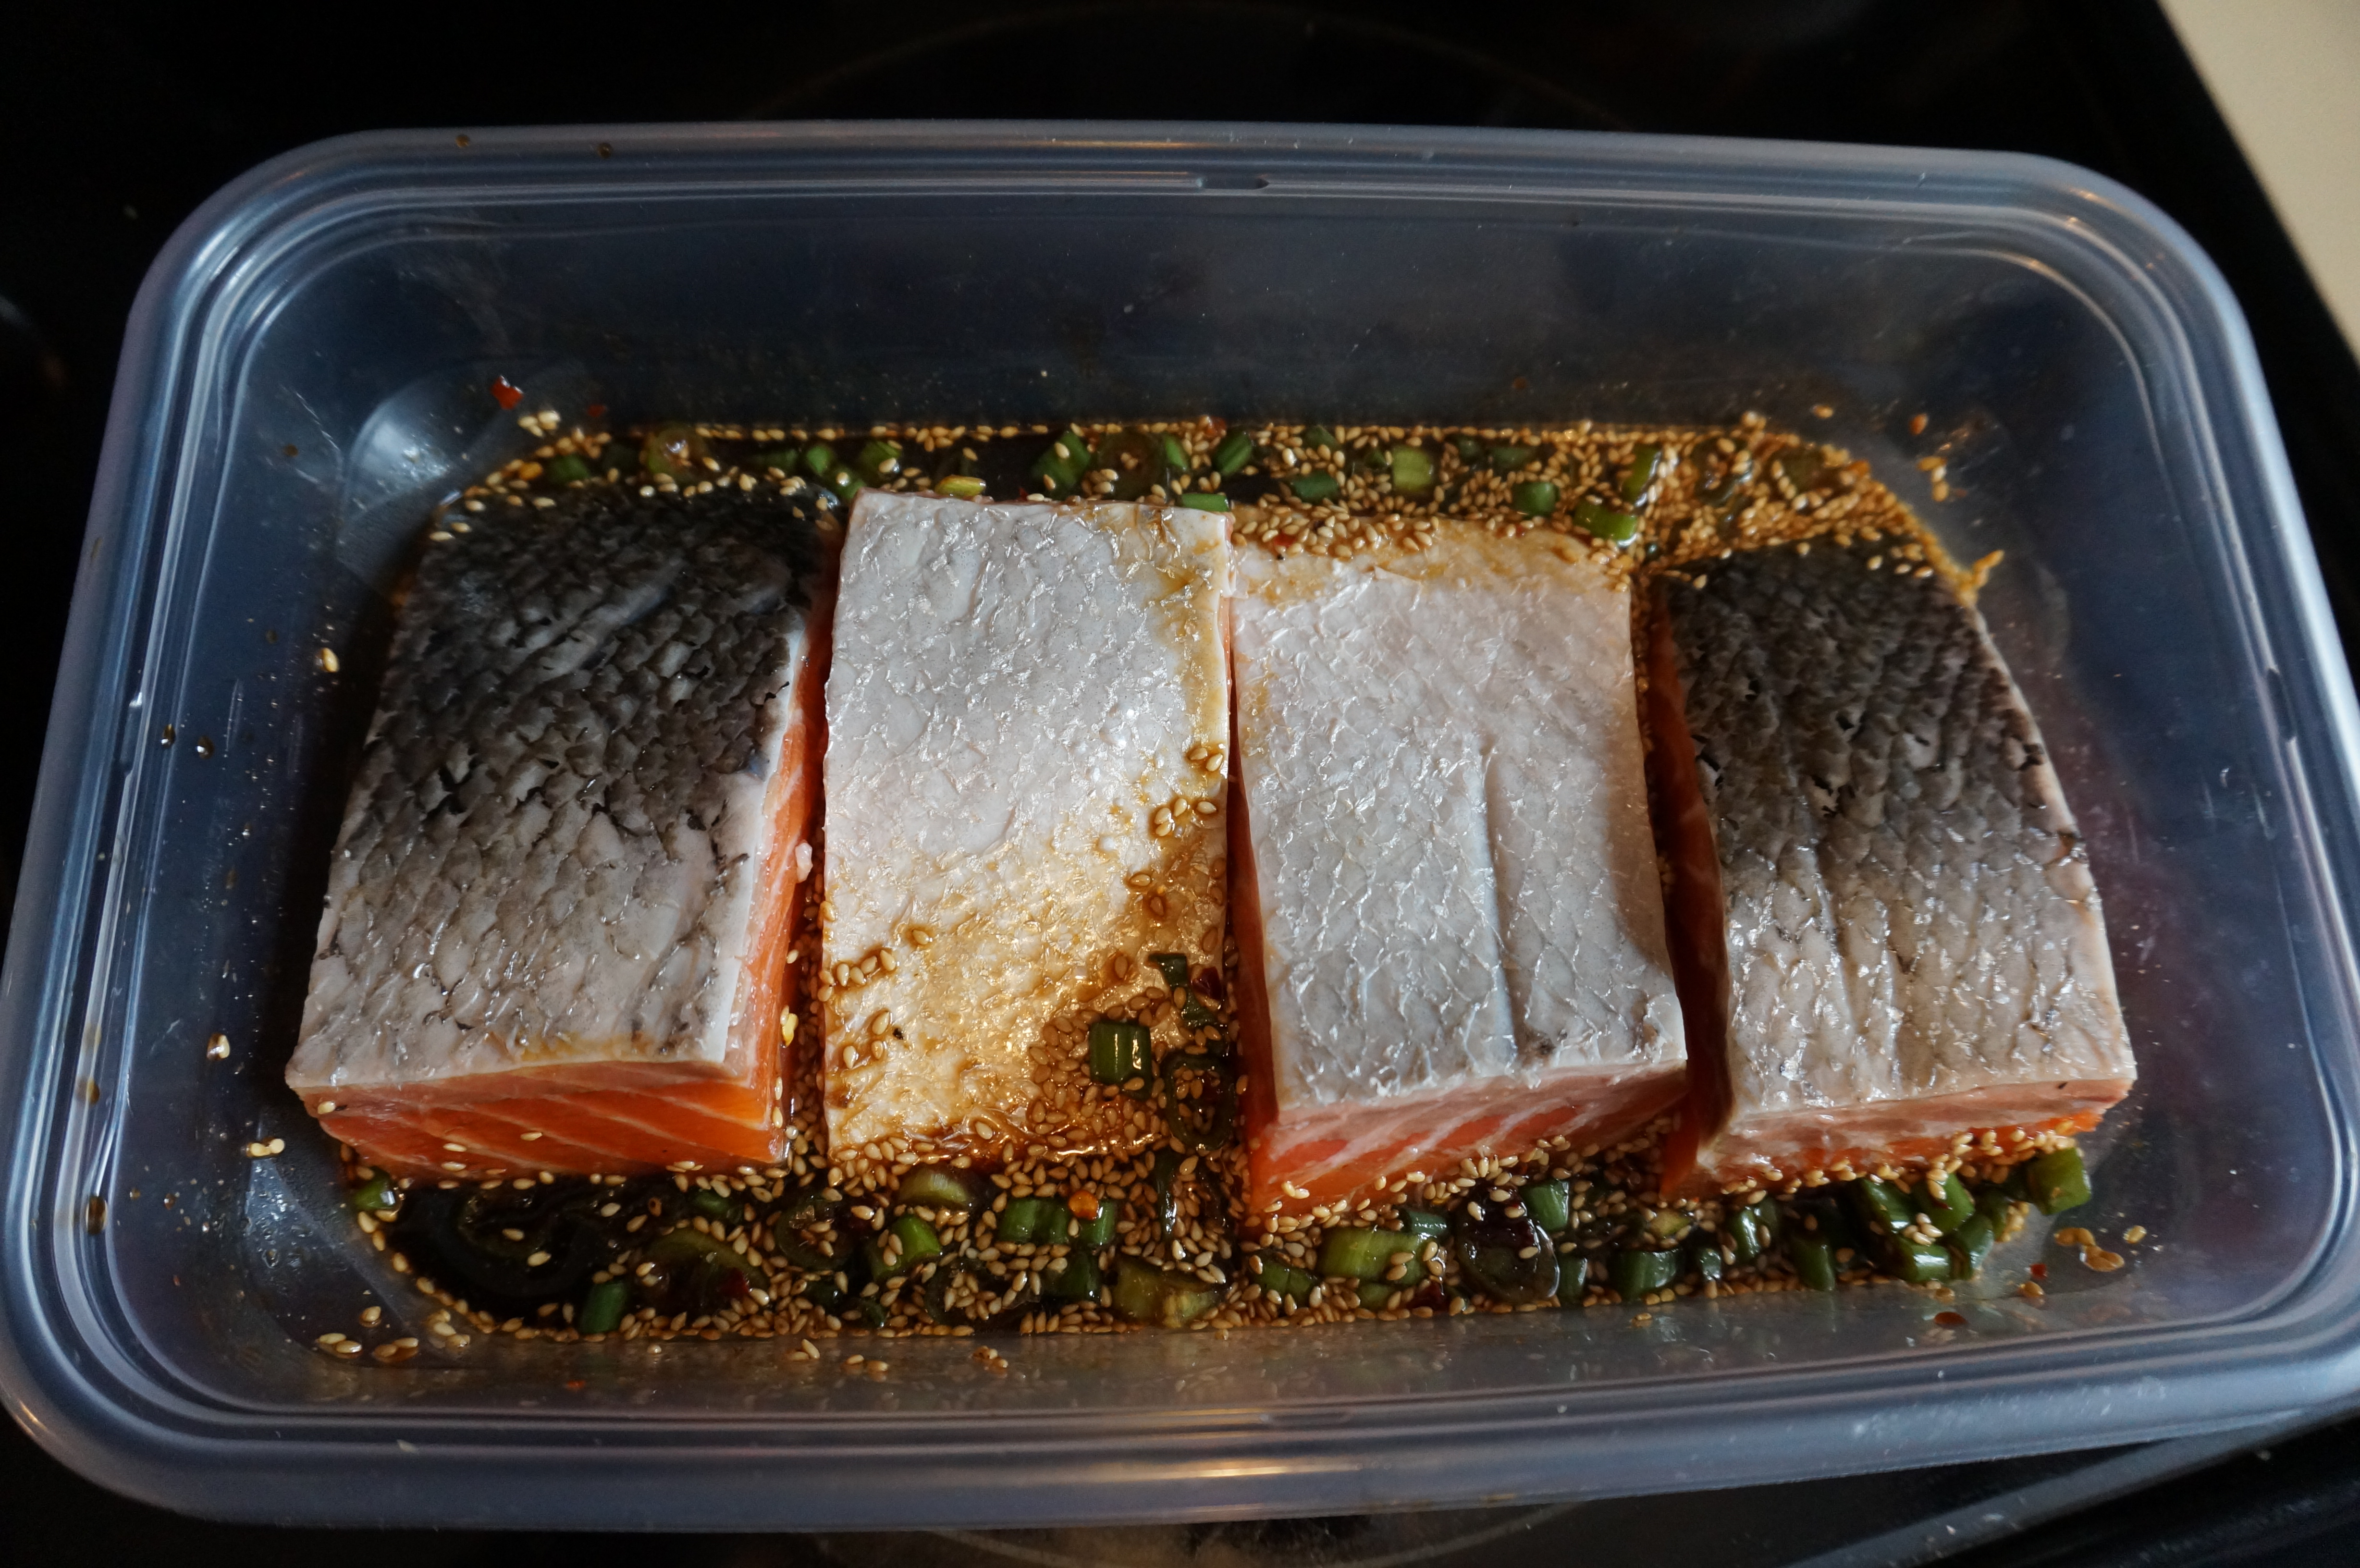
Place salmon, skin side up, in the marinade. Cover and marinate in fridge for at least 3 hours. Couldn’t be easier- just fix it and forget it!

DSC00717
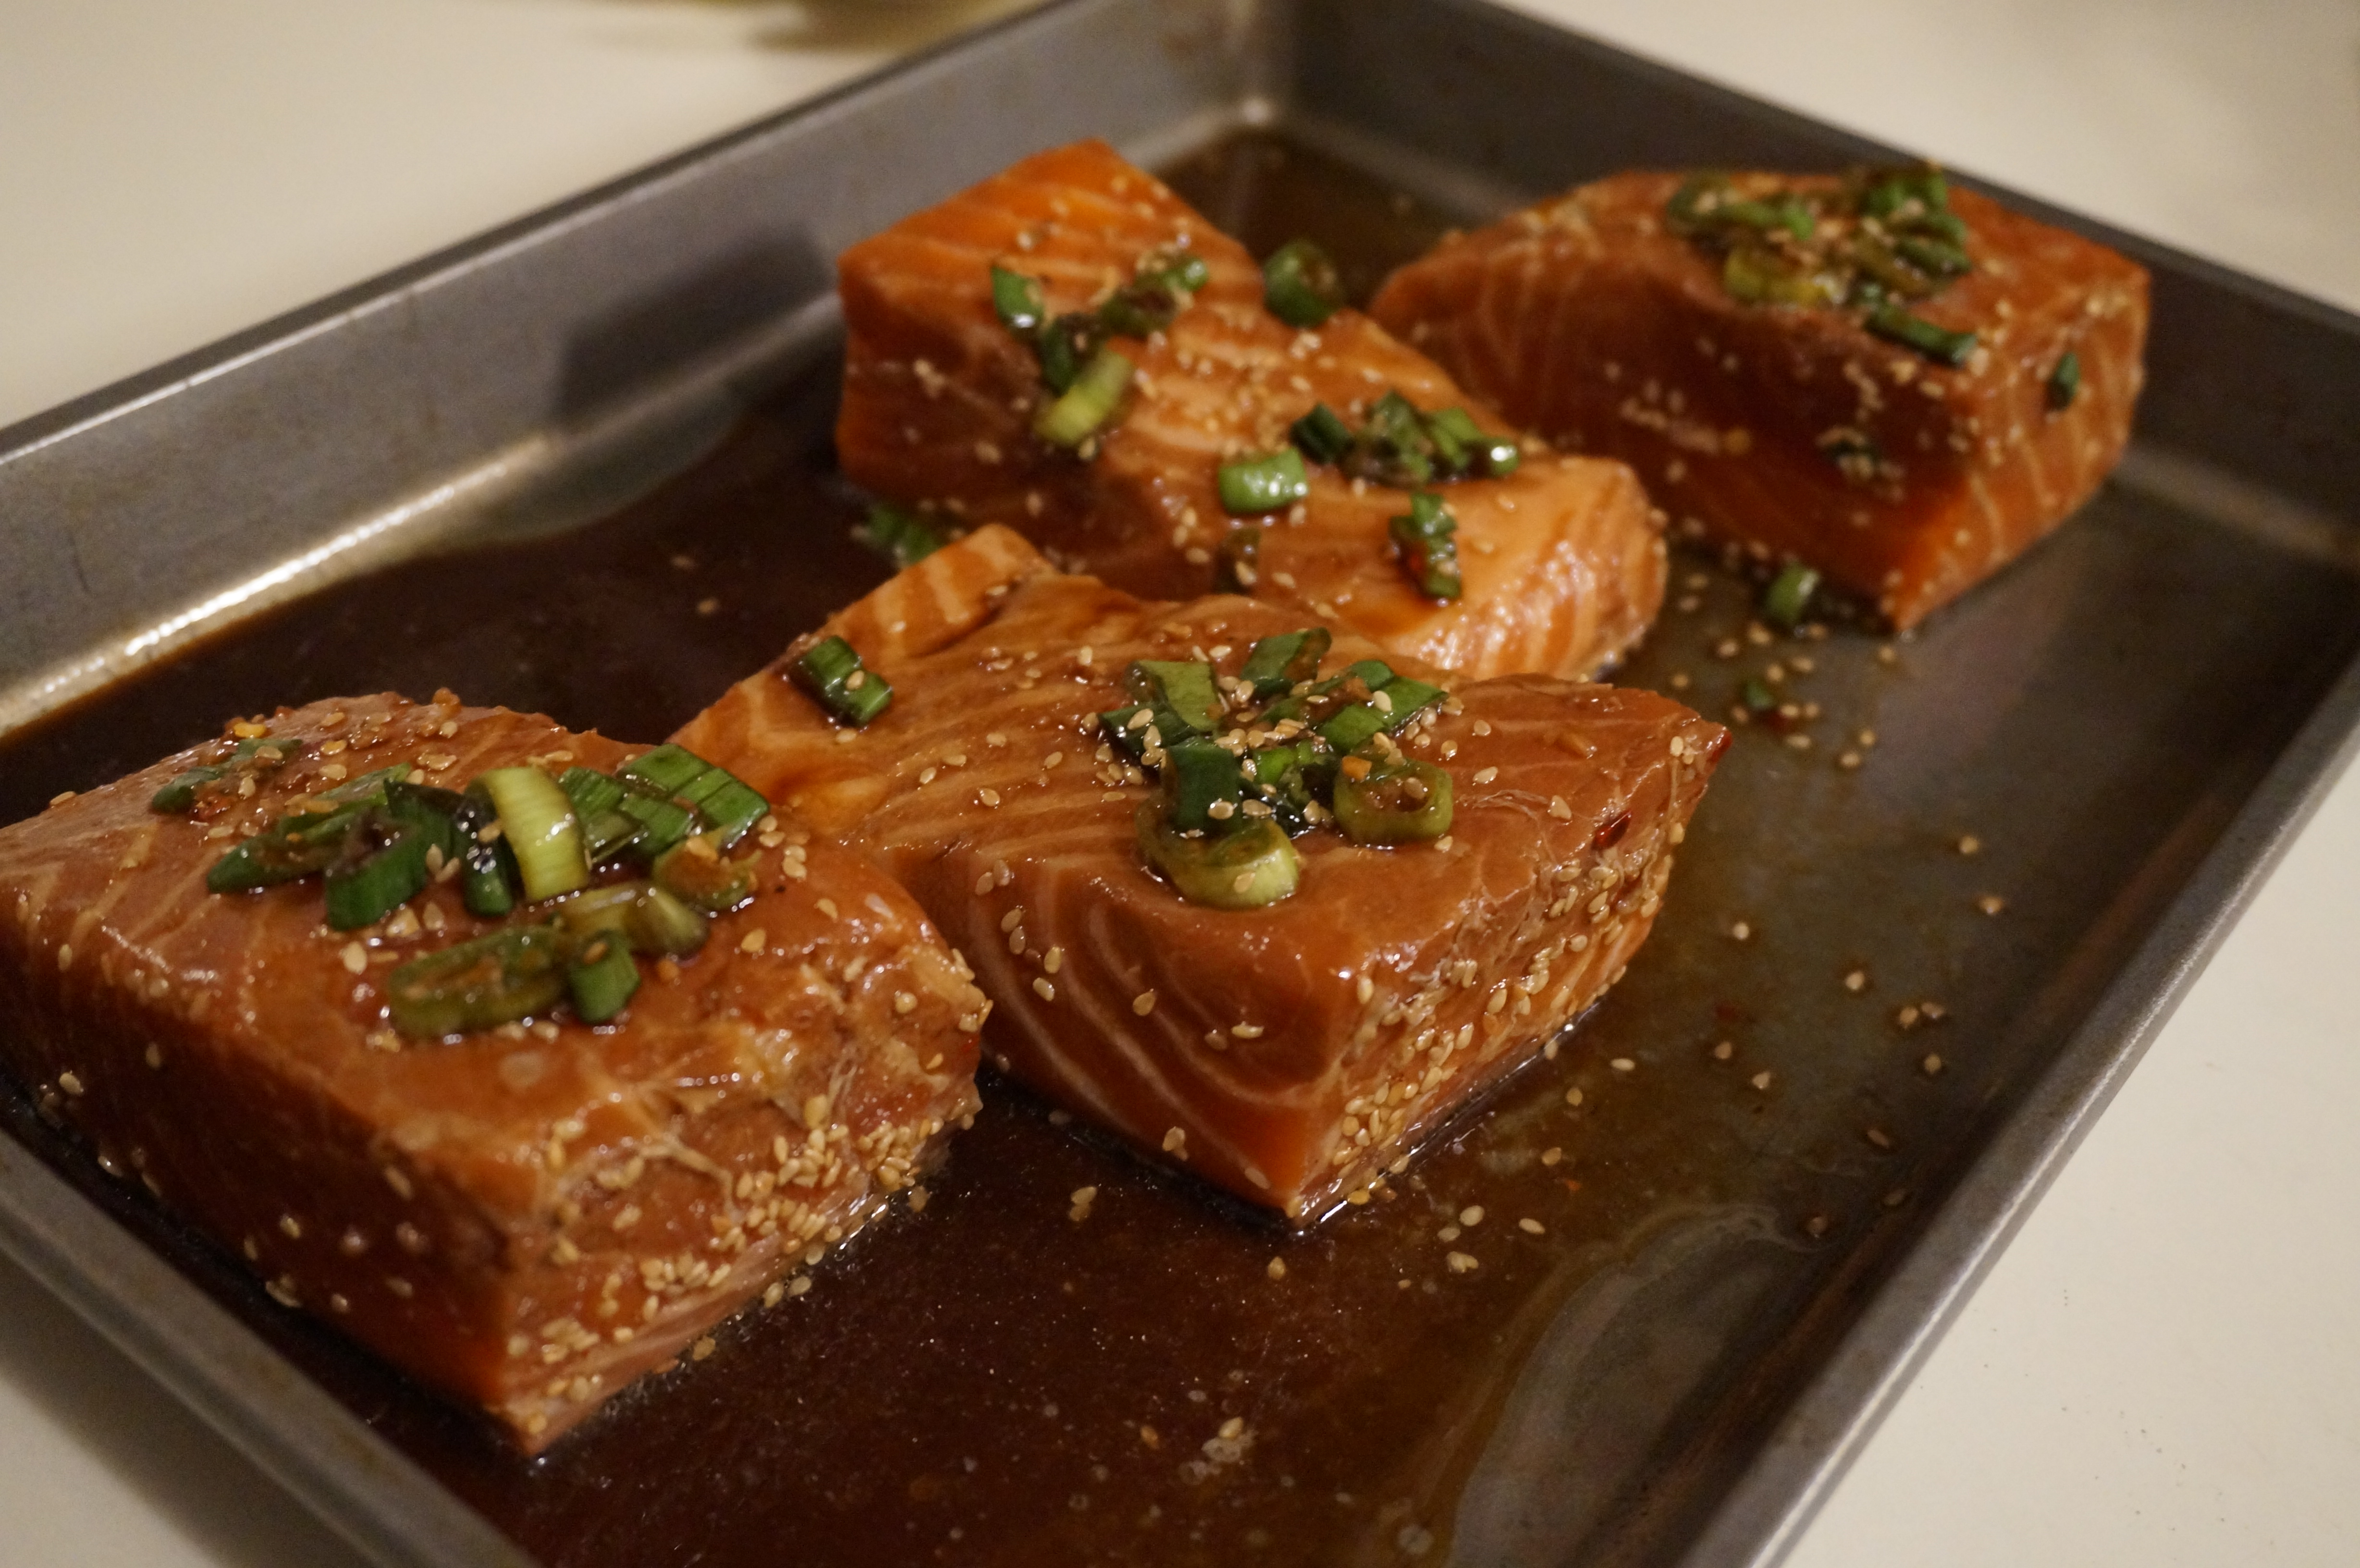
When ready to bake, preheat oven to 450 degrees and arrange fish on a lightly-oiled baking sheet.

DSC00723
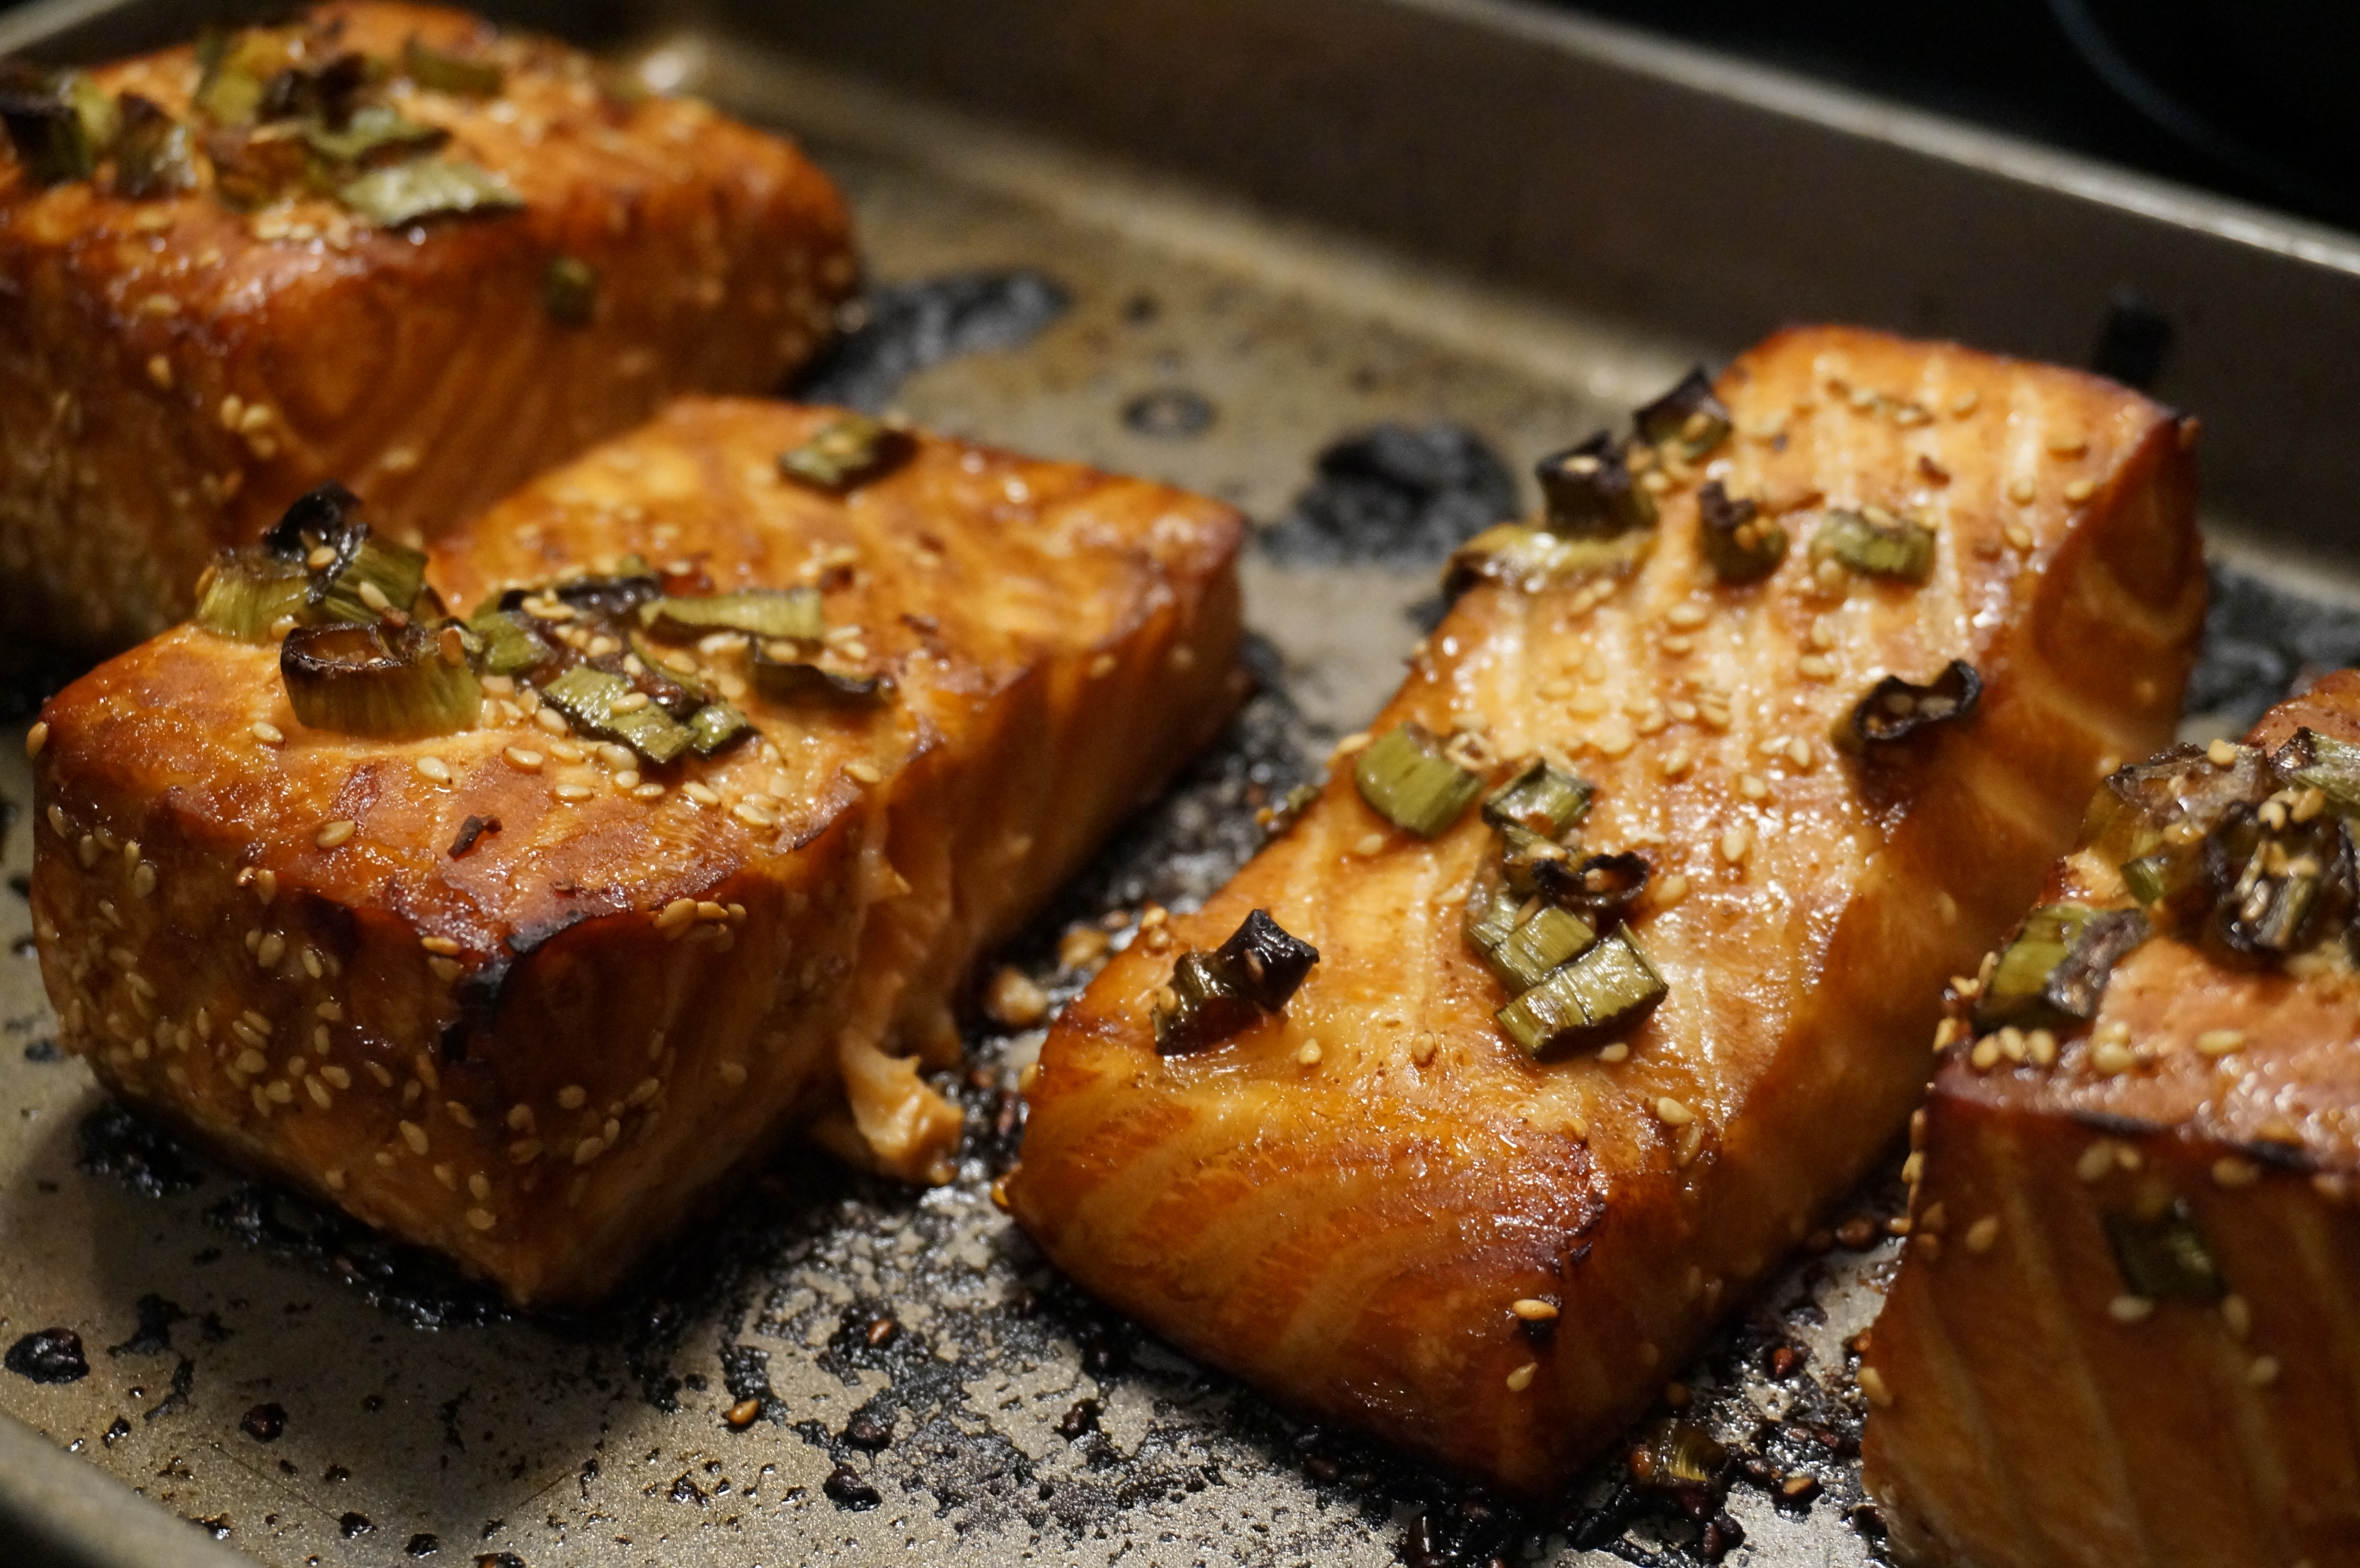
Bake at 450 degrees for 15 minutes, or until fish flakes easily with a fork.

DSC00725

DSC00738

DSC00744

DSC00746


Rainbow Kale Salad w/ Lemon Hummus Vinaigrette (Adapted from “Sea Salt”)

The delicious recipe was inspired by a similar one that my sister, Mary, made for me while I was visiting her in San Clemente, CA. She’s the one who introduced me to hummus dressing (and juicing)! Consider my mind blown. World changer. You can see her original post on her blog, Sea Salt.

DSC00696

Rainbow Kale Salad w/ Lemon Hummus Vinaigrette
Recipe Type: Salad
Cuisine: Vegetarian, Healthy
Author: Claire McCormick of “Claire Tastes”
Prep time:
Cook time:
Total time:
Serves: 6
Toss a few on-hand veggies into a big bowl and drizzle with my easy, homemade lemon-hummus vinaigrette! Serve topped with a chickpea burger, feta cheese, and a few sweet potato fries on the side.
Ingredients
  • 5 cups chopped kale
  • 2 whole carrots, shaved into curly strands
  • 1/4 cup lemon juice
  • 3 tsp olive oil, separated (by teaspoon)
  • 2 cups shaved brussels sprouts
  • 1 cup grape tomatoes, halved
  • 1/2 red onion, chopped
  • 2 tsp minced garlic
  • 5 small whole baby bella mushrooms, sliced thinly
  • 2 stalks celery, chopped
  • 2 cups broccoli florets
  • 2 cups cauliflower florets
  • 1 tsp garlic powder
  • 1/8 tsp red pepper flakes
  • salt and pepper, to taste
  • For the hummus dressing:
  • 3 tbsp hummus
  • 1/4 cup red wine vinegar
  • 2 tbsp lemon juice
  • salt and pepper, to taste
  • crumbled feta cheese, for topping
  • chopped almonds and figs, for topping
Instructions
  1. In a large bowl, combine kale, carrots, shaved brussels sprouts, and tomatoes.
  2. Add lemon juice and 1 tsp oil and massage with hands until kale is slightly wilted.
  3. In a medium saute pan, heat 1 tsp oil on medium-high. Add red onion, minced garlic, and mushrooms. Cook until soft, about 4 minutes. Remove from pan and add to kale mixture.
  4. In same pan, heat last 1 tsp of oil on medium. Add celery, broccoli, cauliflower, garlic powder, and red pepper flakes. Cook until slightly browned and veggies are al dente, about 6 minutes. Make sure to scrape up the browned bits on bottom of the pan! (Why, you ask? Because “there’s flavor in the brown!” as Karla Hall would say…)
  5. Remove from pan and add to rest of salad. Toss to combine. The greens will wilt a bit more under the residual heat of the veggies!
  6. Make the dressing: combine hummus, red wine vinegar, lemon juice, and salt and pepper in a small bowl and stir vigorously until hummus is slightly runny and can be poured.
  7. Drizzle over salad and toss to combine. Add more red wine vinegar or hummus dressing as you please!
  8. Crumble some feta cheese on top. Serve salad as a side, or top with leftover sweet potato wedges and chickpea patty (I love “MorningStar Farms Mediterranean Chickpea Burgers”!). A fried or poached egg would also be scrumptious 🙂
  9. I also added a few chopped almonds and dried figs for a little extra crunch and sweetness!

DSC00690

DSC00700

DSC00704

Stuffed Mediterranean Portobellos

Mmmmm… so excited about this one. I just got home from visiting my sister in California, and attending CSM (the national Physical Therapy Conference) in Las Vegas, and I sure am ready to get back to my routine! After a lot of meals out and taxing my tummy with foreign foods (after all, the West Coast IS kinda like a different country…), I feel like I need to reset my system with some healthy, meat-free meals.

Enter stuffed mushroom caps. While in Vegas, we had a Duke Alumni and Friends reception and one of the dishes they served were stuffed mushrooms with goat cheese and bread crumbs. Hence the inspiration for this recipe. While there’s no goat cheese and no bread crumbs or panko, I tried to capture the same depth of flavor and that to-die-for gooey, cheesy texture while keeping it light and heart-healthy. Since I’m a sucker for Mediterranean food, I decided to stuff larger portobello mushroom caps with quinoa, chickpeas, olives, capers, and lots of feta, plus some other classic Med-style ingredients.

I love the combination of the lemon and parsley in this recipe, combined with the slightly tangy flavor of the capers and saltiness of the kalamata olives. The quinoa also brings a nutty taste, and of course the mushrooms and chickpeas give the entire dish a meatiness without actually requiring any meat (although if you really miss it, ground turkey would be delish).

I’m just happy because I got to finally use my truffle oil. There is nothing greater in the realm of gourmet food than truffles. Just saying.

Have a great week, everyone!

DSC00619

Stuffed Mediterranean Portobellos
Recipe Type: Main Dishes, Gourmet
Cuisine: Mediterranean, Vegetarian
Author: Claire McCormick of “Claire Tastes”
Prep time:
Cook time:
Total time:
Serves: 10
Looking for a healthy vegetarian dinner idea for tonight? Look no further- these stuffed Mediterranean ‘shrooms are sure to satisfy, and you won’t miss the meat one bit!
Ingredients
  • 10 portobello mushroom caps, cleaned and stems removed
  • 1 1/2 cups quinoa, dry
  • 1 small onion, sliced
  • 1 1/2 tbsp minced garlic
  • 1 tbsp olive oil
  • 1 lemon
  • 6 roma tomatoes, quartered
  • 1 small jar roasted red peppers
  • 1 large bunch fresh parsley (about 1/2 cup minced)
  • 4 cups fresh baby spinach
  • 2 cans chickpeas, drained and rinsed
  • 1/2 cup kalamata olives, rinsed and chopped roughly
  • 1 small jar capers
  • 1 cup feta cheese, crumbled
  • 1 tbsp Greek seasoning
  • salt and pepper, to taste
  • truffle salt, for finishing (optional)
  • truffle oil, for finishing (optional)
Instructions
  1. Preheat oven to 425 degrees.
  2. To clean mushrooms, carefully pull the stems to one side until they pop off. Using a small spoon, gently scrape out the gills inside the cap (remember, they’re mushrooms, not rocks, so it shouldn’t take a lot of force!) and turn mushroom over to discard the remains into a trash can. Don’t worry if you don’t get every single gill out- just go for the majority!
  3. Gently rub the top of the mushroom cap with a moist paper towel.
  4. In a casserole dish or baking sheet sprayed with cooking spray, place mushrooms (cavity-side down) and cook 5 minutes, just until they are thoroughly dried out. Remove from oven and set aside until ready for filling.
  5. Prepare quinoa according to package directions.
  6. In a medium saucepan, cook onions and garlic until soft- about 4 minutes. Add to cooked quinoa and toss. Set aside.
  7. In a food processor, combine tomatoes, roasted red peppers, parsley, 1 tbsp olive oil, and juice from 1/2 of lemon. Pulse until roughly chopped- this should take <10 seconds! (Don’t over-pulse!)
  8. Using a spatula, spoon mixture into a large colander and drain excess water.
  9. To same food processor, add chickpeas, spinach, and remaining lemon juice. Pulse until roughly chopped, about 5 seconds. Transfer mixture to a large bowl.
  10. When tomato mixture has drained, add to bowl with chickpeas.
  11. Stir in kalamata olives and capers.
  12. Add 1 tbsp (or to taste) Greek seasoning, salt and pepper. Stir to combine.
  13. Toss in the cooked quinoa and feta.
  14. Fill each mushroom cap (remember those?) with about 1/4-1/3 cup of filling (depending on the size of the mushroom). Pack down into the cavity with the back of the spoon.
  15. Sprinkle additional feta, truffle salt, and pepper over top of each mushroom. Place back into casserole dish or baking sheet.
  16. Bake for 15 minutes, or until feta has softened and browned slightly.
  17. Remove from oven, and drizzle with the teensiest bit of truffle oil (optional). Cool for a few minutes before serving!
Serving size: 1 mushroom Calories: 315 cal Fat: 10 g Carbohydrates: 45 g Fiber: 10 g Protein: 15 g

DSC00608See all those gills in there? Those will give the mushroom a musty taste. Make sure to clean your mushroom caps before filling!

DSC00609To clean, gently remove stems and scrape gills out with a small spoon. Also use a damp paper towel or dish rag to clean the tops of the caps.

DSC00613Clean(er) fungus FTW!

DSC00614Stick in the preheated oven for about 5 minutes to dry them out.

DSC00574Cook onions and garlic until soft.

DSC00577Toss in onions and garlic with the cooked quinoa. Set aside.

DSC00575Process tomatoes, parsley, lemon juice, olive oil, and roasted red peppers.

DSC00581Drain in a colander to get rid of excess water.

DSC00582Process chickpeas, spinach, and the remaining lemon juice.

DSC00584Transfer to a bowl and toss.

DSC00585Roughly chop kalamata olives.

DSC00586Add to bowl with chickpeas, along with the quinoa, capers, and drained tomato mixture.

DSC00587Add feta, Greek seasoning, and salt and pepper. At this point, you could definitely eat this on its own, or set some aside for a quick and healthy salad later in the week! (See note at bottom of this post)

DSC00616…Or you could keep going! Fill each mushroom cap with some of the filling and gently press down into the cavity.

DSC00634Sprinkle with more feta, salt (I used my truffle salt here!), and pepper. Bake at 425 degrees for 15 minutes, or until feta has softened a bit and gotten a little brown on top!

DSC00626Drizzle with truffle oil while they’re still hot, and allow to cool for a few minutes. Serve over a bed of greens with a side of some fresh orange slices!

Ben and I enjoyed the leftovers from this recipe all week long! This supper was half of a leftover ‘shroom, some more of the quinoa salad (warmed), steamed veggies, parsley, and a poached egg on top! DSC00637

Superbowl Snackables Part 1: Krispie Chicken Strips

DSC00453

Superbowl Must-Haves: Krispie Chicken Strips
Recipe Type: Appetizer
Cuisine: Comfort
Author: Claire McCormick of “Claire Tastes”
Prep time:
Cook time:
Total time:
Serves: 8-12
Who doesn’t love a good crispy chicken strip? Perfect as an appetizer or snack for the big game, or even as a main course with a salad on the side for dinner!
Ingredients
  • 1 1/2 lbs boneless skinless chicken tenderloins
  • extra virgin olive oil
  • 1/2 cup all-purpose flour
  • 1 tsp ground mustard
  • 2 eggs, beaten
  • 4 cups rice cereal (like Rice Krispies!)
  • salt and pepper
Instructions
  1. Preheat oven to 400 degrees.
  2. In a shallow bowl, whisk eggs.
  3. In a separate bowl, whisk flour and mustard together.
  4. In a freezer bag, pour rice cereal and mash with hands or the back of a frying pan until the cereal forms rough crumbs.
  5. Dip chicken first in flour mixture, then in egg. Shake gently to remove excess.
  6. Add chicken, a few strips at a time, to cereal in the bag. Shake, shake, shake, until evenly coated!
  7. Remove from bag and place on a foil-lined baking dish or aluminum foil pan.
  8. Drizzle with a bit of olive oil and sprinkle with salt and pepper.
  9. Bake at 400 degrees for 20 minutes, turning chicken halfway through. Chicken will have formed a nice crispy crust!

Savory Mushroom “Cobbler”

Calling all meat n’ potato lovers out there!

DSC00423

I’m not a big fan of beef, or red meat of any sort, but I saw a recipe similar to this one last fall while watching The Chew, aka my all-time favorite show (perfect for watching on the iPad while on the treadmill! I swear everyone at the gym thinks I’m a 40 year old housewife with way too much time…). On the show, Chef Curtis Stone shared his recipe for a Steak & Mushroom Cobbler, which appealed to even to my quasi-vegetarian tastebuds. I figured it was something I had to try, maybe doctor up a bit so I wasn’t just purely copying. I love the idea of a “cobbler” made out of all the ingredients you would find in a stew. Basically, I guess anything baked with little mounds of crust on top could be considered a “cobbler,” but for some reason we always think of cobbler as something you have after Thanksgiving dinner that is filled with apples, cherries, and/or other sweet things.

When I decided to use pot roast meat in this recipe instead of steak, it all of a sudden reminded me exactly of the Beef Stew my mom always made in the Crock Pot growing up. And then things took off from there. I decided to add potatoes for a bit more heartiness and sauce-soaking potential (sweet, of course- why wouldn’t you use sweet potatoes when given the option?), peas and rosemary for some much-needed color (you know I can’t completely ignore my veggie-loving tendencies), and substituted the Elvis biscuits with the baking powder ones my mom would always serve with our stew. I also added a little cheddar cheese. It just seemed to fit.

I also found I needed to add a little more thickener- just a touch of corn starch- to the original recipe (perhaps because I used more beef broth, since the carton I had was 8 oz. larger than the 24 oz. portion Stone recommends). The result was a light gravy-like sauce that provided the perfect thickness to nestle in between the veggies and stew meat. The biscuits on top were nice and toasty around the edges, but still soft and doughy on the inside- perfect for soaking up the gravy. I definitely recommend adding some type of fresh herb as well. If not rosemary (which provided just the right degree of woody fragrance to complement the savory), then perhaps try sage or thyme.

Let’s just say my husband was a happy camper.

Savory Mushroom Cobbler
Recipe Type: Stews, Casseroles
Cuisine: Comfort Food
Author: Claire McCormick of “Claire Tastes”
Prep time:
Cook time:
Total time:
Serves: 8-12
It’s like having beef stew, pot pie, and cobbler all at the same time! You won’t want to miss out on this one. I think I actually saw my husband licking his bowl out of the corner of my eye. Cut the biscuits up into fun shapes with cookie cutters to give the dish a fun and elegant twist!
Ingredients
  • 2 lbs pot roast meat, cut up into small cubes
  • salt and pepper
  • 4 tbsp olive oil
  • 2 small yellow onions, chopped
  • 1 10 oz package sliced white mushrooms
  • 2 tsp minced garlic
  • 1 package onion soup mix
  • 1 medium sweet potato, chopped into small cubes
  • 4 large carrots, chopped horizontally into ~1/2″ “buttons”
  • 2 tbsp all-purpose flour
  • 1 32 oz. carton beef broth
  • 1/2 cup dry red wine
  • 2 tbsp Dijon mustard
  • 1/2 tsp dried thyme
  • 3/4 cup frozen peas
  • 1 sprig fresh rosemary, finely minced
  • 1 tbsp corn starch
  • 4 slices sharp cheddar cheese
  • FOR THE BISCUITS:
  • 2 cups all-purpose flour
  • 1 tsp salt
  • 1 tbsp sugar
  • 3 tsp baking powder
  • 1/2 cup shortening
  • 3/4 cup milk
  • 1 tsp garlic powder
  • 1/2 tsp dried rosemary
Instructions
  1. Chop pot roast into small chunks, if not already done. Season liberally with salt and pepper.
  2. Heat 1 tbsp of the oil in a large skillet on high heat.
  3. Add pot roast and cook until brown, about 5 minutes, turning occasionally.
  4. Remove pot roast and juices from skillet and set aside in a medium bowl.
  5. In skillet, heat another 1 tbsp of oil. Add onion, sweet potatoes, garlic, and onion soup mix. Cook until onions are soft, stirring occasionally, about 3 minutes.
  6. Remove from skillet and add to the same bowl as the pot roast.
  7. Add the remaining 2 tbsp oil to skillet. Add mushrooms and carrots and cook until carrots are soft, about 3 minutes. Stir in 2 tbsp flour and stir well until combined.
  8. Return the beef, potato, and onion mixture to the skillet with the carrots and mushrooms. Add beef broth, wine, mustard, thyme, and peas. Sprinkle fresh rosemary on top. Season with salt and pepper. Stir well.
  9. Bring stew to a boil and reduce to medium heat to maintain a steady simmer. Simmer about 15 minutes until the broth has reduced a bit.
  10. Add corn starch and stir. The stew should have thickened by now such that it has a thin gravy-like sauce.
  11. Pour stew into a lightly sprayed 9×12 casserole dish. Sprinkle with additional dry rosemary.
  12. Using the same cookie cutter you used for the biscuits (recipe below), cut the cheddar slices into shapes (or just tear into strips- but this is way less fancy!)
  13. Layer cheese on top of the stew in the casserole dish. Add the cut biscuits so that they are slightly overlapping the cheese.
  14. Lightly drizzle biscuits with olive oil.
  15. Preheat oven to 375 degrees.
  16. Bake for 30 minutes, or until biscuits are a deep golden-brown in color and stew is bubbling.
  17. Remove from oven and cool for at least 5 minutes. Serve with biscuits on top!
  18. FOR THE BISCUITS
  19. In a medium bowl, combine flour, salt, sugar, and baking powder.
  20. Cut shortening into flour mixture, using two knives and running them across one another until the mixture forms fine crumbs.
  21. Add garlic powder and dried rosemary.
  22. Add milk and stir until the dough just comes away from the side of the bowl. The dough will be sticky!
  23. Transfer dough to a lightly floured surface and knead about 15 times.
  24. Flatten or roll to about a 1/2″ thickness. Use cookie cutters (any shape you like!) or an inverted wine glass to cut biscuits.
  25. (At this point, add this dough to the top of the stew to act as the “cobbler”- as described above. Alternatively, you could bake them separately by placing them on a nonstick cookie sheet at 450 degrees for 12 minutes.)

DSC00351

Gather your ingredients!

DSC00353

Season and brown the meat.

DSC00358

Set aside browned meat in a medium bowl.

DSC00360

Chop, chop, chop!

DSC00362

Add onion soup mix and garlic to sweet potatoes and onions.

DSC00365

 Then let them party in the meat bowl.

DSC00368

More chopping… (who said this was a quick one?)

DSC00369

Cook until soft.

DSC00370

Adding flour acts as a thickener for the sauce!

DSC00371

DSC00372

 Add back the meat and onions.

DSC00374

Add the broth, spices, mustard, wine, and peas.

DSC00377

Simmer at least 15 minutes. Mine took closer to 20!

DSC00381

Add corn starch right at the end to thicken the sauce.

DSC00397

Transfer to casserole dish and sprinkle with a bit more rosemary.

DSC00398

Add dry ingredients to medium bowl. Cut in shortening.

DSC00399

Add milk until the dough just comes off the edge of the bowl.

DSC00402

Transfer to lightly floured surface and knead.

DSC00406b

Roll out into a disc about 1/2″ thick and cut into star shapes with a cookie cutter!

DSC00407

Do the same with the cheese…

DSC00409

Layer the cheese and biscuits, slightly overlapping, on top of the stew. Sprinkle with more rosemary and drizzle with a bit of olive oil.

DSC00420

Bake at 375 deg for 30 minutes or until biscuits are deep golden-brown and stew is bubbly.

DSC00423

Allow to cool for at least 5 minutes (this will also help “set” the stew so it’s easier to ladle out)

DSC00430

Ladle into shallow soup bowls and serve with biscuits on top.

DSC00431

Happy husband! 🙂

Hawaiian BBQ Pizza (Plus Fool-Proof Pizza Dough Recipe!)

DSC00339

Pizza is one of those things that always seems like a ton of work to make myself. My sister makes it all the time and seems to have it down to a science. Every week she and her husband have “pizza night” with their friends in San Clemente, their little surfer town in Southern Cal where everyone walks around barefoot and it never rains. So I am told. (I’ll be visiting her in just a few weeks, and then we’ll see if that’s the truth!) Anyway, I’ve always wished that I could just throw together some flour, yeast, and water, let it grow, and just toss whatever scraps I have left in the fridge on top. Voila! Pizza is made.

But is it really that easy? I wish! I have classically been bad at making my own pizza dough. Maybe I’ve been overwhelmed by the number of recipes out there for all the different tastes and types of crust- thick, thin, whole-wheat, partial-wheat, chewy, crusty, crispy, cheesy, gluten-free, gluten-full, etc. etc. etc. Yikes! Which one do I choose? They even make dough out of cauliflower these days.

Then, there’s the issue of what to do if one of the dough ingredients- water, flour, yeast- is just the teensiest bit “off.” If the yeast is old, the water too cold, you add too much (or too little) flour, not enough sugar, and the stars aren’t perfectly aligned, your pizza may be ruined. I’ve made the mistake before of keeping my yeast in an opened jar in the fridge for way too long before using it again. The result was a chewy, taffy-like pizza crust that did NOT rise and did NOT stretch when I tried to pull it apart. Definitely not blog worthy (although it may have ended up on here anyway :P).

But this time, I think I finally got it right. I used a recipe from Iowa Girl Eats and adapted it a little bit to make it partially whole-wheat. I also doubled the recipe so I could save half of the batch and make another pie later in the week.

The rest went like clock-work. I LOVE the fact that for pizza, the hardest part is the dough and you can literally throw on top anything you have on hand. You can also get creative with the sauce! In the past, I’ve experimented a bit with some BBQ bases as opposed to the traditional tomato. Especially when you have BBQ flavored or Jerk-style chicken leftovers, a smoky BBQ sauce underneath a layer of meat and veggies makes for a perfect pairing. I’ve fiddled a bit with my sauce depending on which spices I have- bottled hickory BBQ sauce mixed with some ketchup, cumin, smoked paprika, brown sugar, and a pinch of chili powder makes for an awesome base! I wouldn’t suggest using a Mediterranean or herbed-style chicken with this, though. Instead, I’d recommend an Alfredo base, pesto, or traditional tomato sauce.

I ended up doing half shredded chicken that was left over from tacos (*guilty*) but was still perfectly good! There wasn’t quite enough meat though to cover the entire pie, so I topped the other with shredded up deli ham. When I think ham on pizza, I immediately jump to pineapple and black olives, so it quickly turned into a “Hawaiian BBQ” pizza. No complaints here! My husband loves the combo, and so do I. (Pineapple on top of pizza confused me for the longest time, but I finally gave up trying to figure it out. One does not question the ways of the pizza topping gods). Added some kale, broccoli, tomatoes, and shredded “fancy” mozzarella (don’t ask me what makes it “fancy” because all I saw was a plastic Harris Teeter resealable bag…) and stuck it in the kiln- er, oven.

Twelve-ish minutes later and we had a delicious pizza on our hands! The crust was soft but still crispy around the edges, and not tough on the bottom as has occasionally happened to me in the past!

Perfect for Friday “take-in” date night!

Hawaiian BBQ Pizza (Plus Fool-Proof Pizza Dough Recipe!)
Recipe Type: Pizza
Cuisine: Dinners
Author: Claire McCormick of “Claire Tastes”
Prep time:
Cook time:
Total time:
Serves: 8-12
Pizza has never been easier! Experiment with your toppings and sauce to make a perfectly personalized pie (see what I did there? eh? eh?)
Ingredients
  • DOUGH RECIPE (2 MEDIUM PIZZAS)
  • 1 cup warm water (how hot? it was described to me as “hot-tub” temperature)
  • 3 tsp (about 2 of the pre-packaged) dry active yeast
  • 2 Tbsp honey
  • 2 cups all-purpose white flour
  • 1 cup whole wheat flour
  • 2 Tbsp olive oil
  • 1/2 tsp salt
  • (FOR ONE PIZZA)
  • 1/2-3/4 cup BBQ sauce (your favorite kind!)
  • 1/3 cup ketchup
  • 1 tsp cumin
  • 1 tsp smoked paprika
  • 1/2 tsp chili powder
  • 1/8 tsp red pepper flakes (optional)
  • 1 Tbsp brown sugar (optional)
  • 1 small can sliced black olives, drained
  • 1 small can sliced pineapple, drained and cut into chunks
  • 2/3 (or as much as you want) cup leftover shredded chicken (pork or turkey would also work!)
  • ~ 6 slices deli ham, shredded into small pieces
  • 1/2 cup fresh kale, chopped
  • 3/4 cup broccoli florets
  • 1/2 cup grape tomatoes, sliced (or chopped whole tomatoes, but make sure to de-seed so they’re not making the crust too soggy!)
  • 1/2 cup shredded mozzarella cheese
Instructions
  1. For the dough: In a measuring cup, combine water, yeast and honey and stir until dissolved and liquid has a “murky” appearance. Allow it to sit somewhere warm for about 10 minutes (I used a heating pad on low!) until it foams up.
  2. Add oil and stir again.
  3. Add entire mixture to the bowl of a stand mixer. Using the mixer or a regular wooden spoon, gradually add salt and flour and stir to combine.
  4. Once dough has somewhat come together, attach the dough hook and set mixer to “stir” setting for kneading.
  5. “Knead” until dough comes together- about 5-7 minutes. If too sticky or watery, add a BIT more flour and reassess your patient- er, dough! (too long of a day at PT school!)
  6. Lightly oil a bowl. Remove dough, form a nice ball out of it, and set it in the oiled bowl.
  7. Cover loosely with a dishcloth and allow to rise in a warm spot for at least an hour.
  8. When dough has doubled in size, punch it down a bit and separate into two smaller balls.
  9. Allow each ball to continue to rise for another 30 min to an hour.
  10. At this point, you can refrigerate/freeze the dough for later, or keep going with your recipe! (I kept one and put the other in the fridge).
  11. Preheat oven to 400 deg.
  12. Oil a pizza pan with cooking spray or olive oil. No skimping here!
  13. Spread dough out on pan into a circle, starting in the center and working your way out with your fingers!
  14. In a small bowl, combine BBQ sauce, ketchup, and spices. Whisk together thoroughly.
  15. Use the back of a spoon to spread the sauce over the top of the dough, leaving about a 1/2″ rim around the edges.
  16. Layer kale, meat, veggies, olives, and pineapple over the top. Sprinkle with the cheese.
  17. Bake at 400 deg for 10-15 minutes (watch this carefully, as the crust can burn easily depending on the thickness you’ve chosen!)
  18. Remove from oven, cool at least 5 min, and slice!

DSC00303

 Just starting out with the yeast and water base… not foamy yet! Set on a heating pad to low to help kick start the process.

DSC00308

All foamed up after about 10 minutes!

DSC00309

DSC00310

“The Claw”

DSC00313.jpg

After kneading for a few minutes…

DSC00316

…and the dough should look like this.

DSC00321

Let her rise (sorry, for some reason I don’t have a picture of the risen dough!) and then spread out onto a pizza pan with fingers.

DSC00322

Whip up some sauce!  

DSC00323

Now for the fun part! Spread the sauce on to your liking.

DSC00324

Add the veggies first

DSC00326

Then the meat

DSC00329

And extras…

DSC00330

Top with the cheese. Into the oven for a hot second…

DSC00334

Presto!

DSC00345

DSC00349

Served here with some honey-balsamic broccoli slaw. It’s pizza night, ya’ll!