Mole Chicken Tacos w/ Mango-Peach Salsa

Mole Chicken Tacos w/ Mango-Pineapple Salsa
Chicken Mole Tacos w/ Mango-Peach Salsa
Recipe Type: Chicken, Main Dish
Cuisine: Tex-Mex, Summer
Author: Claire McCormick of “Claire Tastes”
Prep time:
Cook time:
Total time:
Serves: 8-10
Here’s a healthy and summery recipe that comes together in just a few steps! Kitchen staples like a food processor and crock pot make these tacos a breeze to make! Serve with mango salsa to add some sweetness and tang!
Ingredients
  • 1 mango, peeled and cored
  • 1 peach
  • 1/2 cup red onion
  • 1/4 cup chopped cilantro
  • 1/8 cup green onion
  • 1 lime
  • 1 plum tomato, quartered
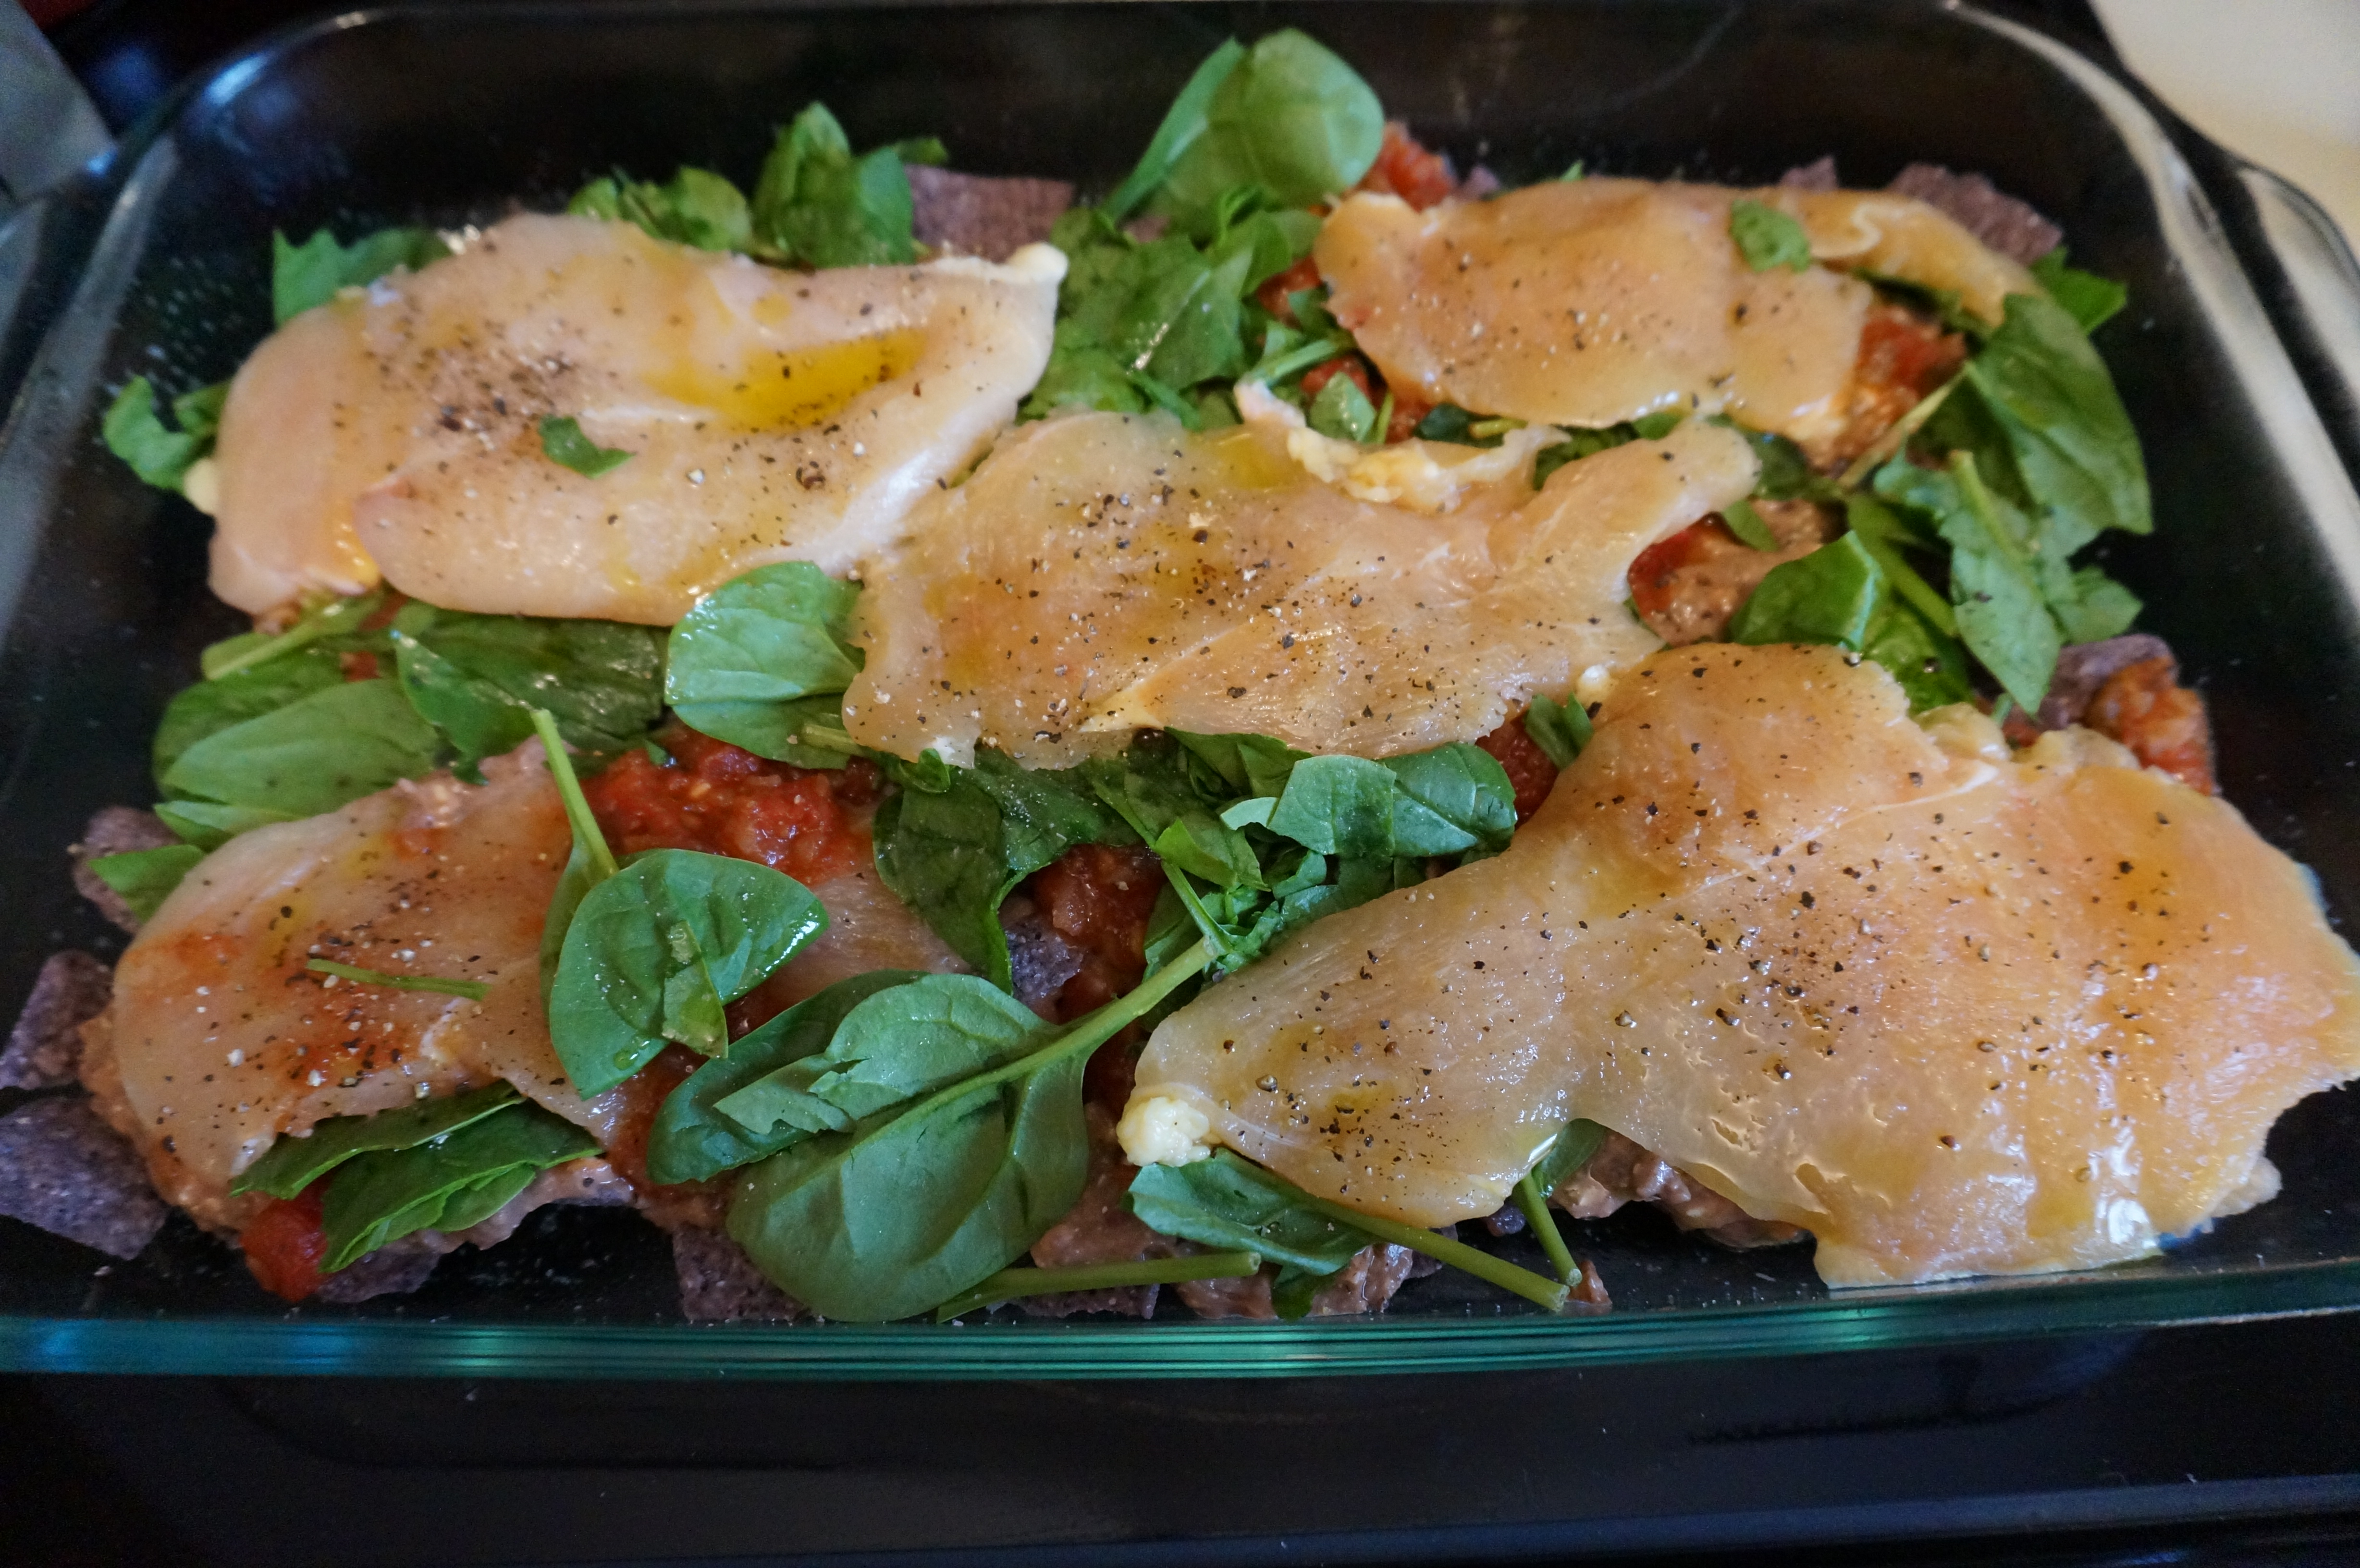
  • 4 large chicken breasts, boneless/skinless
  • olive oil
  • 2 tbsp mole seasoning
  • 1/4 cup ketchup
  • 1/3 cup of your favorite BBQ sauce
  • 2 tbsp Worcestershire sauce
  • 1/4 cup orange juice
  • 1 tbsp minced garlic
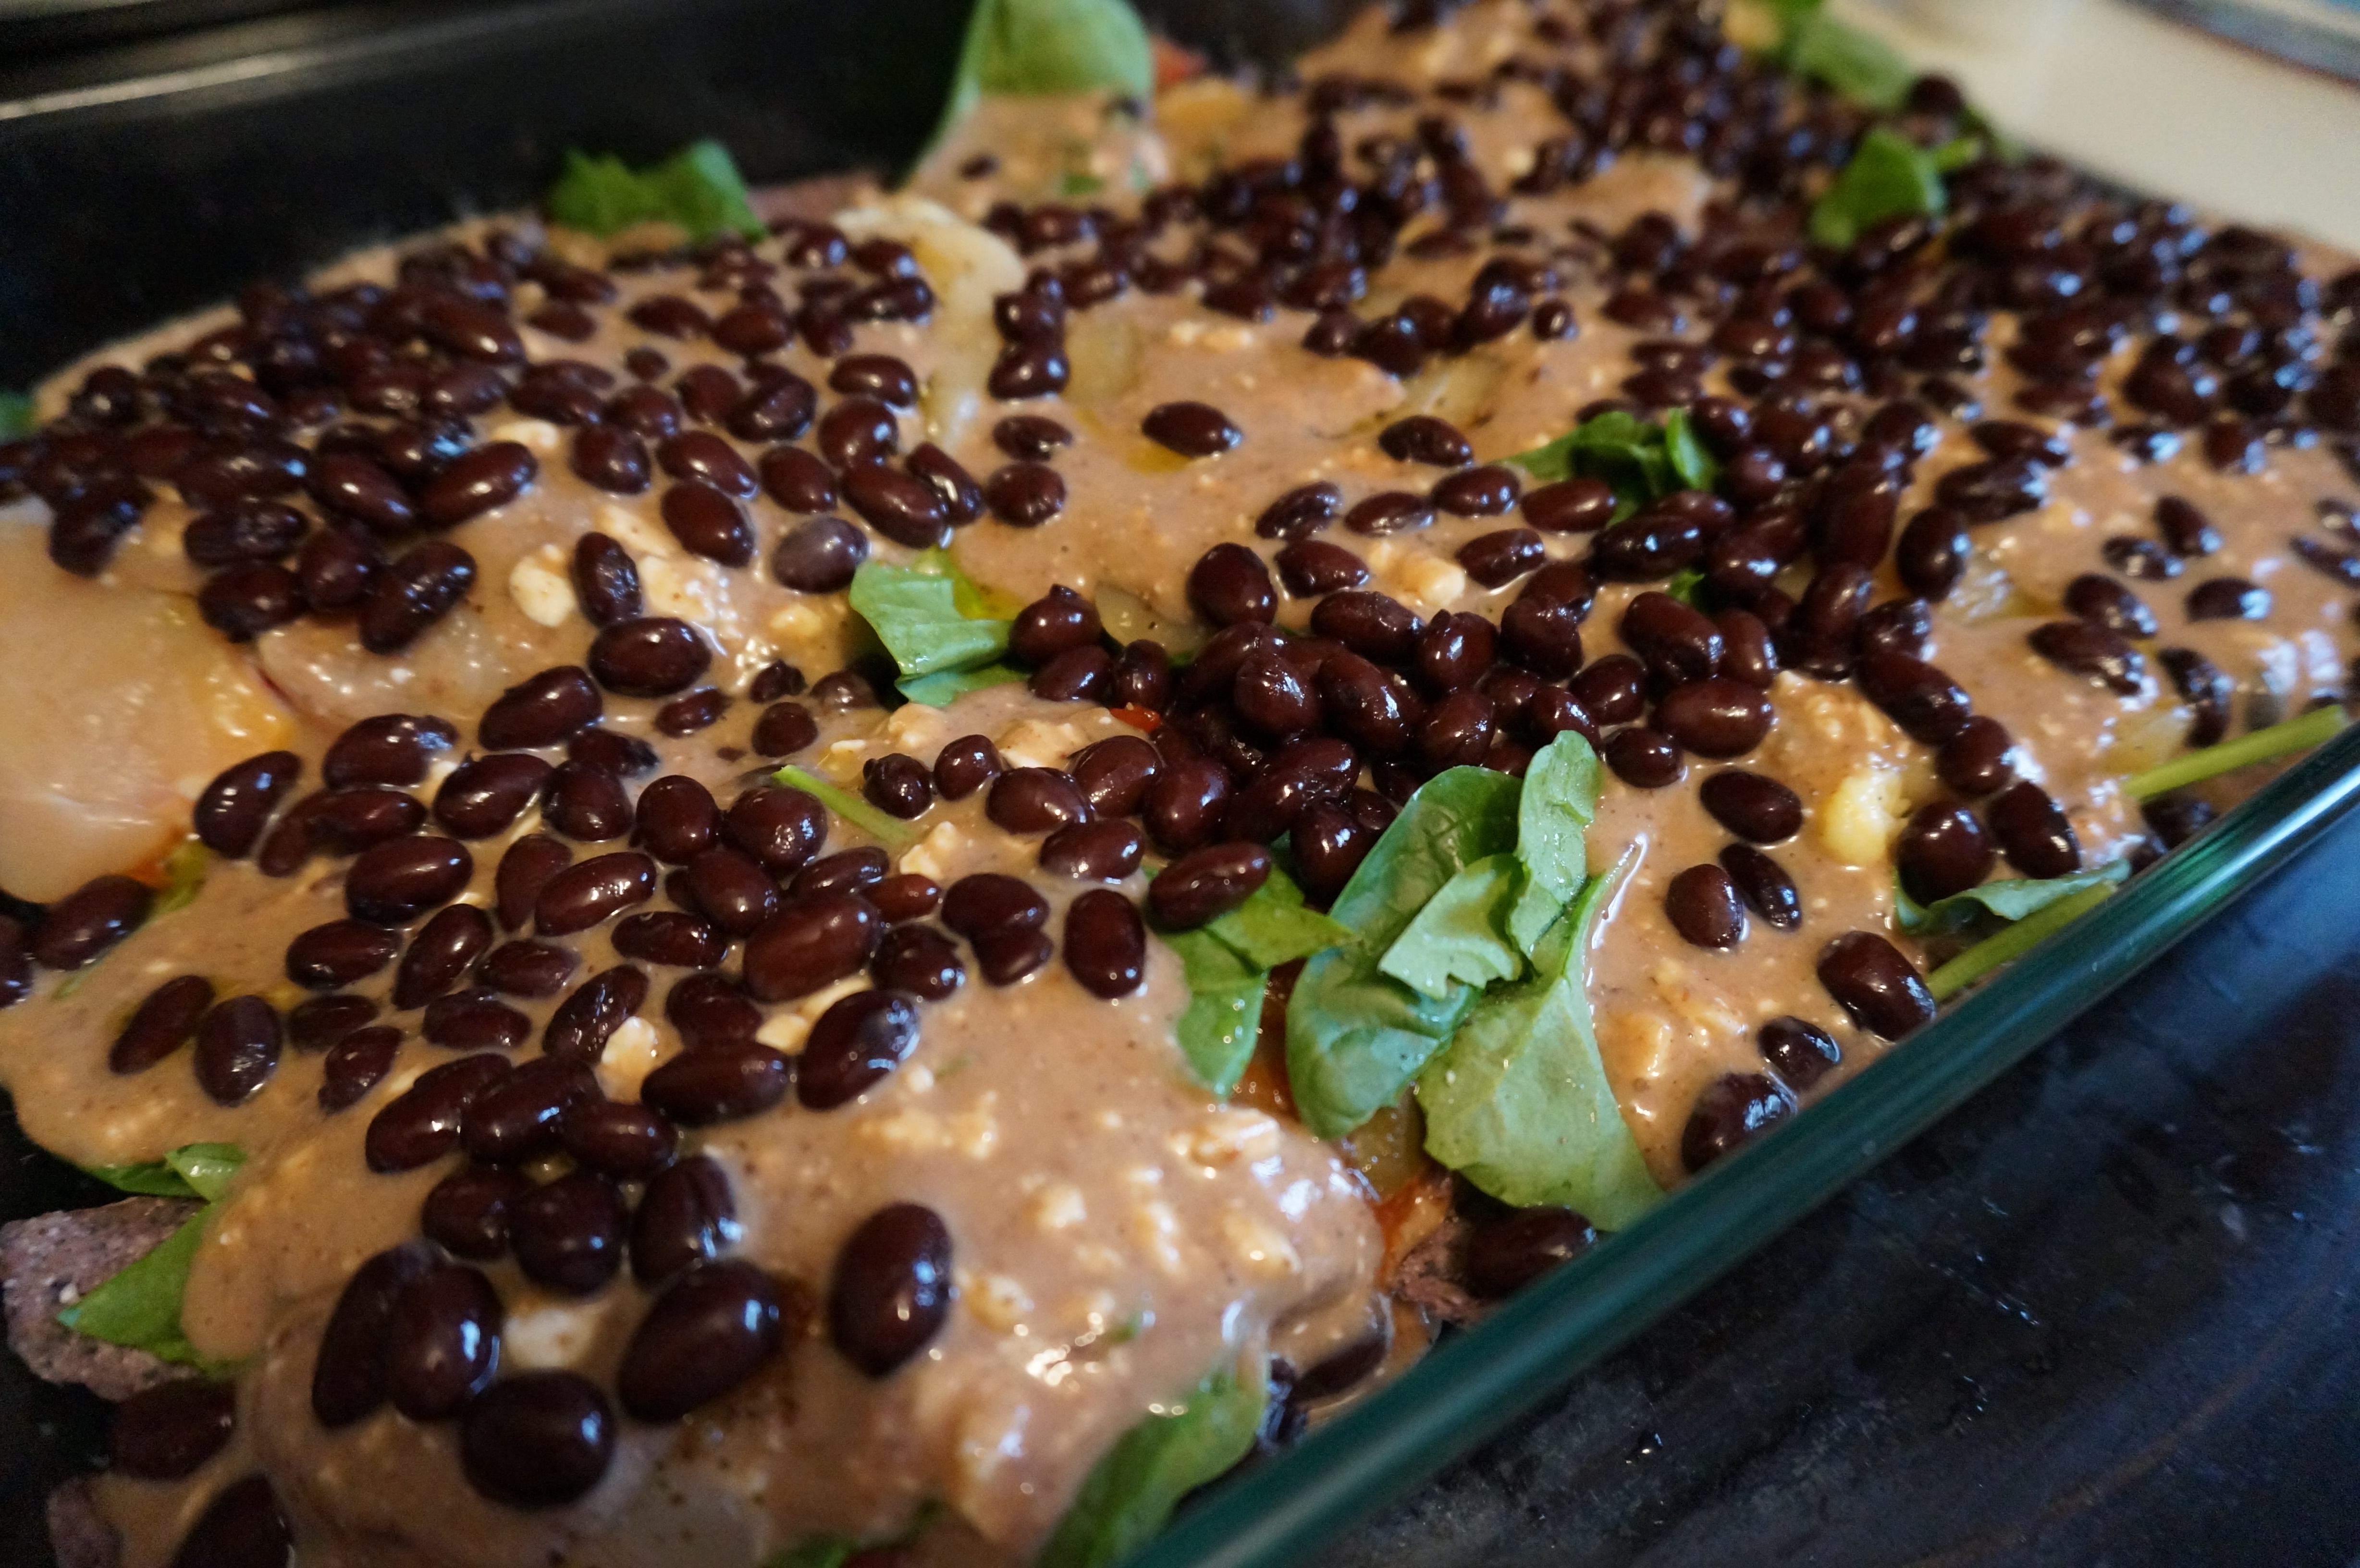
  • 1/2 cup frozen peppers and onions (I used the bagged kind from Kroger)
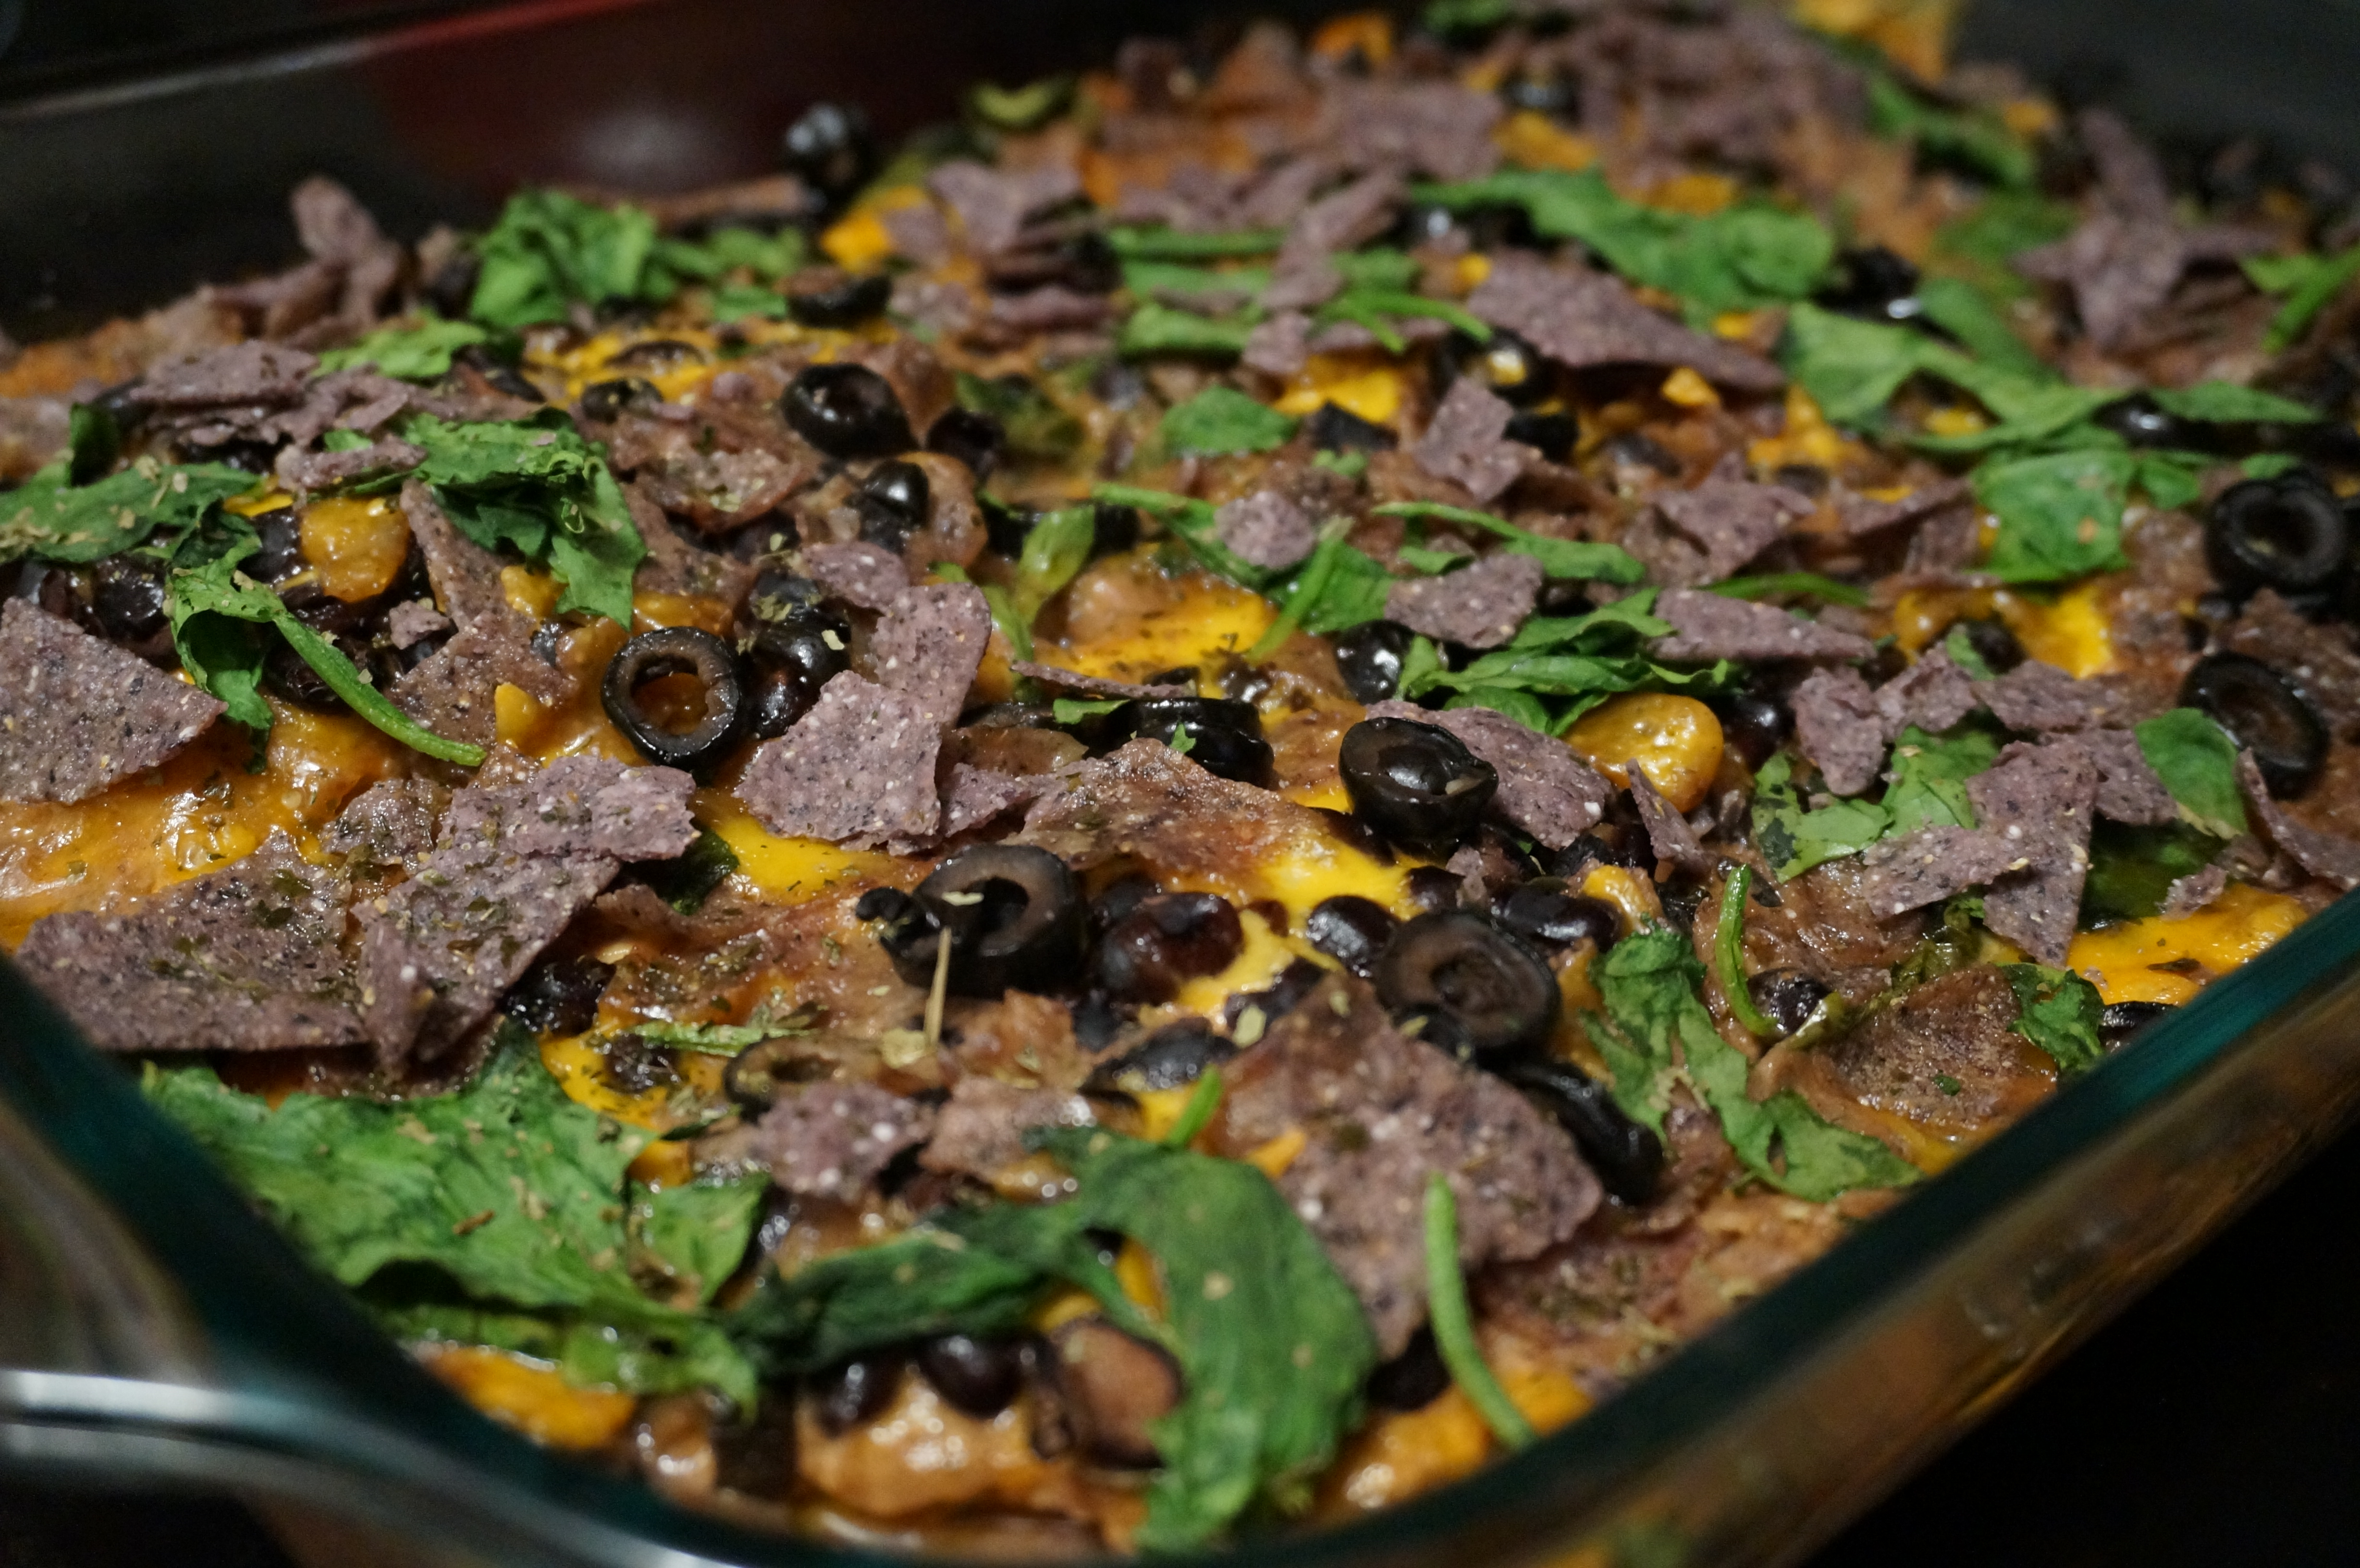
  • flour tortillas
  • Toppings: cheese, spinach, sour cream, green onion, etc.
Instructions
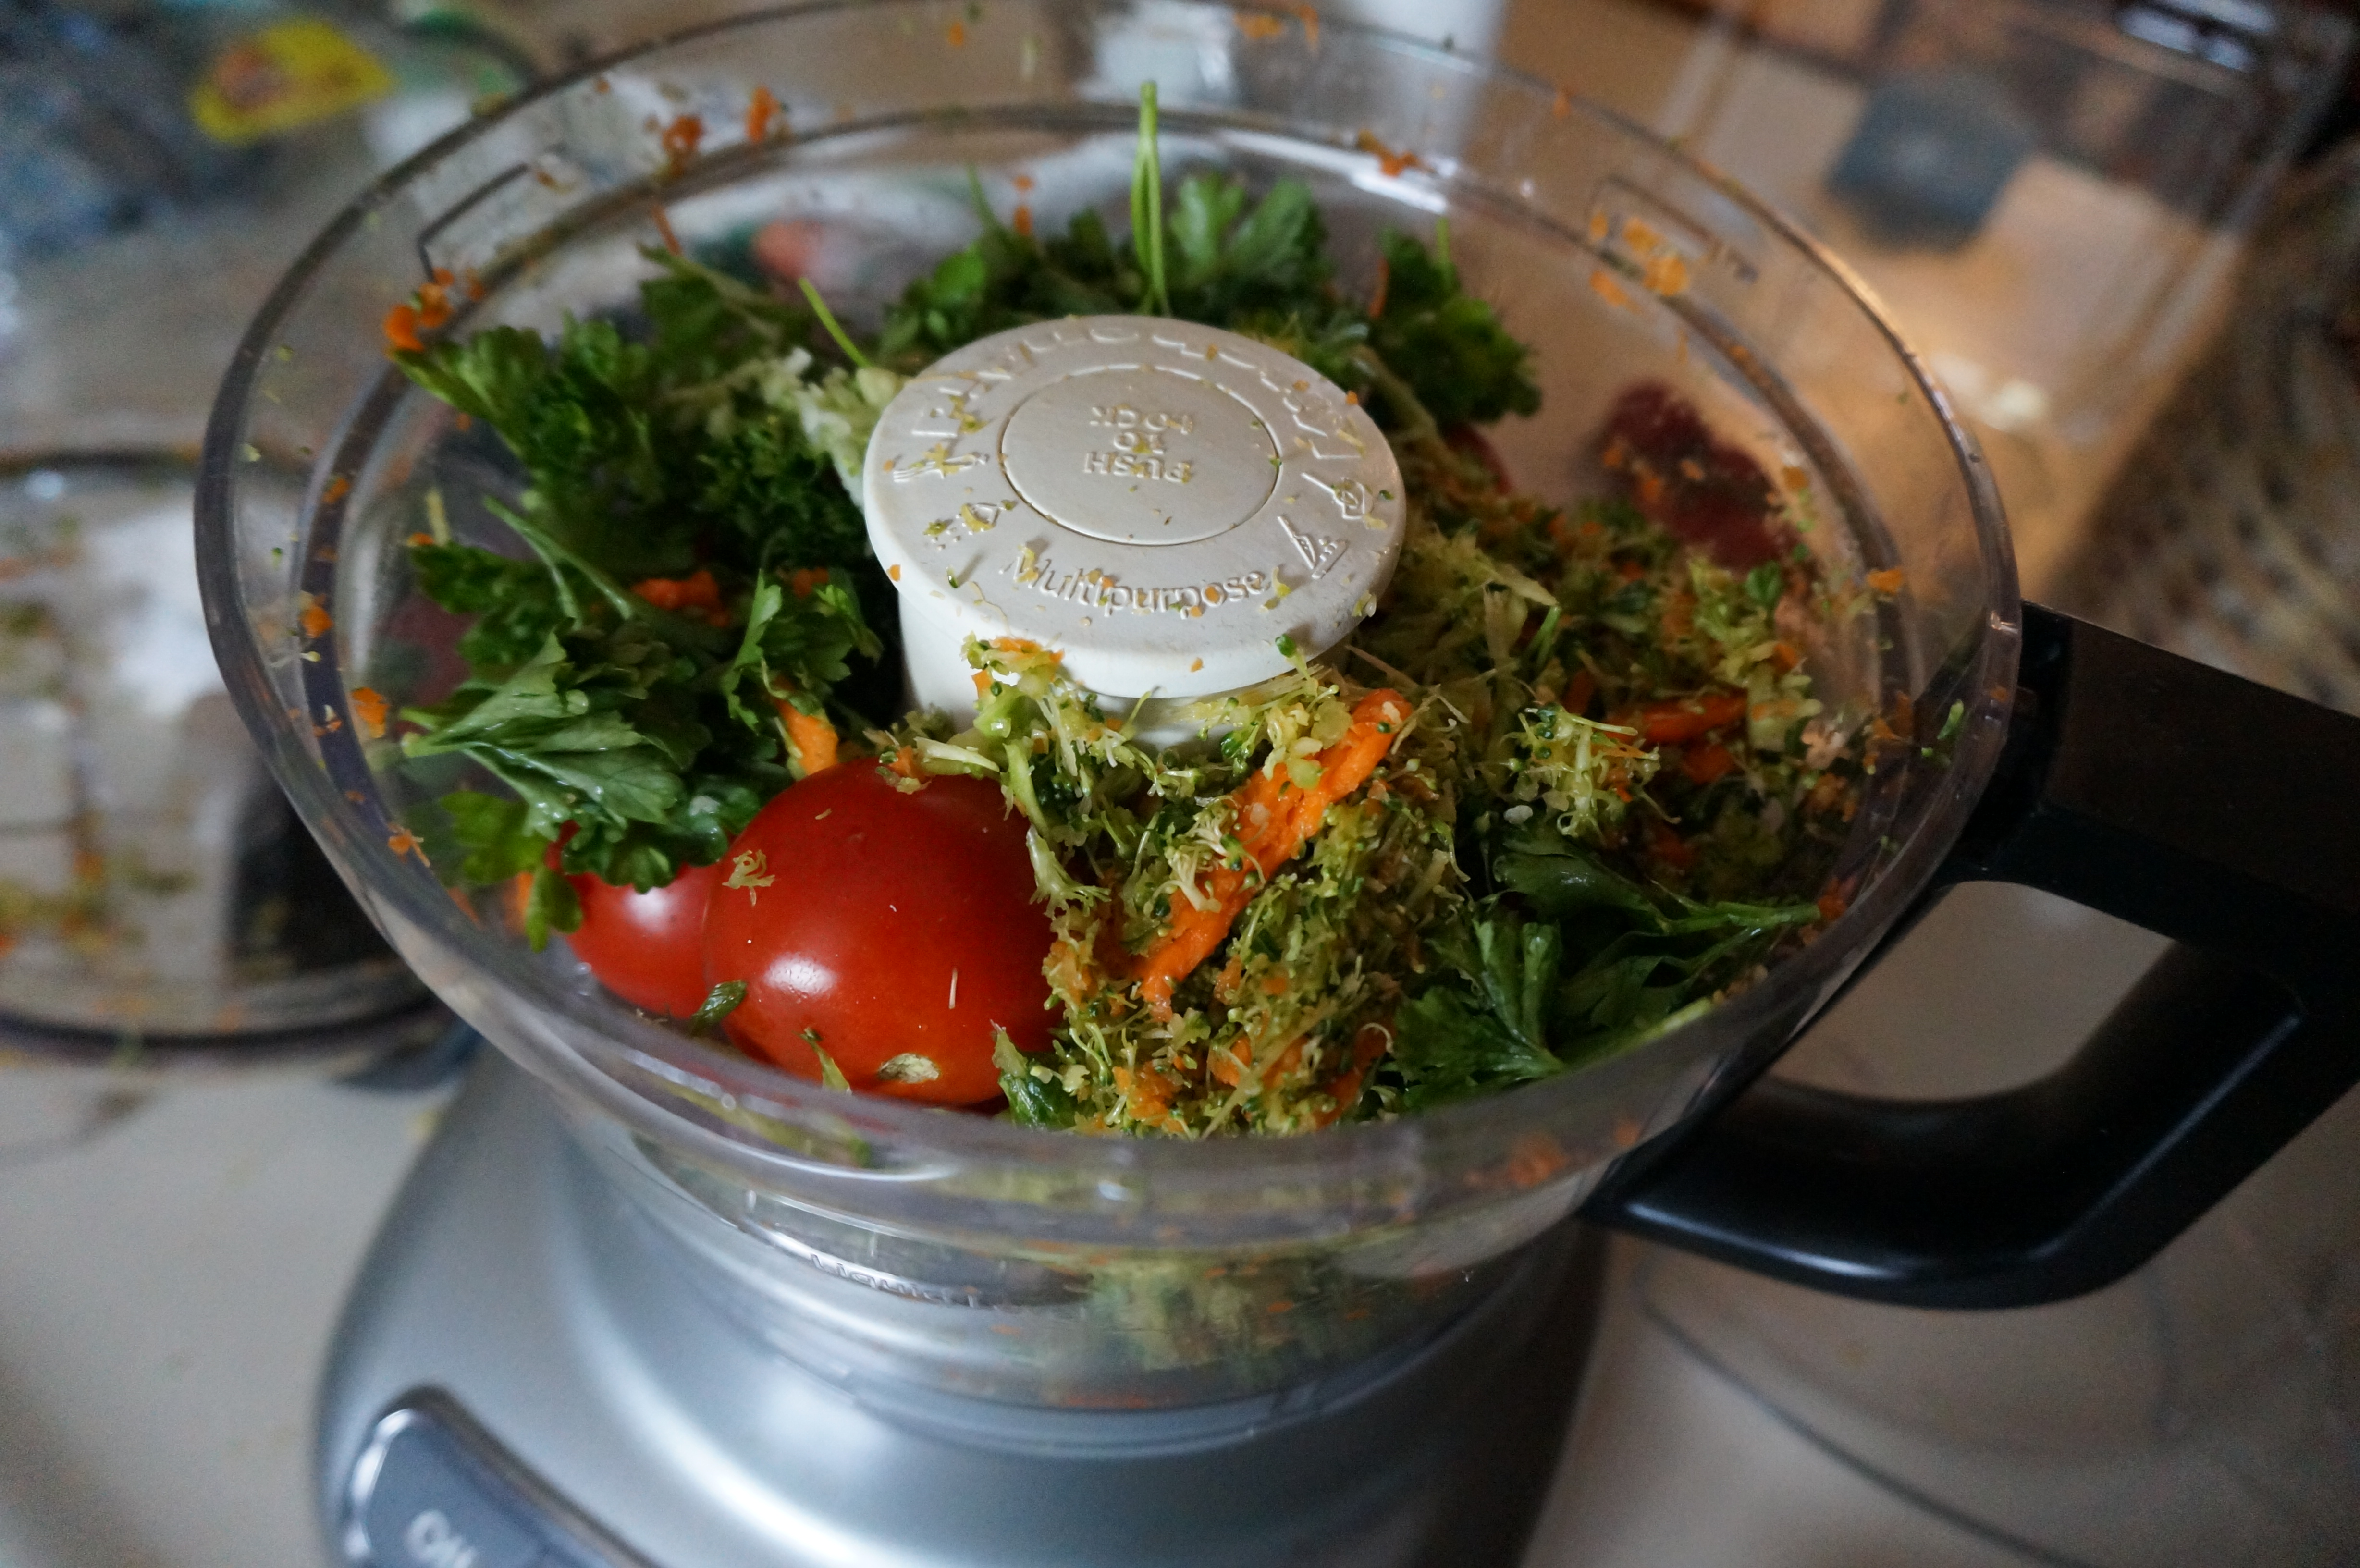
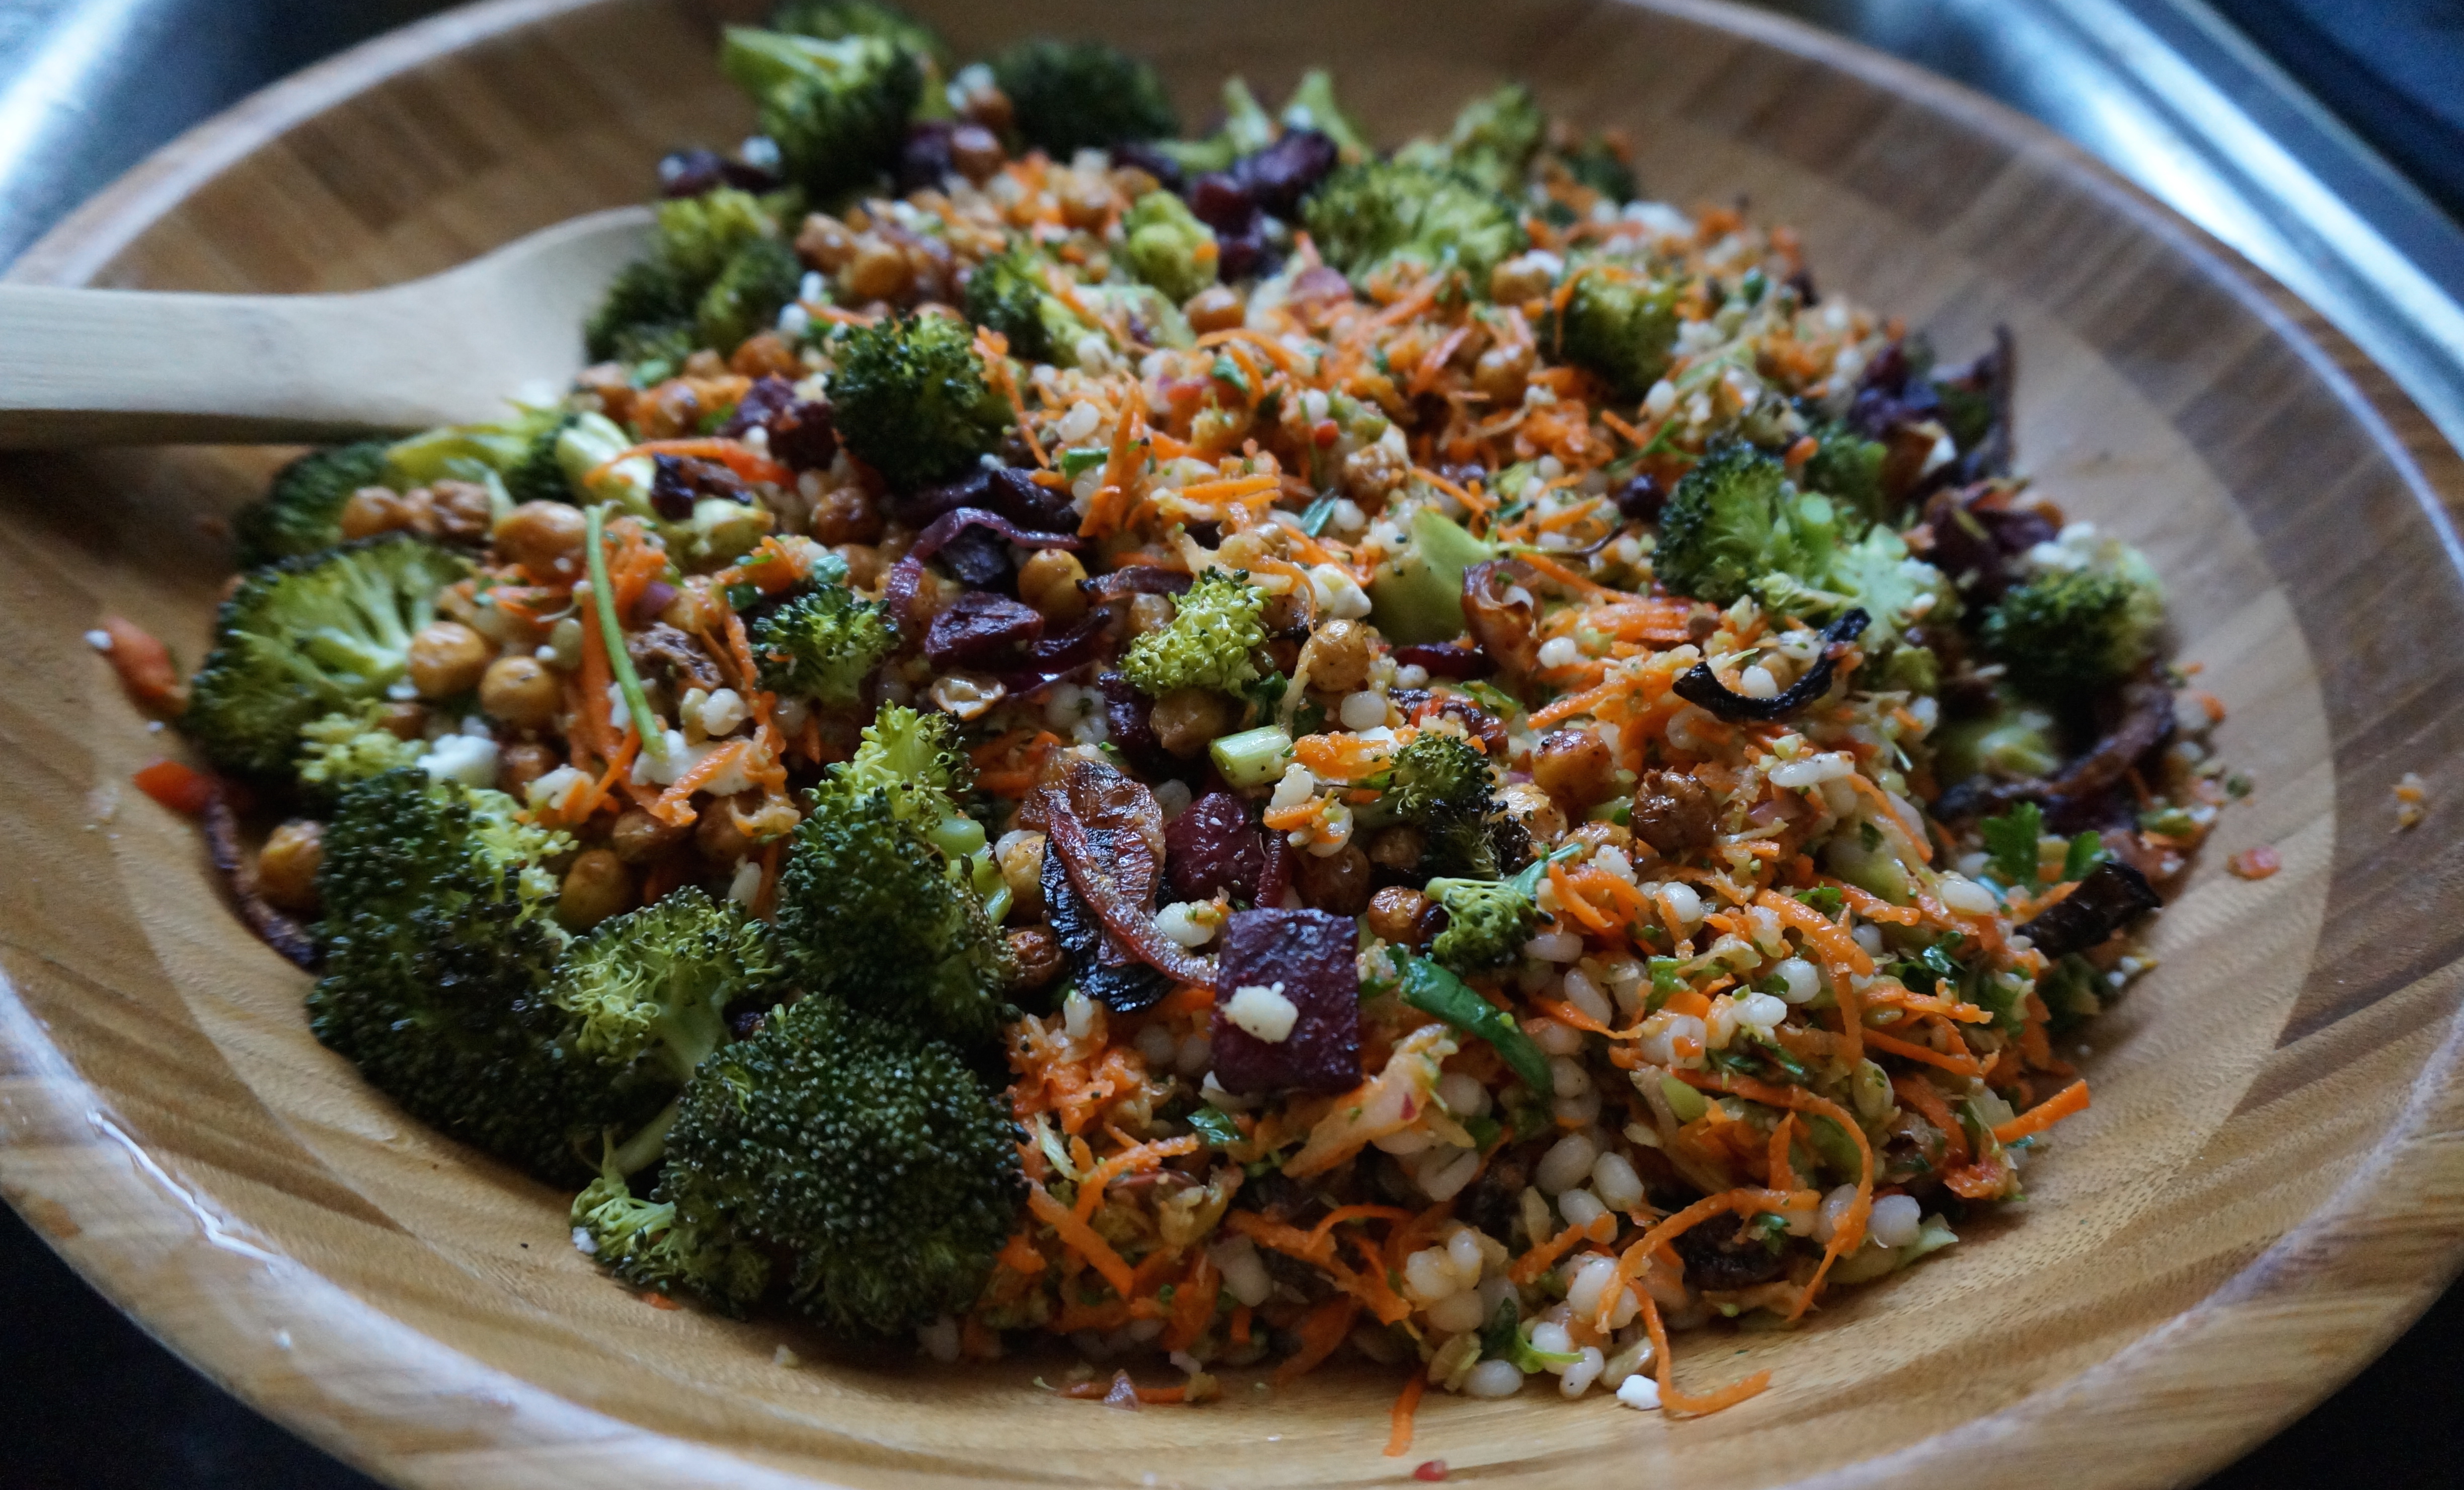
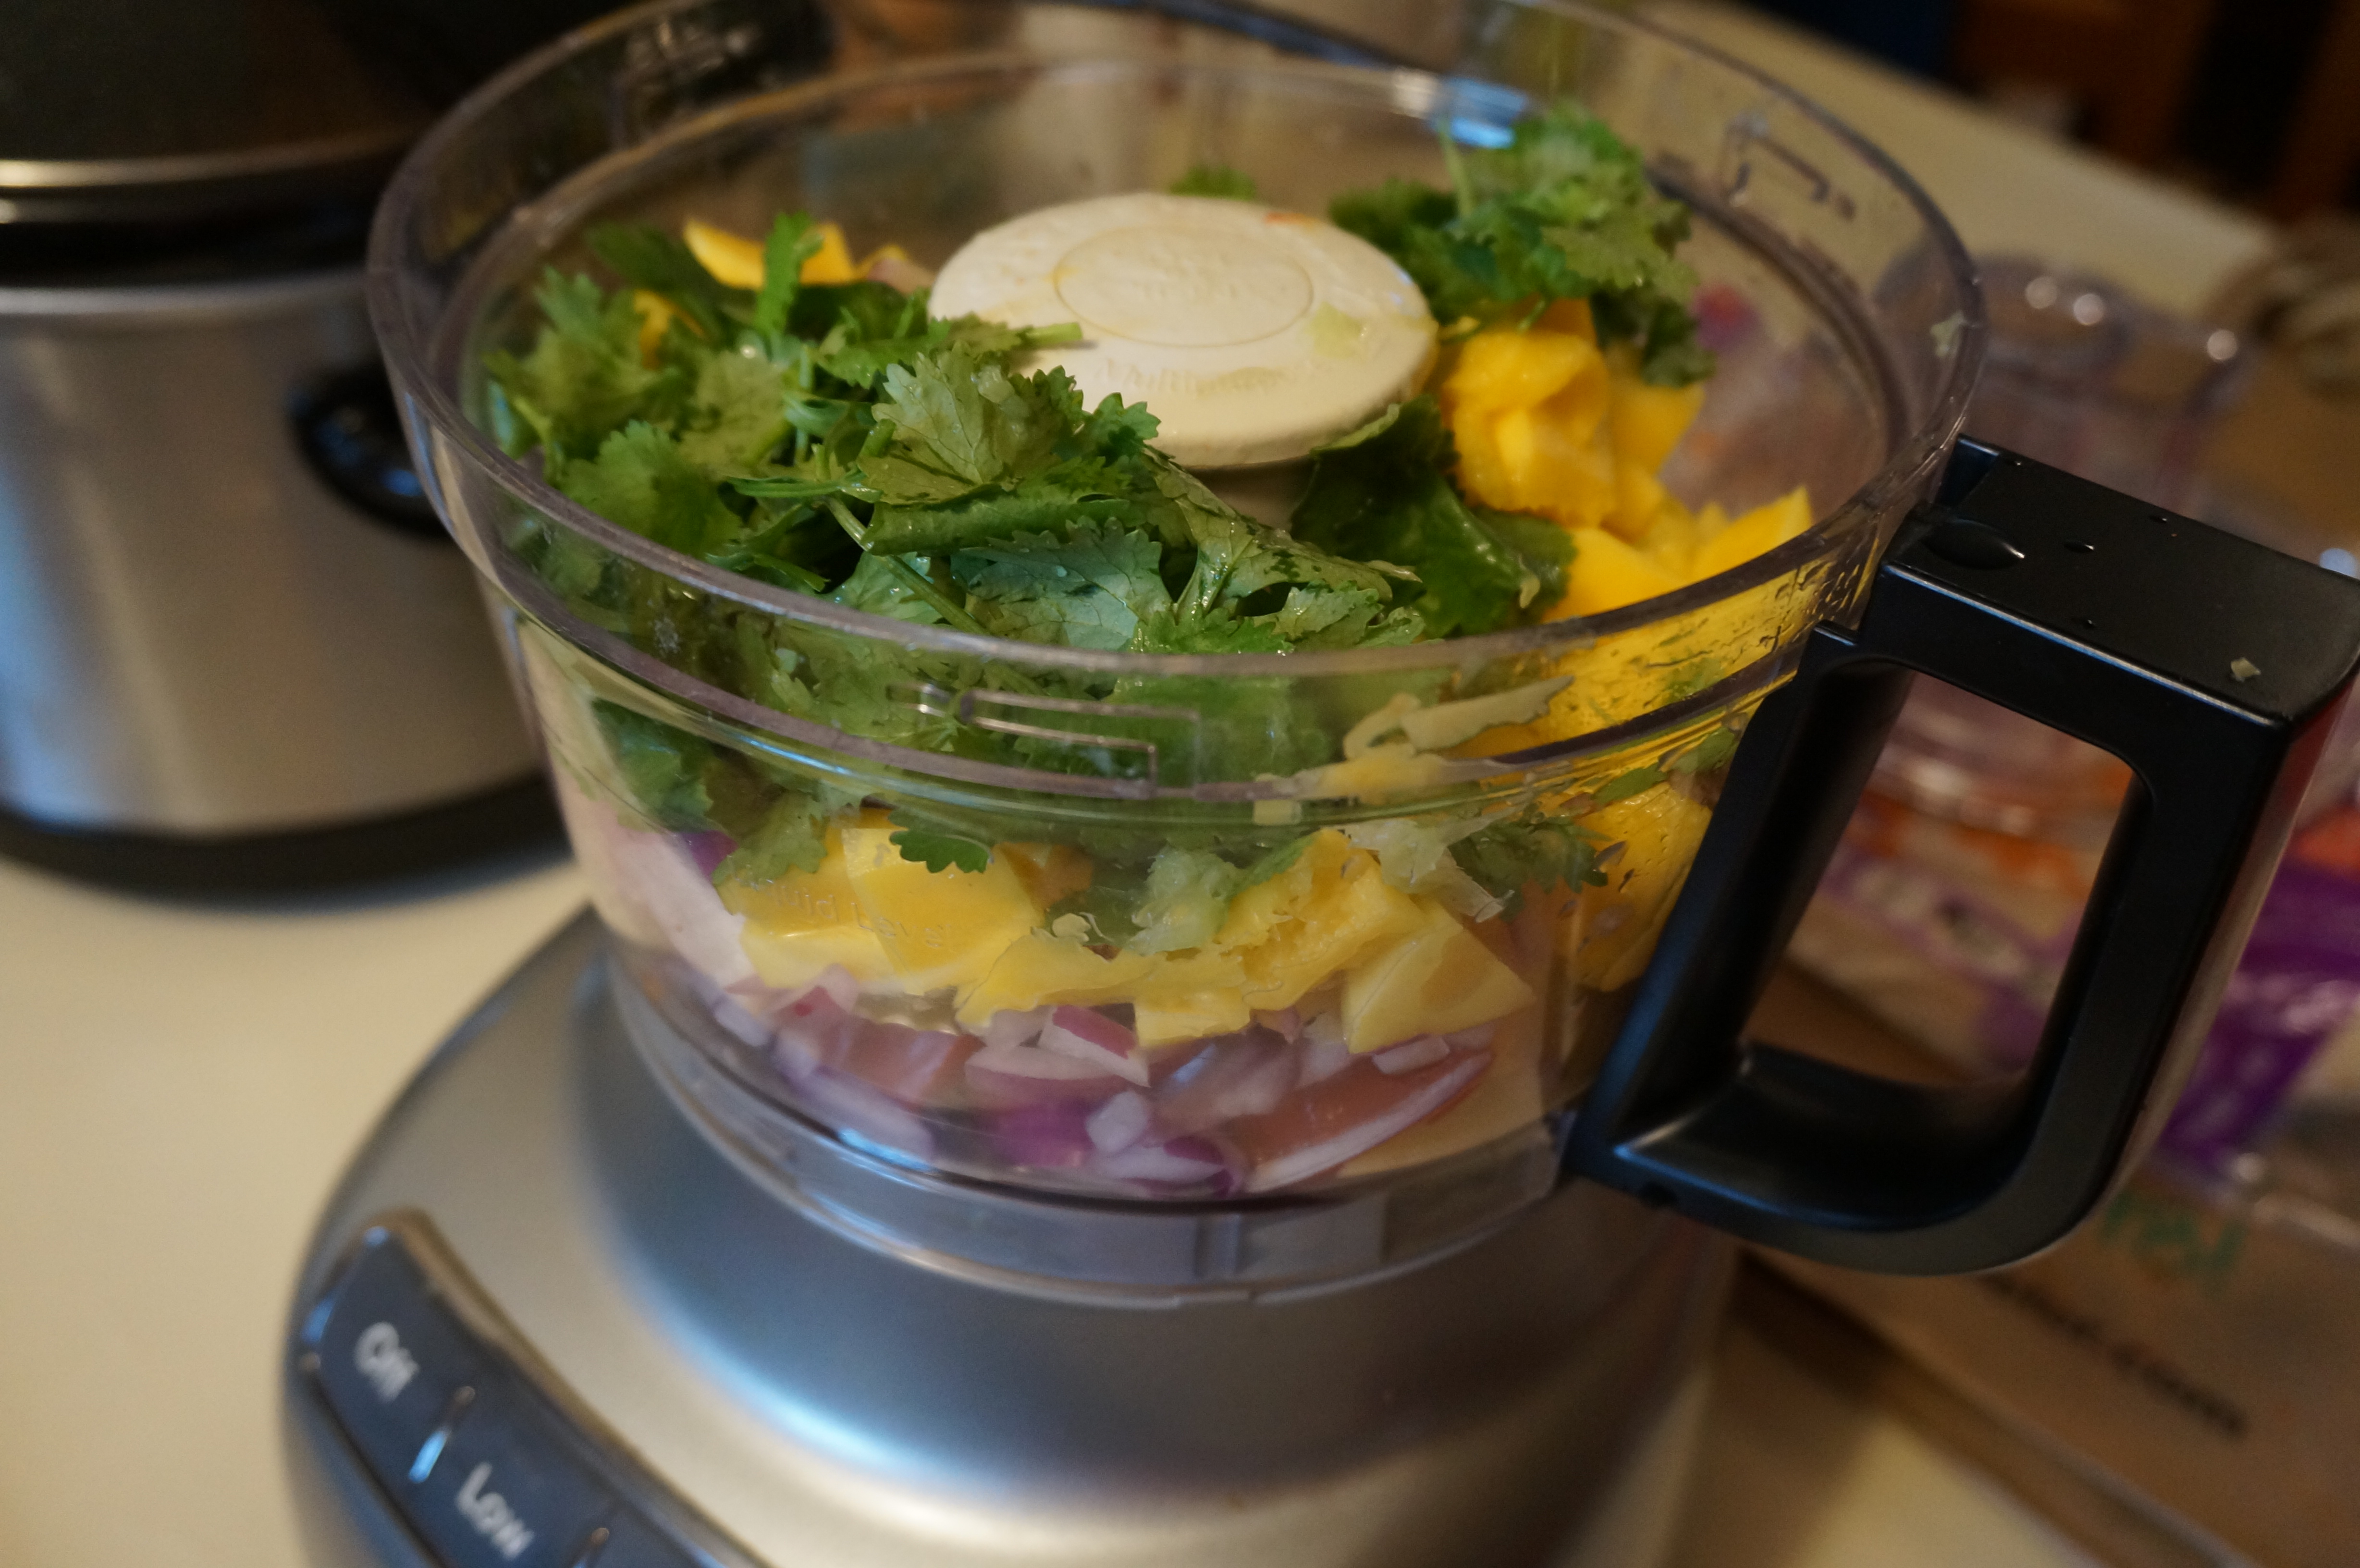
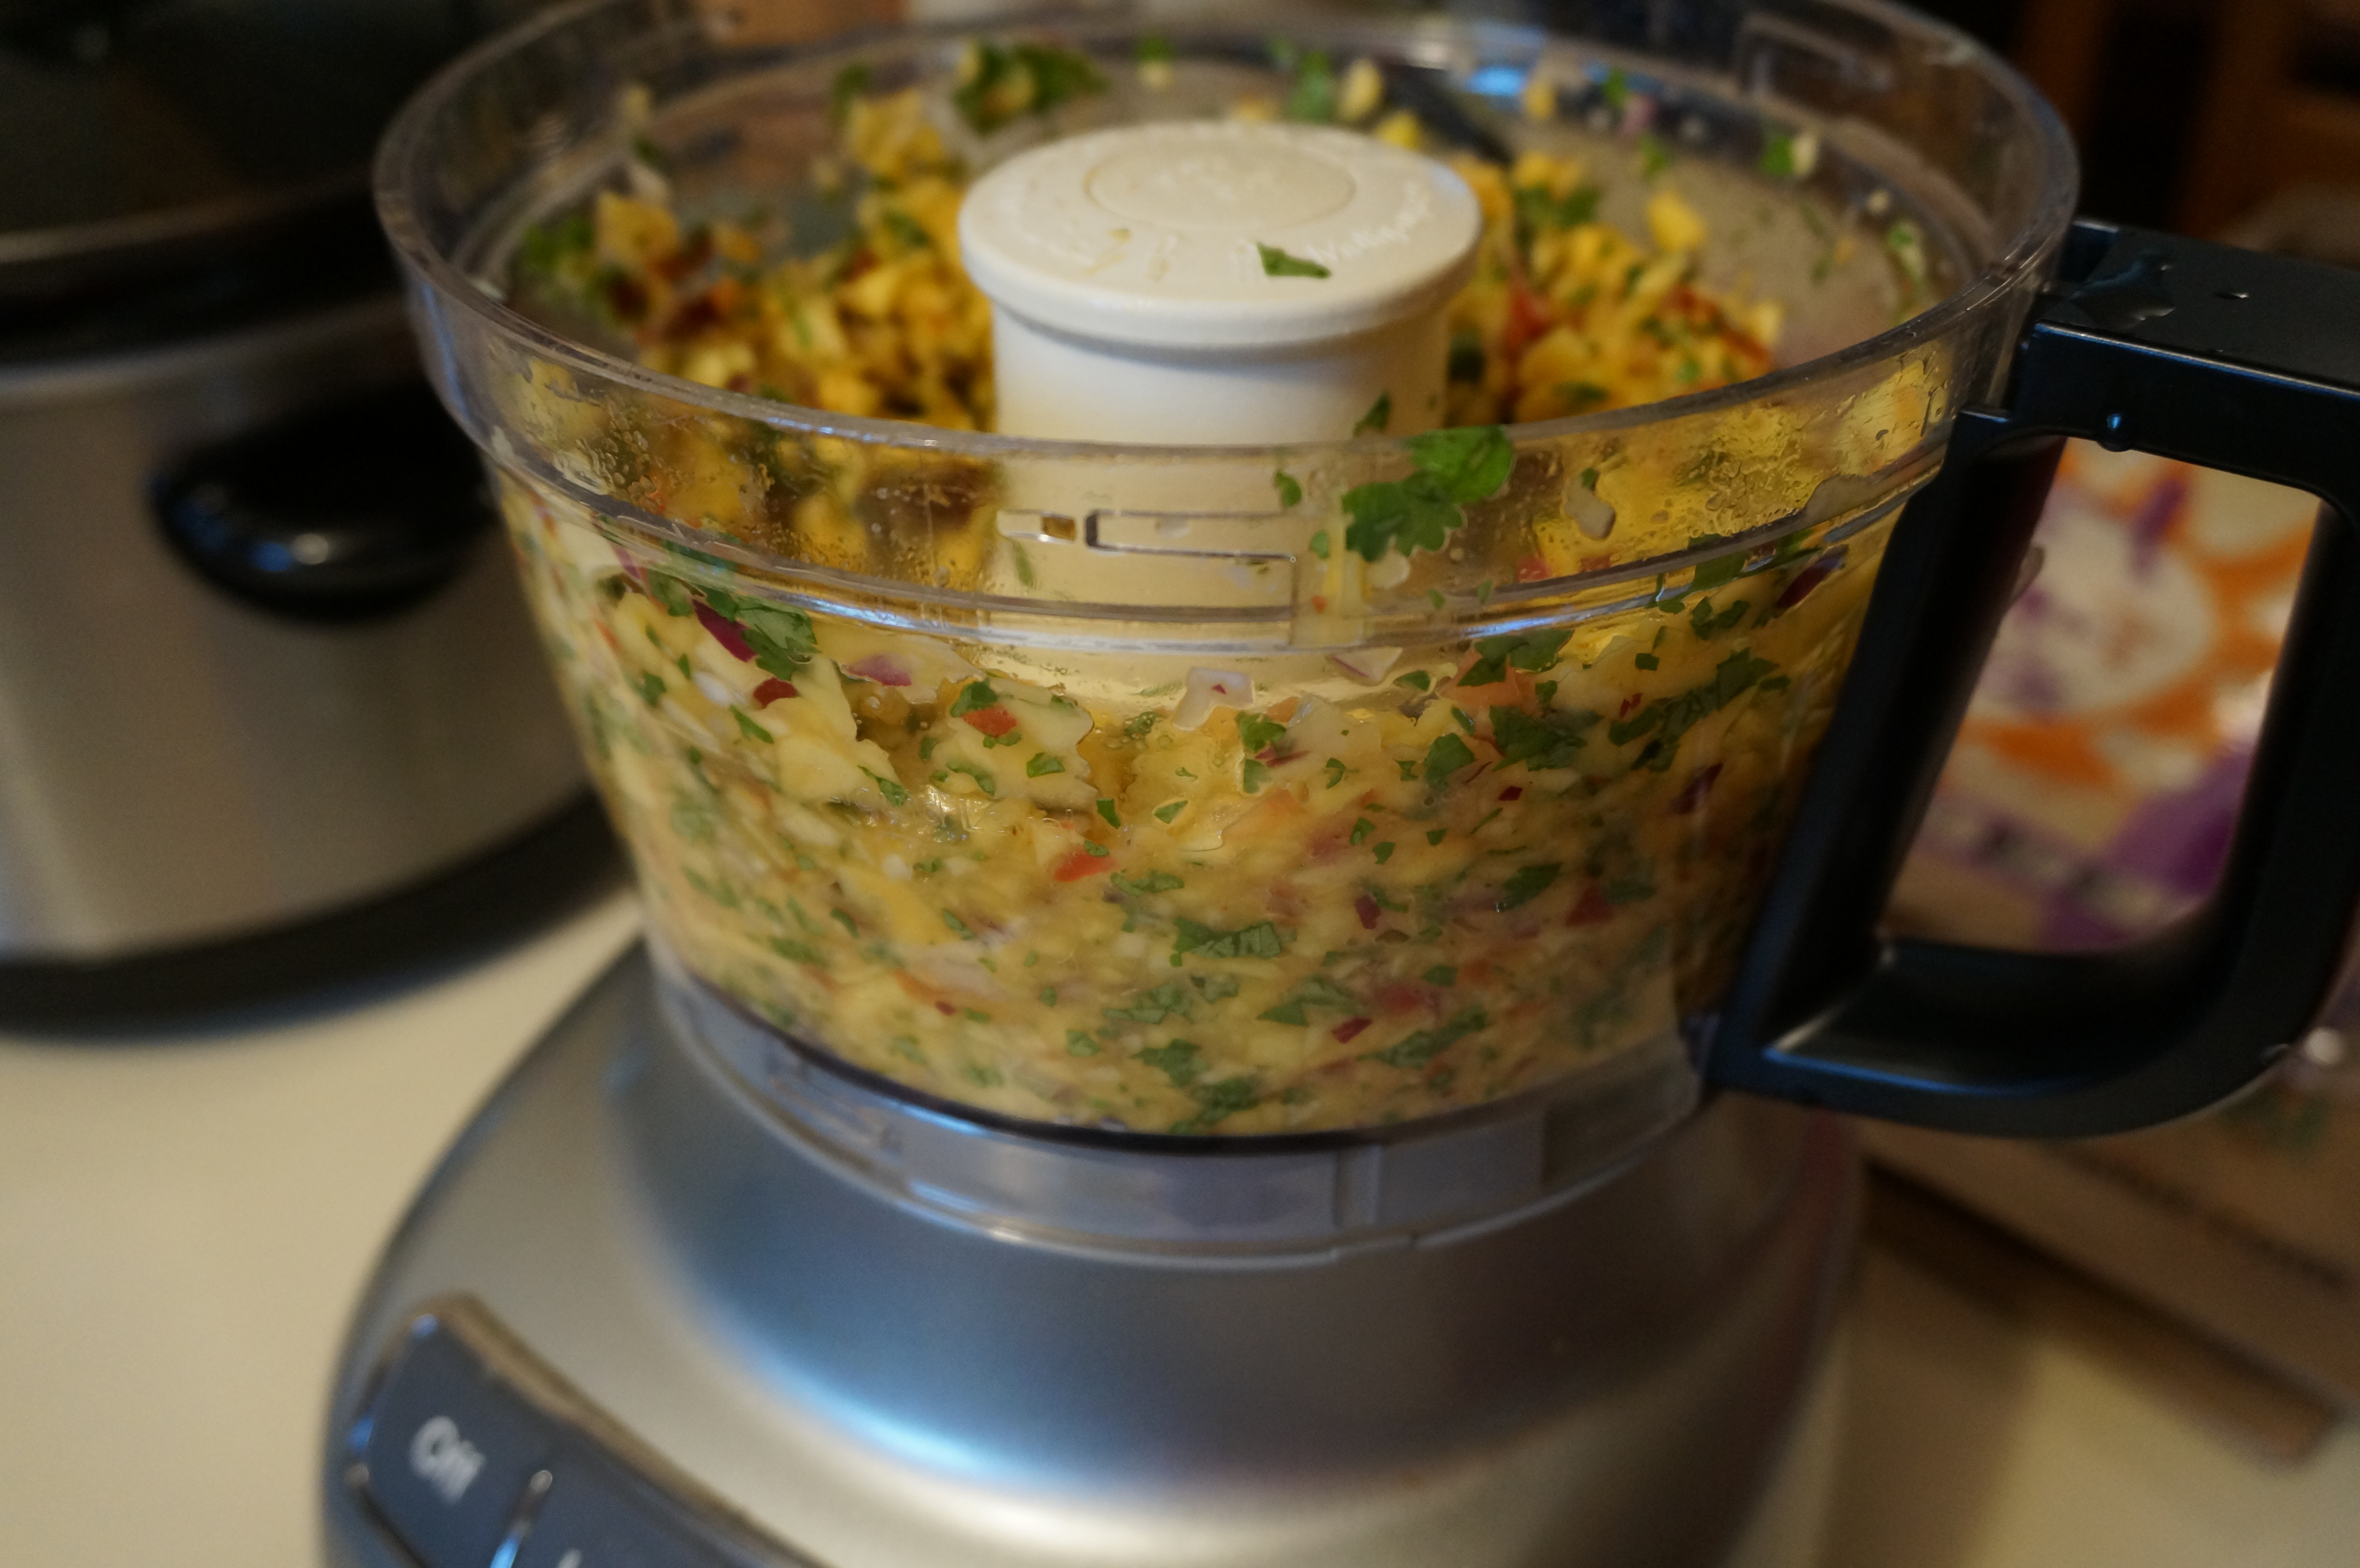
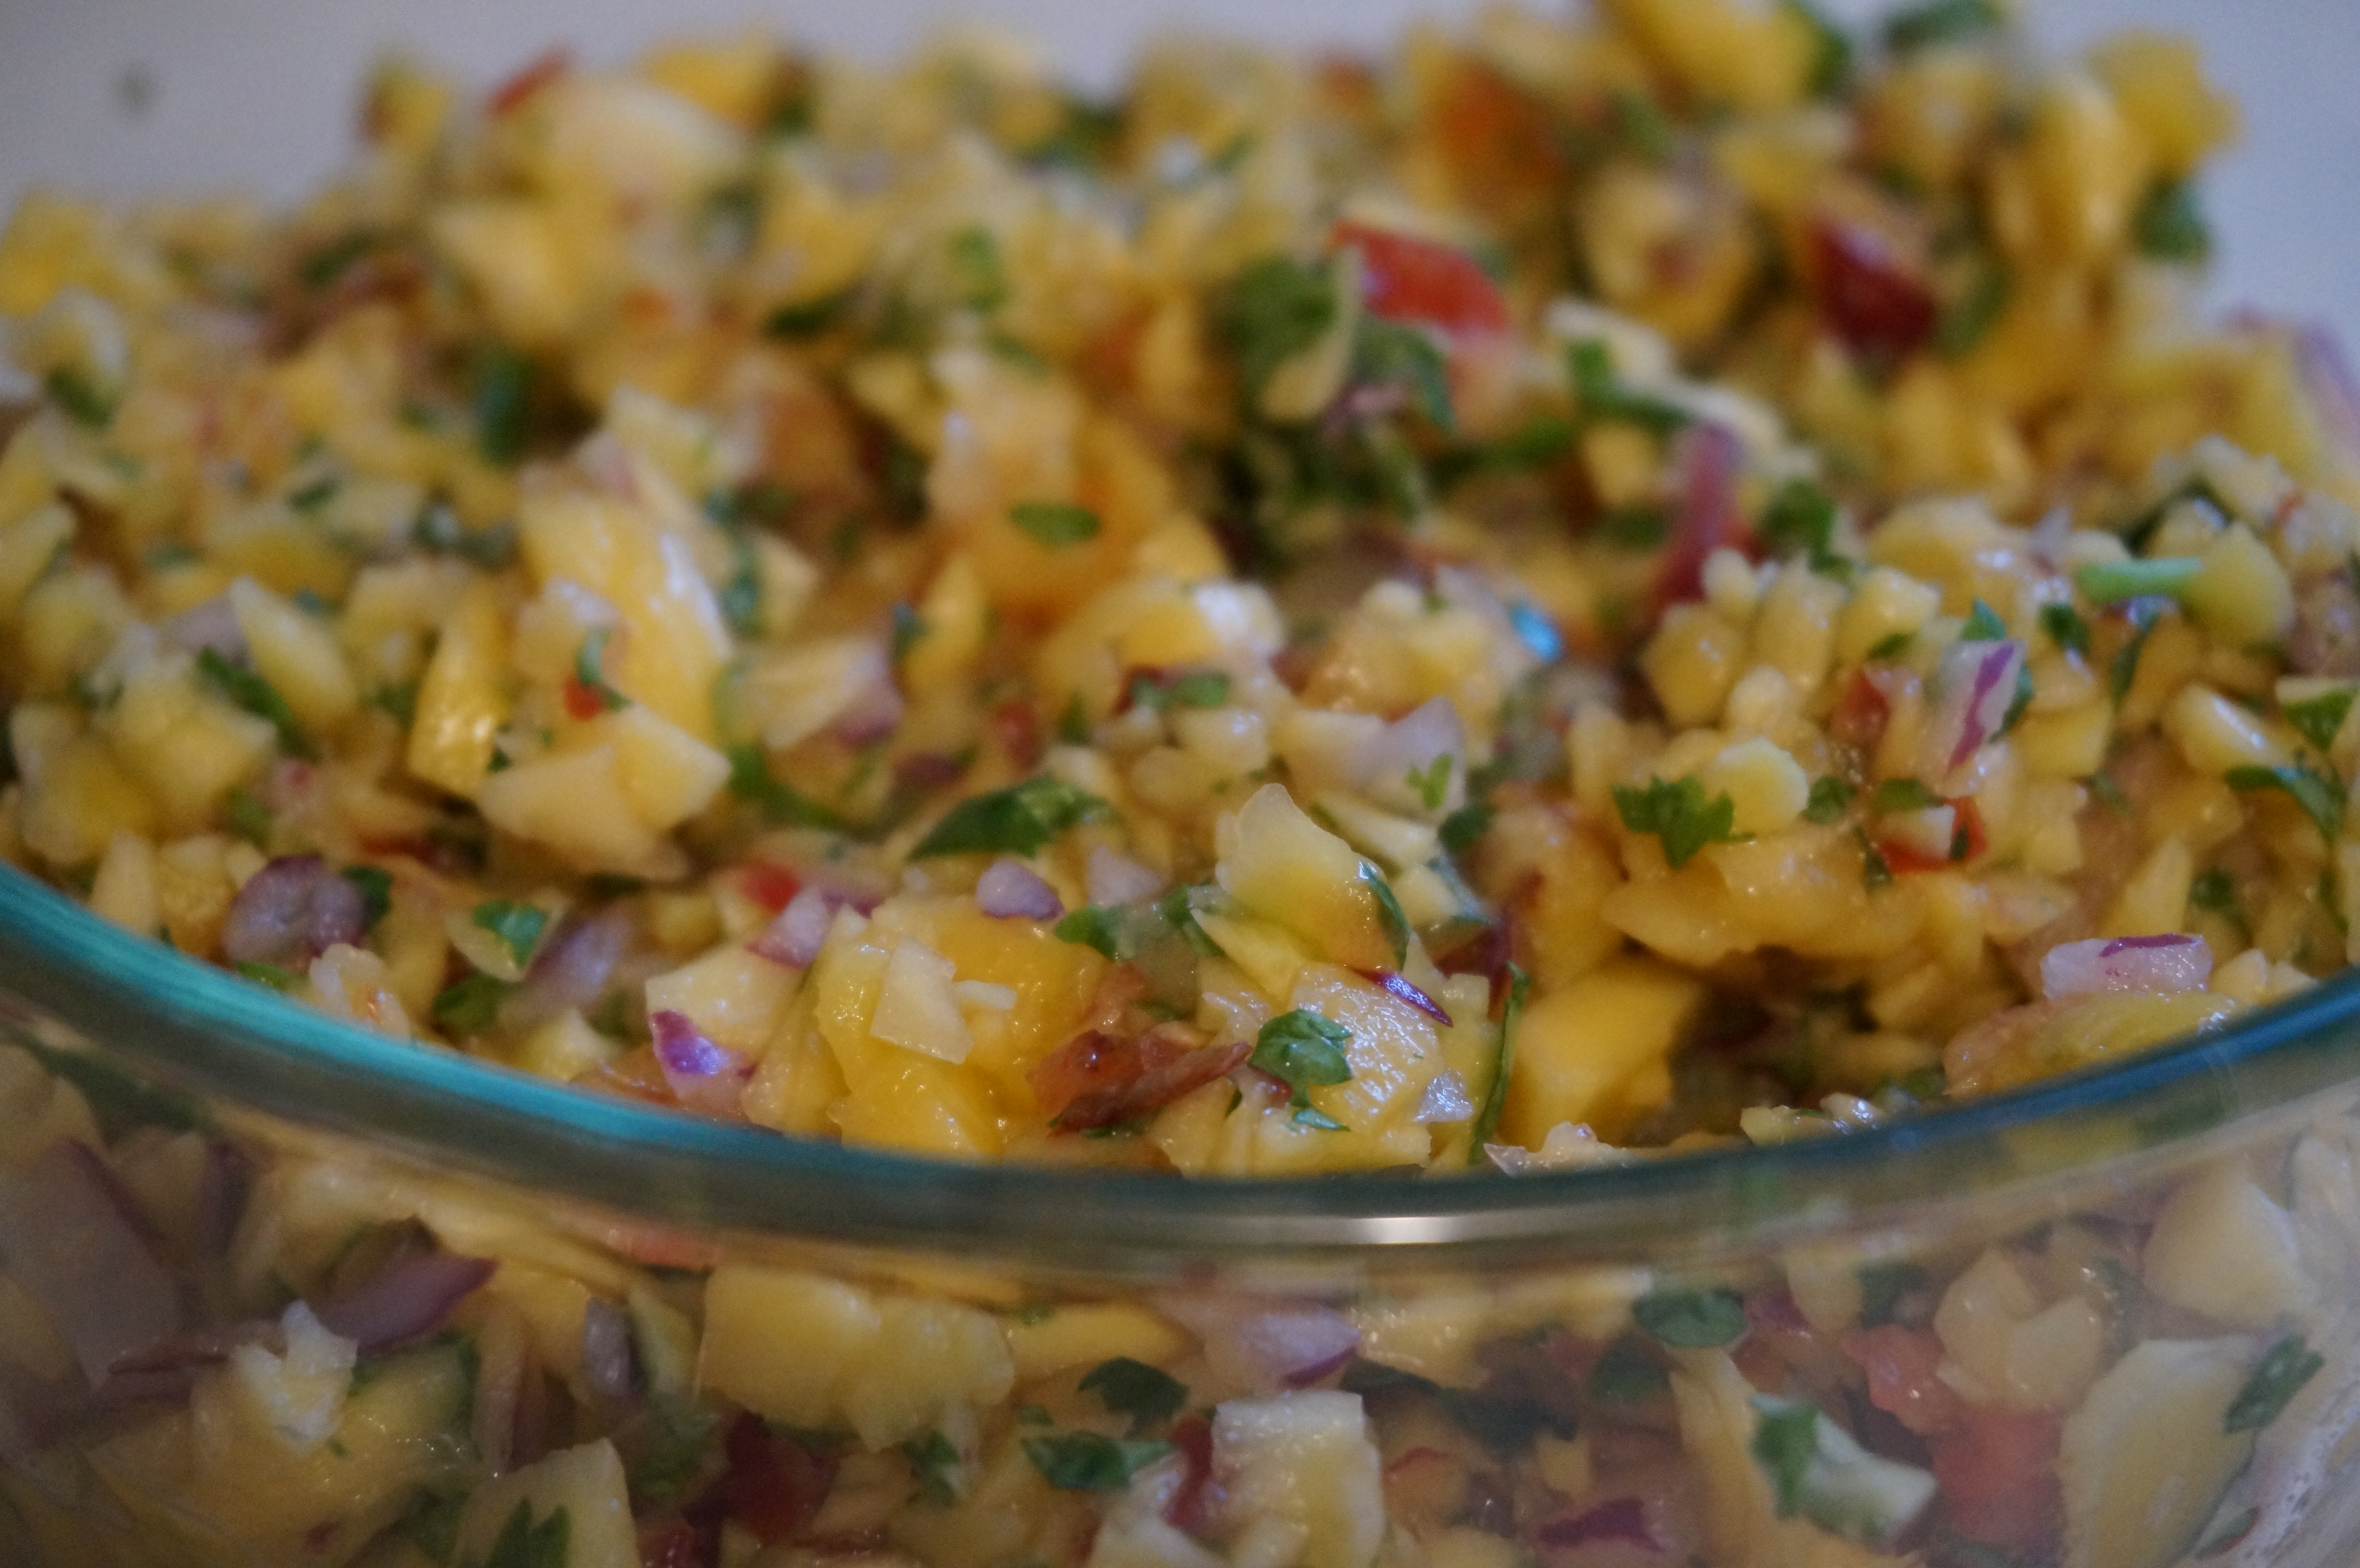
  1. Slice mango and peach into small chunks. In a food processor, add mango, peach, onion, cilantro, green onion, juice of 1/2 of the lime, and tomato. Pulse a few times until combined- but don’t overdo it! Remove from food processor and refrigerate for at least an hour.
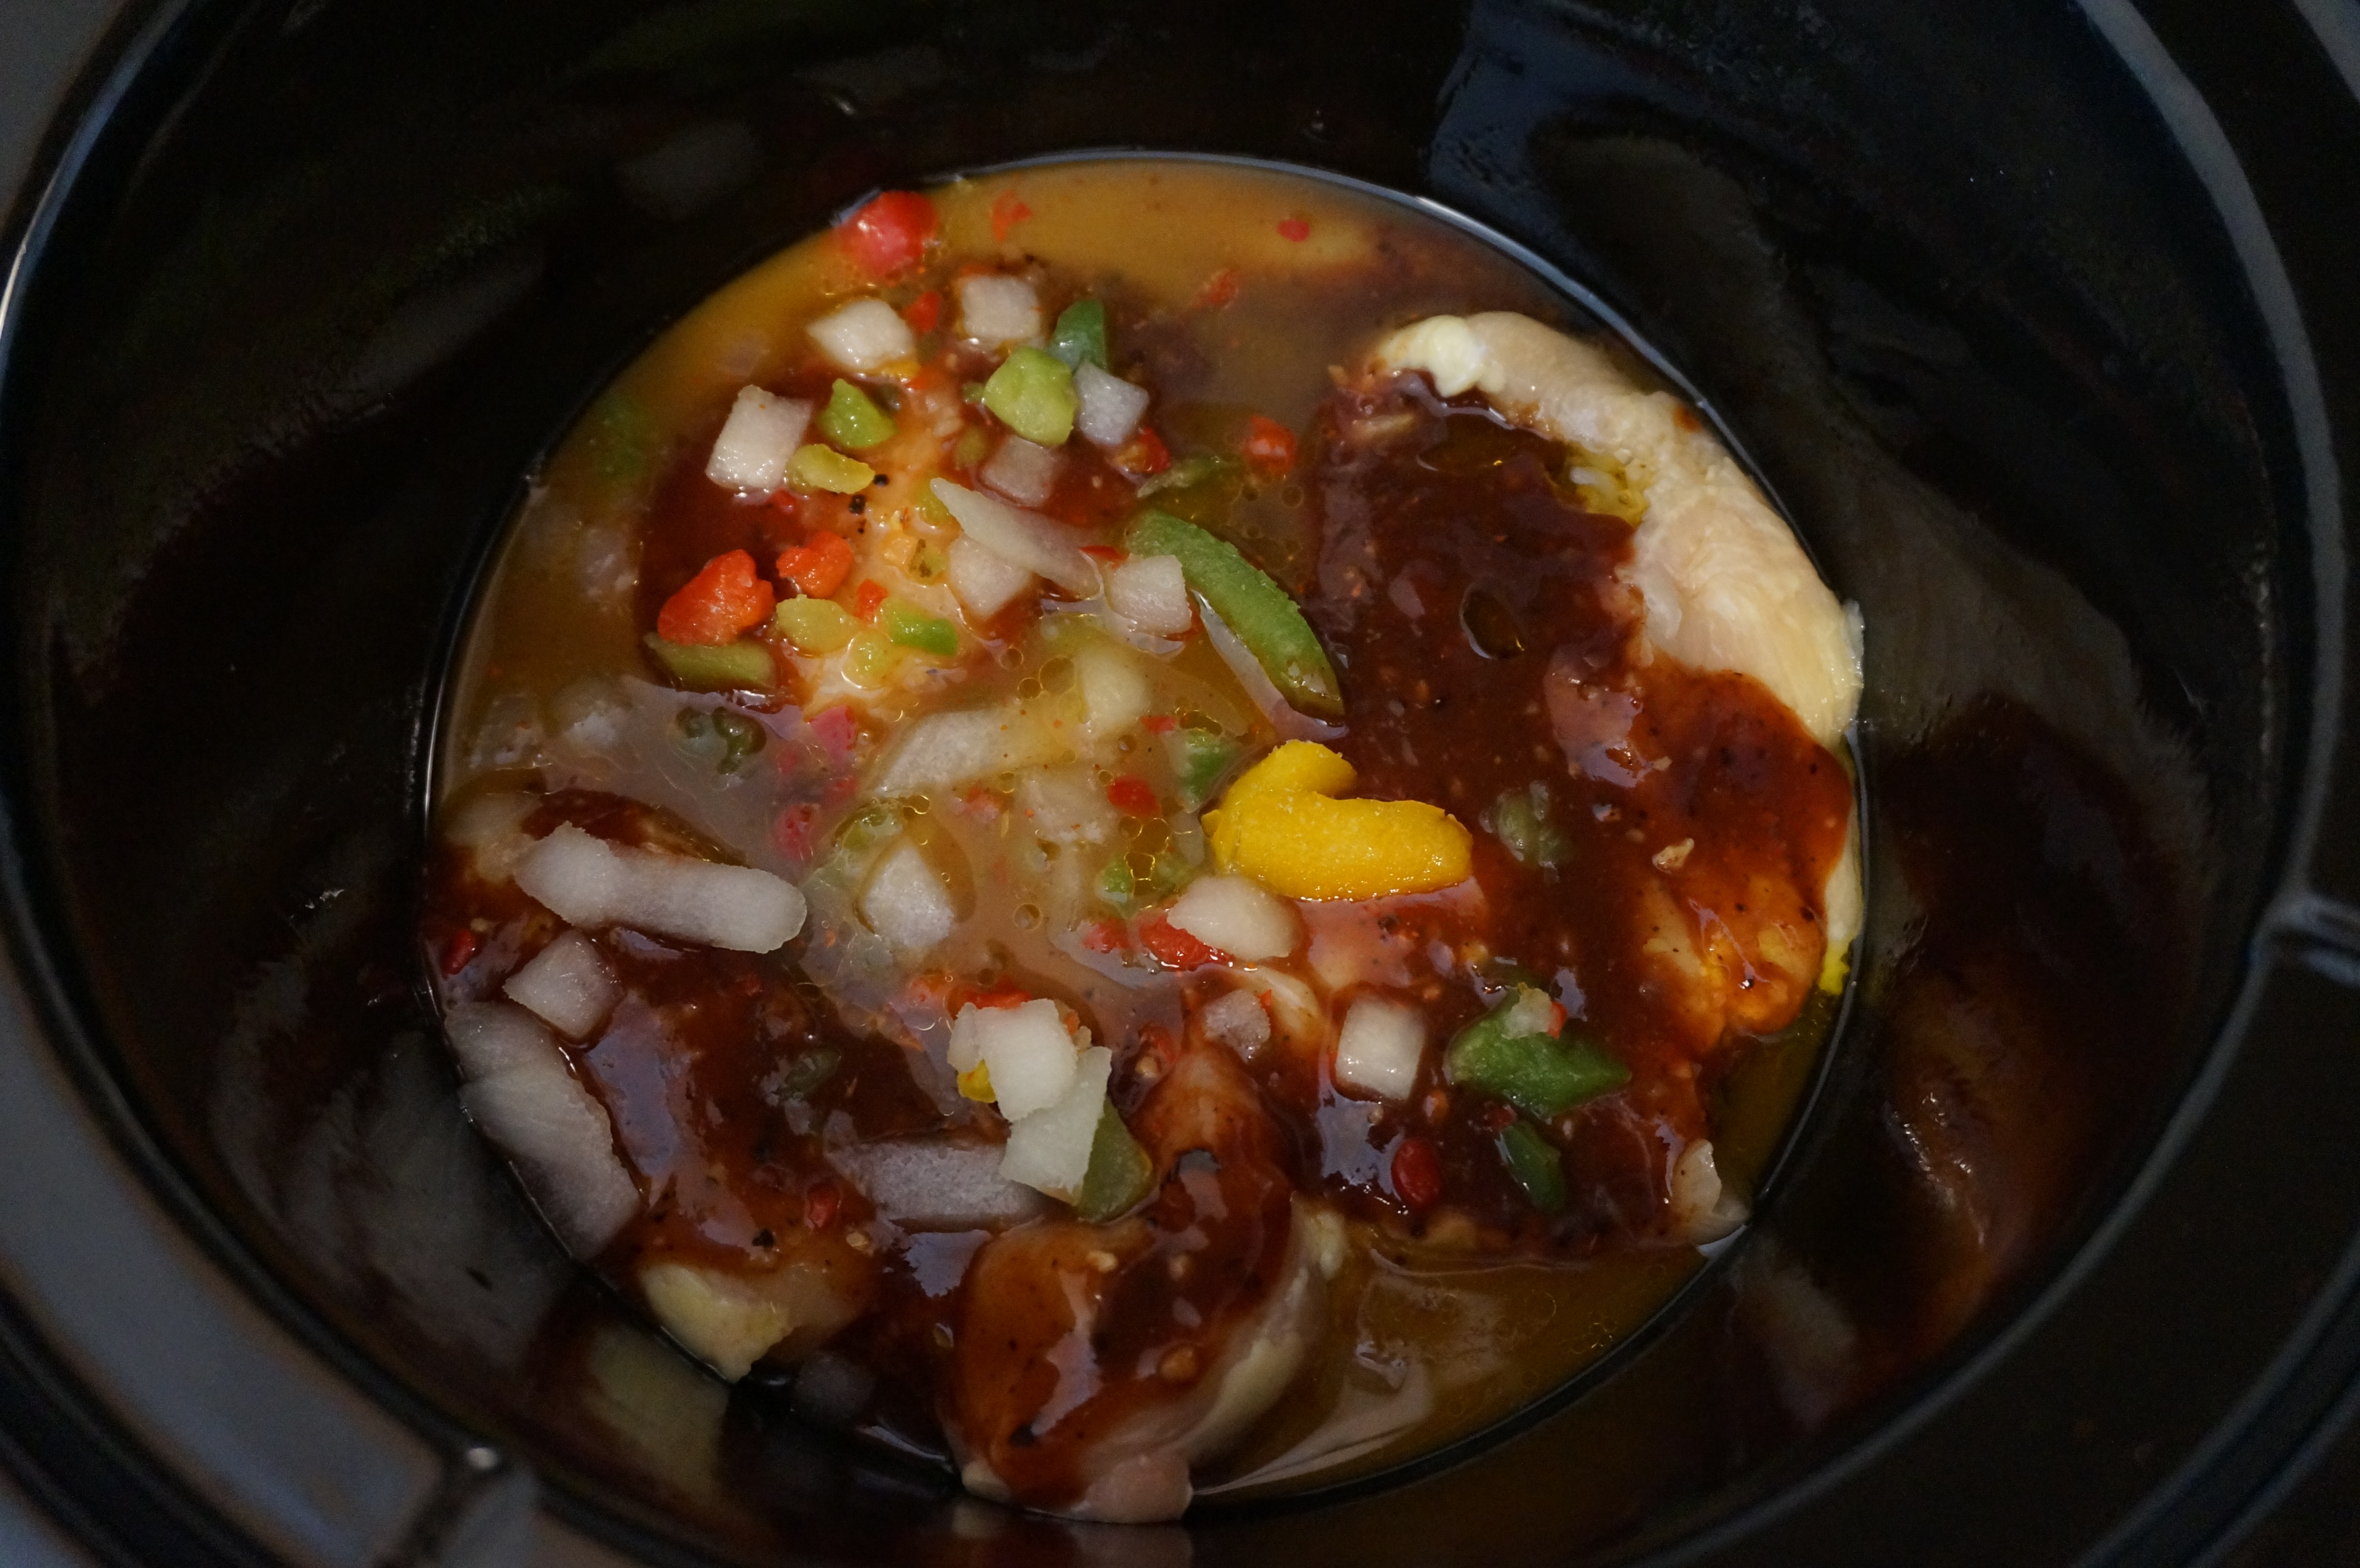
  2. Spray the slow cooker with cooking spray and place chicken breasts on the bottom of the pot. Drizzle with olive oil.
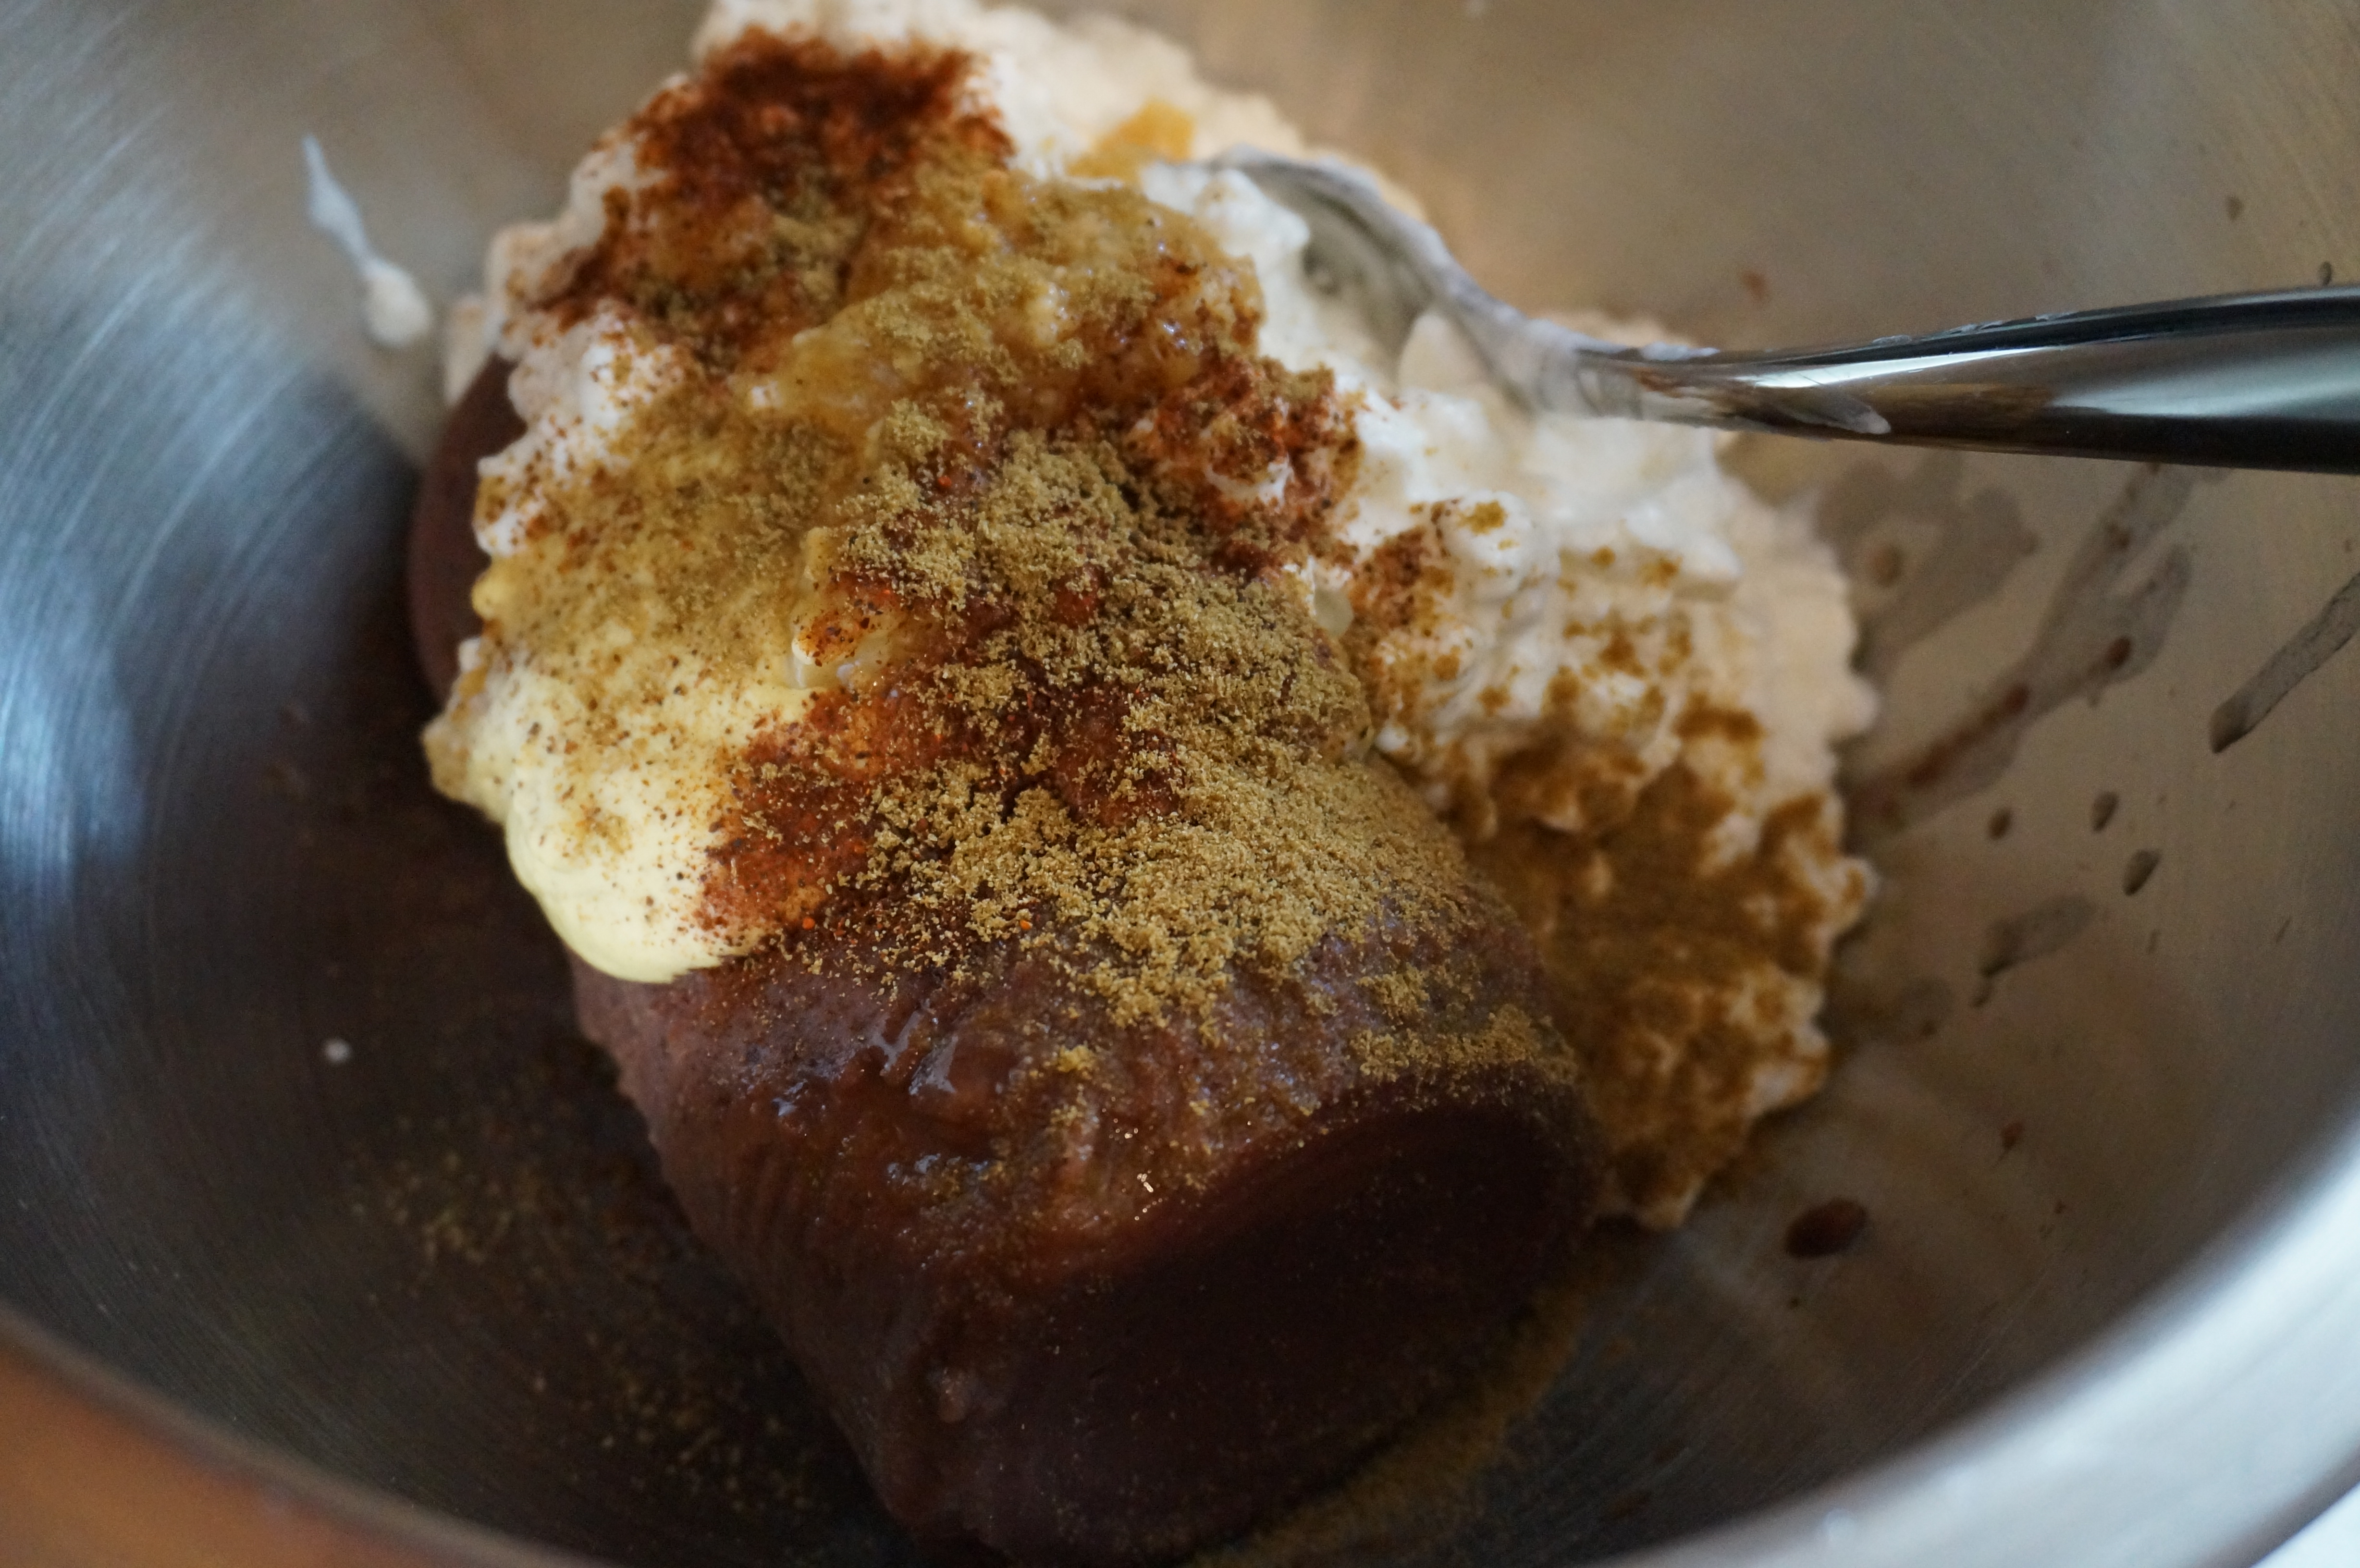
  3. In a small bowl, stir the mole, ketchup, BBQ sauce, juice of the other 1/2 lime, orange juice, and garlic until thick. Pour over chicken. Add peppers and onions on top.
  4. Set crock pot to low and cook for 6-7 hours.
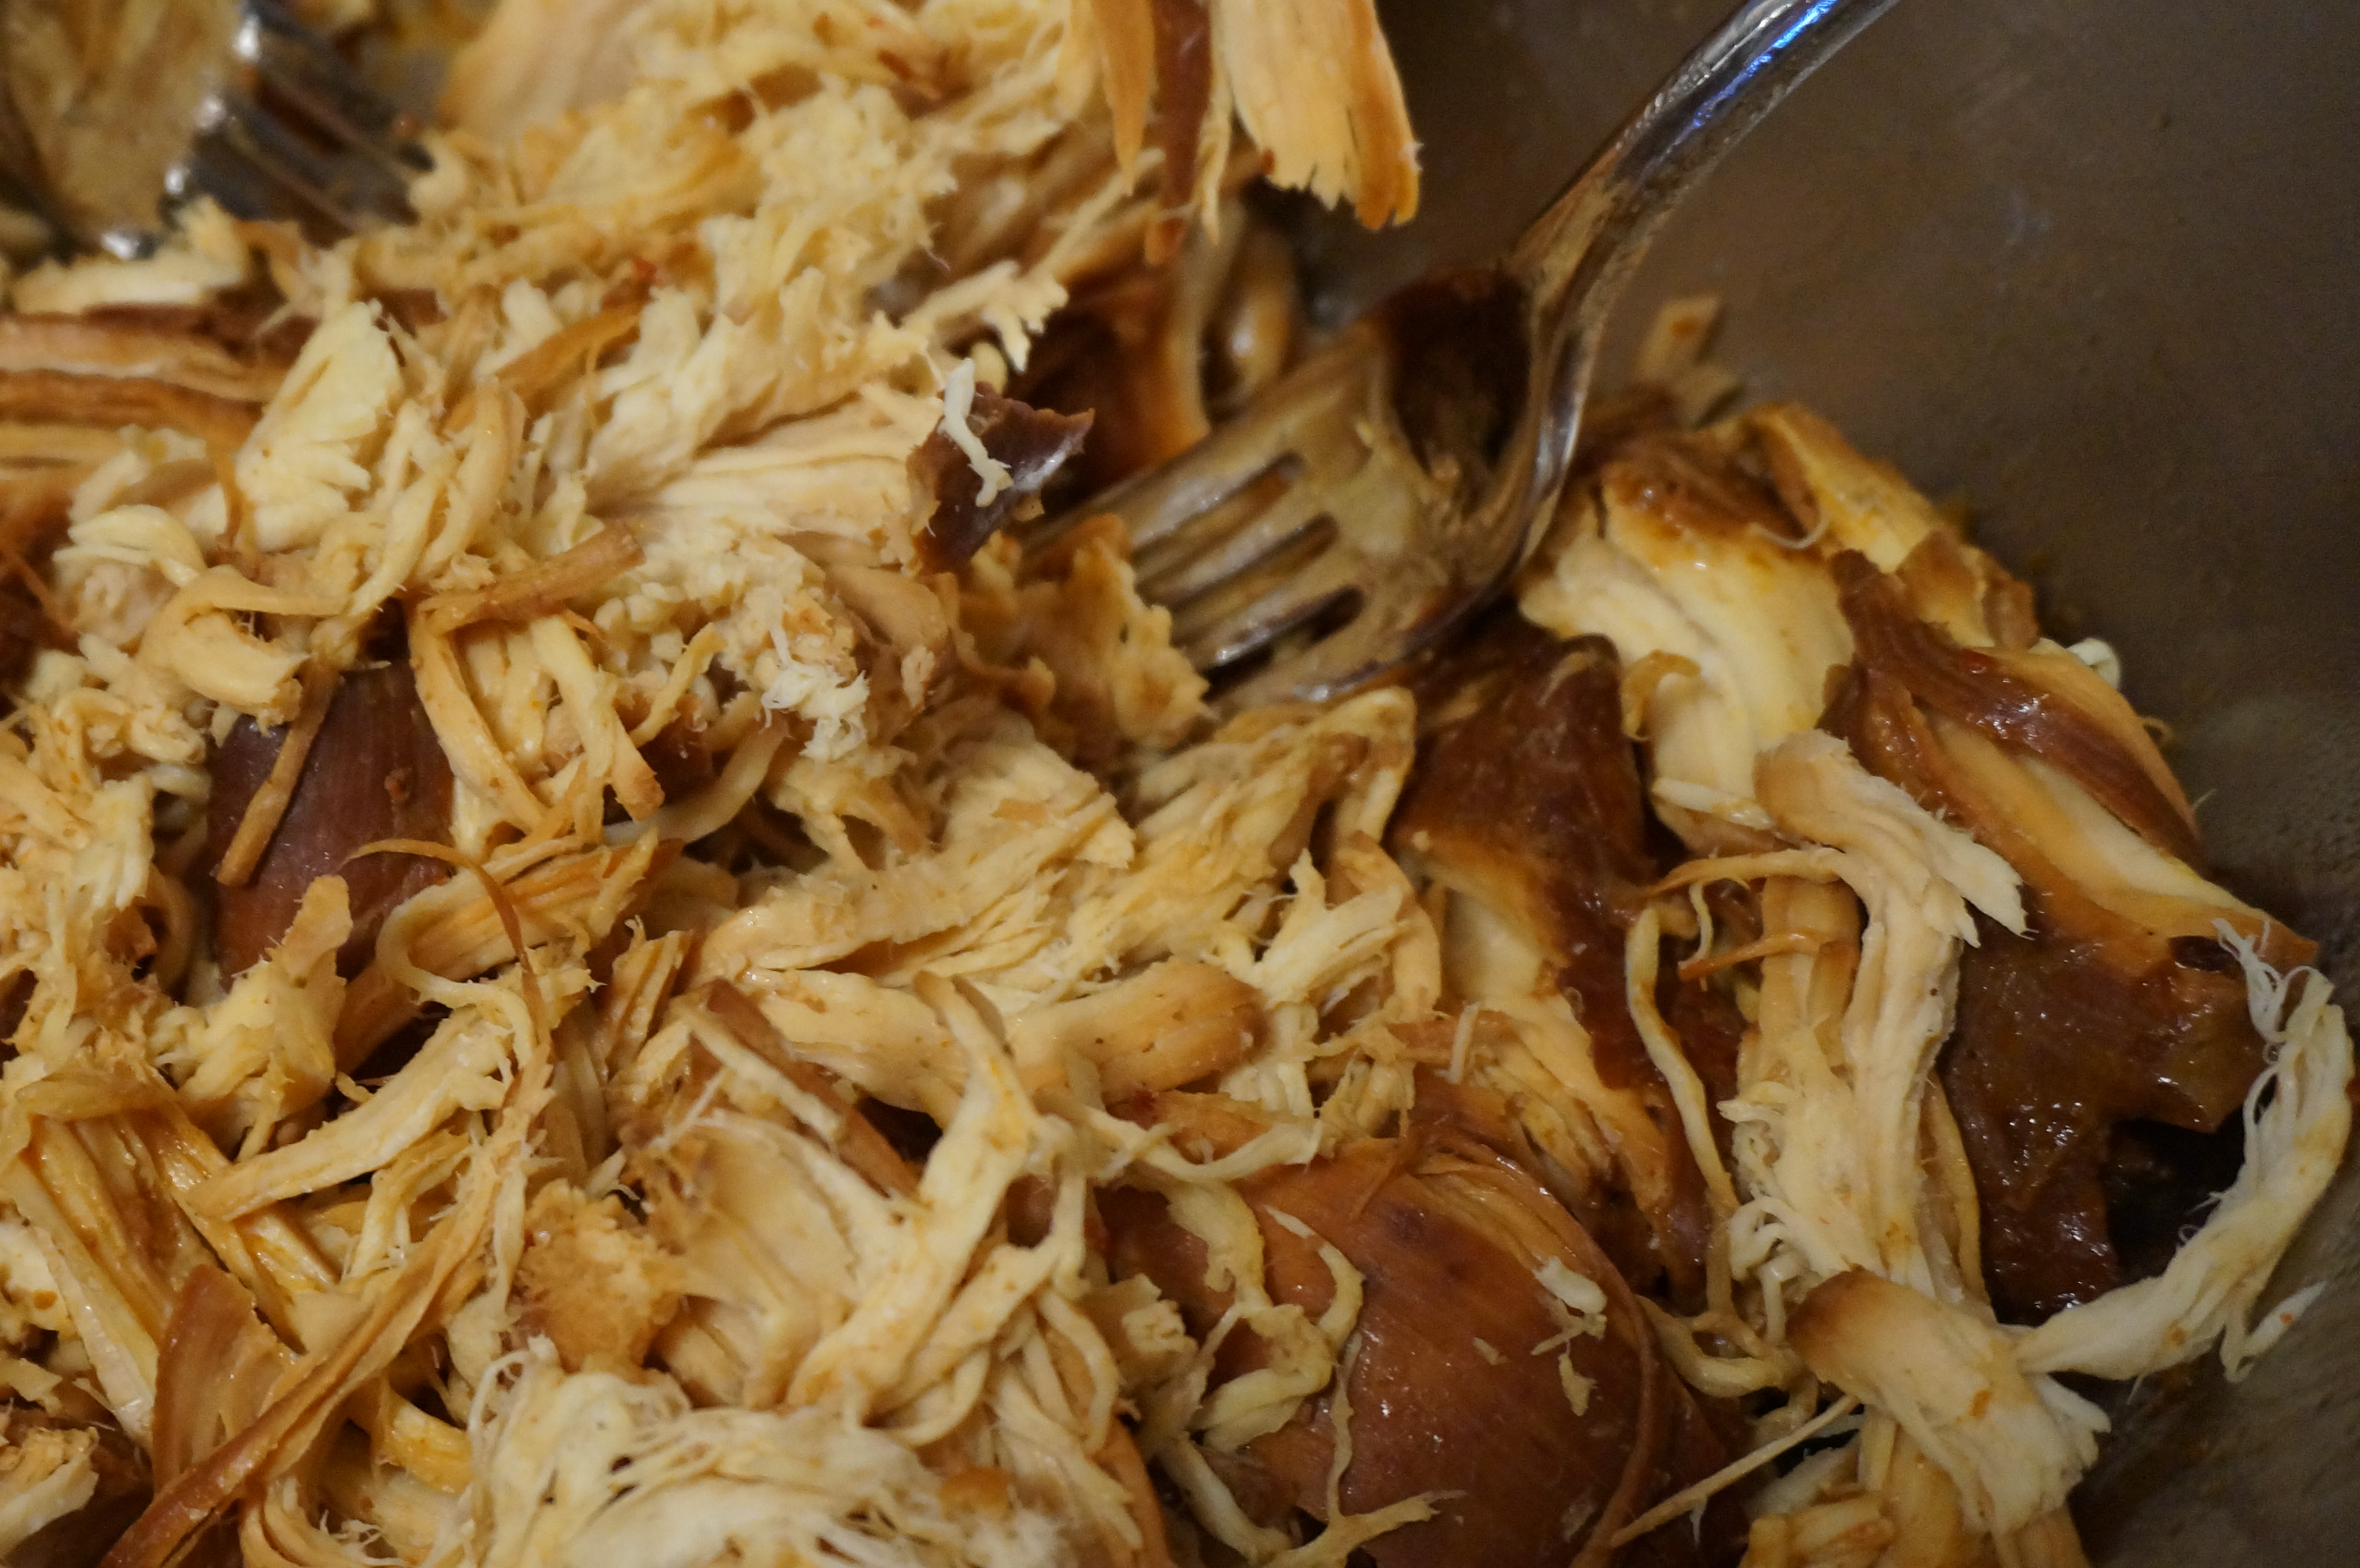
  5. Remove chicken from crock pot and shred with two forks. Return to the pot for 10 more minutes to allow the juice to marinate the chicken.
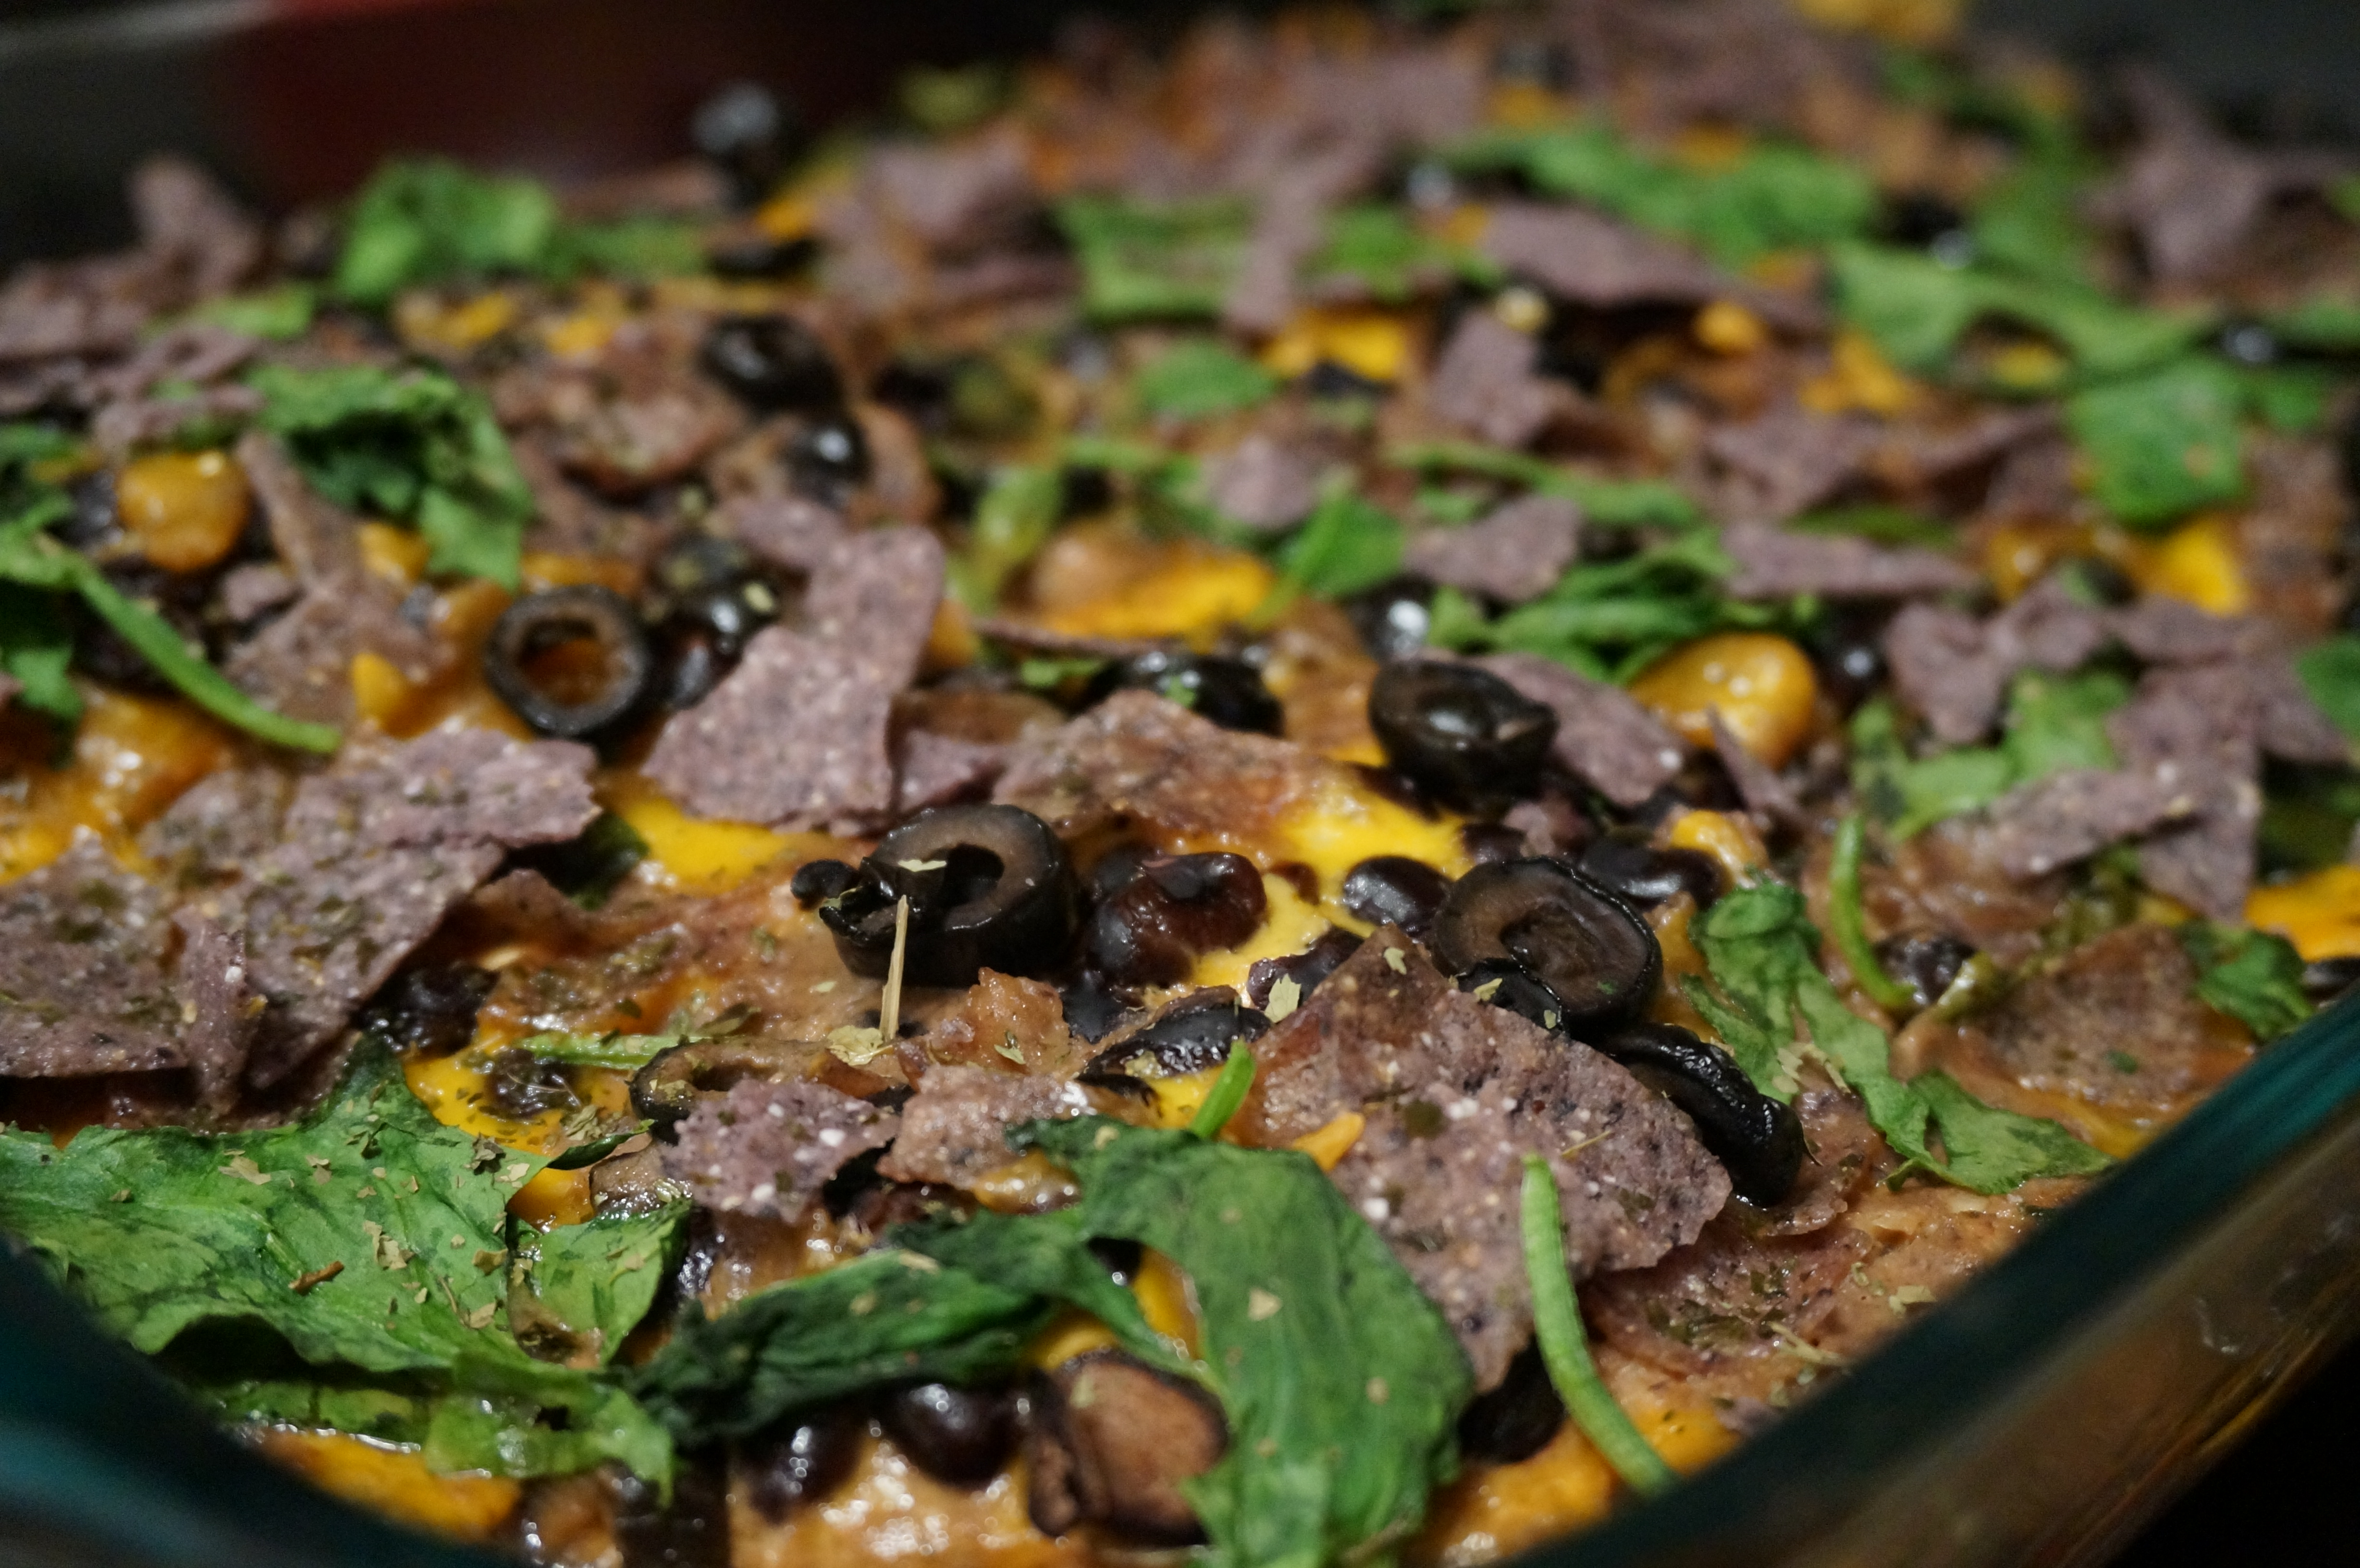
  6. When ready to serve, top tortillas with toppings of your choice (I used spinach and cheddar cheese) and a spoonful of the salsa.

DSC03306

DSC03308

DSC03309

DSC03328

DSC03334

DSC03342

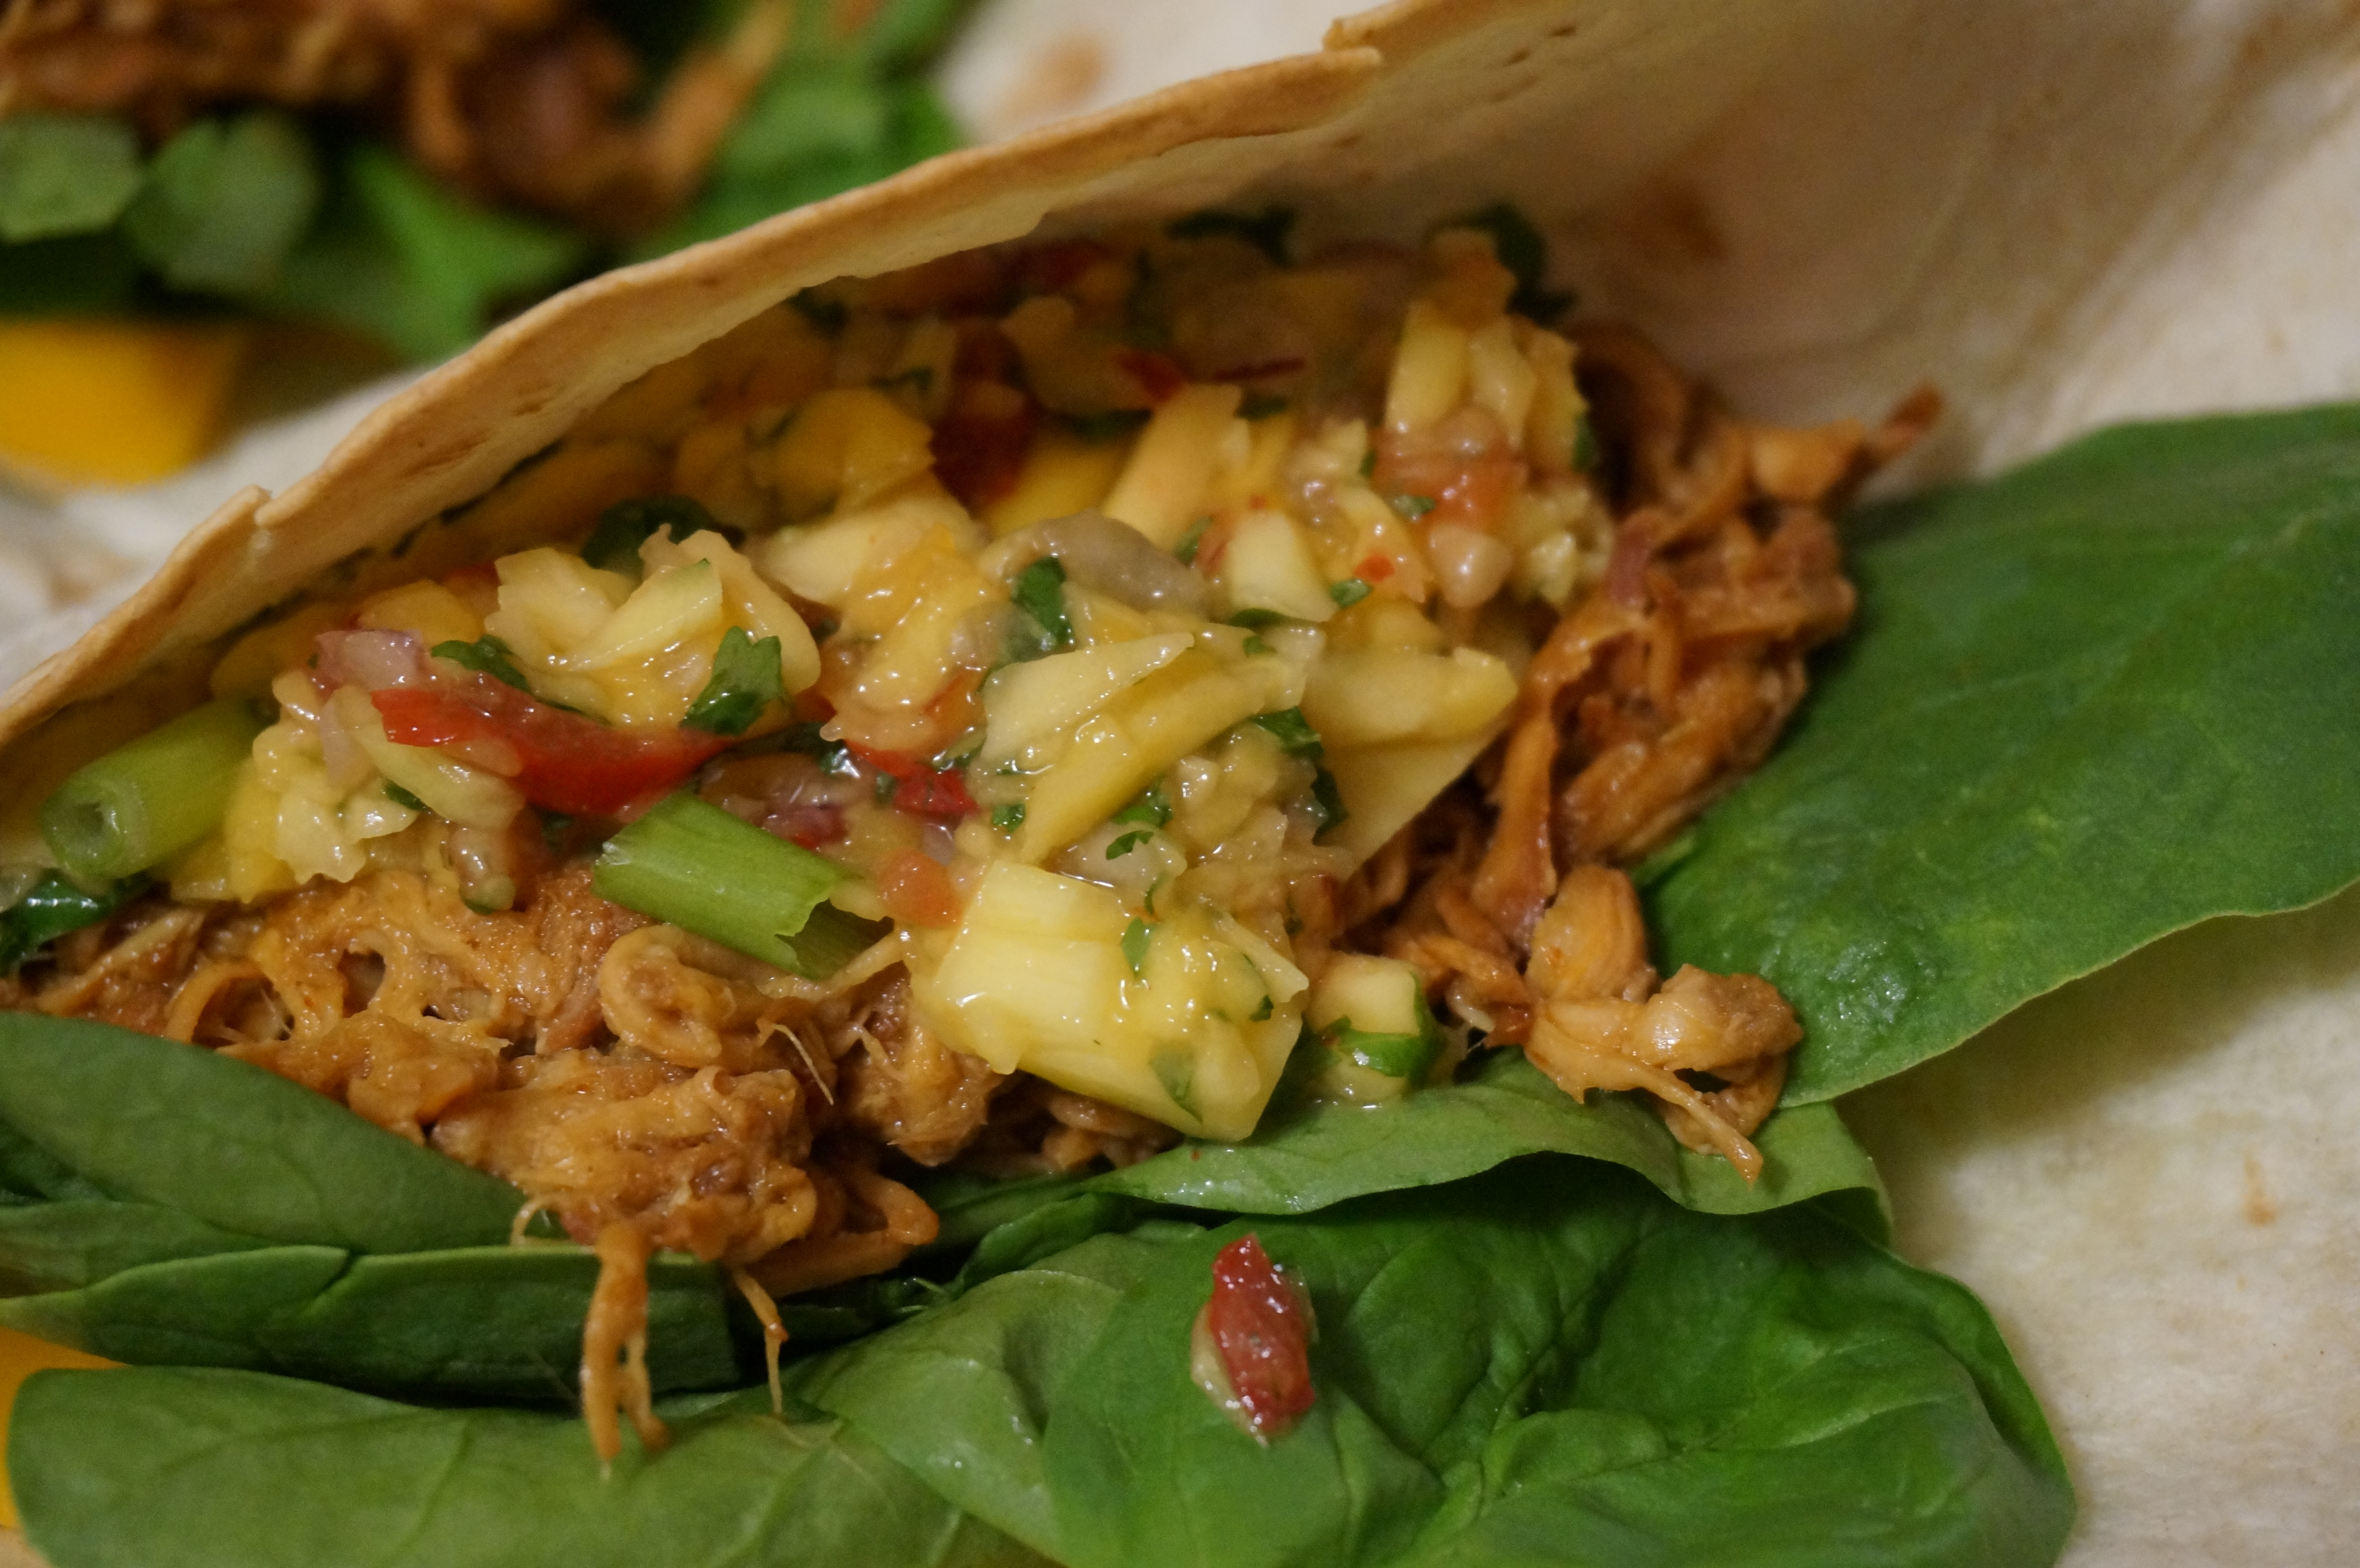
Dinner is served! What are your favorite easy summer recipes?

Carrot Raisin Slaw w/ Roasted Beets & Honey-Lemon Vinaigrette

Can I just say… the colors of summer are absolutely spectacular. The combination of blue sky and green trees, ocean and sand, and July sunsets are breathtaking. And I will never get tired of the bright, saturated colors of summer produce. I’ve been obsessed with beets lately, and I just can’t get over that deep red that threatens to stain every single piece of clothing you own (but it’s SO worth it)!

DSC03268
Carrot Raisin Slaw w/ Roasted Beets & Honey-Lemon Vinaigrette

I was feeling like making a big batch of roasted beet and veggie salad today, and while I had hoped to use wheat berries to copycat the Whole Foods version of their crunchy wheat berry salad, Kroger didn’t carry wheat berries! I settled for a mixture of barley and lentils- equally chewy, nutritious, and (almost) as exciting.

Roasting some chickpeas and broccoli with the beets also helps balance out the raw side of this salad from the grated carrots and broccoli stalks. And hey- I finally learned how to use the shredding function on my food processor! For some reason I always have to gear myself up to get out my processor (maybe cause it’s so hard to clean?), but it was worth the extra effort for the result. Instead of using those bagged grated carrots, grating the veggies yourself gives you a slaw that is much more tender. I also feel like it sucks up the juice of the vinaigrette much better!

Carrot Raisin Slaw w/ Roasted Beets & Honey-Lemon Vinaigrette
Recipe Type: Salad
Cuisine: Vegetarian
Author: Claire McCormick of “Claire Tastes”
Prep time:
Cook time:
Total time:
Serves: 12-16
Ingredients
  • 1 can chickpeas, drained and rinsed
  • 1 can beets, drained and rinsed
  • 1/2 red onion, sliced thinly
  • 2 tbsp olive oil, divided
  • 1 tbsp minced garlic
  • 1 tsp garlic powder
  • 1 tsp greek seasoning (optional)
  • 4 large carrots
  • 2 heads of broccoli, separated into stalks and florets
  • 1 bunch fresh parsley (about 1/2 cup)
  • juice of 1/2 lemon
  • 5 mini tomatoes (or 1/2 cup cherry tomatoes)
  • 4 green onions, sliced thinly
  • 1 cup barley, cooked to package directions
  • 1/2 cup dry lentils
  • 1/3 cup raisins
  • 1/4 cup apple cider vinegar
  • 1/4 cup red wine vinegar
  • 1 tbsp dijon mustard
  • 2 tsp honey
  • salt and pepper
  • 1/2 cup goat cheese (optional)
Instructions
  1. Cook barley according to package directions. In last 20 minutes of cooking, add lentils until all grains are al dente. Rinse with cold water to stop the cooking process. Preheat oven to 375 deg.
  2. Spread rinsed chickpeas on a large baking pan and pat dry with paper towels.
  3. Add beets and red onions to pan with olive oil and garlic. Sprinkle garlic powder, greek seasoning, and salt and pepper and stir to combine. Bake at 375 deg for 40 minutes until chickpeas are crispy. Add broccoli florets and return to oven for 10 more minutes until tender. Remove from oven and cool.
  4. In a food processor using the slicing setting, grate carrots and broccoli stalks (not florets). Scrape into a large bowl. In the same processor using the multipurpose blade, add parsley, lemon juice, and tomatoes. Pulse until roughly chopped- about 2-3 pulses.
  5. Sitr parsley mixture into the shredded carrots and broccoli. Add raisins and green onions.
  6. In a small jar, combine both vinegars, mustard, honey and salt and pepper. Shake vigorously and pour over the salad.
  7. While still warm, add the barley/lentils and roasted vegetables to the salad. Top with goat cheese and toss to combine.

One key with this salad is to add the barley and roasted veggies while they’re still semi-warm; that way the barley really soaks up the lemon vinaigrette and the goat cheese gets this nice melty texture before you stick it in the fridge to marinate for a few hours.

Hope y’all had a very happy Fourth!

DSC03240
Prepare chickpeas and beets for roasting.
DSC03242
Rinse all veggies prior to shredding in food processor.
DSC03243
Process using the shredder attachment.
DSC03245
Process remaining veggies and parsley with multipurpose blade.
DSC03251
Shake up vinaigrette ingredients. I happened to have the end of a mustard container, so I added the vinegar to that and just shook it until my arm got tired!
DSC03261
Prepare barley and lentils and cool to stop cooking process.
DSC03257
Roasted beets, broccoli, and chickpeas. LOVE these colors!
DSC03263
Toss all together and serve with goat cheese.

Balsamic Roasted Tofu

The perfect vegetarian addition to salads and soups! Leave the tofu in long strips and top with a light summery garnish for a light lunch, or cube and top your next salad. I used balsamic vinegar, dijon mustard and oregano, but the great thing about tofu is that it just slurps up the flavor of anything you marinate in- a little peanut oil and nut butter with some ginger makes a great meat sub for Pad Thai!

Balsamic Roasted Tofu
Recipe Type: Dinner, Lunch, Side
Cuisine: Vegetarian
Author: Claire McCormick of “Claire Tastes”
Prep time:
Cook time:
Total time:
Serves: 5
Try this easy, slow-roasted tofu recipe for topping your next salad or soup! Packed with protein and iron, you’ll feel good eating it!
Ingredients
  • 3/4 cup balsamic vinegar
  • 2 tbsp dijon mustard
  • 1 tbsp spicy brown mustard
  • 1 tsp minced garlic
  • 1 1/2 tsp dried oregano
  • 1 14 oz package extra firm tofu, drained
Instructions
  1. Slice tofu into 3/4″ width slices and place between two layers of paper towels. Press with something heavy on top for at least 30 minutes to remove excess moisture from the tofu.
  2. In a jar, mix together all other ingredients and shake vigorously to combine.
  3. Marinate tofu in a single layer in a shallow dish (I used a rectangular tupperware) for 20 minutes. Sprinkle with additional oregano if desired.
  4. Preheat oven to 350 deg. Slow-cook tofu on a baking sheet lined with parchment paper for 1 hour until firm but tender.
  5. Cool at least 5 minutes before slicing into smaller cubes, if desired.

DSC03191

DSC03194

Slow-Roasted Balsamic Tofu

Blue Corn Chicken Taco Casserole

Need a good way to use up all those broken tortilla chips in the bottom of the bag? Let’s be real… we’ve all tried to dunk some of these into a half-empty jar of salsa, only to drop the chip and end up with a ring of crusty salsa around our wrist…

Now you don’t have to deal with the embarrassment disappointment of broken-chip and salsa defeat!

Chicken Taco Casserole
Blue Corn Chicken Taco Casserole
Recipe Type: Casserole
Cuisine: Mexican
Author: Claire McCormick of “Claire Tastes”
Prep time:
Cook time:
Total time:
Serves: 8
Need a good way to use up all those broken tortilla chips in the bottom of the bag? Let’s be real… we’ve all tried to dunk some of these into a half-empty jar of salsa, only to drop the chip and end up with a ring of crusty salsa around our wrist…
Ingredients
  • Leftover blue corn tortilla chips, crushed into small pieces
  • 1 can refried beans
  • 1 cup cottage cheese
  • 1 tbsp red wine vinegar
  • 1 tbsp minced garlic
  • 1 tsp oregano
  • 1/2 tsp garlic powder
  • 1/2 tsp chili powder
  • 1/2 cup chunky salsa
  • 1/4 cup milk
  • 1 egg
  • 1 can black beans, rinsed and drained
  • 1.5 lbs chicken breasts, thinly sliced
  • 1 tbsp olive oil
  • spinach (about 1 cup, shredded)
  • black olives, sliced (about 1/4 cup)
  • cheddar cheese or other mixed blend
Instructions
  1. Preheat oven to 350 deg.
  2. Spray a 9×13 casserole dish with cooking spray.
  3. Layer some of the chips in bottom of dish.
  4. In a large mixing bowl, mix together the beans through the egg. Layer about half of the mixture over the chips.
  5. Layer half of spinach over bean mixture.
  6. Layer chicken and drizzle olive oil over top.
  7. Spread remainder of bean mixture over chicken, followed by more spinach.
  8. Spread black beans and black olives over the entire casserole.
  9. Add remaining chips and cheese and cover with foil.
  10. Bake 40 min covered, then 10 min uncovered until bubbling. (Optional: Add a final layer of chips and broil on high 1 minute until crisped!)

DSC03168

DSC03170

DSC03171

DSC03173

DSC03182

I served this up with some extra spinach and corn on the cob. Summer is THE BEST! Happy fourth of July weekend, to all of those traveling this weekend!


Signature Southern: Roasted Okra w/ Lemony Pepper & Mushroom Bake

I was encouraged a few weeks ago to take advantage of the incredible variety of my local farmer’s market and make an effort to cook with ONE vegetable or fruit each week that I had never cooked with before. Well, for anyone who hasn’t been to the Durham Farmers’ Market, let me just tell you- there are some pretty gnarly looking veggies there. I mean… what in the world are plumcots? How do you cook with ramps? Anyone know the number of licks it takes to get to the center of “lollipop kale”? 

Since I didn’t get to make it to the Farmers’ Market this week, I decided to start slowly. Why not try cooking with something I’d eaten before and knew I’d liked, but never actually prepared from start to finish?

Enter okra.

This “signature southern ingredient,” according to Southern Living, is not only cheap, but it is extremely versatile. Okra can be fried, baked, grilled, pickled, or even eaten raw (though I wouldn’t necessarily recommend that). With origins in West Africa, it thrives in the summer heat and has become a Southern staple right up there with Bojangles and sweet tea.

Okra is also a nutritional powerhouse. Low in calories (if you don’t fry it), with only 30 cal per 1 cup or about 8 pods, it’s also high in fiber to keep you full (12% of your DV). Okra boasts a whopping 2 g of protein per cup, too!. It is also known to aid in digestive peristalsis to “keep you regular,” and is high in vitamins A (for antioxidant properties, vision, and skin health), C (builds immunity), and K (aids in blood-clotting ability and builds strong bones). Could this get any better?

Fun fact: did you know that okra is also sometimes referred to as “lady’s fingers”? I don’t know any ladies who have fingers that are that fat or ridged, let alone green… but apparently it’s a thing. 

Roasted Okra and Sweet Potato Wedges

I’d had okra before, even dabbled in using the frozen version for some stews (remember my succotash recipe from last spring?) but had never prepped it or cooked with it from scratch. While I’m sure I still have a lot to learn on the okra front, I think I did pretty well here. I tried to keep things simple, sticking to a simple roast in the oven (I was originally going to grill them but an unexpected babysitting request came up- next time!).

I paired the okra “fries” with a simple roasted pepper & mushroom salad with white beans and a lemon-caper vinaigrette. I wasn’t sure how the okra (seasoned with chili powder and some red pepper flakes) would pair with the lighter, more mediterranean flavors, but they actually worked together quite nicely! I served the salad with the okra fries over some quinoa and spinach, with a few cubes of leftover balsamic tofu, feta cheese and greek yogurt.

DSC03124 2
Roasted Okra w/ Lemony Pepper & Mushroom Bake

Next time I think I would cook the okra at a higher temperature for a shorter period of time. Broiled might also have been something to try. It was still good, but it turned out a bit more on the chewy side when I would have preferred it to be a bit crispier. This way was a time-saver though, as I was able to bake the okra at the same time I was baking the salad.

If you wanted to make the salad more of an entree on its own, you could definitely add a grain or potato to the bottom of the casserole dish before baking (just make sure to add a few cups of liquid like chicken broth for the grains to soak up!)- quinoa, barley, brown rice, or lentils would all be good. I also want to try sweet potatoes!

Signature Southern: Roasted Okra w/ Lemony Pepper & Mushroom Bake
Recipe Type: Salad, Side
Cuisine: Southern
Author: Claire McCormick of “Claire Tastes”
Prep time:
Cook time:
Total time:
Serves: 8-10
A shout-out to one of the most versatile vegetables south of the Maxon Dixon Line!
Ingredients
  • 2 tbsp extra virgin olive oil, divided
  • 1 onion, sliced
  • 1 tbsp minced garlic
  • 1 tsp dried thyme
  • 1/2 tsp dried oregano
  • 1 yellow and 1 red bell pepper, chopped roughly
  • 1 cup baby bella mushrooms, sliced
  • 1/4 cup roughly chopped kalamata olives
  • 2 tbsp capers and their brine
  • 2 cups broccoli and cauliflower florets
  • 1 can white beans, drained and rinsed
  • 1/2 tsp garlic powder
  • juice of 1/2 lemon
  • 1 bunch parsley, minced
  • salt and pepper, to taste
  • For Okra Chips:
  • cooking spray
  • fresh okra, halved lengthwise
  • pinch each of red pepper flakes, chili powder, and salt, to taste
Instructions
  1. In a large saute pan, heat 1 tbsp oil. Add onion, garlic, thyme, and oregano and cook until softened, about 2 minutes. Add the peppers and mushrooms and continue to cook until tender (but not mushy). Remove from heat.
  2. In a separate bowl, mix together remaining oil, olives, capers, broccoli/cauliflower, white beans, garlic powder, lemon, and parsley. Add salt and pepper to taste, and stir well.
  3. Preheat oven to 350. In a 9×12 casserole dish sprayed with cooking spray, layer the broccoli mixture and pour the pepper mixture on top, stirring to combine.
  4. Bake at 350, uncovered, for 30-40 minutes or until broccoli is tender.
  5. Serve with feta cheese over any grain of your choice!
  6. For the Okra Chips:
  7. Layer halved okra on a sheet pan lined with foil and sprayed well with cooking spray. Sprinkle with spices of your choice (suggested ones above) and bake on the lower rack from the time when the oven is preheating to the time the veggie bake is done, or until crispy.

DSC03091Start by sautéing your onions, peppers and mushrooms.

DSC03092Mix up the lemon vinaigrette with the broccoli, parsley, and white beans. Add in the capers and kalamata olives, if using.

DSC03103Combine all in a casserole dish and bake at 350 for 30-40 minutes or until tender.

DSC03105Prep okra by slicing in half and placing face up on a sprayed baking sheet. Drizzle with olive oil and sprinkle with seasonings.

DSC03120Allow to cool after baking.

Remove okra from oven and cool slightly.

DSC03128Serve over grain of your choice with feta cheese and greek yogurt.

Skillet Zucchini Spaghettini

Sometimes you just don’t feel like cooking. But you always feel like eating. And there are odds and ends of things in the refrigerator, not really enough to make an entire meal out of, but definitely enough that you don’t have to actually do anything special. And there’s that Whole Foods hot bar that has so many pre-cut veggies that are incredibly overpriced but so convenient.

That’s where I found myself last night. Wanting to make something special, something blog-worthy, that would serve two of us (or one with leftovers). Preferably using up some of the endless mounds of zucchini noodles I had sitting in a huge tupperware in my fridge, but not just thrown on top of a salad. I didn’t feel like getting my hands all vinegar-y with massaged kale, either. But most of all, it had to be quick.

Mediterranean Zucchini Spaghettini Skillet

Ta-da! I bring to you a new one-pot skillet-wonder: Mediterranean Zucchini Spaghettini! I’m a sucker for anything Mediterranean, so this recipe makes me a happy camper. All I really did was roast a few veggies and saute a huge mound of zucchini noodles and leafy greens. For spices, I made a dressing by mixing together freshly squeezed lemon, garlic, mustard and some Greek seasonings and tossing the veggies in the dressing before roasting.

DSC03072

The result was incredible- it made enough for two, so I had some and saved the rest for later this week. I bet it would be good cold as well! Seeing as this week our temps are up in the high-90s, cold salads are definitely necessary.

I also served mine over some quinoa with balsamic vinegar and a few cubes of tofu (leftover from last week).

Hope you enjoy!

Mediterranean Zucchini Spaghettini Skillet
Recipe Type: Dinner, Salad
Cuisine: Vegetarian, Mediterranean
Author: Claire McCormick of “Claire Tastes”
Prep time:
Cook time:
Total time:
Serves: 2
Who says dinner can’t be deliciously easy?
Ingredients
  • 2 tbsp olive oil, divided
  • 1 tbsp minced garlic
  • 1 tbsp dijon mustard
  • 1 tsp each oregano and parsley
  • 1 tsp greek or Italian seasoning
  • 1/2 cup chickpeas, rinsed and dried
  • chopped red onion (to taste)
  • 1/2 cup raw broccoli and cauliflower florets
  • 1/4 cup grape or cherry tomatoes
  • 3 cups raw zucchini “noodles
  • 3 cups kale and/or spinach
  • 2 tbsp good balsamic vinegar
  • 3/4 cup cooked quinoa
  • 1/4 cup crumbled feta
  • 1 tbsp each kalamata olives and capers (optional)
  • fresh lemon juice (about 1/2 lemon)
  • salt and pepper, to taste
Instructions
  1. Preheat oven to 350.
  2. In a medium bowl, whisk together 1 tbsp olive oil, garlic, mustard, and seasonings. Add the chickpeas, onion, broccoli/cauliflower, tomatoes and a few of the zucchini noodles to the bowl and stir until combined. (Adding a few zucchini noodles will give a few of them a nice crisp!)
  3. Drizzle about 2 tbsp lemon juice over top of the veggies.
  4. On a baking sheet lined with a Silpat (love my Silpat!), spread the mixture evenly and try to keep the chickpeas from touching each other. Bake for 30 -40 minutes or until crisped. Remove from oven and set aside.
  5. In a large skillet, heat remaining oil on medium heat. Add the rest of the zucchini, kalamata olives and capers (if using), and balsamic vinegar. Cook until zucchini is tender, only about 2 minutes. Add spinach and kale and toss with zucchini until wilted. Add the quinoa and top with roasted veggies.
  6. Drizzle remaining lemon juice over top of skillet and some feta cheese.